Drywall is the optimal and stylish material for the ceiling of a modern bedroom
A sign of modern taste in the interior of a home is plasterboard ceilings for the bedroom. The coziest place, designed for relaxation and good rest, must combine comfort and fashionable style.
Plasterboard ceiling structures can be of completely different configurations
This ceiling will become an elegant frame for a modern bedroom.
Elegant combination of plasterboard and wood on the ceiling
A cleverly designed and executed plasterboard ceiling can turn even a tiny room into a luxurious and magical bedchamber.
Advantages of plasterboard ceilings
Plasterboard ceilings will help make the room beautiful and elegant. This material is able to bring to life all the ideas and thoughts of both designers and premises owners.
A suspended ceiling gives owners a great opportunity to create different shapes and apply unique patterns to it, so don’t be afraid to use your imagination when decorating the surface.
A plasterboard ceiling has many advantages, especially its excellent appearance and the ability to hide defects in the old ceiling.
The obvious advantages of plasterboard ceilings include:
- Safe installation;
- Flexibility and a modular fastening system allows you to change the ceiling at any time and bring your idea to life;
- Environmentally friendly and natural material;
- Aesthetically attractive appearance;
- Ideally even, it is able to hide the shortcomings of any ceiling, even in old Khrushchev-era buildings.
This is only a small part of the advantages of this type of ceiling covering. According to many positive reviews, they are an excellent choice for bedroom decoration.
Step-by-step instruction
To do the work yourself, you need to prepare measuring and electrical tools. All kinds of measurements are carried out with a tape measure, a plumb line, a building level and upholstery thread. Mark the surface and make markings using chalk and a mechanical pencil. Cutting and slicing of material is carried out with a stationery knife, saw, or metal scissors. To fix the fasteners you will need a screwdriver, impact drill or hammer drill.
Construction material is purchased in the required quantity according to the scope of the proposed work. In addition to profiles and drywall, you will need reinforcing tape to seal the seams. Putty and primer are applied with a special roller and spatulas.
Advice. If the premises are small and the workspace is small, deliver building materials as needed.
Preparatory work
First of all, draw up a drawing that includes all structural elements and materials used. You will need to take measurements, and based on them, calculate the required amount of building and consumable materials. Next, clear the work area and begin beating horizontal and vertical planes. Using a tape measure, plumb line and level, mark lines for the profile guides.
Cutting the material
The next step will be cutting the galvanized metal profile to measured dimensions and cutting out the plasterboard sheets. Please note that vertical posts are cut 1 cm less than the height from floor to ceiling. If it is necessary to fasten along the entire perimeter, the profile guides must be securely sewn. The profile is secured using a hammer drill and dowels at a distance of 30–40 cm from each other.
Frame installation
We install into the grooves and fix the racks using a screwdriver and self-tapping screws. The pitch between the profiles is set according to the required strength and load-bearing capacity of the structure from 30 to 60 cm.
Important! The more the structure is subject to load, the more strength you give it, reducing the distance between the supporting profiles.
Sheet cladding
Having assembled the metal frame and installed the wiring cables, proceed to cutting and installing plasterboard sheets. First, carry out installation on one plane. The sheets are mounted with joints on the profile base and fixed with screws.
Advice. The fasteners are screwed until the screw head is completely immersed in the body of the plasterboard sheet.
Then mount the remaining planes of the partition. The areas after the fasteners enter are treated with sealant and the entire surface is primed. Reinforce the corners of the planes with a special corner. The gaps at the junctions of the wall with the ceiling and floor are sealed with plaster. The seams at the joints of the sheets are plastered with a special solution, and the surface is puttied with a starting mixture. Further processing is carried out with finishing finishing material.
To create a decorative plasterboard partition with your own hands, you will need a little effort, patience and a few necessary tools. Approach the process creatively, follow the step-by-step instructions, and the result of creating a partition for zoning your bedroom yourself will allow you to enjoy new comfortable living conditions.
Plasterboard ceiling for bedroom
For many owners of apartments and houses, not only the beauty of the room, including the ceiling, is important, but also a stylish modern design. This material makes it possible to create an unusual surface consisting of several levels. Many designers prefer this solution.
- As for color design, its choice must be approached very responsibly. Light and dark colors are original, but in most cases they are depressing.
- A calming atmosphere is important in the bedroom, and these colors should be used to decorate other rooms.
- A white ceiling for a bedroom is the most common. Therefore, many experts believe that it has lost popularity and will not be relevant now.
- The list of the most stylish colors for the ceiling in the bedroom is pastel shades, for example, beige, cream, peach.
When decorating the ceiling in the bedroom, you should give preference to pastel colors, because they promote relaxation and create a calm atmosphere.
For dense ceilings in the bedroom, preference should be given to pastel colors, as they promote relaxation and create a calm atmosphere.
Peculiarities
A suspended ceiling is a single-level or multi-level metal frame, fixed to the ceilings and walls of the room, lined with gypsum board slabs. A prerequisite is also the presence of lighting sources built into it.
First of all, you need to decide what a sheet of drywall is. Without going into details, we can explain it this way: this is a sheet of dry plaster, covered with cardboard on top.
Despite its apparent simplicity, the material has a lot of impressive advantages:
- With the help of gypsum plasterboard you can level out very significant bumps and depressions on the ceiling without spending significant effort. To do this, you need to take a liquid solution - and the advantage becomes even more obvious.
- Inside the frame, on which the sheets of drywall are attached, you can hide any wires and connect all the desired communications, while leaving them invisible to the eye. And this is a big plus, from an aesthetic point of view.
- Any desired lighting can be mounted in a ceiling made of this material, which allows you to achieve completely unique lighting effects.
- Drywall sheets make it possible to create a multi-level ceiling, bringing the owner's imagination to life.
- Due to the free space in the frame, additional noise and heat insulation can be arranged. It is enough just to lay an additional layer of mineral wool between the ceiling and the false ceiling.
- GCR is installed dry without the use of liquid, which guarantees a minimum amount of dust and dirt.
It is quite possible to carry out all activities related to drywall with your own hands. This means that you can make an original design in accordance with your ideas at minimal cost.
For example:
Due to the fact that when installing a gypsum board ceiling, a frame is used, the ceiling height is reduced. And, if the ceilings are already low, this can become a problem.
- If you don’t have the skills to work with this material, then you can tinker with the frame for quite a long time: it will be difficult to do the installation alone, it’s better to enlist the help of a partner.
- The technology of the finishing process must not be violated, otherwise cracks will most likely appear in the seams and between them.
Plasterboard ceiling and lighting
Much attention should also be paid to the lighting of the room. Plasterboard ceilings can be decorated with lighting to suit every taste. Numerous photographs of bedrooms decorated in a modern style demonstrate the possibilities of high-quality and original room lighting.
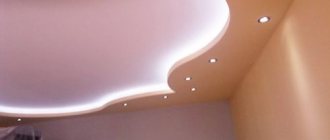
Very often, designers give preference to multi-level lighting combined into one system. Placing light sources around the perimeter of the room creates a cozy atmosphere in the bedroom, and an original solution will help increase the visual impact - LED strips, which each owner can install with their own hands.
Material advantages
The use of a plasterboard wall in the bedroom is justified due to its properties:
- the flexibility of the material is used for the construction of shaped forms;
- resistance to loads due to the use of a metal frame and fasteners;
- the ability to decorate the surface with a variety of finishing materials;
- the hollow design is suitable for additional shelves and compartments, and also hides communication lines;
- Light correction, installation of spotlights and LED strips are possible.
Tips for finishing a plasterboard ceiling in a bedroom
Typically, wavy shapes are popular in the bedroom. First of all, you need to find out what the dimensions of the room are. Depending on this, different types of plasterboard ceilings can be created, with a different number of levels and colors and the presence of accent lighting.
- The color of the ceiling determines how spacious the room will look. Only light colors will help to visually increase the height of the bedroom.
- For example, a blue tint creates a sky effect and has a calming effect.
- Designers do not recommend using a glossy finish in a small bedroom, so matte plasterboard ceilings are an excellent option.
We do not recommend decorating multi-level ceilings in a small bedroom. This adjustment is only possible with a minimum distance between the top and bottom layers. Narrow bedrooms are also not uncommon and for them it is better to choose a longitudinal ceiling design.
It should be remembered that a multi-level design only looks suitable if the original ceiling height is sufficient. It should be remembered that a multi-level design only looks suitable if the original ceiling height is sufficient.
When finishing the plasterboard ceiling in this room, you must also take into account some nuances:
- If the ceilings in such a bedroom are low, then pale shades help to visually increase them;
- To make the ceiling a little lower, designers recommend painting the walls a few centimeters darker than the ceiling;
- The color of floor and ceiling coverings should be different.
- A plasterboard ceiling is also an excellent choice in a child’s bedroom.
Multi-level ceiling
Multi-level figured ceilings for a bedroom made of plasterboard look best. A similar structure is created from three or more stages of drywall, which are attached at different heights.
- This figure is quite complex, but gives the bedroom a truly luxurious look. Therefore, this design is best left to professionals. This method of decoration gives a wide scope for imagination and allows you to realize the most original ideas. In addition, it helps to zone the room.
- In this case, light glossy colors should be used, possibly combined with other materials, for example, with stretch ceilings. Photo wallpapers are not suitable here, as they will unnecessarily clutter the space.
- First of all, you should realistically assess the height of the ceiling. This design is quite voluminous and takes up a large amount of space. Therefore, the multi-level option is suitable only for the lucky owners of high ceilings.
Two-level plasterboard ceilings in the bedroom
Multi-level ceilings in our time are already innovations in the matter of decorating the ceiling in each room. Such ceilings will look especially beautiful and unusual in the bedroom. The main advantage of plasterboard is the ability to create ceiling structures of any shape.
The advantages of this type of ceilings include:
- The ability to create different lines, shapes or ceiling paintings visually decorates the bedroom;
- Such ceilings are an excellent option for zoning a room or emphasizing a particular interior theme;
- They can be decorated in different colors to visually enhance or change the shape of the room;
A particularly good choice is to create another level or, conversely, a niche above the bed. creating this area with bright, warm colors will help create additional comfort in the bedroom.
The combination of a suspended ceiling and a stretch ceiling is the most fashionable innovation and popular design, allowing you to create unique designs, play with colors and textures, and create exclusive lighting.
Drywall is the most common ceiling finishing option. He is the one who can satisfy all the owner’s fantasies and create a unique atmosphere of comfort and tranquility in the room.
Types of zoning
There are two types of zoning:
With the open method, a wall structure of various geometries is constructed to delimit adjacent rooms or zones. Used in most cases for decorative purposes. The functional approach lies in the arrangement of hidden structural elements. With the closed version, a durable structure is built that complements the load-bearing wall with a geometric element.
Advice. To separate functional areas in the bedroom, select the necessary lighting fixtures, taking into account the required brightness in a particular place.
It is possible to highlight all the necessary zones in the bedroom by installing a plasterboard partition of the required shape, and using lighting to delimit them. This approach will change the perception of space, and with the use of geometric structures of different sizes, the sense of visual volume will increase.
The design solution for the design of the partition should not break the volume and disrupt the integrity of the space, or exclude the possibility of free movement around the bedroom.
For a one-room apartment, the separation of office, guest and sleeping areas does not require a complex main wall. The use of a lightweight design allows for the execution of all the necessary figured arches and niches. The separation of decorative levels at different heights will emphasize the smooth transition from one zone to another while maintaining the visual illusion of volumetric space.
If many hanging elements are required, the frame is reinforced during installation with additional metal profiles with stiffeners, and the niches are placed in a checkerboard pattern.
Advice. To achieve comfort, isolate the sleeping area into a long, non-passable part - closer to the window and away from the entrance.
When constructing a more complex volumetric frame, it is possible to obtain a number of space-saving solutions:
- niches for textile materials, linen and stored clothing;
- built-in decorative elements, aquariums and rockeries;
- arrange electrical appliances, TV or audio system;
- build a special fireplace into the structure;
- hide communications and lighting fixtures.
Photos of plasterboard ceilings for the bedroom
Marking and frame
If you have chosen multi-level ceilings for your bedroom, then it is better to start the installation sequentially, level by level: mark out and install the frame for the first level - move on to the second. With a single-level ceiling, everything is much simpler, but the design, of course, will look much more advantageous with a multi-level layout.
Installation of a multi-level ceiling
We begin installation of our ceiling markings:
- On the wall, at the distance we have chosen from the ceiling, draw a horizontal line. To make work easier, you can use a laser level.
- On the ceiling itself we outline a grid for the future frame. The optimal grid pitch is 50-60 cm.
Fastening the wires
After marking, we begin assembling the frame:
- Using dowels, we fasten the guide profile along the marked horizontal line. To ensure that the profile is installed evenly, it is better to install it using pre-drilled holes.
- We attach the suspensions according to the markings on the ceiling. To install them, we use the same dowels with a plastic or metal sleeve).
Frame diagram
- If you have a large bedroom, then in addition to longitudinal profiles you will also need to lay transverse ones - they will give the frame of our future ceiling the necessary rigidity. Also, a ceiling of complex shape requires reinforcement if your design idea involves the presence of protrusions or curved bends.
- When illuminating the ceiling, do not forget that the laying of wires must be done before covering the frame with plasterboard.
When the installation of the plasterboard box on the first-level ceiling is completed, we check its horizontalness and can begin covering the frame with plasterboard. The second level can be installed both before and after the sheathing - it depends only on your personal preferences. There are no fundamental differences in the installation of the second-level frame, so we will not dwell on them.
Ready frame
Options for arrangement and original design of a niche
A plasterboard structure should not only serve its purpose, but also enliven the room. With the help of various lighting techniques, any niche can turn into a bright architectural composition. The peculiarity of proper lighting is not only beauty and decor, it carries a semantic and functional load.
In addition to its decorative function, the light in a niche can carry a functional load.
Bright neon spectra should not be used for the sleeping area. The best option would be to use lamps with warm and soothing light. Of course, the decorative function of lighting is no less important - for these purposes it is better to use an LED strip, thanks to which the structure of the niche will acquire not only light, but also color.
If you have doubts about how to design a niche in the bedroom, you can turn to the Internet or a specialist for help. The design or creative potential of an ordinary person depends on material wealth, personal preferences, convenience and limitless flights of imagination.
Unobtrusive lighting in a niche will replace your night light.
There are a huge number of options for using niches in the interior of residential premises. Even the most demanding and creative owners will be able to find their own option.
For clients who are financially secure, there are practically no limits to their creative fantasies. For example, a customer’s desire to decorate the interior of his bedroom with an antique fresco will not be difficult. The use of innovative technologies allows you to very quickly and accurately recreate any drawing or image.
Don't overdo it with lighting. Too bright spectra of neon light will make the bedroom look like a disco.
It is possible to decorate a plasterboard structure with natural stone masonry, and decorate the frame of the niche itself with Roman columns made of polyurethane with marble imitation.
In the plasterboard construction of the bedroom you can place a real boudoir, hidden from prying eyes. This solution will be of interest to real ladies who are accustomed to using the full time allocated for cosmetic procedures and massage. You can place your own mini salon in your favorite bedroom.
The dream of a wardrobe in the bedroom is also easily realized if there is a deep niche and a place in the room where to put a wide bed.
For those who like to contemplate pictures of nature or watch the crazy pace of the city landscape, this is an excellent option for decorating a window niche. A cozy soft place to sit, shelves with your favorite books, ceiling spotlights and natural light from the window will allow you to admire the views from the window on long winter evenings. You can complement a cozy resting place by using small pillows with bright or interesting patterns, a small blanket and even soft toys.
It is important not to make it too dark against the background of the adjacent light walls.
A niche option is very convenient to use as a workplace, especially in small apartments. If there is sufficient depth, the arch can be equipped with a system of sliding doors that can hide your personal space from prying eyes. It is necessary to consider the lighting system.
In a children's room, in a niche, you can arrange a play area in the form of a fairy-tale castle or a spaceship with ladders, slides and tunnels. You can even build a pirate fortress or ship. An extraordinary solution for using a niche in a nursery could be a bed in the form of a car for a boy or in the form of a carriage for a girl.
The niche can be separated from the rest of the walls with a lighter or darker tone, or decorated in contrasting shades.
GKL finishing
The plasterboard sheet itself is of little interest and, in addition, its moisture-resistant version is green, so at least the surface is puttied. Well, then they start finishing.
- Coloring. GKL holds paint perfectly. Moreover, you can not only paint the sheet with one color, but also choose a texture - matte, glossy, “metal-like” or paint a fragment of the ceiling. This decision is completely individual. Of course, you can’t transfer a photograph onto drywall, but with the appropriate skills, it’s quite possible to create an even more realistic image. You can use molding to highlight a rosette or other decorative elements.
- Pasting. Wallpaper has not been a popular choice for a long time, but it depends on the interior. For example, in the Provence style, plasterboard boxes representing ceiling beams are covered with washable wallpaper with a wood pattern. The effect is wonderful. However, today thermal film is more often used, since it is easier to stick, and it is more decorative: it reproduces not only the pattern or texture of a natural material, but also an image.
Adjusting a narrow bedroom
The smaller the bedroom, the smaller the various decorative elements on the ceiling should be, or they should be small. In small and narrow bedrooms, it is advisable to avoid installing a multi-level structure.
A transverse strip will help to visually expand a narrow bedroom, dividing the room into equal zones. It starts at the head of the bed, smoothly flowing to the ceiling.
However, with properly selected lighting and professional design, even a narrow bedroom will not seem so.
