The creative development of preschool children within the kindergarten is one of the important stages in the formation of a growing personality.
The group environment and surrounding objects promote curiosity, creativity, bold trials and discoveries.
Taking into account the fact that the child spends most of the daytime in a group, the surrounding space and interior in it become part of the gaming and educational process. The more opportunities children have to realize their own fantasies, the easier it is for a teacher to direct the learning process in the right direction.
The child treats objects and space as a resource, seeing in them opportunities for realizing his plans.
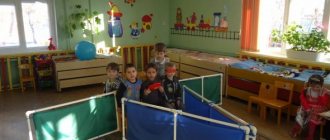
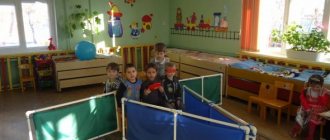
One of the interior details that can help in the creative development and organization of group life is a stylized screen. Being an important attribute of theatrical performances, with a touch of mystery, it evokes genuine delight and curiosity among children.
The simplest puppet theater attracts children much more than painted fictional characters.
Depending on the size, with the help of a screen you can stage scenes both for puppet theater and for real small actors, adding entertainment to the process and increasing interest.
The screen in this case becomes an urgently needed item.
If the group’s budget does not allow for purchasing a ready-made option, but the children have a desire to organize a theater club, you can make your own screen from plastic pipes for the kindergarten with your own hands.
The design of this multifunctional device is very simple.
Choosing design and sizes
Depending on the purpose of use and the age of the children, various designs can be made.
This could be a large full-length theatrical screen.
Or a small tabletop version of the screen to independently show scenes with puppet characters.
An important factor is the lightness and versatility of the design: children really appreciate the rare opportunity to independently change the arrangement of interior items, using them not as a mandatory established order, but as a resource for realizing ideas.
This develops management skills and also gives more space for play and creativity.
As a rule, the standard model of a screen made of PVC pipes is made with three sections.
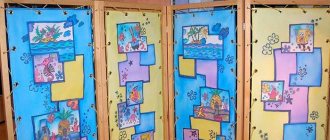
It is enough to collect 3 frames, connect them together and cover them with beautifully decorated curtains.
However, this is not a mandatory rule, and if you wish and have the material, you can make a larger number of frame components. The design of the fabric stretched over the frame depends only on personal preferences - you can choose it together with your children from several options by making removable covers with Velcro fastenings.
When choosing covers, you can show your imagination and creativity.
Different colors of covers can be associated with seasons or themed holidays. For example, a green background in the spring, yellow and orange - with the onset of autumn, blue or dark blue - in the winter season.
There is a lot of room for imagination here for the teacher.
Japanese style
An interesting option is a Japanese-style product. To make it yourself, prepare:
- bars 2x5 cm;
- furniture hinges;
- fabric of any color, texture;
- thin cord (decorative) or rope;
- hammer, chisel;
- screwdriver or screwdriver;
- glue, clamps;
- brush, paint (varnish);
- furniture corner, screws;
- measuring tool;
- sandpaper.
To begin, mark the bars by setting a distance of 5 cm from the edge and drawing a line across. Further actions:
- Make a cut to 1/2 the thickness of the block, remove part of the wood with a chisel and hammer to the depth of the cut. Do this on both sides of the planks.
- Connect the long and short parts perpendicular to each other, not forgetting to first apply wood glue to the inside of the recesses.
- Clamp the joints with clamps, wait until the glue dries and screw the furniture corners onto the joints. Finally, attach the fabric to the frame using a decorative cord - to do this, make fabric inserts around the perimeter.
Materials and tools
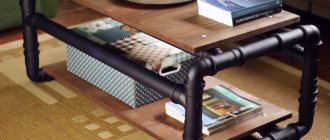
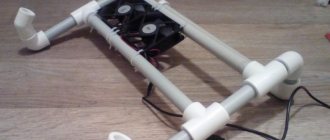
Making a screen from plastic pipes with your own hands will not require large expenses. You will need propylene pipes of various lengths, plastic corners and double-sided fasteners to connect the sections to each other.
It is necessary to think through the design and calculate the amount of material.
All this can be taken after a recent renovation, or purchased at any specialized store for repairs.
The pipes are connected to each other using a plastic corner.
The sections are connected to each other with special double fasteners.
A special machine for welding plastic pipes made of propylene, which is used by professional plumbers during installation, can be a good help.
If you have nowhere to borrow it, you can also use the conventional heating method over the stove.
If desired, PVC pipes can be painted. For durability, you should use a mixture of putty and regular gouache.
Various ways to use multifunctional screens in kindergarten are suggested by the children themselves.
You can use any available fabric to sew covers. It must be remembered that it must be durable and easy to wash, since children's games are fraught with various consequences for any furniture, and the screen will not be an exception.
It is best to choose a bright and colorful material.
Depending on the design, you may need Velcro fasteners, ribbons or cords for garters, additional material for pockets or loops, and reliable adhesive.
Thanks to the principle of accessibility, children have the opportunity to independently change the space in their group at any time.
Master class “Table screen for puppet theater”
Evgeniya Vyskrebtseva
Master class “Table screen for puppet theater”
height 30 cm, width 50 cm , plus 2 more doors on the sides (which open in both directions)
.
To make this screen I needed :
-colored tape (wide stationery tape)
-a hot glue gun (plus rods for it)
-very thick cardboard (I used cardboard from an old children's large alphabet book in A3 format)
- foamiran (for screen . It is better to take 2mm thick, it is denser)
First you need to cover the edges of the cardboard with colored tape. Then connect all the screen doors so that the doors can be opened in both directions.
It is also important to remember that it will be stored folded flat.
Moreover, with a margin, since foamiran also has its own thickness.
Then we measure and glue the foamiran to the screen doors on both sides .
If the foamiran has been crushed, it is better to iron it through the fabric at medium temperature. If you iron without fabric, or with a very hot iron, it may become deformed.
Please note that in this photo I cut out the foamiran, but did not smooth it with an iron yet.
When the base of the screen was ready , you can decorate it. (in particular the snowdrifts) with glitter foamiran.
Made from plush foamiran. The material is pleasant to the touch and adheres perfectly and firmly with hot glue. If it gets dirty, you can wipe it with a damp sponge.
Thank you for your attention!
Master class on making dolls for a puppet theater Theater is a magical world. He gives lessons in beauty, morality and ethics. And the richer they are, the more successful is the development of the spiritual world of children...” Master class on making a screen for a puppet theater Master class on making a screen for a puppet theater Theater is a magical world. He gives lessons in beauty, morality and ethics. With what. Master Class. Screen for tabletop theater. In our group there are several types of tabletop theater, but there was no screen. In one of the sets of paper fairy-tale characters there was something like a screen. Master class “Screen for the tabletop theater “Seasons” 2022 has been declared the Year of the Theater, within the framework of which our kindergarten teachers have done a lot of work to update what they already have. Master class “Screen for the theater from scrap material” Dear colleagues! I want to tell you about how I recently made a screen for my children of the second junior group. This school year we continue. Master class “Screen for a shadow theater” I offer you, dear colleagues, my version of making a screen for a shadow theater. To make it I needed the following materials:.
Source
DIY screens for kindergarten - 50 photo ideas:
PreviousOtherReview of accessories for beds: types, materials and functionality
Next
OtherRoller guides for drawers. How are they built?
Casement model
A classic product consisting of a durable frame, the elements of which are connected to each other either using piano hinges or parts made of thick fabric or leather.
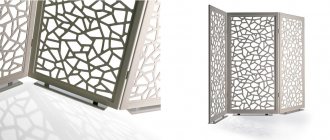
The most common are three-leaf structures, but four-leaf ones are also found. The number of elements depends on the area of the room. The height of the product reaches 180-200 cm.
Screen-picture or just a little about storage
If the screen was made of thin rigid foam plastic (EPS), it, folded, can be stored in a very original way - on the wall, as a decorative panel. To do this, the front side of one of the outer wings of the partition is decorated accordingly - painted, using a fragment of photo wallpaper, or decorated in some other way. And on the opposite side, hangers are made - for example, from pieces of fabric, nylon threads or pieces of chain.
(
72
voice, middle:
5,00
out of 5)
Loading…
Transparent model
A decorative element of the interior of any shape and size, having an openwork fabric that does not hide what is on the other side. Either translucent fabric or mesh is stretched over the frame. Products of this type are used only for decorating the room.
Note!
Do-it-yourself installation of interior doors - preparation of the structure, selection of doors, installation step by step + instructions from professionalsDIY shoe rack - types of designs, manufacturing materials, step-by-step master class with simple diagrams and drawings
Do-it-yourself sliding wardrobe - manufacturing manual with a full description of the stages, types of structures, choice of manufacturing materials (photo + video)
Single screen model
This partition consists of one continuous leaf. For stability, it is either attached to the floor or fixed with one edge to the wall. This deprives the product of mobility.
Single-screen screens are often installed in offices to delimit workspaces, in kitchens to highlight a dining area, in studio apartments to designate the living, sleeping and kitchen areas of space.
Single-leaf partitions have also found their use in small cafes or restaurants to separate tables from each other.
The simplest screen on legs - step-by-step instructions
If you are building a folding partition at home, then to protect the floor you need to cover it with something: hardboard, greenhouse film, or at least a thick layer of newspaper. The sequence of work is expected to be as follows:
- Cut the pieces of timber to the required size. We fold the first frame, not forgetting to leave the legs, align the corners (exactly 90 degrees) and fasten them with furniture corners. We prepare the remaining frames in the same way.
- We tint the frames with stain in the desired color and dry them.
- We place one of the frames on the floor and stretch the prepared fabric (the edges are folded and ironed) over it. It is better to work together: while one person holds the edges of the fabric, the second secures it with a stapler. We leave the distance between the staples minimal - no more than 5-7 cm, otherwise the fabric will soon sag.
Partition made of boards
This screen will look more solid, and thanks to its density and massiveness, the product can muffle sounds to some extent. This wooden structure can serve as a stand on which you can mount drawings, photographs, and various small crafts.
The most optimal material for it will be boards made of light wood. It is better to take wide but thin products. A possible replacement - MDF panels - can simplify the task assigned to the master. To work you need to prepare:
- boards (panels) - 3 pieces, their length is 1800 mm, width 450 mm;
- thin sheet padding polyester - 3 pieces with dimensions 500x2000 mm;
- the same number (three) of pieces of dense fabric (also 500x2000 mm);
- acrylic paint and brushes;
- primer;
- decorative furniture nails;
- glue;
- upholstery tape;
- furniture hinges;
- hammer;
- scissors;
- stapler;
- screwdriver
If the farm has suitable boards of a different size, it is necessary to pre-fit the pieces of filler and fabric to fit it, taking into account that a certain amount of material will be required for hemming the sashes.
- First, prepare the material. The outer part of the boards is treated with a primer. After it dries, the surface is painted.
- The synthetic winterizer is laid on a flat surface, a strip is cut off, the width of which is slightly larger than the size of the sash-board. The material is secured using a stapler. The excess remaining on the sides is cut off with scissors.
- Move on to dense material. Exactly the same strips of fabric are cut out. Narrow fabrics are applied to the padding polyester, stretched well, the edges are folded, then the fabric is “fastened” to a wooden blank with a stapler.
- Upholstery tape is attached along the edges of the semi-finished doors: first, it is placed on glue for reliability, then additionally small decorative nails are driven in. The step between them is at least 50 mm.
- The first two panels prepared in this way are placed side by side “face down”, both aligned along the bottom edge. Having retreated 100 mm from the top and bottom, attach the hinges. In a similar way, they “deal” with the third leaf board.
- The surface of the finished screen is decorated using the same nails, which are driven in according to the invented (observed) pattern.
This design will be much heavier, but such a massive product will not transmit light and can also protect from drafts.
Fastenings
The least labor-intensive and cheapest (with low weight and sufficient rigidity) is a screen frame made of 50x25 or 40x20 mm slats. If you are making a portable temporary screen, using this material is ideal. The finished structure will have only one drawback - the furniture corners that will have to be used to fasten the slats will clearly show through the covering.
It is better to make a more rigid and durable floor screen from 50x50 or 40x40 mm timber with self-tapping screws at the ends and with obligatory gluing. In this case, the fasteners do not immediately reach the end, but gaps of 1 or 1.5 mm are left. 3-4 drops of PVA glue are poured into each joint, and only after this the frame is pulled together tightly.
To dry, each frame should be lifted and leaned against the wall. It is highly undesirable to rearrange and disturb it until it dries completely.
It is more correct to use the most common hinges for the doors, card hinges. But only piano hinges can ensure complete blindness of the screen, although they are quite expensive.
