The creative development of preschool children within the kindergarten is one of the important stages in the formation of a growing personality.
The group environment and surrounding objects promote curiosity, creativity, bold trials and discoveries.
Taking into account the fact that the child spends most of the daytime in a group, the surrounding space and interior in it become part of the gaming and educational process. The more opportunities children have to realize their own fantasies, the easier it is for a teacher to direct the learning process in the right direction.
The child treats objects and space as a resource, seeing in them opportunities for realizing his plans.
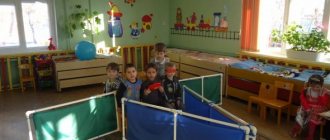
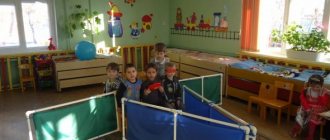
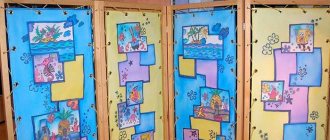
One of the interior details that can help in the creative development and organization of group life is a stylized screen. Being an important attribute of theatrical performances, with a touch of mystery, it evokes genuine delight and curiosity among children.
The simplest puppet theater attracts children much more than painted fictional characters.
Depending on the size, with the help of a screen you can stage scenes both for puppet theater and for real small actors, adding entertainment to the process and increasing interest.
The screen in this case becomes an urgently needed item.
If the group’s budget does not allow for purchasing a ready-made option, but the children have a desire to organize a theater club, you can make your own screen from plastic pipes for the kindergarten with your own hands.
The design of this multifunctional device is very simple.
Choosing the screen design we need
A lightweight DIY screen made from plastic pipes will not require much time to make, but it will fit perfectly into any interior and will last a long time.
The child treats objects and space as a resource, seeing in them opportunities for realizing his plans.
The screen can be made for different purposes - for fencing off space, for garden fairy-tale performances, for a tabletop theater, etc. The size of the product depends on the room in which it is intended to be used. The standard design has three sections, but a screen for zoning a large space should consist of at least 5-6 cells.
One of the interior details that can help in the creative development and organization of group life is a stylized screen.
Note! In order for the screen to be stable, its total length at the base should not be less than its height. Stability is also provided by an increase in the number of sections.
A frame is constructed from pipes, which is then decorated and decorated based on the purpose of using this item.
What it is
A screen can be called a structure containing various hidden elements. With its help, you can organize skits, performances, use it for a puppet theater, conduct a master class in a kindergarten, and much more.
See also
Pantry closet: what is it, how is it different from a regular one, how to make it
In addition to its entertainment function, a screen or decorative fence is actively used for the development, education and upbringing of children. Believe me, any teacher in the kindergarten will only be glad if something similar appears at her disposal. These are truly multifunctional products that, with imagination and experience, can be used for a huge and varied range of applications. Using medical-themed covers, you can organize a lesson on taking care of your health. By stretching thematic canvases, it is easy to stage different performances or stage a whole performance.
Officially, such screens are called nothing less than a developing subject-spatial environment. There is even a state educational standard that it must meet.
Don’t worry, if you have ordinary polypropylene, verified dimensions and the right tools, it will be difficult to violate these standards.
But it is still important to remember that we are talking about a product for children, not adults. Leaving the kids alone near the screen, the teacher or parents should have no reason or reason to worry about their safety.
All this is spelled out in the requirements and standards. In relation to the screen they are:
[adv1]
- Safety. We are talking about the stability of the structure and its strength;
- Transformability. The ability of the screen to change its appearance through simple movements;
- Availability. This is not about price, but about the ability of each child to carry out certain actions;
- Variability. That is, the ability to change covers and contents;
- Content and richness. Here, I think, everything is clear;
- Multifunctionality. In fact, a combination of all the previous points.
Such a decorative partition has excellent developmental functions; it allows you to concentrate and hold the attention of children, develop their intelligence, thinking, show ingenuity, learn something new, develop creatively, etc.
A screen also becomes an excellent way to zone a room during quizzes, skits, and various events so that children are not distracted by other matters.
Preparation of all materials and tools
Very often, plastic pipes remain after renovation of premises and can be used for folk crafts, including screens for kindergartens. If you don’t find any, the materials can be bought at your nearest hardware store, and they are inexpensive.
Making a screen from plastic pipes with your own hands will not require large expenses.
Before purchasing, you need to accurately determine the dimensions of the future product, make a drawing of the required frame, calculate the pipe footage from it, as well as the number of plastic corners (fittings) and double-sided fasteners.
You will need propylene pipes of various lengths, plastic corners and double-sided fasteners to connect the sections to each other.
- For example, a traditional three-leaf screen made of polypropylene pipes consists of flaps that require pipes of sizes 60-80 cm (top and bottom width, 6 pieces) and 100-120 cm (side height, 6 pieces). Thus, the total footage of the pipes should be approximately 10-12 m.
Note! As a rule, the standard length of plastic pipes in stores is 5 m. Keep this in mind when calculating the length of the required pipes for the product, because they all must be solid.
- For the standard screen in question, you will also need 12 corners, or fittings (4 for each section), as well as 6-8 double-sided connecting fasteners.
- For drapery in sections of the screen you will need fabric and materials for decoration.
You can use any available fabric to sew covers.
It must be remembered that it must be durable and easy to wash. The set of tools and materials for the work should include a hacksaw for cutting plastic, an iron for heating the ends of pipes before joining (or buy special glue for PVC), and alcohol wipes for degreasing the surface. Having a special plumbing apparatus for welding plastic pipes will greatly simplify the work.
A special machine for welding plastic pipes made of propylene, which is used by professional plumbers during installation, can be a good help.
Attention! A child can help in the process of making a screen, but work with glue or iron should only be carried out by an adult using all safety measures!
A few words about design options
Before making the furniture in question, you should decide on its tasks and design.
Most often, shelving from the following types of pipes is installed in the garage:
- Wall-mounted - are a stand-alone structure that is not attached to the wall. Thanks to this, the product can be transported. Another advantage is that the structure does not put a load on the walls, which is important when they are not very strong, for example, framed or covered with plasterboard;
Wall-mounted furniture can be moved from place to place
- Stationary - unlike wall-mounted ones, they have racks only on the front side, so the load-bearing function of the rear racks is performed by the wall to which the shelves are attached. That is why such models are called stationary;
Stationary rack attached to the wall
- Cantilever - unlike stationary ones, these products have rear supporting posts, as a result of which the shelves are attached in a cantilever manner, i.e. only from the back side, while the front side simply hangs in the air. The frame of such a product can be attached to the wall or be portable.
Note! Console models take up a little space, but have a small load capacity, so they are not suitable for storing heavy items.
The photo shows a diagram of a cantilever structure made of profiled pipes
- Hanging - unlike all the products described above, they are hung on the wall, so the entire load falls on the walls, not the floor. In essence, these are ordinary shelves, but larger in size and connected to each other by construction sites. They can be either console or regular, i.e. with front pillars.
Hanging rack does not rest on the floor
The most versatile are wall-mounted and stationary structures, as they allow you to store everything from tools and all kinds of small items to wheels and various heavy objects. If the garage is small, it makes sense to use suspended structures installed under the ceiling, as a result of which the lower part of the garage will be unloaded.
The process of making a screen from plastic pipes with your own hands
Having prepared the materials, you can immediately begin work.
Once the dimensions of the future screen have been determined, you need to cut the PVC pipes to the desired length.
First, you need to cut pipes of the required length, 4 for each section (2 for specifying the width, 2 for the height). The ends of each tube must be degreased with alcohol.
How to connect pipes correctly
- When connecting with glue, it is necessary to apply the product to the ends of the pipes, and after the plastic has softened (after 1-2 minutes), insert it into the hole in the corner. Excess glue should be immediately removed with a dry cloth.
- The ends of the tubes can also be heated using an iron. To do this, you need to place a sheet of paper on the cut of the pipe, and then press the sole of the hot device and hold for several seconds, after which you immediately insert the tube into the fitting.
We fasten the section frames using corner joints.
In this way, all sections are fastened from the tubes; they must be identical in length and width.
Connecting sections
The parts of the future screen need to be connected to each other, waiting 15-20 minutes after gluing the parts.
Here you will need either a special apparatus or a little physical effort to heat and insert the plastic pipe profile into the corner.
Double-sided fasteners are installed on one side of the section, after which the side of the next section is attached to them. The fasteners should be evenly distributed along the entire length (standardly there are three of them - at the top, bottom and in the middle).
How to assemble the frame correctly
Using a cutter, we make “pockets” at the end of the boards for wooden veneers. We sand all cuts and indentations with sandpaper. Apply wood glue to the holes made and insert the slats. The glue will swell and the connection will be very strong. In this way, we assemble all the components of the frame and leave until the glue dries completely. Thus we assemble three frames. After drying, we tint the frames in the desired color; for this you can use paint or wood stain, which will give the frame an interesting color and at the same time the natural grain of the wood will remain visible.
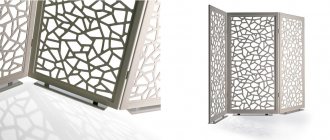
The first option for a partition that can be created is a Chinese-style screen with glass. Next, to make it, we will decorate the glass panel with stained glass film. We cover the surface of the glass with a slightly soapy solution and, using a regular ruler, remove liquid bubbles from the surface. To insert glass into the frame, you need to make a special recess on the inside of the frame. We insert our pseudo windage into it, secure the glass using glazing beads, small nails and a hammer. Having marked the desired place, using a screwdriver and screws, we install all the hinges that will connect the sashes together. The first screen with glass is ready. If desired, wheels can be mounted at the bottom of the screen to make it easier to move the partition to the desired location.
Video tutorial on how to create a screen on a wooden frame in the Chinese style:
We will make the second version of the screen using fabric. This time we will stretch the fabric onto the frame prepared in the same way as in the first version. We select the fabric of the required color and, having previously taken measurements, take it with a small margin so that the fabric does not stretch, but hangs like a “curtain”. You can take ready-made pleated fabric or create this effect using a sewing machine. Using a construction stapler or small nails, we attach the blank fabric to the frame. You can attach chair supports or furniture wheels to the legs of the screen with nails.
The filling of the screen can be anything you want; you can use your own drawings on whatman paper, beads, feathers, and so on according to your imagination. Of course, it’s easier to make a screen on a finished frame, but it costs a lot, and why spend money if the job is essentially not dusty.
Parts of the frame frame can be fastened in completely different ways using the one that is convenient for you: with screws, joint-to-joint wood glue or using lamellas - we described this method above.
Design and decorations
Designing a screen is the most creative and enjoyable part of the job, in which you can realize all your ideas. If the screen is intended for a kindergarten, it should be bright and attractive.
Fastenings made from Velcro tape or loops are sewn or glued along the top side of the future cover.
- To disguise the plastic, the finished frame can be painted with acrylic paints and dried well. Details can be made in different colors to make the product even more decorative and bright.
- The openings of the sashes need to be draped with fabric covers so that the screen acquires its main function - fencing off the space. It is better to take a material of natural composition so that the product does not become electrified and does not attract dust. The covers are sewn to the size of the sashes; they can be in the form of free-flowing curtains, attached only to the upper slats, or in the form of canvases, attached along the entire perimeter. Fastenings for fabric can be in the form of loops, fabric ties, decorative bows, Velcro, rubber tensioners, etc.
- The functionality of the screen is significantly expanded if the product is supplemented with patch pockets for storing toys and hanging clothespins for displaying children's drawings and crafts.
You can make drapes of different styles in order to use the screen for different purposes - for example, winter/summer decor, decorations for different types of children's performances and fairy tales.
You can stick colorful appliqués or sew small pockets onto stretched covers.
Let's move on to the decor
Now let’s work on the fabric that will be used to fill the gaps of the screen. Using a stencil, we apply a design (for example, flowers) to a plain material. If you couldn’t come up with your own ornament, the template can always be found in various sources. The stencil is cut out with a wallpaper knife or scalpel.
If you are making a children's screen, you can decorate it with your own hands with little animals or any “cartoon” motifs.
Dip a small roller into textile paint purchased in advance and roll the fabric over the stencil. It doesn't matter if the edges of the flowers come out slightly blurred. Each time we lay the sheet with the stencil on the fabric in an arbitrary direction, this will make the drawing more picturesque. In addition, the fabric can be additionally decorated with elements sewn on top (soft fabric flowers to match, for example, gauze).
The fabric is stretched over the frame and secured with a stapler. You can decorate the screen from the inside with platbands made of thin strips of fiberboard. By the way, it is not at all necessary to fill the screen panels with fabric. Instead, you can insert into the frames sheets of fiberboard or thin plywood (or even very thick cardboard), pre-pasted with wallpaper to match the walls or, on the contrary, with contrasting wallpaper. Just be careful not to get too colorful.
Master classes on creating screens
- A successful master class on making a screen from plastic pipes with your own hands embodies the idea of creating an entire children's house on its basis - for this purpose the door and windows are decorated on covers.
- Another master class gives advice on using screens for children's creativity - appliqués and children's crafts are attached to the covers.
- If paper wallpaper sheets are attached instead of fabric covers, the screen can be used for collective drawing by children, creating large posters - for example, for the holidays.
- The design can serve as a basis for activities with children; counting material, letters, and materials for the development of logic and imagination can be attached to it.
Use of ventilation pipes in everyday life
Ventilation pipes with a set of connecting and fastening parts are usually called air ducts. They are designed to ensure air circulation and are installed in those rooms where there is no access to natural air movement or there is an additional need for ventilation: in kitchens, bathrooms, toilets.
Before the appearance of plastic parts on the market, air ducts were made of zinc-coated alloy; they are still often found in production shops or in catering establishments (their introduction is associated with high temperatures).
But for implementation in everyday life, that is, for installing ventilation in apartments and cottages, polymer products are more suitable.
They have the following advantages:
- have less weight than iron ones, so they are easier to install with your own hands;
- smooth walls have little resistance to air movement;
- airtight, as they have no seams;
- resistant to high humidity, do not rust;
- On sale you can always find a set of fittings suitable for the cross-section.
Products that meet GOST standards and have certificates of conformity are allowed for sale, so we can talk about the safety of plastic parts.
https://www.youtube.com/watch?v=4wC36soTX8k
Peculiarities
Metal pipes are made from different raw materials:
- cast iron;
- carbon and stainless steel;
- brass;
- aluminum and other composite materials.
Their cutting is carried out using a mechanized or automated method using various equipment. The use of a machine for cutting and trimming pipes allows you to cut pipes more accurately, quickly and efficiently in comparison with manual cutting.
A distinctive feature of the products of the first group is their versatility. They are comfortable and light weight. This allows them to be used in different conditions, in addition to the workshop, during pipeline installation and repair. They are easy to install on pipes by one worker.
In addition, they provide for easy adjustment of the pipe diameter. Essentially, these are mobile or portable units, which, depending on the type of cutter, can be:
- oxygen gas;
- plasma;
- water jet.
Models may have auxiliary rotating devices to make pipe cutting easier. Analogues of mechanical cutting are needed to cut and obtain the ideal chamfer, which is characteristic of new factory pipes. These devices do not generate sparks during use, so they are used in work with oil and gas pipelines, in which open flames are unacceptable. They are equipped with a mechanized trolley to allow movement around the pipe using a chain.
Frame
- We make a frame that consists of two legs and five spacers. Start at the bottom, with the first and second spacers forming the top and bottom borders of the weave of the plywood strips. Cut the legs (A) and spacers (B) to the required length.
- Mark the position of the spacers on the inner surface of the legs. To make sure the measurements are the same on both legs, place the legs together edge to edge, line up the ends, and tape them together.
- Draw a reference line 260mm from the bottom ends of both legs. These lines indicate the position of the upper edge of the lower brace.
- Then draw reference lines 1140mm up from the first reference line. These lines indicate the bottom edge of the second brace. The top spacer should lie between the legs flush with their top ends.
- Mark the position of the remaining spacer where you want it. We placed it at the same distance between the top and second spacers, approximately 90 mm apart.
Tools for working with furniture
- Drill two 3mm pilot holes through the outer surfaces of the legs into the center of each spacer. Countersink the holes to a depth of 4 mm using a 9 mm diameter combination bit. Apply glue to the ends of the spacers and place them between the legs.
- Secure the frame with clamps and measure it diagonally from corner to corner to make sure that the wooden screen is rectangular and the structure does not “float”. Attach the spacers to the legs using 50mm screws.
