Modern technologies make it possible to produce furniture of any size and design. If a suitable model is not in stock, you can always order it. However, Russians are distinguished by a special craving for independent production of furniture. Doing it using the old old-fashioned methods is not serious in our time. It is necessary to prepare furniture drawings so that the future product meets modern requirements. Design requires knowledge in this area and skills in working with open sources of information. You can always find all the necessary information on the Internet.
Development nuances
It is impossible to produce high-quality furniture without preliminary design work. To make an item yourself, you need to draw up a drawing. It is a graphic drawing of the product, made on a reduced scale and including the parameters necessary for its manufacture. Not only a design of the product is made, but also a drawing of the room where the furniture will be located.
Design is a rather complex process that requires special knowledge. Ideally, it is better to entrust this difficult job to a professional. If a person wants to start developing a drawing himself, he needs to adhere to the following algorithm of actions:
- decide on the type of future product;
- indicate its location;
- complete all measurements;
- select types of materials;
- start designing based on the results obtained;
- create a sketch;
- make adjustments if necessary;
- draw up a final technical design that allows you to assemble a high-quality product.
The project can be made based on a room with furniture that you like. For the convenience of drawing up documentation, it is recommended to use standard drawings and diagrams from manufacturers. They include:
- general form;
- list of accessories;
- assembly drawing;
- specifications;
- detailed drawings showing fastening locations, types of holes, edge locations.
You don't have to strictly follow this list. An individual manufacturer may change the contents of the list at his own discretion.
Chairs and stools made of natural wood
We figured out how to make a table, all that remains is to figure out how to sit at it. Of course, it was possible to make a table with short legs and sit next to it directly on the floor, but this option is not very convenient and is not always appropriate.
It is much more pleasant to sit on a nice, stable stool with three legs. Assembly is carried out using dowels and wood glue.
Finished stool
So, sizes, materials and list of necessities:
- The stool is made from podocarpus totara wood. Coniferous, evergreen, native to New Zealand. You can replace it with any other material that is available. In the example under consideration, boards with a thickness of 40 mm were used;
- dowels with a diameter of 10 mm;
- it is advisable to prepare a couple of pieces of plywood so that when the parts are compressed in the clamps there are no dents left;
- The tools you will need are a saw, a drill, a 10 mm drill, a grinder, a hammer or mallet, small nails or dowels (12 pieces);
- decorative coating - stain and varnish. If you don’t like this option, you can age the surface using the technology described above;
- In addition, you need to take a carpenter's pencil, a protractor, tracing paper, a ruler, and glue.
Step 1. Making the legs. The parts are beveled down at an angle of 30 degrees. Leg height 310 mm. The top of each leg is 140 mm. The lower part on which the stool rests is 40 mm.
Leg
The outer part of the vertical ends along the length is cut at an angle of approximately 120 degrees.
We make a simple drawing on tracing paper, as shown in the image below, cut out the part and make markings on the wood. We cut out three blanks for the legs of the future stool.
Step 2. Making the seat. We draw three identical parallelepipeds on tracing paper, cut them out, combine them to check how well the parts fit together. We transfer the image onto wood, cut out the details and sand the corners and surfaces.
Step 3. Connecting the seat elements. We draw a horizontal line at the short ends and put 3 points at equal distances on the drawn line - these are the locations of the dowels. We drill holes for the dowels, apply glue to all holes, drive in “wooden nails” and connect the seat elements. If the parts are connected slightly inaccurately, we correct the geometry by grinding.
Connected seat elements
It is better to remove any released adhesive immediately.
We clamp the seat with clamps and wait for the glue to dry.
On a note! It is recommended to slightly round the sharp edges of the bars to make it more comfortable to sit on the stool.
Step 4. Connect the seat and legs.
The legs will be secured with four dowels each. We attach each leg to the bottom of the seat, align the position, and outline the perimeter of the attached part.
We mark the position of the dowels as described above.
Marking. Nails without heads are driven in to mark the position of the dowels
For convenience and more accurate marking, you can use nails without heads, driving 4 pieces into the ends of the legs and pressing the part into the seat with force so that noticeable indentations remain.
Recesses from studs
We clamp each leg individually in a vice. To avoid any traces left from the tool's jaws, we use plywood sheets as liners on both sides.
The part is clamped in a vice with plywood
We drill holes for dowels in the legs and seat.
Holes drilled
Holes for dowels
Apply glue, drive in dowels and connect the elements.
Assembling with dowels to check the connection
Applying glue before final assembly
Connection of legs and seat
In order for the stool to stick together firmly and reliably, we place it on a workbench, place a board on top, and clamp clamps along the edges of it. Or we put something heavy on the stool.
Gluing elements
Step 5. Completing the work - decorating the surface with stain and varnish or wood wax.
And in conclusion, a small selection of wooden furniture in the interior. Click on images to enlarge.
Video - How to make a stool
Classification
There are several types of drawings for furniture:
- Parts drawings. They depict individual components and indicators necessary for the manufacture of furniture.
- Assembly. Display products, groups of parts, and also contain assembly data.
- Tabular. Includes data for the production of identical components.
- General views drawings. Shows the main characteristics of the product.
The main stages of making cabinet furniture with your own hands, tips
At the preparation stage, design and working diagrams are carried out. They also have their own varieties. There are two types of design drawings:
- A preliminary design drawing depicts the architecture, shapes, structural elements and dimensions of the furniture. This document becomes the basis for preparing a technical project.
- Based on the technical design, which includes general and prefabricated diagrams, working drawings are developed.
All data on the production of the model is shown in working drawings, which are divided into documentation for serial and mass production. After testing prototypes of products, they become the main ones in furniture assembly. Custom production drawings are used to create individual, one-off items. In furniture manufacturing, breakdown is sometimes used instead of prefabricated documentation. On it the model is shown in a vertical projection in its actual size. Horizontal and vertical sections are superimposed on the breakdown.
Parts drawing
Assembly
Tabular
General view
Online services
Bplanner
The Bplanner online application is often integrated into the websites of cabinet furniture stores. But you can also use it on the official website. There are software versions for creating cabinets and kitchens, and there is a VR version for viewing the interior in virtual reality.
The service is Russian-language and easy to understand. No special knowledge is needed - the user only enters the dimensions, moves the doors and shelves.
The application is free for the user, but for a site owner who wants to embed it, it will cost from 1,900 rubles per month.
Functions and capabilities:
- adjusting dimensions, materials, filling of cabinets, kitchen units;
- working with a project in 2D and 3D;
- mobile app;
- VR support;
- personal settings when installing on the site.
Pax3d
A non-standard service developed by IKEA. This is a full-fledged cabinet designer. The program only works with parts produced by the Swedish corporation.
The Pax3d application with a Russian interface is free, understandable even for those who do not understand furniture. The user simply drags ready-made elements into the three-dimensional interior of the room and arranges them together. You can then save or print the resulting cabinet.
Functions and capabilities:
- a rich library of structural elements from IKEA;
- interior customization;
- choice of material;
- built-in hints;
- saving a project using code on the site.
Prodboard
Prodboard is a simple designer of cabinets and kitchen sets. Not suitable for professionals, but will appeal to ordinary users who are choosing a cabinet and trying to understand how it will look in the interior. The settings are only basic; you cannot flexibly change the geometry of the cabinet furniture.
The application does not have a Russian interface, but is completely free.
Functions and capabilities:
- built-in library of standard structural elements;
- dimensions editor;
- interior customization;
- saving, printing the result.
Calculation of the wardrobe
This online service takes a different approach from all previous ones. There is no need to move or drag elements - just enter the numbers in the required fields. The program will draw a wardrobe and perform the required calculations.
The main task of the service is to calculate how much materials will be needed for the cabinet model of interest. This online tool does not work with other home furnishings.
Functions and capabilities:
- drawing up drawings;
- calculation of the required area of material;
- counting the number of holes for the drawing.
Many applications have been developed for designing furniture for any purpose and need. If you want to make a cabinet or table yourself, use one of the online resources. For use in an industrial enterprise, it is better to purchase a professional downloadable application.
What you will need to make a sketch
To prepare a project you need a computer and special programs. When drawing up documentation for making furniture with your own hands, you will have to use some devices. The master will need: tape measure, pencil, level.
The basis for creating a project for a future product is a sketch. It is a sketch or simple drawing of furniture. To compile it, you first need to determine various parameters related to the location of the product in the room relative to the walls and other pieces of furniture, that is, draw up a room plan.
If you decide to make a kitchen set, the following parameters are determined:
- width, height, depth of the place where the furniture should be;
- location of the ventilation pipe, communications, window sills, sockets.
Guided by these data, you can make a pencil drawing of the kitchen. It is necessary to determine the size of the modules, their location in the room in relation to each other and relative to other objects. Each item must fit perfectly into the place determined by the drawing. The sketch shows “working” dimensions. They are designed to comply with technical and operational standards. At this stage, the design of the model is determined and the formation of the project itself begins.
How to make your own furniture polish using improvised materials
Freehand sketch
Design in a computer program
Natural wood table
An unusual “antique” table can be made from the most ordinary boards. Before work, you should stock up on patience, diligence and a fire extinguisher just in case.
Step 1. Let's start by making a wave-shaped connection from the boards.
We select high-quality planed boards without knots, it is advisable to take the smoothest ones. We lay the boards on a workbench, measure the length of the future tabletop, put marks and saw off the excess with a jigsaw.
Sawing boards
We ended up with 7 blanks for the table top.
Step 2. Lay out the blanks on the workbench. We arrange the boards so that the pattern of annual rings looks most natural and aesthetically pleasing.
Laying out blanks taking into account the texture of the wood
In order not to confuse anything, we number the blanks with a pencil.
Numbering of blanks
Step 3. Randomly draw a wave along the edges of the first blank.
Marking
If we were unable to select a material without knots, we outline the defects, since they will be difficult to process.
Step 4. Use a jigsaw to cut out the design along the drawn lines.
Sawing a picture
Step 5. Now transferring the drawing to the end of the second workpiece.
Performing markup
It is important to maintain the same width of the workpieces at both ends so that a wedge does not form.
Using a jigsaw, we saw off the excess along the markings.
Cut according to markings
On a note! To prevent the workpiece from moving, secure it with clamps to the edge of the workbench.
The resulting joint
An accurate cut will not work one way or another. The joint will be a little imperfect, but that's okay.
The connection is loose
The position can be corrected using a hand router.
- Set the desired depth of the cutter.
- We secure the workpieces on the reverse side, spreading the boards at a distance slightly less than the diameter of the cutter.
- And then we will need attentiveness and steadiness of hands, since milling will take place in “Non-stop” mode. The cutter cuts wood simultaneously from both ends of the workpiece, forming a perfect junction.
Milling the ends
In the same way, we saw and mill the remaining blanks, and then put them together and check the total width at both ends of the board.
Checking the width of the tabletop
In our case, the difference was insignificant - only 4 mm.
On a note! To speed up the process, you can process several workpieces at once.
You can process several workpieces at once.
Step 6. Mark the places for decorative fasteners. We will not touch these places during further processing.
Marking the position of the grooves
Step 7. Now we have a very dusty job ahead of us, for which we will need a drill and a disk brush attachment with metal bristles.
Nozzle with metal bristles
Attention! Such attachments are not intended for high speed power tools - more than 4.5 thousand rpm. If you do not adhere to this rule, the metal bristles will begin to break off and fly out in different directions.
We brush the wood without touching the areas marked for fasteners. The recesses should not be too deep so that the overall appearance of the artificially aged countertop is harmonious.
Brushing
Surface after brushing
Important! Perform work in a respirator, safety glasses and gloves!
Step 8. We put all the blanks into one shield, turn them face down, fasten the shield from the wrong side with wooden strips and short screws.
Fastening elements
We mill out places for fastening.
Milling grooves
Step 9. Now it’s time to pour the metal into the newly milled grooves. And the first thing we must do is to lay the shield on a stable base, and strictly level.
The shield is laid strictly level
To create fasteners, we will use tin - a metal that melts easily and is less toxic compared to lead.
In order for the tin to better hold the tabletop elements together, we additionally drill blind holes in the grooves. Remove chips and dust.
Drilling blind holes
We throw the pieces of tin into an old tin can and heat it with a burner. We wait until the tin becomes liquid.
Tin smelting
Pour liquid metal into the grooves.
Pouring tin into grooves
You can pour it in a small heap; the excess can be easily removed with a sharp knife.
Removing excess tin
We grind the fasteners so that the metal surface is flush with the wood.
Sanding fasteners
Perfectly finished surface
Step 10. Let's move on to decorating the table. And for this purpose we will not use paint, but a gas burner. We burn the tabletop evenly until a beautiful dark shade is formed.
Searing the table top
Don't forget to scorch the ends of the tabletop.
Searing the ends
To remove fumes and give the countertop a shabby look, we use a disk attachment with plastic fibers.
Nozzle
We process the surface of the wood unevenly so that the overall appearance is natural.
Grinding
Step 11. To emphasize the texture of the countertop and the depth of color, treat the surface with tung oil.
Oiled countertop
Step 12. All that remains is to make square legs for the table. All using the same technology.
Making table legs
Each leg is made of two boards. The legs are connected by transverse drawers. Fastening the legs and drawers to the tabletop using metal corners.
Ready table
Side view
And you can decorate a beautiful wooden table made of natural wood with a simple but stylish candlestick.
Video - How to make a candlestick from wood
Cutting map
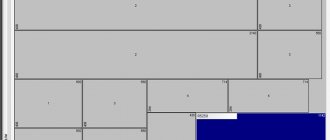
Furniture manufacturing begins with cutting out the main consumables. More often, cabinets, tables, and chests of drawers are made from chipboard or HDF. Let's say the sheet has standard dimensions 2750 x 1830 x 16 mm. To cut out the required parts, you need to draw up a cutting map. It provides schematic documentation indicating the elements that will be needed. Based on these drawings, the worker will cut out parts that correspond to the parameters of the future product. The remaining materials that need to be returned to the customer are also marked on the map.
The cutting map is a very important document and deserves a thorough study. The first sheet is called "Specification". Here is a list of elements. The product number is highlighted in a red circle at the very beginning of the table on the left. The word "Orientation" and three lines indicate the direction of the texture. On the cutting map it is predominantly horizontal. Four columns next to each other give an idea of integrity, size, quantity and material. On the right is information about the square footage and percentages of residues, parts, waste and cut length.
An important indicator is the cut; it directly affects the cost of cutting. The tariff is determined by footage. The cutting distance in mm must be divided by 1000. To find the total footage of all sheets, it is necessary to sum up the parameters.
Sheets of material are produced with errors, so they have to be sawed off at the edges. The offset is usually 5–15 mm. This work should not be counted in the cutting footage; the contractor should be warned about this in order to avoid unnecessary expenses. To learn to understand the meaning of the symbols on the map itself, it is worth studying a specific example.
| No. | Cipher | Name | Size | Quantity |
| 1 | 1–2 | Chipboard bulkhead | 2368 x 598 | 1 piece |
| 2 | 1–1 | Chipboard bulkhead | 2368 x 598 | 1 piece |
Tips for creating creative DIY furniture at home
Dimensional data is plotted in the center of the line. The number in column 1 indicates the part number on the sheet. As for the code: the first digit here indicates the product number, the second - the part. This data and the name of the material on the map are recorded in the lower right corner. The designation of the remainder is given by the word of the same name.
Example of cutting map
Natural wood hangers
Theater begins with a hanger, everyone knows this. This means that the hanger should not only be comfortable, but also beautiful.
On a note! The simplest hangers can be made in a smaller version and used as a key holder.
Option one. Simple hanger for home or office
Simple hanger for home or office
Rectangular shaped hanger. To make it you will need a board or a small furniture board; you can choose the dimensions at your discretion. You also need to purchase several screws, hooks, loops on which the hanger will hang, as well as 2 dowel nails.
Tools you will need are a screwdriver or screwdriver, as well as a saw if the workpiece is larger than required. If the surface is not smooth enough, you should prepare sandpaper.
Tools for work
To decorate a hanger, you need to prepare stain, 3 shades of enamel or acrylic paint and masking tape, a medium-thick brush, clear varnish or wax composition.
Step 1. Measure the required length of the board or furniture panel and put a mark with a pencil. We cut off the excess. We process the edges and surface of the workpiece with sandpaper.
Cutting boards
Surface grinding
Step 2. Cover the wood with stain in 1-2 layers. We wait until the workpiece dries well.
Applying stain
On a note! In the example under consideration, a rosewood stain was used.
Wood stain: varieties
Step 3. Turn the board over and cover the perimeter with masking tape. The reverse side of the hanger will not be decorated.
Pasting tape from the inside out
On the front side we outline a beautiful geometric pattern, chaotically gluing strips of masking tape.
Pattern Formation
Step 4. Paint the front surface of the hanger in three shades. In our case it is white, beige and blue. But even if you take only one shade, the finished product will look stylish.
Coloring
When the paint dries, remove the tape.
Removing tape
Step 5. Cover the hanger with wax to protect the surface.
Applying wax with a sponge
Step 6. We fasten the fasteners from the wrong side, stepping back 3 cm from the ends, in order to hang the finished product on the wall.
Fastening awnings
We drill 2 holes in the wall for dowel-nails. The distance between the holes is equal to the distance between the fasteners on the hanger. We drive dowels into the holes and screw in the screws, but not all the way, the caps should protrude slightly.
Step 7. Screw on the hooks. We use short screws.
Fastening hooks with self-tapping screws
Now the product can be hung on the wall and used for its intended purpose.
Stylish hanger
Vintage hanger for home and garden
A hanger stylized as a rustic fence will decorate a hallway in a rustic, eco, chalet, or rustic style.
Hanger for home and garden
To make a hanger, you will need a saw, a screwdriver or a screwdriver, hooks, a sander or sanding block with paper of different grains, clear varnish, acrylic paint and colors (blue and brown), a brush, and a wax or paraffin candle (without dye).
You can make a hanger either from new boards or from an old wooden pallet. The main thing is that the wood is not rotten or heavily stained, especially by fatty substances such as machine oil.
Step 1. We disassemble the pallet into separate planks. In our case, the hanger consists of four segments, but you can increase their number if necessary. The segments are held on two horizontal bars.
We make markings on the boards, and then cut out the blanks with a miter saw or jigsaw.
Blanks from old boards
We grind the surfaces of the workpieces clean.
Step 2. Paint the blanks with white acrylic paint in one layer. The texture of the wood will be favorably emphasized, but not hidden under a layer of paint.
White acrylic paint is applied, the pile is sanded
If the pile on the boards rises during the process of applying paint, then after the workpieces have dried, they must be sanded with fine-grained sandpaper. At the same time, the first abrasions will appear on the boards.
Step 3. Rub the workpiece with a candle in those places where the paint will be removed the most. This way we will achieve the effect of an aged surface.
Use a candle to rub the workpieces unevenly
Step 4. Paint the boards with blue acrylic paint in one thin layer. We wait until the paint dries. This usually takes from 1 to 4 hours.
The blanks are painted blue
Step 5: Take a sanding block and start sanding off the blue paint. First we use 80 grit sandpaper, then finer ones - up to 240.
Step 6. Now, to make the surface more “natural”, add some “dirty spots”. Mix white acrylic paint with brown color. Apply a little paint to the surface of the workpieces with a brush and immediately wipe with a damp cloth. There should be light brown streaks left.
Workpieces in the process of painting
The final layer is clear varnish. Apply it in one or two layers and leave the workpieces to dry.
Step 7. Turn the boards face down. Place it on top of the cross member. We fasten everything with self-tapping screws.
Step 8. We fasten the canopies and hooks with self-tapping screws. The hanger is ready!
Vintage hanger
Video - Original hanger organizer
Special design programs
The software facilitates furniture design, sheet cutting and product manufacturing . There are many different services available to the public to help craftsmen. Among them there are also free programs.
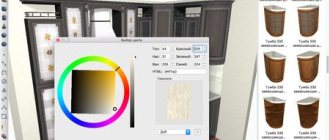
The “PRO 100” program allows you to virtually arrange furniture in a room and copes with configurations of parts of any complexity. Has a wide range of functions:
- compiling a list of materials and accessories;
- detailing the product with sending to the cutting program;
- creating projections and applying dimensions;
- working with ready-made modules and implementing individual models;
- calculation of the cost of the product based on the cost of raw materials.
"Basis-Furniture Maker" is considered a leader in the creation of virtual models of increased complexity. It has functions that are not available to many well-known programs. The service allows you to make all types of drawings, create a cutting map, and receive instructions for installing fasteners.
The disadvantages of the Basis-Furniture Maker program include the high cost and complexity of development.
“Oblik-furniture enterprise” is one of the most modern programs. Has two main components:
- Graphics editor. Allows you to create a project for any furniture. Elements can be easily moved from place to place. After a few minutes of work, any user begins to realize how convenient it is to use the program. First, for quick orientation, it is better to select the top view.
- Cutting sheet materials. This process has several types of calculations; the program processes the residues and adjusts the thickness of the cutting part.
The program contains a large number of projects for various products. The abundance of samples gives a wide scope for choice and allows you to create your own unique model based on them. “Obemnik-furniture enterprise” runs on Windows, Linux, MacOS.
PRO 100
Basis-Furniture Maker
Volume-furniture enterprise
Tires
From old car tires you can make beautiful and elegant garden furniture, which can be installed not only in the garden, but also on the terrace.
In an open and closed gazebo, coffee tables and comfortable ottomans with a soft surface, chairs and armchairs made from tires, and even hanging swings will look great.
bCAD Furniture
bCAD Furniture is a powerful software package that contains everything necessary for furniture production. This is its peculiarity, since in other similar solutions additional modules must be purchased separately. Here everything is in one: drawings, cutting cards, estimates, 3D modeling, reports - these are tasks for which bCAD Furniture can be successfully used.
The program is easy to learn, and while working it will prompt you if you have any difficulties. Also bCAD works in semi-automatic mode. This means that this system does most of the routine work for you: arranging fasteners, creating drawings and cutting maps, adjusting dimensions... But at the same time, you can interfere with the work of the program and make your own adjustments. Powerful rendering tools allow you to create accurate drawings and photorealistic 3D images using OpenGL. Thanks to this, you can see and demonstrate the project to the customer in advance.
K3-Furniture
K3-Furniture is a powerful set of programs in Russian, with which you can fully automate production in small and large enterprises. Its peculiarity is that each module of the complex is customized for the enterprise that uses it.
The largest component of the system, K3-Mebel-PKM, is a module for the production of cabinet furniture that can be used independently. With its help, you can streamline the production process: from design to product sales.
The module also monitors the correctness of the model construction and automatically places fasteners, creates drawings and cutting maps.
Especially for small businesses, there is a K3-Furniture-AMBI module, which contains all the tools of the K3-Furniture complex, but with already selected settings for small businesses.
Here we consider only a small list of the most popular programs for 3D furniture modeling. We tried to select solutions for all categories: for enterprises, for designers, and for ordinary users who want to make repairs. We hope you will find something of your choice.
We are glad that we were able to help you solve the problem. In addition to this article, there are 12,585 more instructions on the site. Add the Lumpics.ru website to your bookmarks (CTRL+D) and we will definitely be useful to you. Thank the author and share the article on social networks.
Describe what didn't work for you. Our specialists will try to answer as quickly as possible.
Sketches of computer desks with the most popular sizes - photo gallery
Below you will see drawings of the most popular models of tables for personal computers. The diagrams visually show how to create an ergonomic and practical product from a minimum number of parts that will decorate any room.
SketchUP
SketchUp is one of the simplest and most intuitive systems for 3D modeling. It is presented in two versions – paid and free. Of course, the paid version offers many more possibilities, but even in the free version you can create many, many interesting projects. SketchUp allows you to create models using simple tools: lines, angles, arcs, geometric shapes. With their help, you can manually draw any interior detail. But if you don’t want to draw, you can also download and upload ready-made models from the official website or the Internet.
In addition to simple tools, this program also has a number of its own features. For example, the Push/Pull tool allows you to build walls simply by dragging lines. In SketchUp, you can go into inspection mode and examine your model, as if playing for a person. This allows you to examine the object from all angles and compare dimensions. And another interesting feature is importing terrain from maps and exporting models to a map. This opportunity is provided to you by Google Earth.
Video tutorial on working in SketchUp
PRO100
PRO100 is a popular 3D modeling program that is distinguished by its simplicity and professional solutions. With its help, you can create high-quality projects and sketches in the shortest possible time. You can make changes directly in the presence of the customer, as it will take very little time.
Video tutorial on working in PRO100
PRO100 has a standard library with a large number of objects and materials, but in case that is not enough for you, you can create your own materials from a photograph or draw. You can create new furniture from existing elements or by downloading additional libraries from the Internet.
One of the features of this product is that it keeps track of the materials spent, so at the end of the project, you can generate a report that will indicate all the costs. Unfortunately, this is only available in the full paid version.
Also, here you will find many modes that will help you display your project in the most successful way. You can choose one of seven projections that will show the model from different sides and from different angles. And also select drawing mode, photorealism, shadows, transparency and others.
