Hello visitors and readers of the “Secrets of the Master” site! I think that the summer has been fruitful and eventful for you. You have prepared for winter by making some reserves in the form of canned food. But that's half the battle. Now you need to hide your works so that the jars do not interfere and at the same time are always at hand. To solve this problem, I will tell you how to make a cabinet for storing cans. This cabinet will be very simple with two hinged doors at the top and two doors at the bottom. The overall dimensions are not large. 2400 mm – height including supports; 850 mm – width; 470 mm – cabinet depth excluding doors. Thanks to this size, it can be placed not only in the corridor, but also on a glazed balcony or loggia. To make it we need some tools.
- Drill with a set of drills + a universal drill for drilling holes for confirmation, as well as a pen drill
- A grinder with a metal cutting wheel for cutting furniture pipes.
You can get by with a regular hacksaw.
- Wallpaper knife for trimming edges.
- Iron or hair dryer for gluing edges.
- Screwdriver for assembling the entire structure.
You will also need material to make the cabinet. Parts made of laminated chipboard 16 mm thick for the frame:
- 2318×470 mm (2 pcs.) – side parts.
- 850×470 mm (2 pcs.) – top/bottom.
- 817×450 mm (3 pcs.) – shelves.
- 817×470 mm (1 pc.) – dividing shelf between the upper and lower parts of the cabinet.
- 700×370 mm (1 pc.) – support for this shelf.
- 817×370 mm (1 pc.) – top shelf.
Parts made of laminated chipboard 16 mm thick for doors:
- 1620×422 mm (2 pcs.) – upper doors.
- 715×422 mm (2 pcs.) – lower doors.
Laminated fiberboard parts for the back wall of the cabinet.
- 2345×845 mm – 1 pc.
Cabinet accessories:
- Confirmats + plastic decorative plugs – 30 pcs.
- Minifixes for fastening the support (700×370 mm) – 2 pcs.
- External furniture hinges for doors – 12 pcs.
- Plastic furniture support, height 50 mm – 6 pcs.
- Furniture handles for doors – 4 pcs.
- Trimming (edge) plastic 0.5 mm for trimming doors.
Please note that this trim can be glued and processed at home.
- Paper trim for trimming everything else.
- Furniture pipe Ø25 mm and 1250 mm long – 1 pc.
- Furniture flanges Ø25 mm – 5 pcs.
- You can have 8 pieces, but it won’t be economical.
- Screws 16×3.5 mm – 63 pcs. for fastening hinges and flanges.
style=”display:inline-block;width:336px;height:280px” data-ad-client=”ca-pub-3518738935631683″ data-ad-slot=”6877683473″>
Let’s get to work.
Bonus: trends and anti-trends
In addition to functionality, it is important to consider design and compliance with the interior. We have compiled a list of trends and anti-trends and share tips on how to choose the color of the cabinet in the hallway, what should be avoided so as not to harm the interior.
What's relevant
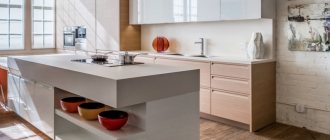
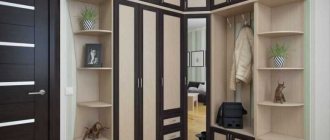
- As in the past, this year everything in fashion is as natural and natural as possible. Therefore, you can’t go wrong with furniture in all possible shades of beige.
- The smooth matte wood front always looks stylish and definitely won’t get boring. A special highlight of this design is the preservation of the natural grain of the wood.
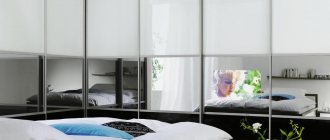
- Wooden inserts on coupe doors are still in fashion.
- Doors matched to the floor covering look no less interesting in the interior.
- The trend for joyful pastel shades has not yet passed - mint green, dusty pink, light yellow, muted aquamarine. Despite its neutrality, furniture in these colors can become an accent.
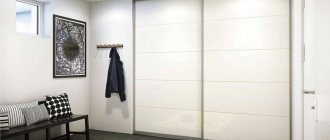
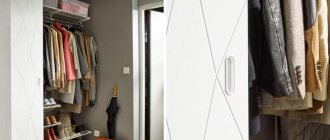
- Pale white Scandi furniture has already become a modern classic; such a wardrobe, even of the most impressive size, will look elegant.
Instagram @asi.design
Instagram @mera_in_art
Instagram @bodes_studio
Instagram @alexey_volkov_ab⠀⠀
Instagram @mihail_kurnosov
Instagram @andesign.studio
What's not fashionable
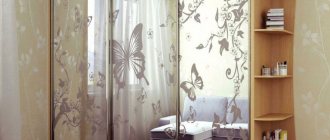
- Photo printing on doors is an absolute taboo. Mountain landscapes, lotuses and still lifes will irreparably spoil any interior. Especially if we are talking about a small room.
- The situation is much the same with the once very fashionable sandblasting designs in the Japanese style. It is better to leave the doors simply matte, or add a geometric pattern on the mirror.
- Bright colors - fuchsia, acid green, lemon yellow - will “eat up” the space of the entrance area and become not an accent, but a spot that will be difficult to balance with something. It is better to choose from a muted, calm palette if color is still necessary.
- Radius cabinets are now rather an anti-trend. The complex round shape does not fit into minimalist modern interiors. In addition, this design often looks too bulky and massive. It is unlikely to look appropriate in a small entrance area.
Instagram @decoline.ekb
Instagram @ekoshkaf_perm
Instagram @decoline.ekb
Instagram @n.akkerman
Instagram @decoline.ekb
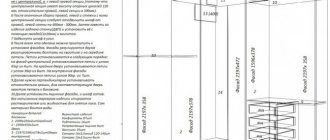
Cabinet layout for cans.
- We cut the necessary parts in a furniture workshop.
- Using an iron, we trim the visible parts of the chipboard with a paper edge.
- We drill through holes with a Ø30mm pen in three shelves, because the pipe for my cabinet will be intact.
You can cut the pipe into parts, but this way the rigidity is lost. - We attach the flanges under the pipe.
- In the chipboard support (700×370 mm) we drill Ø15 mm holes for the eccentric of the minifixes. And at the same time we screw in the minifix rods in the dividing shelf (817x470 mm) between the top and bottom of the cabinet.
- We mark and drill holes with a universal drill for confirmations for fastening the side parts (2318×470 mm) with the top and bottom (850×470 mm), as well as the shelves.
The counter holes in the shelves and the top and bottom can be drilled using a jig - this will be faster and more accurate.
Closet
The cabinet for storing preserved food must have a special design, since a simple clothes wardrobe in this case will be small in capacity and unreliable. Glass jars not only create an increased load on the shelves, but can also easily break if dropped, so storing them requires the installation of strong internal shelves and good fixation of the cabinet itself to the adjacent wall. In addition, it must close tightly and not have glass inserts that allow sunlight to pass through.
Special attention should be paid to the doors. They can be of different types depending on the available space:
- swing - if there is enough of it;
- sliding – if there is not enough space;
- blinds, curtains, roller blinds - if you need to fit the wardrobe into the interior.
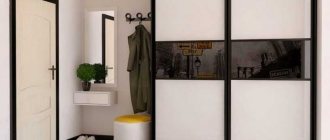
If possible, the best solution would be a wardrobe.
It is compact, roomy, and aesthetically attractive. Helpful information! Options for pumpkin preparations for the winter
Thermal container
A container designed like a thermos allows you to store preparations on the balcony even in winter. You can buy it or build it yourself. To do this, you will need 2 boxes of approximately the same shape, but one should be smaller than the other so that when placed inside there is a gap of 8-10 cm between the walls.
The work order will be as follows:
- foam is placed at the bottom of the larger box or sawdust is poured;
- insert a smaller box, if necessary, cut off the protruding upper part;
- insulated around the perimeter with the same material;
- the gaps are filled with polyurethane foam;
- the internal surfaces are covered with foil polyethylene.
Related article:
We grow 5 useful crops in the garden that prolong life
Exterior decoration can be done at your discretion.
Rack
You can buy a rack or build it yourself. Such a structure is most often located near the end walls on a balcony, in a storage room or in another place where it will not block the passage. If the room allows, then you can use other walls. To make the rack as stable as possible, the frame is attached to the wall along the entire perimeter using suitable fasteners.
Related article:
Working in the garden in summer: 6 must-do items
The following points are important for storage racks:
- strength, reliability of construction (preferably metal);
- reliable fastenings (also made of metal);
- suitable dimensions for installation in a specific location.
The disadvantage of the rack is its openness. Under direct sunlight, workpieces quickly lose their original qualities and may deteriorate. Therefore, such a design must be installed in a dark room (closet) or equipped with protection (curtains, roller blinds).
Assembling a cabinet for cans.
- We fasten one side with the shelves with confirmations.
- Then the second side.
- We install a chipboard support.
- We fasten the bottom.
- We install support legs.
- We insert the pipe through the shelves.
- We fasten the top.
- We fill the back wall with fiberboard.
- We hang the doors.
- Attach the handles.
The closet is ready. Please note that the dimensions of the cabinet can change as you wish, but preferably in proportion.
By the way, I have plans for an article about furniture on the balcony, so subscribe to site updates - it’s free.
If you have any questions, please contact us via the “Contacts” page or through the feedback form (blue button on the left). You can also contact us through comments. I'm always in touch. And further. While I'm writing the next post, you can read past articles. Good luck to all! Sincerely, Yuri Filippov.
Pull-out mini-racks
Installation of furniture and appliances is not always done end-to-end. Between them or against the wall there are often gaps 20–30 cm wide, into which a retractable mini-rack can be placed.
It is installed on wheels and equipped with a suitable number of shelves, which depends on the size of the free space and cans with blanks. This design can be placed in any place where there is no high temperature or excessive humidity.
Helpful information! Tomato salsa for the winter
