Repair is a long process and it is difficult to keep everything under control. Selecting and purchasing furniture is a stage that directly brings you closer to a pleasant result of all work. But even calculating the exact dimensions of furniture and its parts can be confusing. To prevent this, it is worth knowing the correctness and sequence of actions.
Sliding wardrobes have long become an integral part of modern apartments due to their functionality and convenience.
Sliding wardrobes have been a part of our lives for a very long time. Their simplicity, durability, accessibility and functionality have captivated many. Determining measurements is a fairly understandable and everyday matter, but calculating the size of wardrobe doors makes you think.
The larger the compartment door, the heavier the door leaf, which makes it difficult to move.
Features of the wardrobe door profile
A profile for a sliding wardrobe means framing the structure with an aluminum frame. Sometimes a steel product is used, but it has a number of disadvantages.
Purpose
The profile consists of several elements that form a single and effective mechanism. Among them:
- Cabinet edging.
- Pen.
- Guides.
This detail is responsible for the comfortable, silent and safe opening or closing of doors. Its quality and reliability affects the durability of the furniture. There are several types of products that differ in the material they are made of. The greatest demand is for aluminum structures, which are characterized by lightness and practicality.
Expert opinion
Ekaterina Marmaza
An expert in the field of furniture design, she is engaged in drawing sketches and creating 3D projects in furniture programs for the manufacture of cabinet furniture. Consults clients on filling the interior space of furniture.
The most popular types of profiles for sliding wardrobes are aluminum systems such as:
- vertical “S”, “P”, “N” and “O” products
- Top and bottom frames
- Dividing frame
As for manufacturers, local entrepreneurs are now engaged in production in the regions. By releasing products under our own brands. In our region (Far East), such a brand as Lomart is known.
Article about furniture
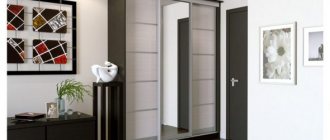
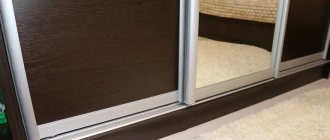
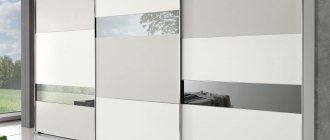
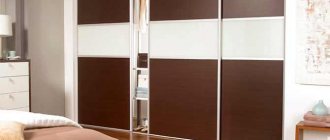
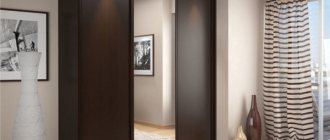
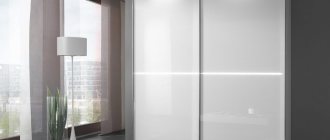
The desire for minimalism in the interior of living rooms has led to the appearance of wardrobes with doors framed by a thin narrow profile. It looks elegant, stylish, fashionable and pleasing to the eye.
Previously, wardrobe doors were framed with a C-shaped profile. It is called a “handle profile” because it has a protruding curve that is easy to pry with your fingers. The profile thickness is 33 mm, width – 35 mm. For those who are trying to minimize the furnishings and make living spaces more spacious and brighter, such a frame for a glass or mirror door seems somewhat cumbersome.
Initially, thin profiles for furniture were produced by foreign manufacturers. They were very expensive, since the door design provided for top fastening. In sliding wardrobes, the track was fixed on the ceiling rail, in modular furniture - on the lid. Both the system itself and its installation were complex and expensive.
Even with a narrow frame, the weight of a door made of glass or chipboard reaches 35 kg. Furniture and the overhead moving mechanism cannot withstand such a load for long. First, the cabinet roof sags. The door warps, it moves away from the sides, and gets jammed.
Ceiling mounting requires installation of a powerful rail. It can only be attached to the floor slab. Plasterboard ceiling lining is not suitable for this. But even in this case, the door does not last long. Due to high pressure, the rollers quickly wear out and get stuck.
What are the benefits of the new thin profile?
The narrow profile of MS-161 is the latest trend in interior design. Previously, due to the complex and expensive transportation system, only wealthy people could afford it. However, in 2022, a new design of compartment doors appeared, the rail for which is attached to the floor. It costs much less and is available to most consumers.
The narrow profile has the following advantages: •
. It looks very sophisticated, almost transparent. •
, and for framing decorative inserts. • Manufacturers produce
. • Thin metal element
.
Sliding wardrobes have become available to every Russian family thanks to the introduction of a new door movement system. Now the track is mounted below. The door rests its entire weight on the floor. The load is evenly distributed across all rollers rolling on a completely flat rail. Nothing sags or becomes deformed from overload.
Only a guide is fixed at the top, holding the door in a vertical position. It does not carry any load; it can be installed in apartments with suspended or suspended ceilings.
Buyers are delighted with the slim profile in a modern, minimalist interior. It fits harmoniously into the decor of the room, without burdening it with unnecessary details. Having selected the appropriate color of the planks, designers associate them with wall decoration and the design of other home furniture.
The thin narrow profile has only one drawback. Fingers cannot get caught in the narrow bar. It protrudes only 7 mm above the plane of the facade. For the front door this is not a problem. There is enough space for your fingers to effortlessly move a sheet of glass or chipboard that easily rolls on rollers.
It's more difficult with the back door. The protruding part of its profile is hidden by the front door leaf. In a system of three or more doors, this problem can be solved by moving the front door slightly. In a two-door system, you have to push the rear leaf, resting your palms on its surface. Because of this, handprints remain on the front of the cabinet.
If you are ordering furnishings for the bedroom or dressing room of a small family, the indicated disadvantage of a cabinet with a narrow profile is insignificant compared to its aesthetics, effectiveness, and visual lightness. This element is the most fashionable and in demand on the built-in furniture market today. Europe switched to its use several years ago. And the price of the system rolling on the floor is more than acceptable. Russian consumers have already appreciated the benefits and are ordering just such coupes.
If the cabinet will be installed in the hallway of a house where a large family lives, you should think about choosing a profile. Each family member, including children, will move the doors several times a day. In such conditions, it is more advisable to order a coupe with a traditional C-shaped handle profile.
To order a wardrobe with a thin profile, please contact our company.
Author Vyacheslav B.
All articles
Main characteristics of profiles
When selecting fittings for a sliding wardrobe, you need to pay attention to the following parameters:
- Wall thickness. It varies from 1 to 1.6 mm. Excessively narrow parts can become deformed or fail, while thick ones will put additional stress on the furniture or will not fit into the groove of the guide.
- Life time. Manufacturers use the term “opening-closing cycles” to indicate the durability of a profile. If the technical specifications indicate 60-70 thousand openings, the service life will reach 20 years.
At the selection stage, you should take into account the manufacturer’s reputation and reviews of other users.
Dimensions
Existing types of products differ in size, which are selected taking into account the dimensions of the doorway, fittings and fasteners. To calculate exact values, the following data is used:
- Horizontal guides correspond to the distance between the side walls.
- A gap of 2-4 mm is maintained between the top of the furniture and the vertical profile for uninterrupted movement of the roller mechanisms.
- The height of the guides is selected taking into account the type of cabinet - usually these parameters vary from 2 to 6 cm.
- The width of the slats is 8.5-10 cm. For doors with 3, 4 and 5 leaves, it is increased by installing additional rollers.
Color design
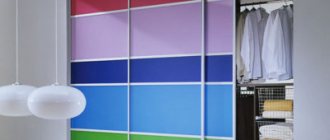
Door profiles are available in a wide range of colors. After all, they should be combined with other elements of furniture and look beautiful.
Metal elements are painted using anodizing technology, which results in a stable and durable coating with a suitable shade. It is also possible to give profiles the texture of precious stones or shiny metals with luxurious external properties.
If we are talking about budget steel samples, they have different colors, but during operation the paintwork peels off and becomes unattractive.
We select the necessary furniture fittings.
The body parts can be connected using various furniture fittings.
The simplest fittings are furniture dowels. It is a wooden barrel with a diameter of 8mm and a length of 30mm. The 8x30 dowel is mainly used for non-adhesive joints. The most typical is a dowel measuring 8x35 (for adhesive joints with slab thickness of 18 mm). In general, there are dowels of other diameters and lengths, but sizes 8x30 or 8x35 are the most common.
Furniture dowel.
Using furniture dowels, you can make a permanent connection between two parts. To do this you need to put them on glue. It is better to use glue pva d 3 or d4. In this case, no additional fasteners will be required.
When assembling a cabinet, it is better to use dowels simultaneously with an eccentric tie (minifix), confirmants or a tightening screw with a nut. With this connection, the dowels do not need to be glued in and thus you get a high-quality connection with the possibility of complete disassembly if necessary.
To install a furniture dowel 8x30, you must first drill blind holes with a diameter of 8 mm in the parts. At the end of the part, the hole should be 18mm deep, and in the plane of the second part, 14mm deep. The depth of 14mm is given for chipboard with a thickness of 18mm.
It is advisable to observe the depth of the holes, since if you drill a hole more than 18 mm deep at the end of the part and drive a dowel into it, there is no guarantee that it will not sink even deeper when attaching the second part.
When connecting two cabinet parts at an angle of 90 degrees, first a dowel is driven into the end of the first part, and then into the plane of the second part. If you first drive the dowel into the plane and not into the end, then there is a possibility that the dowel will pierce the part through.
Connecting parts using dowels. In the photo, the dowel is driven into the plane, but correctly the dowel needs to be driven into the end of the part.
Confirmee. This is a furniture screw with a hex head. Most often, a confirmant with a diameter of 6.5 mm and a length of 50 mm is used to assemble cabinets. It can be used to reliably connect various parts when making furniture. Confirmants are used mainly in conjunction with furniture dowels. The dowels prevent the parts from moving relative to each other, and the confirmants reliably attract them to each other.
To install the confirmant, you will need to drill two holes. At the end of the part you need to drill a hole with a diameter of 4.5 mm (D2 in the figure below), and in the plane of the second part a through hole with a diameter of 7 mm (D1 in the figure below). When drilling through holes, a wooden strip must be placed under the part at the drilling site. This will avoid chipping the laminated coating where the drill exits.
Confirmee.
Confirmant installation diagram.
The installed confirmand's hat is closed with a special decorative plastic cap.
Eccentric furniture tie (minifix). With the help of such a tie you can connect various parts of the body. Its advantage is that this screed is not visible on the front or side of the cabinet, unlike the confirmant. But, on the other hand, the connection made with the help of an eccentric furniture tie is inferior in strength to the connection on confirmants.
Furniture screed(minifix)
To install such a furniture tie, you will need to drill different holes in the parts to be connected. For the eccentric itself, you need to drill a hole with a diameter of 15 mm and a depth of 13 mm. The distance from the edge of the part to the center of the hole should be 43mm.
At the end of the part where the eccentric will be installed, it is necessary to drill a hole with a diameter of 8 mm. So that this hole connects to a hole with a diameter of 15mm. How the holes should be drilled correctly can be seen in the picture below. It should be noted that all holes are drilled from the inside of the parts.
Installation diagram of an eccentric furniture coupler.
A hole with a diameter of 5 mm is drilled in the plane of the second part and a screw from the eccentric coupler is screwed in. Then the parts are connected, and the eccentric is tightened clockwise with a screwdriver.
We screw in the eccentric coupler screw.
We connect the details.
We tighten the eccentric.
Compression screw with nut.
This type of tie is intended for connecting parts in furniture production. The connection is very rigid and durable. The only drawback is that after installing the screw, the screw head is visible on the front side of the part, but it looks pretty neat. If you plan to make a cabinet cabinet in which quite a lot of things will be stored, then such a connection will be the best choice because of its strength.
The screed must be installed in conjunction with furniture dowels. To connect two parts, you will need to install at least two furniture ties and two dowels. To install such a screed you will need to drill 3 holes. In the plane of the part where the round nut will be installed, it is necessary to drill a hole with a diameter of 10 mm and a depth of 13 mm (dimensions A, B in the figure below). A hole with a diameter of 8 mm is drilled perpendicular to this hole from the end of the part. In the second part, a hole is drilled in a plane with a diameter of 8 mm.
Compression screw with nut.
Installation diagram of a coupling screw with a nut.
Tighten the clamping screw.
Raffiks screed
This is another type of screed. Its design is similar to the minifix eccentric tie. Its advantage is that it is not visible on the front or side of the cabinet, but in terms of connection strength it is significantly inferior to the connection of parts on confirmants or a screw tie with a round nut.
Raffiks screed
To assemble a cabinet on rafixes, you need to drill two holes. One hole with a diameter of 20 mm must be drilled in the plane of the part. The drilling depth should be 13-14mm, the center of the hole should be at a distance of 9.5mm from the edge of the part. The second hole is drilled with a diameter of 5 mm for the tie screw in the plane of the second part.
Raffiks screed installation diagram.
Install Raffiks into the hole.
We screw in the screw from the Raffiks tie.
We connect the details.
Tighten the Raffiks tie.
Various cabinet cabinets can be assembled using such a screed, but if you are assembling a built-in wardrobe, the geometry of the walls may make its own adjustments and the alignments may not match, this point is worth remembering.
Furniture overhead hinge.
If you are assembling a cabinet with hinged doors, then you cannot do without a furniture hinge. Installation dimensions can be seen in the figure below.
Furniture hinge installation diagram.
Door marking diagram for installing a furniture hinge.
To install the hinge, you need to drill a hole with a diameter of 35 mm in the door. It is convenient to drill using a Forstner drill.
Forstner drill.
Shelf holders. These holders are designed for installation in a cabinet of removable shelves. They come in two types: a galvanized cylinder with a diameter of 5 mm and a corner.
Shelf holders.
To summarize in the description of the most common furniture fasteners, I would like to say that holes for eccentrics and dowels need to be drilled as accurately and perpendicularly as possible, because they don't forgive mistakes.
Profile material
There are much more steel and aluminum types of products in production. They have an increased margin of safety, resistance to damage and ease of processing. Less often you can find products made of polymer materials and plastic. However, their service life is limited by a short term.
Steel
The key advantages of steel guides are a large margin of safety, resistance to damage and wear. Such profiles are cheaper than aluminum ones, so they are confidently sold on the domestic market.
Among the key advantages of steel guides:
- Relatively low cost, which will allow you to change products during cabinet repairs without much financial loss.
- Strength and durability. Due to the absence of additional mechanisms and elements, the design remains serviceable throughout the entire period of operation.
- Steel samples are available in a wide variety of sizes, making it easy to select compatible components for a specific type of furniture.
Among the disadvantages of steel profiles:
- Questionable quality of commercially available samples.
- Vulnerability to corrosive processes. Over time, cracks, traces of rust and other defects appear on the surface, worsening the overall appearance of the furniture. If during operation the integrity of the outer surface is compromised, a corrosion process will begin with subsequent destruction of the profile.
- A number of restrictions in design. The color palette of the guides is extremely poor - it is difficult to paint them or give them special textured coatings.
As a result, steel guides have both advantages and disadvantages that should be considered at the purchasing stage. If we are talking about repairing furniture from a well-known foreign brand, a steel accessory may be incompatible.
Aluminum
Aluminum guides are more expensive than steel ones, but they do not have the same disadvantages as steel samples. Aluminum profiles combine reliability, elasticity and strength. They are not afraid of corrosion, the negative effects of moisture, temperature changes and mechanical stress. This contributes to a long service life and good maintainability.
The thickness of aluminum structures is greater, which is due to structural features. At the same time, they have less weight and simplify the operation of the door. Installation of an aluminum profile is not accompanied by any difficulties, since such products are quite lightweight.
Aluminum components are in great demand. They are used if you want to create a thin and narrow frame, as well as choose a compatible shade.
How do you adjust the height of an interior sliding door with your own hands? Detailed instructions
To secure the door leaf of the system to the ceiling, two rollers are installed in the upper running guide. We fasten it to the ceiling with self-tapping screws, after which the system is suspended on the tetrahedral head of the roller screw.
The system is attached to the bracket with a fixation nut in exactly this position.
By rotating the bushing for adjusting the partition in height, we carry out debugging. We fasten the roller to the bracket with a fixation nut so that the partition bushing is held in height.
Types by place of use
For smooth and correct operation of the door system, it is customary to combine several types of guides. Among them:
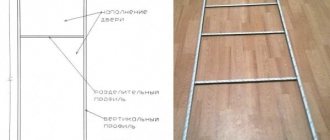
- Vertical profiles. They frame the canvas on the sides and allow you to connect it with other elements. Such products are straight, asymmetrical, L, H, P and S-shaped.
- Horizontal guide. It has symmetry in the cut and an H-shaped configuration. Used to attach rollers and cover them.
- Bottom profile. It has a track for wheels that provide movement when opening the doors.
- Top bar. It is fixed in the upper part of the canvas and connects it with the rollers. Has 1-3 rectangular or square parts.
- Top guide. It has a symmetrical profile that creates enough space for the wheels to move.
Suspended modifications of the system support changing the configuration of the guides. The roller mechanism is located on the top wall, and the structure itself is fixed to the floor covering or the bottom of the cabinet.
Horizontal
Structures with a horizontal configuration solve two problems: they support the profile at the optimal level and provide support. Profiles can be lower and upper, single or double.
Vertical
Vertical structures are open and hidden, expanded and N-shaped. Taking into account the style of the furniture, you can choose different profile designs.
Dividing
The dividing profile is intended for combining inserts from different materials when installing the canvas.
Bottom support sliding system
Most often, when assembling furniture with sliding door leaves, mechanisms equipped with lower running rollers are used. They are compatible with both slab and frame facades. Bottom support systems are popular due to the following advantages:
- quick installation of facades in the doorway;
- easy adjustment of the position of the blades;
- easy and smooth movement of facades.
However, such mechanisms also have disadvantages. In some modifications, the lower rollers are not equipped with an anti-jump mechanism, which provokes vibrations when opening the facades. You also need to take into account that door panels can fly out of the opening after a strong blow. Therefore, it is not recommended to install the systems in rooms where children are constantly present. The main area of application of bottom-support mechanisms is standard-class sliding wardrobes.
Calculation of the profile for a sliding wardrobe
To assemble a frame door, it is necessary to perform the correct calculation and procurement of components. You can calculate the dimensions in several ways, but the easiest way is to go to the website - a calculator (dveri-aristo.ru/raschet_dverei_kupe.php).
The length of the guides corresponds to the width of the niche. If we are talking about shaped stops, then their thickness is subtracted from the length of the guides by 2 mm on each side.
The side profile has a length that matches the height of the door.
The horizontal lines have identical lengths. To calculate it, the profile width is measured.
For other types of frame systems, calculations are performed using an identical algorithm. The main thing is to measure all the components and then adjust the formulas.
Calculation using the calculator on the website
To quickly obtain profile parameters, you can use a special online calculator. This will simplify the upcoming calculation and allow you to create exact dimensions in a few clicks.
Do-it-yourself interior sliding doors: calculating the parameters of the door leaf (Puerta system)
Let's look at the main stages of assembly. How is the installation carried out?
We take measurements of the width and height of the opening. Mounting from the outside is the first option. Using this formula, the height is calculated: H of the partition = H of the opening + 4mm
If you take the formula: A height of the system = H of the opening + 69 mm, you can calculate the position of the fastening of the corners. This calculation is relevant for fixing the corner flange along the upper edge.
Formulas allow you to calculate the width of the canvas.
Formulas for calculating the width of the canvas.
Formulas for calculating two door leaves.
The second method of fixation is done internally. The formula for calculating the height is shown in the figure below.
Formula for calculating height
The stroke of the partition is calculated depending on the width of the passage in the wall. Taking these nuances into account, installing a sliding door into a room with your own hands will be done according to all the rules.
Calculation of the partition stroke.
Calculation of D value.
Calculation of the width of the partition.
What else do you need to consider?
It's time for adjustments, now we eliminate the gap between the baffle and the bottom roller. There is play between these elements. To adjust this area, place the tip of a flat-head screwdriver into the end of the wheel plate (opposite the ellipse-shaped groove).
Using a hammer, rotate the roller body relative to the central hole. Gently tapping the tool, we remove the gap. We remove the partition again and tighten the screws until they stop to firmly fix the lower wheel. We install the structure in place.
You can view the assembly instructions in more detail in the following video.
Now you know how to assemble not only compartment doors, but also sliding interior doors with your own hands, and you can easily do it at home!
Features of steel products
One of the main features of the profile for steel compartment doors is its high strength and hardness. Thanks to these indicators, the product can last for many years. However, this requires compliance with the manufacturer's recommendations for use. In addition, the price of a steel profile is much lower than the cost of an aluminum structure.
However, with constant contact with a humid environment, the product can quickly undergo corrosive processes. In addition, with intensive use of the product, its high degree of rigidity properties are affected. Thus, during the process of opening and closing the door leaf, significant rattling may be present.
