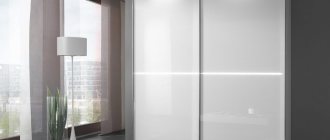
Assembling wardrobe doors with your own hands: easier than you thought
Good day to all! Assembling furniture yourself is not as difficult as it might initially seem. Even if it’s assembling wardrobe doors.
For some reason, many people are afraid of this process and will give any money to have the assembly done by a master.
Only they forget that this same master just yesterday was exactly the same philistine and novice as you. But he tried, realized that it was not difficult, and eventually began to make money from it.
The step-by-step instructions will make it clear that the assembly can be done with your own hands. It is not necessary to know in detail the entire structure of the cabinet, or study drawings and diagrams with a magnifying glass in hand.
Alliance-N system
"Alliance-N" system for sliding wardrobes: economical and high quality
From RIAL-MOSCOW you can order the Alliance system for sliding wardrobes of the size you need. We guarantee that our products will fully meet your expectations.
The Alliance coupe system is a simple and reliable option
One of the most budget-friendly options for a closet or partition with sliding doors is the Alliance system. It has a minimal cost, but not at the expense of quality. As a result, the user receives both efficiency and functionality.
Alliance guides for sliding wardrobes are frameless bottom-support systems. Special paired rollers are attached at the bottom and top of the door leaf, which move along an aluminum guide profile mounted on the bottom shelf of the cabinet or directly on the floor. Sliding doors with this system move smoothly and effortlessly, thanks to high-quality sealed bearings on the lower rollers. Each pair of rollers can withstand a load of about forty to sixty kilograms.
Main advantages
Sliding wardrobes with the Alliance door system are in high demand because they meet all the needs of our users. They value, first of all, comfort of use, long term trouble-free service and proven reliability. The advantages of using it are obvious:
- paired rollers (lower and upper) are mounted very simply, directly to the door leaf using self-tapping screws - without additives and even without preliminary markings;
- sliding door facades can be manufactured directly at the cabinet assembly site;
- a wide range of colors allows you to perfectly match customer requirements;
- Almost all components for sliding doors of the Alliance system are interchangeable and versatile, which makes it possible to create the necessary furniture;
- reasonable prices.
IMPORTANT. If sliding doors with the Alliance guide system begin to make noise when moving, their lower rails need to be cleaned.
“Alliance” profile for sliding wardrobes – buy in Moscow and Moscow Region
If you need to purchase high-quality systems for Alliance sliding doors that meet modern ergonomic and environmental requirements, contact RIAL-MOSCOW. Our online store is available at any time of the day, and applications from our customers who place an order online are accepted automatically.
If you have difficulty choosing a system for sliding wardrobes, our employees will always help you choose the right interior and place an order.
Sliding wardrobe Lord (Wenge/Loredo)
Coordination of delivery with the client (exact date and time) is carried out on the eve of delivery, namely, on the day the route is formed by the logistics department. Delivery will not be made without prior call!
Delivery in Moscow within the Moscow Ring Road and beyond the Moscow Ring Road (Moscow region up to 110 km) (daily):
| Cabinet furniture | 0-50 kg | 51-200 kg | 201-500 kg | 501-800 kg | 801-1100 kg | Over 1101 kg |
| Delivery within the Moscow Ring Road, rub. | 499 | 899 | 1 299 | 1 499 | 1 999 | 3 000 |
| Delivery beyond the Moscow Ring Road (up to 110 km), rub. | 499 + 25 rub/km | 899 + 25 rub/km | 1299 + 25 rub/km | 1499 + 25 rub/km | 1999 + 25 rub/km | 3000 + 25 rub/km |
| Individual delivery on time, rub. | 3500 | |||||
PROMOTION! For residents of NEKRASOVKA microdistricts, Zheleznodorozhny microdistrict, New PAVLINO and Savvino - DELIVERY FREE!
Delivery interval - the driver informs the client 2 hours in advance about the exact time of arrival at the address.
- Furniture is delivered to the client’s address in Moscow and the Moscow region by motor transport from the Arnika Trade House at special rates within a 110-kilometer zone outside the Moscow Ring Road.
- Delivery for clients from the regions is carried out to Transport companies at the cargo delivery point in Moscow at the tariffs of Moscow and the Moscow region. The cost of transporting an order to the buyer's region is calculated in the shopping cart when placing an order, indicating the delivery address.
Pickup point for small goods for private clients
Every day from 9 to 16.00, except Sunday.
Warehouse address: Balashikha, microdistrict. Zheleznodorozhny, st. Avtozavodskaya, house 36.
+7, ext.2002, 2003, 2004, 2005, 2006, 2013, 2015.
On the eve of shipment, strictly coordinate with the warehouse and provide data on vehicles!
| Cabinet furniture | ||
| Freight elevator ride | 1.0% of the cost of furniture | (minimum 200 rubles) |
| Taking a passenger elevator | 2.0% of the cost of furniture | |
| Manual lifting (including private houses) | 0.8% of the cost of furniture per floor | |
| Upholstered furniture (sofas and armchairs) | ||
| Taking the elevator | 500 rub. | (minimum 200 rubles) |
| Manual lifting (including private houses) | ||
| Corner sofa | 350 rub/floor | lift to the first floor - 300 rubles. |
| Straight sofa | 250 rub./floor | lift to the first floor - 300 rubles. |
| If the package does not fit into the elevator, the cost of manual lifting is | 1 package / 1 floor - 50 rubles. | |
| Moving packages manually, if it is impossible for a vehicle to reach the unloading site (to the entrance of an apartment building or to the gate/fence of a private house), over 3 meters | 1 package - 90 rubles. | |
| The cost of unloading and lifting furniture for legal entities is calculated individually. | ||
How to assemble an alliance wardrobe
Among all types of clothing storage products, the leading place today is occupied by the wardrobe. It is multifunctional, spacious, comes in different shapes and sizes, and does not require additional space to open the doors. That is why most people, when choosing between a wardrobe and a sliding wardrobe, prefer the latter option.
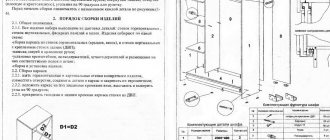
Assembling a sliding wardrobe with your own hands in the video presented is not at all difficult - all you need to do is have the necessary tools in your apartment and be familiar with the design of the product. Often, when ordering a cabinet without the services of assemblers, the company sends a document that contains a drawing of the product. This also lists all the component parts, which are numbered in order. By looking at the drawing and comparing the elements of the cabinet, you can intuitively assemble the product.
To work according to the sliding wardrobe assembly diagram, you will need the following tools:
- building level - to check the levelness of the installation parallel to the floor;
- corner;
- rubber and regular hammer;
- straight and Phillips screwdriver;
- roulette;
- pencil and ruler;
- screwdriver;
- wood drill - to make holes;
- metal drill – for installing an aluminum base.
Additional tools for assembling furniture yourself include a jigsaw, drill and sandpaper. It is also necessary to prepare all the details of the cabinet, which means checking the diagram to ensure that the number of items matches. Pay attention to the fittings and mechanisms: if there are drawers in the closet, ball guides should be included.
Doors for the product are often supplied ready-made. They are pre-installed with rollers and a strip of soft material. The door must be installed in the final phase.
Installing a mirror and sliding door
The mirror for cabinet doors should be chosen on a film basis, the thickness is approximately 4 mm. The mirror itself can be ordinary, matte, or have an unusual pattern. When ordering, you must immediately indicate the required dimensions, since cutting at home is very inconvenient and you can get unpleasant “surprises” in the form of chips. For installation, a silicone-based sealant is used; it must be carefully applied to the edges along the entire length. There should be no folds or bubbles left after application. The mirror is carefully inserted into the frame (it is best to work together), after which it is given exactly the position that is needed. To do this, use a rubber hammer, with which the edges are carefully tapped.
If you, having bought a wardrobe,
decided to save money on furniture assemblers, then this article with detailed instructions and some secrets will help you assemble a cabinet without the mistakes that beginners usually make. We hope that this article will save you not only time on assembly and disassembly, but also your expensive nerves. Sliding wardrobes have different designs, and the way they are assembled
may be a little different. We offer you the most common and common wardrobe, the assembly instructions for which will also help during the assembly of other models.
Tool for assembling a wardrobe
To assemble a wardrobe, you need a screwdriver, a screwdriver, a set of hex keys, a tape measure, and a utility knife. Sliding wardrobe with three doors with pull-out shelves and a hanging bar
Assembling the cabinet base There are two types of wardrobes; in some, the base is screwed to the body separately, in others, the side walls are the base of the base and are connected by a longitudinal plank-base. This cabinet has a separate base, which is assembled using Minifixes (furniture corners).
The indentation should be the same on all sides. Make sure the angles are 90 degrees. Typically, furniture makers use self-tapping screws measuring 4*16. Sometimes the base can be screwed a little closer to the front side if you have a wide baseboard in the room. We nail the support legs onto the base. Sometimes the manufacturer equips the cabinet with adjustable legs, with the help of which the level of the cabinet is adjusted. For convenience, cabinets are assembled mainly in a lying position, so it is recommended to provide sufficient space for installation of the cabinet in advance.
Assembling the cabinet body
Follow the included instructions carefully. All parts and fasteners have their own designation. It is very important not to confuse the body parts, which at first glance are the same and may differ in only two or three holes. Otherwise, when the cabinet is almost assembled, you will have to disassemble it again and put the parts in their place. Lay the side wall pieces parallel. Important! Be careful not to confuse the top and bottom of the parts, as well as the front side with the back
. The front side always has an edge, the back side may have a groove for the back wall made of fiberboard. This cabinet is also assembled using Rafix furniture fasteners. A part that is similar to a minifix, but has a plastic body. We screw the rods from the rafixes into the holes intended for them and tighten them with an eccentric. Be careful that until the cabinet body is assembled and the back wall is installed, all fasteners can be easily broken. Do not warp the cabinet parts, keep the corners straight. Installing the back wall of the cabinet. After the cabinet body is assembled and the connections are tightened, you need to turn the cabinet over and place it face down. To avoid scratching the front of the cabinet, it is advisable to place cardboard or a rag. You can use cabinet packaging.
Installing the bottom
We screw the bottom of the HDF box to the assembled frame. Since in my example the drawer is quite wide, I used 4 3x16 mm screws on each side - a total of 16 pieces for each drawer.
We will install the fronts of the drawers later, when the drawers are already in place in the frame of the wardrobe.
This is what I got (see photo).
In the bottom photo you can see 5 through holes in the front wall of the drawer. I drilled them in advance for screws for installing the facades. This will make it more convenient to install the facades.
Let's move on to installing the guides
Assembly diagram – Wardrobe “Marvin 3”
Stinger tool set, 20 tools, in plastic case, 160x40x90 mm
Go to the Nozhikov.ru store
Stinger tool set, 20 tools, in plastic case, 160x40x90 mm
Stinger tool set, 15 tools, in plastic case, 290x75x205 mm
Go to the Nozhikov.ru store
Stinger tool set, 15 tools, in plastic case, 290x75x205 mm
Stinger tool set, 13 tools, in plastic case, 245x55x160 mm
Go to the Nozhikov.ru store
Pivot mechanism for sliding wardrobe doors
You know exactly what a compartment door looks like. So, the hinged compartment door looks exactly the same. It just opens like regular swing doors. The need for such a system arose because the openings were too narrow, where it was impossible to install two sliding doors.
The pivot door opens using a mechanism fixed to the door handle profile. Which in turn is recorded in the pivot track. The track is attracted to the lower and upper horizontal strip of the opening. If the floor and ceiling are level, then you can do without planks.
The mechanism itself is simple - an aluminum sleeve is inserted into a hole made of hard plastic. For this reason, there are restrictions on the width and weight of the door. You should not assemble high glass or mirror doors wider than 500 mm. Once I managed to catch one :), during installation.
Components of a hinged coupe door
- Track (upper and lower) 2 pcs.
- Mechanism (top and bottom) 2 pcs.
- Magnetic stopper 2 pcs.
Hinged coupe doors calculation
Very often I made mistakes when calculating the height. When the door turned out to be large, I reduced the leveling strips leveling the floor and ceiling to the level, when it was small, the system made it possible to adjust the mechanism up to 25 mm, although the gap appeared terrible. Only upon closer examination did I notice what my mistake was.
Height
To calculate the height of a hinged compartment door, you must first purchase a pivot track. The fact is that there are two types of them and it is difficult to predict which one you will get. The difference between them is 5 mm, which is significant for this mechanism.
Installation of interior doors in Moscow
Check that the new door has no mechanical damage, the door itself matches the model and size, the components are available, and the locks work.
Cover nearby interior items from dust and, if possible, cover the floor with cardboard.
Preparing the opening
Check that the edges and surfaces of the opening are free of cavities, mortar overflows and other damage more than 10 mm deep. Fill defective areas with waterproof compounds.
If you need to reduce the opening, use foam blocks or bricks.
If you need to enlarge the opening, after enlarging it, inspect the brickwork of the wall. Fill any cracks found with cement mortar.
Treat the finished opening with an antifungal primer.
Door installation, installation of trims and trims
Before installation, cover the inside of the door frame with masking tape.
Install PSUL tape along the perimeter of the inside of the door casing. All corner and longitudinal connections of the tape are made end-to-end.
When installing door frames, the overlap on the wall is at least 20 mm on each side.
Do not allow the box profile to deviate from horizontal or vertical by more than 1.5 mm per 1 meter of length.
The sides of the box must be secured in at least two places, the distance between which does not exceed 1 meter. For fastening, use anchors with a diameter of at least 10 mm, and bury the anchors into the wall at least 100 mm.
Before installing the door leaf, lubricate the door hinges with silicone grease.
After installing the door leaf, check that the play of the leaf when closed does not exceed 3 mm, and that the open leaf does not move under its own weight. Locks should open and close without effort.
From the room side, close the installation seam with special vapor-opaque sealing tape.
Fill the space between the door and the opening in the wall with polyurethane foam. Apply the foam evenly without breaking.
Cleaning
Pack all waste generated during work into a construction bag and take it out of the room.
Preparation
So, the disassembled wardrobe is already in the apartment. Check the package to see if all parts of the future furniture are in place. In particular, you need to check the number of connecting elements:
- There should be one screw for each hole in the frame or door.
- All double holes must have a corner.
- There must be at least four legs.
- It is necessary to check the presence of metal pins and “hats” on them (they are necessary for attaching the supporting structure).
- Also, to fasten the back wall you need nails; there can be from 15 to 30 of them. If you don’t have nails, you can buy them yourself, choosing short ones of medium thickness.
After all the components have been checked, you need to make sure that you have all the necessary tools at hand: screwdrivers, a hammer and components. Please note that if the assembly is vertical, a stepladder is required.
Assembly instructions
How to assemble a cabinet
How to assemble a cabinet? Probably every person has asked a similar question at least once in his life. After the new furniture has been delivered in disassembled form, all that remains is to stand in the middle of the boards, parts, fasteners, and scratch your head. And then search the Internet for various services that will definitely tell you how and what to do. In addition, many people want to make a closet themselves, from scratch. Or they create original and unusual designs, after which they order parts from the factory or specialized services.
Final recommendations
We hope we have answered in detail and you do not have any additional questions. Otherwise, write to us in the chat, we will add to this article.
Finally, an important recommendation : do not rigidly fasten the bottom track before trial installation of the sliding doors. Only after making sure that the doors are perpendicular to the bottom/floor and that they move reliably in the tracks can you begin fixing them with self-tapping screws. Use double-sided tape to pre-install the bottom guide.
Guide systems for sliding wardrobes: from A to Z
Sliding wardrobes have long gained popularity among buyers. Their use does not require additional space, because the doors do not open on hinges, but are moved apart using guides. It is the guide system that is responsible for the quiet and smooth operation of the doors. And the appearance of the facades, service life and cost of the cabinet will depend on which mechanism you choose. We will analyze exactly those systems with which our factory works and which have earned the greatest popularity and trust among customers.
The sliding mechanism system includes: guides, moving rollers, closers that ensure smooth closing, silicone seals and brushes, mounting screws, screws, stoppers and clamps.
System types:
Suspended structures place load on the upper rollers. In support systems, the main weight of the doors falls on the lower profile. The single hanging mechanism on which the doors are mounted is located at the top of the cabinet. Over time, the canvas may become loose. To prevent this, you need to install a stabilizer. Support system - rollers move only along the bottom guide. The door is secured at the top with special clamps. By changing the height of the wheels it is easy to adjust the tilt of the doors. The main disadvantage is that dirt and dust get into the runners, which causes the rollers to wear out quickly. This can be avoided by securing belt brushes or regular manual cleaning. Combined. This is the most expensive and reliable mechanism, combining all the advantages of the two previous guide systems. If your cabinet is made of heavy natural wood, the door leaf is more than a meter wide and more than three meters high, then a competent manufacturer will advise you on the combined type. Coplanar. For the most aesthetic appearance and saving useful space inside the cabinet, use this type of guides. The essence of such a system is as follows: when the door leaves are closed, they are practically in the same plane (the distance between adjacent door leaves is 2-3 mm). When you need to open the closet, you need to pull the door handle, it will move forward slightly and begin to move to the side. In general, such a system has no disadvantages, except perhaps its high cost. Systems are manufactured from three types of materials: Aluminum. High-quality and expensive components. They are lightweight and highly durable. Can withstand doors of any weight and width. They are easy to cut. Steel. Durable, reliable, inexpensive. The correct selection of furniture parameters is required. Heavy, difficult to cut and adjust. Steel guides are difficult to install. Plastic. The cheapest fragile profiles with a short service life. Plastic should be combined with metal elements.
