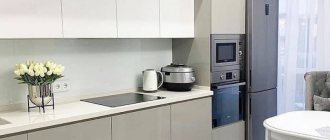
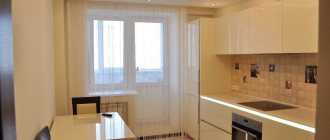
Having a beautiful interior for your living and living space is a natural desire of any modern person. Creating comfortable conditions in the kitchen is the first goal that the housewife sets for herself and all family members, immediately after the housewarming.
The main formative role in the formation of interior design is played by furniture, especially its main elements - tables, cabinets and the most functionally significant cabinets. The appearance of this household space as a whole depends on the architecture, construction and design of these products.
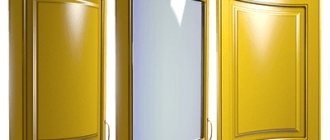
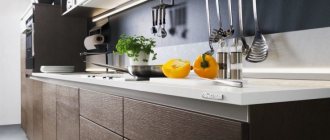
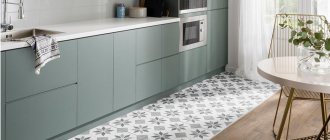
The more ergonomic, functional and aesthetic the kitchen room is, the more pleasant it will be to spend time on it not only cooking, but also using it for leisure time. In search of the most optimal solution in terms of aesthetics, the designers paid attention to such a seemingly forgotten element as radius (rounded, curved) facades.
Advantages and disadvantages
Such an original set always attracts more attention than a regular one. Moreover, the smallest imperfections and defects of the room remain unnoticeable: uneven walls, defects in the floor covering and the geometry of the room are smoothed out.
There are many advantages of curved facades:
- beauty and aesthetics. Often, only this factor influences the choice of owners, since it plays a very important role. To many, smooth and oval shapes themselves seem much more attractive than constant right angles;
- reliability ensured by good stability. There is no need for reinforcement or installation of any stiffening ribs, so the manufacturing process is not so difficult;
- safety. The owners will long rejoice at the absence of sharp corners when small children appear;
- increased capacity. If we compare the capacity of the same size standard headset with a radius one, the latter will win;
- increased workplace due to radial protrusions;
- zoning. Concave and convex elements can very successfully divide the space into different functional zones;
- wide range of both design and color;
- Possibility of installation in small and large kitchens.
The disadvantages of radius facades are not so numerous:
- appearance. Still, not everyone likes such extravagant furniture;
- price. The production of bent panels is more complicated, the waste of material is greater, and engineering calculations are more complicated - all this is reflected in the cost;
- deadlines. Such a set is often made to order, which is reflected in the waiting time for furniture;
- if the room does not have a large area, for example, in a Khrushchev-era building, then the set may not look as impressive as planned.
Size range
In fact, the permissible dimensions of furniture vary quite widely. Large hypermarkets - Ikea, Leroy Merlin - offer a fairly wide selection of products. Since the dimensions of the kitchen itself can be quite different, and the parameters of kitchen appliances also affect the height of the countertops and the width of the doors, manufacturers try to maximize the size range.
The size table for kitchen fronts varies from manufacturer to manufacturer. But, since companies still focus on the average statistical standards and dimensions of dishwashers and ovens, you can find suitable sizes in many catalogs. The configuration of the headset is straight, angular, U-shaped, it doesn’t matter.
The standard sizes of kitchen facades are shown in the table, the most popular ones. Additional dimensions are possible - minimum or maximum.
| Hinged doors | Drawer fronts | ||
| Width, mm | Height, mm | Width, mm | Height, mm |
| 396 | 496 | 140 | 296 |
| 396 | 596 | 140 | 396 |
| 570 | 296 | 140 | 446 |
| 570 | 396 | 140 | 496 |
| 570 | 446 | 140 | 596 |
| 570 | 496 | 283 | 296 |
| 570 | 596 | 283 | 396 |
| 713 | 296 | 283 | 446 |
| 713 | 396 | 283 | 496 |
| 713 | 446 | 283 | 596 |
| 713 | 496 | ||
| 713 | 596 | ||
| 900 | 296 | ||
| 900 | 396 | ||
| 900 | 446 | ||
| 900 | 496 | ||
| 900 | 596 | ||
The depth of the cabinets depends little on the parameters of the doors. The limitation is the minimum depth, since in this case the entire structure ceases to be balanced.
This is relevant when making furniture according to individual wishes.
- The standard depth of a wall-mounted module is limited to 30 cm. It is not recommended to increase it much, since shelves that are too deep are inconvenient to use.
- The depth of the floor module is selected according to the dimensions of the room and the depth of the oven or dishwasher. A prerequisite is to obtain the lower part of the headset of the same depth. A typical value is 55–65 cm.
The dimensions of corner modules are calculated using special formulas. However, the same requirement applies here: both parts of the corner module must have the same depth as the other compartments located along the wall.
Standard sizes
To avoid discrepancies in the parameters of individual elements, standard sizes were created, which most manufacturers adhere to. Facades can have 4 different radii with individual sizes.
| Radius | Inner radius | Inner chord | Outer chord | Arc length |
| R300 | 2.84 cm | 4 cm | 4.22 cm | 5.15 cm |
| R400 | 3.84 cm | Average value: 5.6 cm | 6.5 cm | |
| R700 | 6,84 | 5.18 cm | 5.3 cm | 4.65 cm |
| R1000 | 9,84 | 7.13 cm | 7.25cm | 7.4 cm |
Standard facade heights are as follows: 536, 573, 716, 956, 1316 mm.
Gluing
In most cases, it is recommended to use PVA-based adhesive systems or cold-curing polyurethane adhesives , especially with the frameless method of manufacturing curved structures. The use of contact adhesives in this option is not recommended due to the high plasticity of the adhesive seam and the technological need to shift the sheets relative to each other when bending. More information about soft rubber and rubber silicone membranes can be found on this page.
Choice of material and coating
Not just any material can be used to make such a complex structure. For example, solid wood is rarely used, since only certain species are suitable - birch, cedar or beech. Basically, only five options are used for the production of radial facades:
- Multilayer plywood. It is used by craftsmen who make kitchens with their own hands. In this case, the accuracy of all measurements and bending radius plays a critical role. But plywood is an elastic, durable and pliable material, so production can be started even at home.
- Chipboard. Another option that can be used at home is that chipboard bends well, so working with the panels will not be difficult. But the very use of bendable chipboard in the kitchen is questionable, since this material has a loose structure with gaps, which means it is not very dense and may lose its marketable appearance just a few years after installation. Bent laminated chipboard is afraid of moisture and temperature changes.
- Aluminum structures are not the most beautiful option, but they can be used as a frame for the internal filling of the headset. Radial aluminum facades are definitely not afraid of dampness and temperature changes, but they can become deformed and darken during use.
- Steel is suitable for an ultra-modern high-tech kitchen. You just have to take into account that high-tech prefers strict shapes and lines.
- MDF. The most used material because it provides the best results. Finished MDF boards do not bend, so they are bent during production using vacuum pressing. It is this method that guarantees durability and preservation of geometric dimensions.
You can also find individual craftsmen who use not very flexible MDF panels at home, bending them after production - this costs less. But this affects the strength of the material, so the durability of the kitchen is called into question.
Finishing
Due to bending, not every material can be used on radial facades, since not all of them can be bent.
For example, acrylic sheet plastic cannot boast of such a feature, so it is not used. Moreover, the process of fixing the material on a bent surface is quite complicated, especially if you do it yourself.
- PVC film is one of the most popular solutions for kitchen facades, and not only radius ones, but all of them in general. The color range is extensive, and the film itself, if it is of high quality, is not afraid of either moisture or temperature. But if we are talking about poor-quality application or material, then the film may actually begin to come off after some time. It turns out that the most important thing is to monitor quality.
- Coloring — waterproof enamel is used for this purpose. Enameled doors made of MDF or plywood perfectly withstand dampness and contact with water, increased temperature or sunlight. The paint can be damaged, but the damaged area can be easily painted over.
- Veneer is a very thin section of wood several millimeters thick. It bends, so it is easy to use for gluing curved facades even at home. A very important point is to correctly calculate the size of the facade. The veneer will make the doors indistinguishable from natural wood, but at the same time such a bizarre shape that wood cannot have.
- Glass - even radius facades can be glazed. Yes, if we are talking about classic quartz glass, then this option is only made to order. But there is a modern alternative - polycarbonate glass, which bends well and is suitable for DIY work. The main thing is to accurately calculate the dimensions and shape.
Any of these options can give either a glossy or matte finish - depending on the material itself:
- the film can be selected matte, glossy or with a pattern;
- There is also a variety of enamel; you can even layer one layer on top of another to achieve interesting effects, or cover the façade with patina;
- veneer can be coated with varnish - colorless, tinted, matte or glossy;
- It’s the same with glass - it can be transparent or colored, matte or glossy.
Features of the production of bent front parts
For those who want to create an exclusive, individual interior design in the kitchen of their apartment, radius facades are the ideal solution. The manufacturing technology itself implies the individuality of these products:
- rounded parts are mainly made to order, and their originality, aesthetics and ergonomics depend only on the client;
- Thanks to the individuality of the order, kitchen owners have a unique opportunity to realize their most secret dreams of furnishing a kitchen space, which is quite difficult to achieve when choosing pieces of furniture from a catalog.
For example, using curved facades, you can perfectly divide a studio apartment into living and kitchen areas, using a double-sided wall or a rack with drawers and compartments, the doors of which have a radius shape. In recent years, when arranging a kitchen space and furnishing it, wall-mounted pencil cases, which have radius doors and front front parts for drawers, have become quite popular.
Individualization and rather complex manufacturing technology predetermined the material for these items. Initially, curved parts were formed in two ways:
- by bending natural solid wood (boards), which often led to cracking of bent parts if operating conditions were not met;
- by cutting rounded parts from thick timber, which led to additional, unproductive wood consumption.
Both of these technologies are quite expensive and complex, and today they are used only in the production of exclusive “VIP” furniture products - a category where production costs take second place, and decorativeness, uniqueness and prestige prevail. Today, the vast majority of parts and elements of furniture structures curved in longitudinal or cross section are made of thick multi-layer plywood with subsequent decorative finishing.
In individual (handicraft) production, flexible MDF panels are often used. The use of this type significantly reduces the cost of the finished product, but its quality depends on the characteristics of the material itself. Therefore, when ordering a radius facade made of MDF board, you need to find out about its properties, characteristics and manufacturer (brand).
However, for premium products and furniture of a minimalist style, other materials can be used, which will be discussed separately below.
End processing
If you want to evaluate the quality of a kitchen, then pay attention to its ends. The best option is an ABS edge; it will last a long time and maintain a presentable appearance, despite hot steam, high humidity and even mechanical stress. Moreover, it is more environmentally friendly than PVC edging.
PVC edge is distinguished by its budget cost. It is not a new material on the market, unlike ABS plastic, which is why PVC is very popular. Over time and under the influence of hot steam, this edge may move away, so it is better to keep the kettle away from it. The optimal thickness of such plastic is 2 mm.
If the facade is painted with enamel, then the ends are also painted over - in this case there is simply no need for an additional edge.
Calculation of the lower extreme radius module
Today we will calculate the lower end module on which the outward curved façade should be installed.
We will make calculations for bases with a depth of 600 and 420 millimeters (the two most common tabletop depths).
The height of the lower boxes will be equal to 722 millimeters (for a total height of 850mm with a tabletop 28mm thick).
We will design modules for curved facades (R=300) separately.
So, let's start with a module for a 600mm countertop, the depth of which is 460mm.
We will determine the width together.
Since we are designing the boxes for R=300 facades, the chord size between the two extreme (internal) points of this facade is 400mm.
Consequently, the overall depth and width of the projection of this facade onto perpendicular planes (front and side) will be equal to 283 mm (we use the Pythagorean theorem to determine it).
For example, let's give 2mm gaps. In this case, we get a width and depth of 285mm.
Now we fit this facade with its overall dimensions (taking into account gaps) into the lower module, 460 mm deep.
To attach the facade to this “facade1”, adit (blind hinges) are needed. But in order for it to be hung on “facade1”, this “facade1” must be attached to the lower horizon from the side, that is, on the right side (unlike the side of the box, which is attached to the horizon from above, that is, it “ stands" on the horizon).
Taking all this into account, the total width of the box will be equal to:
285+16=301 (mm), where 16mm is the thickness of the “facade1”
The height of the side (taking into account how it is placed on the horizon) is equal to:
722-16=706 (mm), where 722mm is the total height of the box, 16mm is the thickness of the horizon.
And the height of “facade 1” will be equal to the total height of the box, that is, 722 mm.
The dimensions of the horizon will be 460x285, taking into account the radius fillet shown in the diagrams.
Shelves for this module are designed and manufactured very simply.
Two parts are made (as in this case), the same as the horizon.
As mentioned above, the box is made for a front R=300, and taking into account the height of the box, the height of this front will be equal (taking into account a gap of 4 mm):
From the back of the box (as in most lower modules) the back wall is made of fiberboard.
Now consider a module for a 420mm tabletop, the depth of which is 365mm.
This box is calculated according to the same principle as the previous one. The whole difference is that when the depth decreases, the width of “facade 1” decreases; in the case of the box in question, this facade is designated “facade 3”.
Here you need to understand that the width must be such that a hinge (or rather, its strike plate) can be installed on this part.
But if the depth of the box is reduced, then at a certain stage, it may happen that the width of the part we are considering may turn out to be such that it will not be possible to install a hinge plate on it, since there is simply not enough size.
In such calculations, this must be taken into account.
Otherwise, all dimensions of this module will be the same as the previous one (except, of course, the depth of the parts).
Let's write down its details:
Here, in general principles, are examples of calculations for boxes for the most commonly used fronts for kitchen units, with a radius of 300 mm.
In the end, I want to give you one piece of advice about making boxes for the fronts in question.
Quite often, the manufactured fronts do not comply with the dimensions proposed by the manufacturer (especially when it comes to rounding radii).
Therefore, in order not to get into a bad situation (and any error in curved parts will cause a whole problem associated with their subsequent adjustment), it is better to do rounding radii on horizons and shelves when you already have ready-made facades on hand, that is , straight from the template.
See you in the next articles, where we will continue our review of this interesting topic.
Source
Types of radius furniture
The concept of a radius kitchen hides several different solutions at once. They differ from each other not only in the number of radial valves, but also in the features associated with this.
- Rounded corners - in this case, only one or two outer facades have rounded outlines. Not even a radius kitchen cabinet is used as a wall unit, but simply semicircular shelves. Most often this is modular furniture, where only the outer sections occupy a stationary position. The shape does not affect the area of the space in any way, but the kitchen looks more ergonomic due to the absence of sharp corners.
- Separate radius facades — in addition to bent ones, they also make several central facades. This is no longer modular furniture, since the composition itself is built from a combination of convex and flat facades. This solution is impressive, but takes up a little more space than usual.
- Only curved facades - here there is already a combination of concave and convex elements. It is very difficult to make such a set with your own hands, so the furniture is made to order. The result will be an unusually impressive set. Especially if the facades are glossy and bright in color. But you need to understand that such a kitchen will take up more space than standard units.
- Curved set - this is already a fantasy on the theme of Antonio Gaudi, where not only the facades are bent, but also the furniture. The most spectacular solutions are with a bar counter or island. From a practical point of view, this is a very convenient ensemble, but it takes up a lot of space.
Facade bend
Not only can curved furniture itself be of different types, but also the facades themselves can have different curves:
- standard - convex, with a cross-section in the form of an oval arc or circle;
- wavy - the wave on facades can be either vertical or horizontal. The first option is used for wall cabinets;
- with an asymmetrical radius - a very impressive, but also incredibly difficult solution to manufacture;
- concave - the opposite option to the standard one.
The bending radius itself depends on the capabilities of the material and its correct processing. Curved facades will fit into almost any interior, but you should still choose the shape carefully:
- it should not reduce kitchen space;
- must be in harmony with the design.
Where to start
To make a curved facade with your own hands for a shelf, cabinet or kitchen, an MDF board is a good choice. If someone has already dealt with her, it will be much easier for him. It is soft and pliable, so it can be easily processed. To make a curved facade, two slabs are needed - internal and external. The total thickness of the workpiece should be 16 mm. To get radial parts you need:
- make an end template with the required radius;
- subtract the required number of slabs that will be curved;
- cut blanks for bent parts;
- make markings for cuts where the area will be bent.
Facade design options
In addition to the shape of the facade, it is also necessary to decide on its appearance. In this case, it is better to proceed from the general style of the house and kitchen, in particular. There are several options for how to decorate a radius façade.
- Color. If you choose painting or film coating, you can create almost any color that comes to mind. It is advisable not to choose too dark shades, as they are easily soiled and can visually reduce the space. Moreover, the more complex and curvy the design of the headset, the lighter its tone should be, so as not to overload the space.
- Photo printing. This idea seems dubious to designers, since the image will be printed on radius facades, which means its perception will be disrupted. If you choose some kind of print, it should be abstract drawings and patterns, and not photos of fruits, coffee or the like.
- Milling. The possibility of milling depends on the material used as the basis of the facade. Some companies are ready to mill MDF radius doors. This embossed option is best suited for kitchens in the style of classic, country, Provence and the like.
- Glass will make the kitchen more refined and original. It is best to choose a material with a thickness of 4 to 10 mm. There are both matte and glossy surfaces, as well as glass with curly processed edges.
Lesson 19 — How to calculate the dimensions of facades in cabinet furniture
Calculation of facades is a fairly important procedure, because they are the face of the finished product and in some cases (for example, MDF facades) it will not be possible to change anything if there is an error.
In this article I will try to explain how calculations are made for all the main types of furniture facades (with the exception of sliding doors and radius doors). We will disassemble it on the basis of a box with external dimensions of 600 x 300 mm.
So, let's start with swing facades. In order for the doors to open, it is necessary that they do not rub against each other and against the body; technological gaps are provided for this.
They are 2-4 mm (more - they look ugly, less - they rub).
Personally, I prefer to make gaps of 2 mm.
Separately, I note that the dimensions must be calculated for each module separately, that is, if you are assembling a kitchen in which there are 3 floor drawers and 3 wall drawers, then the dimensions must be calculated for each drawer separately, that is, 6 times - this way you will insure yourself against a number of possible mistakes.
The width of the facade is calculated using the formula:
w = (W/n)-3 mm
where w is the width of the facade, W is the width of the box, n is the number of facades (by width)
Some furniture makers subtract 4 mm, but in my opinion the gaps are too large.
Height of facades. When calculating height, there are no clearly defined formulas - you should be guided by common sense and some simple subtleties.
For example, let's calculate the dimensions of the facades for several kitchen modules.
in red , the gaps in blue in orange .
So, the dimensions of the box are 730×450 mm
We calculate the width using the formula (450/1)-3 and get 447 mm. (there are 1.5 mm gaps on the sides, which will allow you not to cling to adjacent cabinets, which will have the same allowances).
In terms of height, we decide to make 3 facades, of which 2 are large, 300 mm each. We take into account that the optimal distance between adjacent drawers is 2-3 mm , and between the tabletop and the upper facade 5 mm (so that the facade does not cling to the drip tray, which is found on kitchen countertops). As a result, subtracting these values from the height of the box, we obtain the height of the small facade 121 mm
730mm - 300mm - 2mm - 300mm - 2mm - 5mm=121 mm
Let's move on to another example: calculation of facades for a hanging cabinet. Its peculiarity is the presence of two hinged facades, as well as an overhang of the upper horizon, which seems to cover the doors, giving the entire cabinet a finished look.
Based on the overall dimensions of the cabinet: 636 x 600 mm, we calculate the width of the facades. (600/2)-3 = 297.
Knowing that the thickness of the upper horizon is 16 mm, and making a 3 mm gap between it and the facade, we get the height of the facade (636-16-3) = 617
Now let's move on to the individual subtleties of the calculation.
1. When calculating the dimensions of facades made of laminated chipboard edged with 2 mm PVC edges, do not forget to subtract another 4 mm from the dimensions, both in height and width (edge thickness on both sides)
2. When calculating the dimensions of hinged facades
for corner cabinets, it is necessary to take into account that there are two types of corner hinges (+45, +30 g).
Visually they do not differ from each other; the difference is noticeable only on the assembled body with a hung facade. Therefore, the installation diagram for the corner hinges that you purchase should be checked with the seller. Let us analyze the calculation for each using the example of a corner cabinet with a distance between the walls (in the façade opening) of 300 mm.
So, option 1, the facade turns out to be inset; its size should be 1 mm less than the width of the niche, that is, equal to 299 mm.
Option 2, on the contrary, provides for the overhead nature of the facade. In this case, the facade is 5 mm wider than the niche (305 mm)
Let us separately dwell on such a topic as the calculation of sliding doors in various variations
Calculation of sliding facades of the "Versailles" straight cabinet system
Calculation of facades-compartments “Versailles” corner wardrobe
Selection of accessories
The construction market now offers a huge range of fittings for radius fittings, including hinges. From a technical point of view, hinges can be divided into those with and without a closer. A closer is a special mechanism with which doors close smoothly and door slams are eliminated.
There are also loops for:
- overhead doors - they cover the ends of the side walls of the frame;
- adjacent doors - when used, the facade covers the edge of the side of the cabinet by half;
- inset doors - used when the depth of the door does not protrude beyond the cabinet frame.
For corner cabinets, you should take a closer look at crab hinges. The best fittings are made by German.
How to cut MDF panels?
The length of the panels is more than two meters, so, especially if you do not have your own transport or are inconvenient to transport, they are cut right in the store , but what should you do at home if cutting is necessary?
The following equipment is recommended for cutting :
- A hacksaw for wood – it is not recommended to use a very large tooth, otherwise the edge will turn out loose, in addition, the teeth can catch and pull the decorative film along with them;
- A hacksaw for metal – cuts accurately and carefully, but slowly, so it can be used for isolated cases when something needs to be adjusted;
- Grinder with a cutting wheel - cuts quickly and accurately, but a lot of dust is generated, so it is suitable for working outdoors, or during major repairs;
- Jigsaw - suitable for indoor work, since it is possible to connect a vacuum cleaner to it.
In isolated cases, you can use a metal sharpener or a mounting knife for adjustment, provided that the panel thickness is no more than 3 mm.
The blade is pressed forcefully against the material, after which a sharp cut is made and the fragment is broken off with your hands, while cutting off the film on the opposite side with a knife; metal scissors .
What styles are appropriate?
According to the designers, the radius set can fit into any room from baroque to modern style. You need to focus on the facade itself: its color, decor, finishing, and so on. For example,
- The classic style will be characterized by a coating of light matte enamel, as well as sophisticated milling. Perhaps the owners will even emphasize it with patina. Radius glass will also be in place;
- in a country style, a radius set will look appropriate, but there should be less decor, since the design initially assumes rustic comfort;
- in a modern style, you can use your imagination to the fullest and create a simply unique interior element with a riot of colors, shapes and patterns.
Introduction
Currently, there are a great variety of styles and designs of kitchen sets. To the delight of modern housewives, we have already moved far away from the standard forms of floor and wall cabinets. Nondescript, dull laminated chipboard doors, similar decors and handles remain only in memories and old photographs. Today, housewives have kitchen sets of all styles, shapes and colors! We can see both irreplaceable classics with facades made of natural wood, and modern urbanism, moving away from standard forms and lush excesses. Built-in kitchen units with corner cabinets, which in many cases are covered with radius facades, are now in fashion. Bent doors are made both from MDF for a modernist style, and from solid wood with veneer for an essential classic.
Layout options
Designers claim that rounded facades are not just an original solution, but also a universal solution in terms of placement. They will fit perfectly into the interior of a combined kitchen-living room or studio, but will look no less impressive in an ordinary standard kitchen. There are several of the most popular radius kitchen layouts that highlight all the advantages of such an unusual set.
- Straight - the most common layout that can be: furniture is placed along one wall. Differs in versatility. The best solution for such a layout would be to round off the end cabinets with a curved facade, for example, if they interfere with the passage.
- Corner - in this case, the corner itself is smoothed out and a sink is built in there. Washing dishes with such a set is a pleasure. At the same time, more free space appears in the cabinet under the sink, where you can arrange additional storage (for example, a “magic corner”).
- With an island - a very functional solution that is suitable only for a large kitchen. It is advisable to make the island radius, that is, without corners - this way the room will look as harmonious as possible. This decision will be especially appreciated in those moments when small children appear. In addition, this will help, at least a little, to widen the passage and make it safer.
Radius kitchen fronts
When creating a kitchen design and project, not only a beautiful, presentable appearance is taken into account, but also convenience and functionality.
Therefore, attention should be paid not only to materials, but also to the shapes of facades. Radius kitchen facades are becoming increasingly popular. Thanks to curved facades, you can create a curved contour of a kitchen set, which can be either convex or concave. Curvilinear facades in a radius kitchen can expand the space and make the work area more comfortable. Besides, they look quite attractive.
Radial kitchen facades can be made from materials such as MDF, plastic, solid wood, glass, and metal. PVC film, enamel, and veneer are used as finishing for curved kitchen facades.
One of the best countertop options for radius facades is artificial stone. Since countertops made of artificial stone will not have visible seams and joints. They can also be made to the desired shape, with all the necessary bends.
Advantages of radius facades in the kitchen
Among the advantages of curved facades is a presentable appearance. Radius kitchen facades are usually made to order. This will make the kitchen set original and non-standard, as well as harmoniously fit into the interior of the kitchen.
Using kitchen furniture with rounded corners and waves, you can create different functional areas.
Despite the non-standard design of radius kitchen furniture, various household appliances are perfectly built into it.
The absence of corners on curved kitchen furniture will protect against bruises and bruises.
Disadvantages of kitchen radius facades
The disadvantages of radius facades include their cost, which will be higher in comparison with standard rectilinear facades.
It is also worth noting that in some cases it is impossible to install some types of built-in internal fittings in a building with curved facades. For example, a retractable trash can or roll-out baskets.
Using a radius kitchen is comfortable and pleasant, as it includes various elements that improve convenience and appearance.
Selection of curved facades
Experts give several recommendations with which you can choose the ideal headset for your needs:
- a radius set is truly unique furniture, so it requires adjustment not only to the style of the room, but also to its size;
- if the kitchen is small, then you should abandon “multi-wave” facades, so as not to visually reduce the space - it is better to opt for a set with one or two waves;
- it is best to choose a bent set made of plywood or MDF - this is the optimal solution in terms of price/quality;
- the more complex the design, the more neutral the color.
How to choose a kitchen
Unfortunately, just the desire to see just such MDF furniture from Ikea is not enough.
When choosing a headset, you need to accurately assess the dimensional parameters, and in order to reduce costs, try to fit into the proposed table of typical dimensions.
- First of all, it is necessary to carefully measure the height and width of the walls in order to correctly calculate the available footage.
- Then set the dimensions of the kitchen appliances. If it is possible to select models along with furniture, then it is worth finding out the possible parameters of the oven, dishwasher or stove. If the equipment has already been purchased, its dimensions are taken into account as a starting point.
- For greater clarity, you need to make a drawing of the kitchen or create a virtual object using the necessary programs. In this case, it will be easier to calculate what dimensions an ideal headset should have, and what dimensions are present in standard tables.
- It is worth taking advantage of various additional options: for example, installing narrow bottle holders allows you to fill unsightly gaps between wall and floor cabinets. This is much cheaper than ordering furniture according to individual parameters.
How to do it yourself?
If you wanted, you could make anything with your own hands, even radius facades. But in this case, desire alone is not enough; it is necessary:
- be able to make accurate measurements;
- special equipment;
- be able to find curved cornices and false panels - they are rare and expensive.
Even making such furniture with your own hands will cost more than regular furniture.
Design
The easiest way is to contact a specialist who will carefully and accurately collect all measurements, from which you can then find all the necessary components in the catalog. If you definitely decide to make curved facades yourself, then you must follow some principles:
- the round corners of the kitchen facades, which are located on top of each other, must have the same radius;
- it is advisable to adhere to the rule of symmetry;
- You cannot make shelves and facades of the same set of different radii.
The calculation itself is not very complicated: the point is that any radius horizontal element (shelf, tabletop) is divided into two parts - with a straight side and a curved one. The curved one represents a quarter of a circle.
Making a template
The template greatly saves the time of cutting the following elements, and at the same time serves as a guarantee that there will be no errors in the manufacture of identical elements, for example, shelves.
To begin with, the template is made from cardboard, and then transferred to a chipboard or MDF board, which must be bent. When cutting, it is used as a sample.
Creating a template for a curved facade is more difficult. Typically, a metal blank with the required radius serves as a sample. But any other material that can withstand pressure will do, even durable plastic.
Facade production
After calculating all the required dimensions and transferring them to the material, a workpiece is cut out. It is very important to trim the edges correctly so that after the slab is bent, the ends of the facades touch at right angles.
- To achieve a bend, it is necessary to make cuts on the back side. It is necessary to carefully approach the issue of the location of the cuts, because if they are too frequent, the semicircular door will crack; if they are too far, ribs will appear on the facade.
- Typically, the depth of the cut is three quarters of the thickness of the facade, and the pitch is up to 3–5 cm. The cut itself should not be more than 4 mm wide; you need to select a suitable blade. The incision is not made along the entire length of the facade - 7–10 cm should be left along the perimeter.
- After this, it is necessary to make a protective layer for the facade; for this, smooth fiberboard is used. It must be glued to two layers of PVC.
- The workpiece is secured with tightening straps to the blank. You must wait until the glue is completely dry.
- Then the ends are covered with an edge. It is difficult to do this on a facade of an unusual shape, so it is better to use an edge banding machine.
- The next step is finishing in any way you like - pasting with film, painting, veneering, and so on.
Using the same technology, a radius base is also made, if necessary.
How to integrate equipment?
After the facades are made, it’s time to attach them to the frame and build in the equipment. It is at this point that many people have problems, because integrating equipment into a convex or wavy façade simply won’t work. In this case, there are only two options:
- do not integrate equipment at all;
- embedding it in another place, for example, in a tall cabinet-column - this solution is considered the most modern, optimal and convenient.
Step-by-step facade production
Without taking into account minor nuances, the production of facades using the second method is presented in the following sequence:
The creation of curved facades involves the use of a template frame. The value of its radius should be 3% less than required. The difference is due to the fact that the ready-made curvilinear module bends slightly over the next two weeks. Chipboard residues are mainly used to make the template.
As the experience of many enterprises shows, it is much cheaper to develop your own production of curved facades than to order them from third-party companies. Curvilinear modules create a special design, adding originality and harmony to the finished product. Due to their functionality, they have always been and will be in demand.
The tabletop was done very well. Externally everything is done well, the kitchen is now like new. I really liked the master himself, he is professional in his work. The price has not changed, I will contact the company again. And I will recommend it to others
electric field of bound charges
Source
An interesting option: the entire kitchen without corners
An ideal solution for a kitchen where there are small children. There will be no more abrasions on the head and drops of Valocordin in the glass!
Not only does the absence of sharp corners in the kitchen make work more productive and simpler, it also saves people. Not only the little ones, but also the owners themselves, since no, no, but also adults hit the corners of the headset. Of course, the most painful thing is the little finger.
In this case, we mean not just kitchen sets without sharp corners, but also:
- bar counter;
- island;
- table;
- and even stools!
Of course, the very top is to remove the door and make a rounded wall, if there is one at all.
Complement this safety idea with better designed handles. Perhaps it will be a push-to-open kitchen system without handles, integrated handles that represent a profile on top of the facade, or some other option. The main thing is that they cannot be hit or scratched too much, that is, it is better to give preference to plastic options rather than metal ones.
Advantages of a kitchen with rounded facades
- Aesthetics: smooth lines bring harmony and balance to the interior. This set looks more delicate than strict angular facades with square and rectangular elements.
- Minimum injury: the main culprits for bruises at home are corners. Rounded kitchens (photo) are completely safe due to their design features.
- Reliability and strength: the presence of additional stiffening ribs ensures the structure’s resistance to loads and mechanical damage. The materials used have the necessary properties to form convex and concave elements.
- Rounded shapes fit perfectly into a small room or an irregularly shaped kitchen.
- The design of a rounded kitchen suggests the possibility of zoning the space with elements with smooth shapes, for example, a special bar counter.
- Ergonomics: curved shapes ensure easy placement of all necessary items. Achieving this level of comfort with rectangular shapes is more difficult.
What is Feng Shui?
Smooth curves of furniture are always beautiful and non-trivial. But besides this, according to the teachings of Feng Shui, curved shapes will bring peace of mind, tranquility, harmony in relationships and even an influx into the family budget to the apartment.
And all this because, according to Feng Shui, it is in the corners that negative energy accumulates, which can harm the owners of the apartment.
You can believe in it, you can not believe it, in any case, this is a good bonus to a beautiful kitchen.
Kitchens with curved facades
Brief description of flexible MDF NeatForm
Neatform is a high-quality flexible sheet material made from MDF (MDF - Middle Density Fiberboard).
Neatform flexible MDF is widely used by furniture manufacturers, architects and interior designers when creating complex curved surfaces.
Neatform has a completely smooth surface, making it an ideal material for painting, veneering or laminating. This, combined with the high uniformity and dimensional stability of quality MDF sheets, makes Neatform the material of choice for many applications, including columns, counter fronts, curved walls and ceilings, steps, furniture fronts and more.
There are two methods of using flexible MDF: 1. In one layer , in which Neatform sheets are attached to a curved frame. 2. In two layers , in which the sheets are bent and glued together, forming self-supporting double-sided structures.
Neatform is often used for lightweight construction in combination with flexible tropical plywood, especially where the product's surface structure, impact resistance and fastener holding capacity are important. We talked more about flexible plywood in the previous article, in more detail.
How to use Neatform flexible MDF
Using a supporting frame
1.1. In one layer on a supporting frame.
It is used to create lightweight structures and solve interior problems, such as creating columns, front surfaces of racks, curved walls and ceilings, steps.
1.2. In several layers on a supporting frame.
It is used when it is necessary to increase the load-bearing capacity of curved surfaces.
1.3. Combined method.
A layer of flexible tropical plywood is attached to the supporting frame and covered with a layer of flexible MDF.
Combines the strength and load-bearing capacity of plywood with the quality of a Neatform exterior finish.
Self-supporting (frameless) structures
2.1. Combined into one layer.
The Neatform sheet is laminated on both sides with decorative plastic, which retains the shape of the product.
Used to create lightweight self-supporting structures.
2.2. Two-layer method.
Two Neatform sheets are glued together with their milled sides. The result is a strong, double-sided, self-supporting structure - the most common way to use flexible MDF.
2.3. Sandwich method.
A combination of two layers of Neatform with an intermediate layer of flexible tropical plywood .
The product combines the surface quality of MDF with the high load-bearing capacity of plywood. Holds fasteners well and allows the use of simple hinges.
Technological subtleties of the described approaches.
When using a supporting frame
The general procedure for creating a strong supporting frame and the gluing procedure is shown above in Figures 1..4.
The manufacturer recommends setting the pitch between the frame ribs at 350.450 mm. Vertical reverse ribs (Fig. 2) should not interfere with the precise (without gaps) application of the MDF sheet to the frame. The sheet of flexible MDF and the frame itself are taken with a small margin in size for the resulting product.
The MDF sheet must be applied to the frame with the corrugated side! High-quality glue is applied to the frame (Fig. 4) - the types of glue used were described above. With the help of the necessary devices (we will discuss this below), the MDF sheet is securely fixed to the frame until the glue dries (Fig. 5).
Once the glue has dried, the resulting product is carefully cut to the specified size.
You can obtain more detailed information from consultants.
Possible options for fixing the MDF sheet while the glue dries are shown in the next two figures. The right picture (Fig. 4) shows an option for the combined use of MDF and flexible plywood.
When using self-supporting (frameless) structures
To determine the required dimensions of the future workpiece, bend a sheet of MDF or other material and calculate, with a small margin, the required dimensions of the original MDF sheets (Fig. 1, see above).
Next, cut out blanks of the required sizes from two sheets of MDF, attach them to each other with grooved sides. Apply glue to both surfaces to be glued. For PVA glue it is convenient to do this with a paint roller. There is no need to fill the internal volumes of the grooves - the main thing is the contact surfaces.
Attach both sheets to each other and bend to the required configuration of the future shape (Fig. 3).
While the glue is still wet, you should make sure that the surfaces to be glued are in tight contact; the gap is unacceptable (Fig. 4 and 4a). The drying time of the glue should be clarified according to the documentation provided by the glue manufacturer.
After the glue has dried, the resulting MDF structure will retain its given shape.
Sandwich method (using flexible plywood)
To create such a structure, two sheets of flexible MDF are taken (with corrugated sides inward) and a sheet of flexible plywood is placed between them. All three elements are taken with a small margin in size.
Next, glue is applied to the mating surfaces of all three sheets, for example, using a paint roller. For MDF sheets, filling the grooves with glue is not necessary.
The resulting structure is smoothly bent to the desired shape and secured using one of the previously discussed methods. During bending, care should be taken to ensure that all glued planes are in close contact (see Fig. 4 on the right).
Once the glue has dried, the resulting sandwich structure will retain its shape.
Let us remember that this was the last, fourth article devoted to the use of flexible MDF and plywood.
