When arranging a home interior, the question of organizing a place to store household items, belongings, and small accessories certainly arises. For this purpose, various cabinets, chests of drawers, wardrobes, and shelves are provided. However, such furniture is more suitable for storing large, medium-sized items. It is much more convenient to store various small things in drawers. This article discusses their main advantages and provides detailed manufacturing instructions.
Convenient storage of small parts in drawers
Advantages of drawers
The main task when arranging a home interior is to create a comfortable, functional, practical space. Ordinary cabinets cannot always cope with this task. In standard furniture, part of the space remains empty - you simply cannot reach there with your hand. Things that are in constant use should always be at hand. Drawers will help you store items easily.
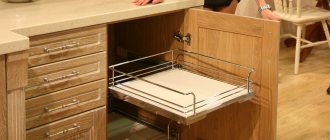
Kitchen drawers allow you to place the necessary utensils as compactly and functionally as possible.
Such systems have become simply irreplaceable. They save space, have an attractive appearance, and are easy to assemble yourself. They are very convenient for storing underwear, cosmetics, kitchen utensils, towels, shoe laces, and other small items. Such furniture is needed in any room.
Very convenient drawers for shoes
Drawers for storing jewelry
We nail the fiberboard bottom
From the bottom of the resulting box we nail a structural part made of fiberboard, having previously aligned the quadrangle along two diagonals
It is very important that the diagonal sizes are equal! Otherwise, you will have problems using the furniture box; it will constantly jam when moving, and will not fit completely
We nail the fiberboard bottom
Varieties
Chipboard drawer
Chest of drawers made from furniture board
Spacious drawers are made in different sizes, shapes, and types. It is simply impossible to list all the variety of types developed by furniture technologists. Let's look at the types of such furniture, depending on the two most common classifications, in the table.
| Classification feature | Kinds |
| Case material | Chipboard. Cheap material, easy to process. Elements made from chipboard can last a long time with proper fastening and handling. |
| Furniture panels. Sold ready-made. They are distinguished by high strength and have sufficient density. Panels are more expensive than chipboards and last longer. | |
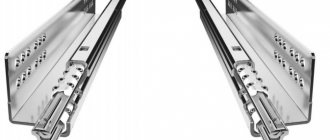
| Guides | Roller. The most popular type. Roller guides are inexpensive, have a reliable mechanism, and a simple design. |
| Telescopic. There are guides with full rollout and incomplete rollout. The first ones are more practical and allow you to fully use the space. These guides are highly reliable. They are able to withstand a lot of weight - about forty kilograms, and are more expensive. | |
| Wooden planks. The most budget-friendly, simple option. Guides of this type can be made on your own from ordinary wood. They can be used to install small drawers. |
Roller guides for partial extension drawers
Full extension telescopic slides
Rails made of slats for drawers
White mesh baskets for wardrobe
The most inexpensive option for mesh metal baskets are the white classic models on roller guides. The cells of the mesh structure can be large or small. Baskets are also distinguished by three sizes - the height of the container, its depth and the width of the base. You need to be especially careful with the last size. If a drawer can be made to fit any size section of a wardrobe, then the baskets are built into a “base” of a certain width.
However, baskets can be assembled into separate racks using additional fittings and placed separately.
This option is especially convenient for dressing rooms - you can always move the rack with baskets to the right place.
For convenience, they can be equipped with wheels. And the baskets themselves have partitions inside.
- The advantages of white mesh baskets include affordability and similarity to the design of mesh shelves. And also lightness and spaciousness.
- The disadvantage is insufficient load-bearing capacity. This type of basket is not designed for heavy loads; you can store light items and linen in them. And also monotony in design.
Do-it-yourself features
Making drawers with your own hands is quite simple, following the detailed instructions presented below. Many people will find it easier to purchase ready-made products. However, the required size is not always available.
Making furniture yourself has its own characteristics. First you need to clearly decide on the materials. An excellent option would be to purchase the following elements: chipboard for the sides, fiberboard for the bottom, full roll-out guides. This is an excellent set of materials from which you can build a good-quality box.
The next stage is creating a graphic plan. On a regular piece of paper you need to draw the components of the future product, note their sizes and attachment points. This plan will help complete the assembly as quickly as possible. The most difficult of all of the above is calculating sizes. It is difficult to determine the required dimensions by eye. Incorrectly selected drawer sizes will significantly complicate the assembly and operation process.
Device methods
This may sound like a sales pitch, but adding sliding shelves to your home is life-changing. To make such shelves, only basic woodworking skills are required, as the furniture parts are easy to install. Having studied tips for planning mobile systems with your own hands, a simple design can be created in a couple of hours. The apartment immediately becomes “bigger”, because mobile furniture increases every cubic meter of free space.
- "Mobile shelving", "sliding shelf" or "roller shelving" are terms applied to shelves equipped with wheel systems. The retractable module is usually mounted on a flat guide, this makes it easy to move heavy structures manually.
- Drawers with slanted sides hold large items. They are good for storing items of different sizes in one place.
- Creating multiple horizontal drawer shelves will give you versatility. It is worth thinking in advance about what will be stored, and then creating shelves with dimensions that meet your needs.
Advantages of sliding shelves
- Money is saved, no one buys unnecessary things, and old ones are no longer lost. You can pull the shelves into the light and see the items that are stored on them.
- Children have full access to all the necessary things and food. For example, if shelves are built into the kitchen, kids can grab their own breakfast with their own cereal—no excuses!
- A sore back or knee is no longer a problem, you no longer have to constantly bend over or take out contents to find your stuff.
Calculation of parameters
Drawing for making a retractable furniture drawer
Designing drawers is not difficult. First you need to calculate the required width. It should be 26 mm less than the width of the cabinet body - its internal opening. There should be about thirteen millimeters left on each side to install the guides.
Next you need to find out the length. It will depend on the depth of the cabinet. This parameter is required when selecting guides. They come in different lengths: from 250 to 800 mm. You need to calculate the length of the products in advance, only then buy guides for it. We measure the depth of the cabinet with a regular tape measure. Don’t forget to leave a few tens of millimeters in reserve, depending on the design features of the furniture. Due to the standard dimensions of the guides, sometimes it is necessary to slightly reduce the length of the drawers.
Now is the time to decide on the height of the sides. The dimensions of the sides depend on the furniture design of the cabinet. In the production of furniture products, the rule is that the height of the drawer should be 40-50 mm less than the height of the facade. There are no reasons to deviate from this rule. The space left will provide an opportunity to correct errors and correctly adjust the operation of the finished product.
Types of structures
More than one type of sliding structures has been invented, but to make installation simple, it is better to choose from two types:
- Rollers sliding along guides. They are given different names, including "side mount" and "bottom mount". Such rollers are inexpensive, adjustment takes about 2 minutes, and the design is almost impossible to spoil. Disadvantage: Most rollers only stretch 3/4 of their length.
- Ball bearings slide on tiny bearings. The advantage is that they completely move apart, providing full access to all items. This design is approximately 3 times more expensive than rollers.
Tools, materials
To assemble drawers, you need to prepare the following list of tools and materials:
- drill (sometimes it can be replaced with a screwdriver, but you need a very powerful screwdriver);
- an electric jigsaw (it will allow you to cut chipboard as efficiently as possible, eliminating damage and chips);
- ruler;
- construction corner;
- rag;
- knife;
- pencil;
- roulette;
- nails, screws, fasteners;
- guides;
- the main material for the manufacture of the structure.
When purchasing slats and structural elements for future drawers, you need to take into account several important criteria. The first is strength, high quality. Materials must withstand loads and not lose their qualities after several years of use. The second criterion is resistance to damage. The peculiarity of such boxes is their frequent use. Pulling out the structure can easily cause minor damage. Durable material must withstand small impacts and collisions with the structure of the cabinet.
Useful tips
The key to being comfortable is to decide what you want, what the end result is.
- Before starting work, carefully lay out the things that will be on each shelf to determine the sizes and intervals.
- The exact dimensions are marked on the cardboard; in this case, arithmetic operations are not performed. It's worth forgetting math! Such a visual assistant helps prevent mistakes; you don’t have to constantly walk between home and the store to constantly check measurements.
- If your DIY sliding shelf is 450mm or more wide, you should consider installing two shelves side by side instead of one. Smaller shelves will work smoothly and easily; bulky structures are more likely to break.
For work, craftsmen advise using birch plywood, because its texture looks great. Unlike standard hardwood plywood, birch never has voids in its inner core. The disadvantage of using such plywood is that it is more expensive and sometimes harder to find on sale.
Drawing programs
To independently calculate furniture dimensions, the following computer programs will help:
- PRO 100;
- "Basis furniture maker";
- Woody;
- "Aster".
Table of advantages and disadvantages of these programs:
| Name | pros | Minuses |
| PRO 100 | Clear interface. High-precision calculation of materials. Libraries with a rich information base. High quality visualization. Low cost of licensed software. | The program does not see the functional difference between objects. Limited functionality in demo version. More suitable for sellers and managers. |
| "Basis furniture maker" | Professional graphic editor. Creation of three-dimensional models. Setting up conditions, algorithm, automatic generation of specifications. | A large number of modules in which an incompetent user may get confused during installation. The need to spend time on training. Expensive licensed version. |
| Woody | Clear interface. 3D design function. Display each part on the screen with a marking diagram. Automation of the drawing process. | Has no updates. Not compatible with many operating systems. |
| "Aster" | Analogue of PRO-100. Low cost of licensed software. Improved cutting and filling functions. | Paid. Few opportunities for designers. Difficult initial training. |
Don't forget to watch the video on how to secure drawer fronts evenly and quickly. Two methods from Igor:
Sliding shelves in the pantry
Having trouble getting to your cans and pantry supplies? It's worth upgrading your storage by creating a retractable system! This idea is useful for those who have deep cabinets with fixed shelves.
If the apartment has a niche for storing food, then the shelves for food should be arranged in such a way that you can get normal access to them and see what is on them. Those who have pulled a bag out of their pantry to find a can of canned goods that has been unusable for months or even years will appreciate pull-out shelves like no other. It's time for a new pantry makeover! No expired goods! Thanks to technology, we can fully adapt to needs.
- plywood,
- wood,
- glue,
- sliding system,
- oil-based enamel paint,
- nails, angles and screws.
A homemade pull-out drawer may not look very impressive, but it will last for years. During assembly, the corners are joined and connected, and the bottom is glued.
- They measure the distances, width and depth, and decide where to install the shelves.
- Boxes are created from high-quality plywood, taking precise measurements. Straight lines are drawn using a ruler. Birch plywood is cut with a saw and the edges are smoothed using sandpaper.
- If desired, apply varnish or paint. The parts are dried.
- The individual parts are combined around a base component.
- Select sliding fittings.
- When working, pencil marks are used to indicate where the routes of the sliding system on the shelf begin and end.
- Installation is done using screws and a screwdriver.
- The parts are placed opposite each other, maintaining accuracy.
So, today it’s easy to optimize your interior with the help of advanced solutions; all the necessary materials are sold in stores.
Source: nedvijdom.ru
We carry out the assembly
After ordering and delivering the parts and purchasing all the necessary accessories, we begin installation.
To work you will need the following tools:
screwdriver with a Phillips head;
drill (if you don’t have one, you can use a screwdriver);
a simple pencil or thin marker;
First of all, you need to twist all the parts into solid boxes.
To do this, you need to drill holes and tighten the parts with confirmations.
The drill must be held strictly at a right angle so that the holes are straight and the confirmations do not come out from the side.
Now we attach the retractable mechanisms.
To do this, you need to take that part of the mechanism that is intended for the box. On the box, using a square and a simple pencil, we make markings for fastening. Then we fix the guides to the sides with furniture screws.
After this, we make markings on the side walls of the shelves in the closet on which the drawers will be installed. For marking you also need to use a square and a simple pencil.
When marking the side walls for attaching retractable mechanisms, you need to take into account the equal distance between the drawers and the gaps between their facades.
After this, we attach the base of the guide to furniture screws. Next, we connect all the parts and insert the boxes into place.
When closing the drawer for the first time, some force will be required. But don't be alarmed - this is only the first time. All bearings should be in place.
All subsequent openings and closings will be smooth and soft.
That's all. The drawers are mounted on guides and are ready for use. By analogy, installation is carried out in any room: bed, bedside table, chest of drawers, etc.
We cut parts and purchase fittings
The author of this article did not stir up dust at home and found a workshop on Avito for cutting chipboards. It turned out to be very convenient to select the appropriate color and on the day of ordering, parts in individual sizes were already ready.
We also managed to purchase fittings for the drawers there. Namely:
Plastic and adhesive plugs for confirmations in the color of the furniture.
It is also advisable to buy a special drill for confirmations with a sting. With its help, you can drill holes for confirmations with a special seat for the head in chipboard parts.
