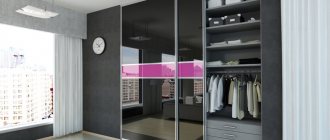
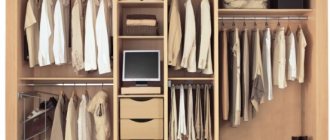
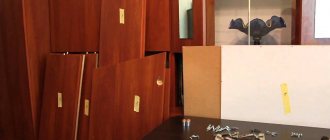
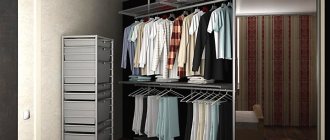
How to make a wardrobe with your own hands: drawings, general project parameters
Having a magical goldfish is not a guarantee of perfect results. In any case, you need the correct formulation of the problem
To figure out how to make a wardrobe yourself, you need to clarify the purpose of the furniture. A careful study of the following facts will be helpful:
- A significant internal volume implies the possibility of placing clothes and shoes, household appliances, New Year's toys, bed linen and other things. For each item, it is necessary to provide an optimal storage mode that is convenient for users.
- With a large façade, aesthetic parameters are of significant importance. A beautiful front surface will have a significant impact on the overall perception of the corresponding interior.
- The choice of basic materials is the most important task. Not only the cost, but also the ease of assembly and the durability of the structure largely depend on the right decision.
One drawing with dimensions is not enough
It is necessary to determine the parameters of fittings and mechanisms for the wardrobe, and understand the assembly technology. The design documentation package must contain a list of components, tools, and fasteners. The article discusses all the important nuances step by step.
Drawings of built-in wardrobes
Built-in wardrobes are a bit like the design of sliding wardrobes. Drawings of cabinets of this kind are made quite simply. It is enough to know the dimensions of the niche in which you plan to place the contents of the cabinet.
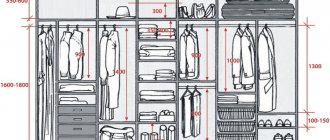
The drawing includes the system and all the contents of the future cabinet: • Shelves; • Boxes; • Shelving.
In a word, everything you might need for a comfortable life for your household. It is also important to understand what the cabinet design will be. The amount of material for assembling the cabinet, as well as the necessary list of accessories, will depend on the nuance.
Having a sketch with dimensions, it is important to decide on the fittings. This process may be slightly complicated by ignorance of the names and purpose of this or that item, but finding out all this is not difficult.
When assembling a cabinet, it is important to take into account all dimensions. This will create a stable structure that can last for many years. This will require good cabinet drawings, in which everything will be thought out to the smallest detail.
Advantages and disadvantages of a sliding wardrobe: price of finished products and homemade products
It would not hurt to clarify the benefits that can be obtained after the successful implementation of the plans. This information will help clarify the amount of eligible funding:
- Each storage location can be organized exactly according to individual needs. To lift heavy objects, a rod with a microlift is installed, and other technical solutions are used.
- The appearance is selected taking into account the general style and decorative elements of a particular interior.
- Large furniture corrects protrusions, uneven walls, and other architectural defects.
- The versatility of the product allows you to create designs that are ideal for the entrance, children's room, and other premises.
- A wide range of guides and specialized fittings allows you to make a high-quality cabinet with your own hands without the help of specialists and extra costs.
- Well-developed technologies, when used correctly, ensure high reliability of all parts of furniture, including mechanisms for fastening and moving doors.
Video of assembling a wardrobe with your own hands:
This material confirms the relative simplicity of the technology. However, it also illustrates the main significant drawback - the work operations will have to be performed independently. In addition to spending time and physical effort, one must remember about personal responsibility for the final result. In this case, there are no third-party warranty obligations, so errors will have to be corrected at your own expense.
Drawings of corner cabinets
Corner cabinets are a very convenient solution, especially in those homes where there is not too much space. On the one hand, they take up little space, on the other, they are quite spacious.
Let's take a closer look at the cabinet diagram. It would not be superfluous to note that all such cabinets have a similar design and differ only in size and content. The front part is cut at 45 degrees, the back side will be located directly in the corner of the room. The side walls allow you to create an internal space, and allow you to easily implement the façade part. It is possible to assemble a cabinet without side walls, but in this case you will have to lose room space, which we are trying to save by resorting to the design of a corner cabinet. The optimal dimensions may be 800*800*1100. Such dimensions will allow you to place a fairly large wardrobe without taking up much space in the room. Speaking about the filling of such a cabinet, I would like to note that it can be determined based on personal needs. Therefore, you should not pay special attention to this moment. When making parts of a corner cabinet, it is important to maintain all proportions. This is especially true for the top cover and bottom, which should be cut at an angle of 45 degrees.
Types of sliding wardrobes: sizes, shapes and other defining parameters
A free-standing structure does not differ significantly from ordinary cabinet furniture.
The built-in wardrobe should be studied in more detail
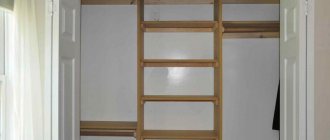
In this project, the brackets are installed in perforated tracks that are attached directly to the wall of the building. This solution allows you to change the height of the shelves during operation and add new elements. The frame with guides for the door leaf is installed exactly in line with the dimensions of the room. The absence of a lid, floor and walls significantly reduces the cost of furniture without compromising functionality, appearance and other consumer parameters.
The only “minus” is the impossibility of moving the wardrobe to another place. However, the internal equipment can be reused after dismantling.
If there is sufficient space, install such a corner cabinet
The radius design is more expensive, since it is necessary to use complex curved doors and guides
Dimensions do not have to match the height of the room
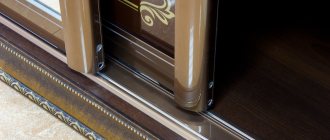
A typical element of every wardrobe is sliding doors on hanging/supporting rollers
Selecting a location
It’s great if there is a niche in the room where you plan to install the cabinet - in this case, all you have to do is assemble a “stuffed” cabinet, attach shelves and hangers to the walls of the niche, and also install sliding doors; in this case, the back and side walls will be absent. If you don't have one, you can build a corner cabinet or simply attach it to the wall of your choice. Keep in mind that once assembled, this structure will be stationary and you will not be able to move it, so choose the location of your cabinet carefully.
Then get to designing. Start by measuring your future cabinet with a tape measure. Measure several times and write down the desired height, length and width of the cabinet on a piece of paper. This information will be useful when purchasing materials. Make a scale drawing and mark on it all the necessary additions that you plan to place in your closet.
These can be shelves, drawers, baskets, lofts, hangers, etc. It’s not so difficult to draw a wardrobe yourself, the main thing is to conscientiously approach its measurement, take into account the scale when drawing up the drawing, and pay attention to every little detail.
The length of the cabinet should not exceed 3 meters, the maximum length is 5 meters. The length of each door should not exceed one meter. This is directly related to the load on the “rails” of the cabinet and the structure as a whole.
Perform a full calculation of the materials required for your individual project. Double check and recalculate several times. Remember the golden rule: measure twice, cut once. It will be very unpleasant if you have to redo something during construction.
How to buy the right materials for a wardrobe
Tree
Expensive furniture models are created from high-quality natural raw materials. They use hard and valuable types of wood, complex drying technologies, and the creation of decorative and protective layers. Only varnishes and impregnations that are safe for humans are suitable for indoor use.
Despite the high cost, it is wooden products that are damaged by the negative effects of changing humidity and temperature. The next negative factor is heavy weight. Most often, decorative panels, baseboards, and other decorative elements are made from this material. The exclusivity of designs created by nature itself is especially highly valued.
Drywall
This is a cheap but fragile material. Only special grades of drywall are protected from moisture. Such products can be damaged even by light pressure. To increase resistance to loads, they are installed in metal frames. Additional surface treatment is required to achieve acceptable aesthetics. The design is complex, with relatively low consumer characteristics, so it is rarely used.
Fiberboard, MDF and chipboard
Boards made from sawdust and shavings are often used in the furniture industry. They are distinguished by a reasonable price, sufficient strength, and durability. In factory conditions, responsible manufacturers use high-quality binders that block rotting processes and help maintain shape and integrity over a long service life. The end parts are protected from mechanical stress and moisture penetration by PVC edges with a thickness of 0.5 to 2 mm.
Using veneering and lamination, they create the desired appearance of finished products
For your information! When choosing materials in this category, the safety of the connecting components is checked. Particular attention should be paid when equipping bedrooms and children's rooms with furniture. It is necessary to exclude the entry of harmful substances and allergens into the atmosphere.
Plywood and furniture panels
These materials, when properly designed, are less susceptible to changes in temperature and humidity compared to solid wood. They hold screws and other fasteners better than chipboard.
High-quality furniture panels look perfect, they do not require additional processing
Other materials
You can assemble such a wardrobe with your own hands from standard components.
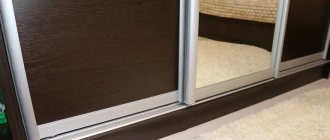
The aluminum frame provides good rigidity with low weight. It is not damaged by corrosion over a long service life. Frosted glass inserts are a practical solution. They hide the inside of the furniture, look aesthetically pleasing, and are not easily soiled. Such surfaces are cleaned of dirt without damage or extra effort. In the most difficult conditions, without additional measures, glass products maintain their integrity.
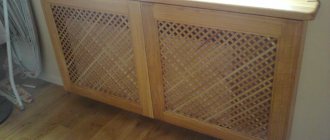
Inserts in wardrobe doors can be made from rattan with your own hands. Creates an interesting appearance and provides good ventilation
Cabinet plans
Cabinet drawings, regardless of their shape, size and where they will be installed, play a very important role. They will be the basis on which you can rely in the manufacture of all components of the cabinet.
Regardless of the features, it is important for all drawings to adhere to clear dimensions. The length, width and height of the external parts and the dimensions of the internal components transferred to paper must be strictly observed when making cabinets. The product will not turn out the way it was intended if the dimensions of at least one part are violated. This will lead to deformation of the entire structure and poor quality results.
The use of wardrobes in different rooms
The factors given below should be taken into account when specifying the parameters of furniture for the attic, kitchen, study, and other rooms.
Hallway
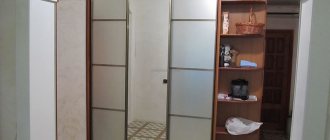
It’s not difficult to make a sliding wardrobe in the hallway with your own hands
Near the entrance area it should be supplemented with a shoe rack (1), a comfortable banquette (2), hangers (3) for outerwear, open shelves (4) for accessories and decorative elements.
Taking into account the highest frequency of use, furniture for this room is equipped with reliable guides. It is appropriate to use glass, metal alloys, and other materials resistant to external influences. In small rooms, light colors and large mirror inserts are used.
Related article:
Do you want to choose a wardrobe for the hallway ? Read our publication! We will look at the features and types of designs, selection secrets, placement tips, photo ideas of interesting options, and other useful recommendations.
Living room
In this room, a wardrobe is combined with a shelf for electronic equipment
To maintain excellent aesthetic characteristics, connecting wires and power cables are hidden in channels inside the furniture. At the project stage, it is necessary to provide appropriate cutouts with plastic inserts.
Here it is appropriate to use extraordinary design solutions for interior decoration
Expensive finishing options are used in living rooms
Children's
It is not difficult to create the necessary interior for every age
Using modern technologies, the facade can be decorated with a photographic quality picture.
For your information! Please note that frames recessed into the wall and the absence of protruding handles increase the level of safety. This type of furniture is well suited for equipping children's rooms.
If you are planning to make a wardrobe with your own hands, it will not be difficult to use a color scheme that harmoniously matches other interior details
Loggia
Furniture for small rooms
This example clearly shows the advantages of creating a wardrobe with your own hands for installation in a loggia:
- Sliding doors perform their functions without moving inside the room, like swing doors.
- The sliding wardrobe fits exactly to a certain size without large cracks in which dust accumulates.
- Inexpensive but resistant to adverse external influences materials are suitable for this room.
- With a mirror, as in the hallway, you can visually increase the volume.
Kitchen Cabinet Drawings
To make a kitchen set with your own hands, you need to take measurements of the places where you plan to install the cabinets. Then, taking into account the quantity and functionality, draw a sketch of the future kitchen set.
When drawing up a cabinet drawing, it is important to enter the correct dimensions; everything else is unimportant. You can even draw it by hand. Accuracy will also be necessary when calculating the details of the cabinets. It is important to take measurements in millimeters, this will allow you to get the desired result. Only accurate calculations will allow you to make a high-quality headset.
Before you start making kitchen cabinets, you need to decide on their number and size and transfer everything to paper. In the future, the manufacturing process is quite monotonous. To obtain a high-quality headset, strict adherence to all dimensions indicated in the drawing is required. Moreover, it is important to observe not only the external dimensions, but also the internal ones. Otherwise, you won’t end up with a kitchen set, but something incomprehensible. The drawing will be your main document when making kitchen furniture.
Stages of making a wardrobe with your own hands
Room measurements and calculation of wardrobe dimensions
Measurements can be taken using a building level
This tool will simultaneously clarify the accuracy of horizontal and vertical elements of building structures. The easiest way to take measurements is for cabinet furniture. In this case, it is enough to take the minimum dimensions and subtract a few centimeters to make a small reserve.
It is much more difficult to accurately fit a built-in wardrobe. With your own hands you need to take at least three measurements for each meter of length (height). If excessive defects are detected, the surfaces must first be leveled.
Important! In any case, check the free opening of the nearest window (door) units. If necessary, install door limiters. You should make sure that the cabinet will not cover the only light switch in the room or be too close to a ceiling or wall light.
Preparation of design documentation for creating a cabinet or built-in wardrobe with your own hands
To calculate sliding doors, Aristo and other specialized manufacturers offer similar calculators
These programs are available on the official websites of trading enterprises. They are completely free to use. Anyone can insert the results of their own measurements. The selection of guides is automatically carried out, designed for a certain size of the blade and load material.
You can make an electronic layout of a wardrobe with your own hands using the “Basis Furniture Maker” program
With its help, you can make a high-quality project even without previous design experience. Even a beginner will quickly master this tool using the following simple algorithm:
- establish the overall dimensions of the furniture;
- select the material of the rear wall and the stiffeners attached to it;
- the internal space is divided into separate storage areas;
- fill them with open shelves, drawers, and other components;
- enter the dimensions of sliding doors for a wardrobe;
- mark the ends that need to be covered with edge tape;
- add handles and fittings;
- make the necessary changes;
- print out the documentation in paper form and save it in a file.
Three-dimensional visualization of the project is available in new software versions
The drawings of the parts can be sent to a specialized workshop, or used to make individual parts of the wardrobe with your own hands. The electronic project is convenient for inspection from different points. It allows you to quickly make various changes to suit additional requirements. The generated list is used to purchase the necessary components and parts.
Important! Quite large scraps of chipboard sheets and other materials remain in the workshop. It is better to take them with you to make it easier to correct errors during the installation process and perform repair operations in the future.
Selection of rollers, materials, equipment and other components for the wardrobe
Different types of door blocks
The drawing shows the main components of a typical design:
- The lower and upper guides for the wardrobe are attached to the floor and ceiling of the room (the bottom and top of the furniture, respectively).
- In this example, the main load is on the lower rollers. But there are also models with hanging canvas.
- The side profile “C” additionally performs the functions of a handle.
- The sealing elements are made of silicone, which ensures reliable fastening of the glass.
- The middle transverse elements strengthen the load-bearing frame and separate individual elements of the fabric from different materials.
Schlegel for sliding wardrobes - a strip with pile that is glued to the edge of the door to dampen impacts
A wide range of colors simplifies the selection of the optimal profile option for sliding doors
To equip furniture, modern manufacturers offer trouser holders, lifting mechanisms and other functional additions
Do-it-yourself sliding door adjustment and other assembly features
| Photo | Adjusting wardrobe doors: description of technological operations with comments |
| During the first installation and during operation, the following typical problems arise: loose fit of the sashes, lack of fixation in the closed position. | |
| To prevent the blade from moving back after hitting the side of the structure, a special locking element is installed inside the guide. Using it you can determine which door needs to be adjusted from a certain side. | |
| First, the Schlegel (6÷8 cm) is separated to free access to the adjusting screw. The top hole is used during the assembly process to tighten fasteners. | |
| To adjust the position of the roller, use a hex wrench. In this example, the wizard uses No. 4. | |
| Clockwise rotation raises the door. In the opposite direction - lowers. | |
| These procedures are performed so that when closed the canvas fits without gaps in the lower and upper parts. After obtaining the desired result, proceed to the next stage. | |
| The locking element made of reliable sheet steel is marked with an arrow in the photo. When the roller moves to the middle part, the spring rises up and prevents it from moving backwards. If this part is shifted towards the central axis of the wardrobe, a gap is formed. | |
| Moving an element is not easy. This is prevented by the ends of the springs, which rest against the guide rails from below. Select a suitable piece of plastic, a board. | |
| Using this device, press the stopper. Next, move the node in the desired direction. | |
| The torn brush can be tucked into the lower hole, or glue can be used for rigid fastening. |
Direct installation of a straight or corner cabinet with your own hands is no different from assembling standard furniture. In the same way, first install the bottom, walls, and lid. Then the internal and external shelves are attached to the load-bearing frame.
For your information! It is convenient to order a sliding system for a sliding wardrobe after installing the cabinet. In this case, you will be able to make an accurate measurement.
Determining the sizes of the main sections
Let's immediately introduce a definition for the dimensions of the shell sections - this is HxHxH ( B height X c Irina xG grease), so as not to confuse the terminology any more.
There are several unspoken rules:
- The width of the compartment sections is not less than 400 mm and not more than 900 mm. This is due to the possibility of incorporating additional storage systems (pull-out baskets, pantographs and other elements are built into the 400, 500, 600, 800 and 900 mm base). And also because of the strength of the particle board. If there is a heavy load on the shelves, it is better not to make spans more than 700 mm wide, and then attach them to the wall using brackets and lay stiffeners.
- The depth of the cabinet sections must be at least 250 mm and no more than 600 mm. This is for reasons of practicality. An internal depth of 250mm is most often used when designing bookcases and narrow entrances. The most common depth for cabinets is 500-550 (with an external dimension of 600-650, respectively), which is optimal for storing things on shelves and placing cross-shaped hangers.
- The height between the shelves is arbitrary and varies from 200 to 1500 mm. . It all depends on the size of the things that will be stored inside the closet.
Based on the type of filling, three main section designs can be distinguished: with shelves, with a linen bar and drawers.
In the above diagrams of sections for designing a wardrobe compartment, the main dimensions, determined by considerations of ergonomics and ease of use, are assigned independently.
Appearance of a modern wardrobe, photos with successful examples
Application of stained glass technology
Such jewelry can be created according to an original sketch
Sandblasting drawings
These pictures are preserved intact after many years of use of a do-it-yourself wardrobe
Vinyl stickers
Using these products you can simulate sandblasting
They are also suitable for creating complex multi-color images
It should be remembered that vinyl films have limited strength. They can be damaged during cleaning of contaminants using aggressive chemical compounds.
Related article:
Modern wardrobes: photos, design. In the article we will look at the features of cabinets, the most popular and interesting designs, recommendations for selection and other useful tips.
Step-by-step manufacturing and assembly instructions
The first stage is marking:
- First, take a ruler or tape measure and measure the full length of the cabinet in the place where you are going to install it. The easiest way to do this is from the corner of the room, then one of the side walls will be the corner wall of the apartment;
- From the resulting point, draw a vertical line from top to bottom to indicate the border of the wardrobe. To make the line more even, you need to take several measurements from the corner at different height levels and make marks with a pencil, which you then connect with a line;
- then you need to measure and draw another vertical line - the border between the department with shelves and the department with a hanger. A wooden post will be installed along this line to separate these departments;
- Now mark the height of the shelves on the resulting lines, making marks on both sides with a pencil.
The second stage is to install the fasteners:
- take the fasteners, attach them to the resulting lines and mark the places where you need to drill holes in the wall;
- a dowel-nail must be driven into each resulting hole;
- We attach the fasteners to the wall with self-tapping screws.
The third stage is installation of the internal filling of the wardrobe:
- to secure the dividing post, place it on the fastenings and screw them to them with screws;
- To install the mezzanine, first of all we draw a line horizontally using a level and a pencil. Next, on the resulting line we drill holes for fastenings - two in each compartment and on each side; Dowel-nails are driven into them and the fastenings are fixed on the wall. Secure the mezzanine to them using self-tapping screws;
- To install the side wall of the cabinet, measure the height of the room as accurately as possible and try to adjust the wall to the result obtained. Install it and attach it with self-tapping screws to the existing fasteners;
- we mount the shelves: mark their installation locations on the side of the wall and on the dividing post, install two fasteners on each side and place the finished shelves on them. Attach using self-tapping screws;
- The second compartment of our closet is reserved for things on hangers, so we need to install a metal pipe there. Purchase round fasteners according to the diameter of the pipe, attach them with self-tapping screws to the wall and the middle dividing post, if necessary, cut the prepared pipe, insert it into the fastenings and secure.
Stage four – installation of false panels:
- false panels are installed at the bottom, top, side and near the wall. Each of them is drilled in several places, placed where installation is planned and marked with a pencil where it is necessary to make holes in the wall;
- Dowels are inserted into these holes, and the false panels are attached to them with self-tapping screws.
Fifth stage (final) - installation of doors and guides:
- To install the guides, you need to measure their desired length and adjust it to size. Afterwards, using self-tapping screws, they are fixed on the false panels - top and bottom;
- Installing doors requires a certain skill and accuracy. Attach the rails to them, but do not tighten them too much to allow the rollers to move more freely. The door is inserted first into the guide from above, then into the guide from below. Set them up to move freely along the rails. It is advisable to stick soft pile on the side of the door to prevent noise from impact and to avoid damage to the door;
- thoroughly check the quality of installation of all parts and the operation of the doors. If everything is in order, the job is finished!
Manufacturing
Once the drawings are ready, you can begin manufacturing the necessary parts. Sawing boards is a rather difficult task, and it is better not to test yourself, but to order this work from professionals. As a rule, such a service is provided at the place of purchase of chipboard sheets. The difficulty is that a machine for sawing chipboard is quite expensive, and purchasing it for one cabinet is pointless. Many people prefer to cut it themselves with a jigsaw, but this results in chips, so it’s better not to risk it.
You need to decide in advance on the door opening system: sideways, up, down, move like in a coupe. Taking into account the number of shelves, drawers, doors, you can calculate the required number of European screws, rivets for them, guides for drawers, and holders.
Separately, it is necessary to say about drills. They should only be made from wood, which will allow you to make an accurate hole yourself without the use of additional force. Their characteristic difference is the presence of a blade in the center and a flat profile (and not a cone, as in other types). Before assembly, it is important to practice drilling on unnecessary scraps that will remain after sawing the chipboard.
To avoid measurement errors, you need to use high-precision instruments. You should avoid tape measures and give preference to a metal meter and half meter ruler; it can be purchased at every stationery store. But beware of Chinese-made plastic analogues; they often contain errors that can turn out to be a serious drawback when assembling the product.
Felt pads will help make further movement of the cabinet easier. They should be glued to the places where the object stands.
Materials and tools
To make a sliding wardrobe yourself, you need to purchase the material and make sure that you have the necessary tools:
- electric drill, screwdriver;
- screwdriver, drills for working on wood, plywood, MDF or chipboard;
- knives - blunt and stationery;
- clamp for parts, clamps, rubber mallet;
- for confirmation - a hex key, a bat;
- tape measure, awl, pencil, square;
- iron, fine-grained sandpaper for edging.
This kit is enough for you to assemble the structure. To work with the iron, also take care to protect your hands and stock up on gloves. It is better to put 2 on the controlling hand at once to avoid burns.
When assembling the housing, it is recommended to use a guide device and clamps to achieve a 90° connection. How to use the guides correctly can be seen in the training videos, which clearly demonstrate the assembly sequence.
Now let's move on to the materials. It is often tempting to make a new cabinet out of an old one. You can borrow individual parts from an old cabinet - for example, drawers or shelves for the internal structure. Remodeling a cabinet completely without purchasing new materials can be a challenge in terms of matching parts and materials. In addition, the material of the old cabinet could be deformed during operation and subsequently distort the new product.
The best option is to purchase new materials for making parts. A wooden cabinet can be made of chipboard, MDF, solid wood.
| Material | Advantages | Peculiarities |
| Chipboard, laminated chipboard | Relatively low cost, large selection of textures and colors. High strength, excellent for facades. | Suitable for simple structures, difficult to finely machined. |
| MDF | Practical, affordable material, easy to process. Large selection of shades and textures. | The cost is more expensive than laminated chipboard and chipboard. |
| Solid wood | Eco-friendly, natural material that guarantees a long service life. | High cost of the material, difficulties in processing if the material has defects on the surface. Wood is sensitive to changes in humidity, can swell and dry out without proper care. |
A wooden compartment will truly decorate your home if you have carpentry skills. Not everyone dares to make furniture out of wood with their own hands, since the material requires understanding. Most often, cabinets are made from furniture board - a specially made wood board that has undergone the necessary processing in production. It is not recommended to make a wardrobe from plywood. The material is cheap, but does not have sufficient strength and is very thin. If you have pieces of plywood with your own hands, you can cut out the back wall or bottoms for the inner drawers.
Tools
Fasteners
Chipboard
Applying an edge
If you have never done edging, then watch the lesson first. Thanks to a special tape, it is easy to process the edge, that is, the place of the cut, yourself. Detailed step-by-step instructions are included with the material. There are craftsmen who recommend edging on parts involved in the visible zone. But on the other hand, the edge protects the cutting area from moisture and dust.
Simply apply the tape yourself by securing the adhesive side and heating it with a hot iron to ensure adherence.
Please note that we are not talking about a professional tool - an ordinary household iron. It is recommended to heat the material on mode “2”
Be sure to wear gloves to avoid burning your hands. After cooling, the excess tape is trimmed and cleaned with fine-grained sandpaper or a special whetstone that has a soft side and is low-abrasive. Edge around the perimeter of all structural parts.
PVC edge
Sliding door design
The doors are installed last, but their size, quantity, and suspension system should be decided from the very beginning. The width of the sections, shelves and drawers will depend on the width of the doors.
The number of doors is calculated based on the width of the room or niche, taking into account the following points:
- the optimal width of the door panel is from 60-70 to 100-120 cm. Narrower doors are unstable, wider ones overload the roller system, move slowly, and jam;
- the higher the cabinet, the wider the door leaves should be; the ratio of the height of the door leaf to the width should not exceed 4:1. That is, if the door height is 2.8 m, the minimum width of each leaf is 70 cm;
- adjacent sashes should have an overlap of 3-7 cm;
- if the cabinet is made without sides, side bumpers (false panels) are installed on both sides, thanks to which the doors will not hit the walls. Therefore, the double thickness of the slab from which the planks are made (16-25 mm) is subtracted from the net width of the opening.
The height of the door leaf depends on the suspension method; the following systems are mainly used:
- double-rail with support on the bottom rail;
- double-rail with support on the top rail;
- monorail.
The system with a bottom support is the most popular and quite reliable; the doors do not touch each other and do not fall out. But the rail located below quickly becomes clogged, becomes clogged with settling dust, and requires regular cleaning. Such a system should rest on a monolithic base; for wooden floors on joists this is not the best solution. If there is a wooden floor underneath and a concrete floor on top, it is better to make the top rail load-bearing. But this system is not very popular, since the doors often fall into the cabinet. The monorail system is more expensive and more difficult to install, but thanks to the rigid rails it is stronger and more reliable than double-rail systems. Such a suspension (the rail itself, not the doors) can be precisely adjusted, so it is not necessary to perfectly align the floor and ceiling for it.
