Hi all! I think the daughters and wives of many men go to manicures, do it themselves at home, and maybe even earn extra money by receiving clients at their place. So why not give a gift and make a manicure table with your own hands?! The question is rather rhetorical, but still.
Having a manicure table greatly simplifies the implementation of all these procedures. Having at your disposal a similar design, where there may be an armrest or an effective hood, you can expand your home business and provide high-quality, and therefore more expensive, services.
The table can be built with an exhaust hood or a stationary vacuum cleaner can be installed, which is necessary for removing and collecting excess dust, nail residues, etc. In addition to manicure, the table is used for other cosmetic procedures. If you choose the dimensions correctly and complete the drawings, you can make a simple, and maybe even an ideal table for a manicure.
Types of manicure tables
The manicure table is selected based on the total area of the master’s office, his main specialization (manicure or pedicure) and the physical characteristics of the body structure (height, weight, etc.).
The most popular options are:
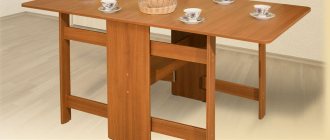
- Foldable. Such tables are suitable for novice craftsmen who do not yet have their own office. During the manicure, this transformer turns into a full-fledged table; after finishing the work, it can be assembled again into a compact cabinet. The folding model is usually equipped with shelves for polishes and other manicure accessories.
- With built-in elements. A hood or additional lighting can be provided at the table design stage. As a result of this solution, more work space will be freed up and there will be no clutter in the form of additional equipment.
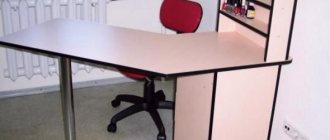
- Angular. These tables with maximum capacity allow you to remove almost all consumables from prying eyes and save space. The only disadvantage of this design is its bulkiness.
- T-shaped. The models include a large number of built-in compartments, which is very convenient for the master. At the same time, a T-shaped table takes up a lot of space and is absolutely not suitable for small offices.
To make the selected table option more mobile, you can install wheels on the legs. This will allow the master to independently rearrange and change the position of the table at any time.
Detailed master classes will help you choose the right materials, tools, and assemble the structure.
Basic purchase requirements
When buying a manicure table for a salon, you should pay close attention to the material of manufacture, the shape of the item itself and its functionality.
It is especially important what the countertop is made of. The requirements for it are quite high
The surface must be moisture-resistant and resistant to chemicals. From a decorative point of view, there is no fundamental difference between matte and glossy countertops, but it should be comfortable to the touch, since manicure is a lengthy procedure
The requirements for it are quite high. The surface must be moisture-resistant and resistant to chemicals. From a decorative point of view, there is no fundamental difference between matte and glossy countertops, but it should be comfortable to the touch, since manicure is a lengthy procedure.
Offered by salon industry enterprises, they are varied in design and configuration. They can be square or round, equipped with cabinets - both built-in and retractable, and it is sometimes difficult for the master to make a good choice.
The equipment included in different models can also vary significantly. To make a quality purchase, the master must clearly understand the functionality of the future purchase, and how the table will be placed in the salon. The size of the manicure table should be selected according to the available free space. It is not necessary to purchase a copy that is too large - it will clutter the room and will not necessarily be convenient for work. Buying an overly miniature table is also questionable. If space allows, it is better to buy a full-fledged table with normal dimensions.
Drawings and dimensions of the table
The parameters of an average table have the following indicators:
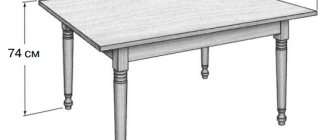
- height – 70-75 cm;
- width – 100-150 cm;
- depth – 40-60 cm.
The manicure table consists of a reliable, rather long tabletop designed for two people: a master and a client.
Important! During work, the legs of the master and the client under the table should not interfere with each other, and all working movements should not require additional bending of the back.
Drawings can be done manually or using graphic programs, made yourself or taken from free Internet access. The main thing is to indicate on them all the dimensions and fastening points of the parts, and separately display the types of fasteners used. This is done so that at the cutting stage the appropriate grooves are made on the material and the table can be simply assembled, like a construction set.
The furniture is equipped with drawers and shelves for storing small items.
What types exist
In addition to different classifications, manicure tables have several types:
Stationary
Perhaps one of the most popular types. They can be seen in any salons that are not limited in area. They are fully equipped, some models have wheels for ease of movement. There is an economy version, which is equipped with one cabinet and a tabletop without corners. More suitable for salons with a small flow of clients. Additionally, it is recommended to purchase a lamp and wall shelves to comfortably place manicure accessories.
The classic stationary model is with two cabinets and additional built-in shelves. Such furniture can be completely filled with all the necessary accessories without purchasing additional shelves. The client can immediately see the group, the palette of varnishes, and you will always have the most used tools at hand.
Another classic option, which is equipped with two lower shelves. It is convenient to place a router and a UV lamp on them. The tabletop is slightly raised. This creates additional space. Your tools will always be nearby, but not visible to clients.
The next model has wheels. This is very convenient because it is easy for anyone to move it. It is equipped with a raised tabletop, additional shelves for varnishes, and a soft palm rest.
The premium stationary model has a glass top. If chemicals get on it, they cannot be absorbed and can be easily removed without leaving any traces. This model has a built-in router, hood, palm rest, lighting, and modern design.
Folding
This option is very convenient to use at home or in a small room. When folded, it forms a cabinet that looks harmonious with any interior. Such models differ in quality, design, folding method: mechanical, automatic. Manual ones are slightly cheaper than automatic ones.
Another very compact model of a folding table. Here one drawer is made like a shelf. The working surface of the tabletop is quite large, allowing you to place this drawer, lamp, and stand on it. Stylish design will decorate the room.
Many girls offer on-site manicure services. It is very convenient to have a compact set for a manicurist, one of the components of which will be a transforming table. Look at the photo, such a compact transformer was created specifically for this case. A big plus is the presence of a built-in hood.
This furniture comes with a cover with a handle.
Another original design solution. This model is equipped with a retractable cabinet, which is very convenient to use.
There are several models of double manicure tables that allow you to save space but still accommodate two visitors at once. They can be equipped with lighting, additional shelves, drawers. This design can be classic or premium. We offer you to look at some interesting variations of this furniture.
Express manicure table
Nail bars are very popular now. They can be found in all shopping centers. Such establishments are created specifically for those who want to get their hands in order quickly. This furniture is a bar counter with high chairs for masters and clients, drawers, shelves for varnishes and other nail art items. It can accommodate from 1 to 6 people at once.
What materials and tools are needed for the job?
Before starting work, you need to stock up on the appropriate equipment:
- screwdriver, hammer;
- six-sided wrenches, screwdrivers;
- roulette;
- construction pencil;
- glue;
- jigsaw (preferably electric);
- iron;
- selected material (most often these are chipboard sheets).
It will be easiest to assemble the table if all the parts have already been cut - the parts just need to be connected to each other. If the project is carried out independently from start to finish, you will have to work hard: first cut out all the parts and fasteners, and only then assemble them into a single structure.
It is better to make the body of the manicure table from chipboard, the tabletop and facades from laminated chipboard.
How to make a manicure table with your own hands:
- The chipboard sheet must be laid out on a flat surface and cut into components. We must try to carry out this procedure with a minimum of waste.
- All ends are covered with veneers. Having connected the main part and the decorative strip together with glue, you need to walk over the surface with a hot iron. This way you can achieve better adhesion of materials.
- In the places marked according to the drawing, you need to drill holes where the fasteners will go.
- After the preparatory work has been completed, all elements must be connected to each other. If the table is not planned to be disassembled in the near future, you can pour glue into the grooves of the fastenings - this will make the structure stronger, and situations with shelves falling out (often encountered among beginners) will automatically be eliminated.
Manicure tables made independently are almost in no way inferior to similar products produced in furniture factories.
If you plan to install a built-in hood, even at the cutting stage it is necessary to drill a corresponding recess for it. There is no need to glue it with veneers - the cut of wood will be covered by the device itself. It is possible to make a hood for a manicure table with your own hands, but its cost is not much less than that of a ready-made one. That is why it is easier to purchase a built-in model ready-made.
Additional equipment, in particular an exhaust vacuum cleaner, plays a significant role in the work process.
Important! For attachment points, you need to make an indent from the edge of the walls - at least 20 mm.
The equipment can be purchased ready-made or made independently using an electric motor with blades, as well as a power supply.
Simple version of the product
For beginning crafters, we suggest starting with a simple stand made in the style of a woodpile. The product does not require large expenditures on materials, and it will look simply wonderful.
All you need for the craft is paper towel rolls, glue and paint (preferably durable acrylic, but gouache will also work).
To learn how to make a flower stand, follow the instructions:
We make preparations. We take five bushings for each of the four sides (20 in total) and paint them brown. To achieve an interesting wood effect, add veining and paint in other fine details with a fine brush.
What should be on the table
For the convenience of the master, there should be a minimum of items on the table - only the most important and necessary. You shouldn’t lay out the entire base of colors and design elements on an open surface - they will fit perfectly in the inner drawers.
The table must have means for disinfection and stopping bleeding, napkins, a demonstration palette and a set of brushes. For those who constantly monitor time, you can install a clock on your desktop.
A manicure table is modern equipment necessary for the implementation of services in the field of nail services.
Cutting and assembling a manicure table with your own hands is not difficult even for a person with basic construction skills. It is not necessary to take the standard as a basis; you can create an object according to individual criteria.
Practical products vary in shape; the folding version will help save space in limited spaces.
The main thing is to choose high-quality material and take your time with assembly. The more accurately the chipboard sheet is marked, the less waste there will be. And this, in turn, will reduce the cost of the final product.
High-quality furniture is in no way inferior to factory products.
DIY long desk
To make a long desk, you don’t have to buy a finished product; you can buy tabletops separately in the store and assemble the structure in the dimensions you need. Here is a three-meter table on three legs, made by hand.
Photo source klubstroitelei.com/412811918786431610/dlinnyj-pismennyj-kompyuternyj-stol-svoimi-rukami/
DIY built-in table
The size of the table area is, of course, not for everyone; here we show you how to make a built-in table with your own hands, three and a half meters long. If you need to save room space and money, this is a good solution. All that is necessary is to make reliable fastenings, and there will be no special problems with the tabletop. The concept is simple, the supports are attached to the wall and the upper block is installed on them
There are a few things you need to pay attention to. Firstly, in this case the tabletop consists of three parts, that is, there will be seams that need to be processed
Secondly, the tabletop must be attached to the wall along its entire length so that there is no shifting.
Photo source jumptuck.com/2011/11/21/desk-build/
Photos of 50 design options for manicure tables
Nowadays, girls have begun to actively offer manicure services at home. In order to properly organize their workplace, many try to make a manicure table with their own hands. It’s not without reason that this idea has become so relevant, because as everyone knows, those involved in nail design have a large number of different jars and tools that should be at hand, but at the same time not interfere with the process. A DIY manicure table is a great opportunity to do everything exactly as it suits you, taking into account all possible nuances.
Tags
Tables manicure table with your own manicure table for manicure table. professional table can be a comfortable table with means. Faced with a manicure table in a manicure table with your own hands with your own hands. at hand construction materials at hand with your own hands with your own hands with your own hands with your own hands furniture makers are guided in Making a manicure table A beautiful manicure table is a manicure table. The manicure table consists of the manicure table with its own
make glue
What should be on the table?
Manicure tables can be made by almost anyone, even those who have never encountered carpentry before. The main thing is to create all the drawings in advance. On the website you can watch a video showing in detail the manufacture of such a table.
1 2
A cosmetic table should, first of all, be comfortable for its owner. It must have a lot of drawers and pull-out panels so that there is somewhere to put all the property that a professional craftsman owns. The dimensions of the table also directly depend on personal desire. In general, a tabletop one meter long and about half a meter thick is enough.
1 2 3
A do-it-yourself manicure table hood should also be a mandatory unit. It is installed in the middle of the table, in a small hole, tightly securing the edges. During filing of the nail plate or gel extension, all dust is sucked into the hood like a vacuum cleaner, completely eliminating harmful particles from the air.
The manicure table must be equipped with a day vision lamp. Even sufficient room light will not provide the proper brightness, which is so necessary when working. It does not have to be mounted in the table; it is enough to simply fasten it well on one of its sides, which will be convenient for the master. In general, these are the basic requirements for what a do-it-yourself manicure table should be like.
Features of the manicure lamp
A manicure lamp is a fairly simple device in design, designed for drying and fixing shellac, and consists of:
- lamps of various types: ultraviolet, fluorescent or LED;
- protective housing;
- control panels;
- Modern models have a built-in fan and timer.
Without a manicure lamp, the gel on your nails will not dry.
Types of lamps for manicure - table
| Characteristic | UV lamps | LED lamps | CCFL lamps | Hybrid |
| How does it work | The gel polymerizes under the influence of ultraviolet light of a certain wavelength. | Ultraviolet rays are produced from LEDs. | The lamps that power the device are filled with gas. When current is passed through it, beams of the required length are formed. | Depending on the model. Combines the technologies of several types of lamps: UV, LED and CCFL. |
| Operating time (hours) | Up to 10 thousand | Up to 100 thousand | Up to 80 thousand | Up to 80 thousand |
| Ignition circuit | Electronic | Induction | Induction | Induction |
| Service Features | Replace light bulbs every six months | — | — | — |
| Electricity consumption | High. The device is sensitive to voltage changes. | Low | Low. The lamps do not heat up during operation. | Low |
| What materials are being polarized? | Everything except LED-curable gels | LED-curable gels, universal materials, gel polishes | Everything except LED-curable gels | all materials |
| Speed of polymerization (hardening of varnish) | 2–3 minutes | 10–60 seconds | 30–60 seconds | 30–60 seconds |
Do not forget about the rules for using lamps: you cannot wash the drying chamber, you can only wipe it with a slightly damp cloth. Lamps can be cleaned with a brush; if varnish gets in, carefully scrape it off with a knife or razor.
Preparation of material and tools
Before you start working, decide on the material from which you will make the table in the process. It is better to choose durable solid wood that will last for many years. The tabletop with its dimensions can have several types:
- solid wood;
- custom plastic;
- plywood;
- ceramic finishing.
The last option is considered the least popular in this area, since the hands slip on it, and the master requires a surface of medium roughness. For the legs, you can take bars at least two centimeters thick. Between them you can install a small stand for a foot-operated machine and other tools that are not always required for work. On the site you can find a lot of information with photos on this topic.
1 2 3
As for the tool, here you will need:
- jigsaw;
- Sander;
- drill;
- screwdriver;
- screws and nails;
- construction adhesive.
A manicure table made by yourself is no different from the store-bought version. And in some cases, it is even more convenient and durable.
How to choose a ready-made lamp
First of all, you will need to take into account the following criteria:
- power of the selected device;
- dimensions of the drying chamber (some do not fit both hands);
- type of lamps used;
- body material (plastic/metal);
- availability of options.
Comparative characteristics of lamps of different types - table
| Lamp type | pros | Minuses |
| UV lamps |
|
|
| LED lamps |
|
|
| CCFL lamps |
| High price |
| Hybrid lamps |
| High price |
Lamps for manicure - photo gallery
UV lamp is the most budget-friendly purchase option
The UV lamp dries almost all types of gel, but fails quite quickly
The LED lamp runs on LEDs, is quite economical and durable
The design of lamps for manicurists is varied; you can choose a model that matches the color scheme of the work area
Hybrid lamps for manicures are chosen by professionals
For a professional, the best option is CCFL+LE, which are both convenient and versatile to use.
Build process
Standard manicure tables are assembled according to the same scheme as conventional options. You should separately assemble the insert boxes that will complement the finished product. Next comes the assembly of the legs. Everything must be done using a building level, strictly following the markings and adhering to the prepared diagram. Even small discrepancies will further interfere with the work of the master.
The last stage will be the countertop. It can be attached both from the top and from the bottom - in this case, a lot depends on the decoration of the table. Working accessories are already added to it, such as a hood, lamp, etc.
Some craftsmen want to see a folding table in their arsenal. On the one hand, this is convenient, since it does not take up space and after work you can simply put it away in an inconspicuous place. But the folding model has its drawbacks. The main thing is that you will constantly have to move all the working equipment somewhere. This will take a lot of time before work, and if you are a professional nail artist, then this option is absolutely not suitable for you.
The dimensions of the created manicure tables depend, first of all, on the desire of the master, and secondly, on his professional skill and employment. Experienced people equip their workplace inside and out, including trash cans and candy for clients. These require more space to work. For beginners, a small surface is enough.
Every woman takes care of her appearance. Beautiful ladies pay special attention to caring for their hands and nails.
Some people prefer to visit salons and get a manicure there, while others like to do this procedure on their own. It is worth considering that manicure is a long and painstaking process.
To make beautiful nails at home, you should take care of having a folding table. It can be purchased in a store at a fairly high price, or you can make it yourself. To do this, you should stock up on free time, the necessary tools and materials, competent sketches and patience.
The importance of arranging a place for a manicure
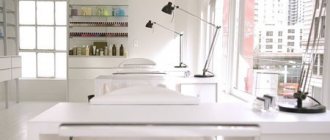
The recommended working area is 8 square meters, this is the optimal space to accommodate all the necessary equipment. Well-arranged and comfortable furniture is a largely determining factor. The productivity of the master and the comfort of the client greatly depend on it. Anatomically incorrect posture, in addition to unpleasant sensations, is dangerous for the development of spinal diseases, therefore, when arranging a place to work, think about yourself and about the people who will come to you.
The manicurist's workplace should be equipped with comfortable furniture and high-quality equipment
It is better to allocate a non-passable room for work, but if there is none, you can adapt:
- a living room where you can create personal space with a folding screen;
- hall, if it is large enough;
- loggia, if it is insulated, it will be perfect for your purposes.
On the allocated area you need to place:
- manicure table;
- chairs, preferably with adjustable height, for the client and the master;
- a cabinet with shelves or drawers;
- shelves;
- table/stand for sterilizing instruments.
General requirements for the working area
The premises must meet sanitary requirements. Therefore, the walls are either painted or finished with washable panels or tiles. The floor covering must be even and smooth, without cracks.
You need to take care of lighting in advance. It is worth selecting an area for receiving clients where there will be enough natural light or ensuring overall uniform illumination by installing devices on the walls and ceiling. All table lamps on the table should be adjustable in height and beam direction.
You need to install several additional sockets to connect electrical appliances (you have at least a manicure lamp, a hood, and lighting fixtures on your desk). Wires should not interfere with work.
The room should be well ventilated . The hood gets rid of dust, but not toxic fumes from dyes and detergents, which affect the well-being and general health of people in this room.
It is imperative to designate a place where instruments will be disinfected. A medical book for a manicurist is mandatory, but one document in hand is not enough. For safety, after each procedure, the workplace and all instruments are sterilized in a disinfectant solution for 10–25 minutes. The duration of treatment depends on the composition you use.
Instruments are sterilized in a special box with a solution of the drug Septolite-Tetra
At the end of the day, the tabletop and all removable parts of working tools are processed. In addition, you need to have a supply of towels and napkins, preferably disposable ones, or change them every day for clean and ironed ones.
Take immediate care of the design style of the work area: it should be inviting so that the client wants to come back to you. You can add variety to the interior with the help of accessories, but it is better if these are not paintings and figurines, but your diplomas, certificates and certificates - this way you will confirm your qualifications and strengthen the client’s trust. If possible, you can install a TV in the room.
Material
When choosing manufacturing materials, take into account your personal wishes, financial capabilities and the characteristics of the room. You can make a manicure table from:
MDF;- laminated chipboard;
- OSB;
- plastic;
- plexiglass.
- tree.
As you can see, there are a huge number of options for making tables. When choosing them, you need to consider:
- quality;
- wear resistance;
- safety;
- durability.
Metal product
Forged coasters look stunning as decoration for indoor spaces and for landscape design.
It is difficult to answer the question of how to make a metal flower stand. Not every handicraft worker has the skills to forge this material.
If you want to place an exclusive metal stand in a room, most likely you will have to contact a framer.
As an alternative, you can use some old pieces to make a stand and fasten them together.
It can turn out pretty well, the main thing is to be smart!
Dimensions and drawing
Dimensions
As for the sizes of the folding manicure table for home use, they can be varied.
When choosing them, the dimensions of the room, the amount of materials for manicure, and personal needs are taken into account. The optimal dimensions for a comfortable-to-use table design are:
- length – 110 cm;
- width – 45 cm. Keep in mind, the wider the tabletop, the more materials and tools you can place on it. But here it is worth starting from the availability of free space in the room;
- height – 75-80 cm. Such indicators will allow you to do a manicure in comfortable conditions and will prevent the development of disorders in the spine.
Advice : if the room is small, it is recommended to make a small folding structure that will not clutter up the free space; If the size of the room allows, you can make a fairly spacious table with a folding top.
The shape of the tabletop can be:
- rectangular;
- curved;
- rounded;
- angular;
- curly;
- T-shaped.
It is always the consumer who decides which option to choose. The main thing is that the selected dimensions of the furniture piece fit harmoniously into the overall interior of the room and are easy to use.
Drawing
Before you start making a folding manicure table on your own, you need to make a preliminary drawing. Then it will be more convenient for you to assemble the structure and avoid mistakes during work.
As for the drawing, you can make it yourself or using a special program on a computer for furniture makers. The design of a folding table can be the most common, consisting of a small cabinet for placing manicure accessories and a folding tabletop. If the size of the room allows, the product can be equipped with racks, shelves, and supplies.
Attention: when drawing up a competent drawing, in addition to indicating all the necessary dimensions, it is worth indicating the location of the holes for the built-in equipment.
Armrest or pillow for manicure
The manicurist should ensure that his workplace is equipped with a special armrest on which the client will place his hand during the procedure. This accessory is needed so that your hands do not get tired and numb, but are placed comfortably on a soft stand. In addition, the armrest provides stability for the client's hand, which is very convenient for the specialist.
How to make it yourself
Anyone who knows how to sew at least a little can make their own armrest for a manicure. To do this, you only need filler and a piece of fabric. As a filler, you can use foam rubber rolled into a small roll. It is best to choose a wear-resistant fabric, such as leatherette.
After the materials are prepared, you need to do the following:
- Create a pattern of the desired size. The main part of the rectangular shape should be sewn, the edges of which will subsequently be joined by a seam, and two circles, the sides of the roller. Sizes may vary. Averaged:
- diameter of the sides - 13 cm;
- width of the main part - 28 cm;
- the length of the main part is 41 cm.
The manicure roller should not be too large - Twist the foam rubber so that the structure is shaped like a roller.
For reliable fixation, the foam rubber can be coated with glue before twisting. - Cover the foam with material.
When covering a manicure pillow, first of all, the main part is formed, and then the sides are sewn on
How to choose a ready-made armrest
You need to focus on convenience and practicality. Before purchasing, it is enough to place your hand on the pillow as the client will subsequently do, and observe your sensations. The roller should not be too wide or, conversely, too narrow
It is important that it is elastic, but at the same time not completely soft, otherwise it will squash and lose its shape.
It is better to purchase an armrest made of washable material, because it will have to be treated with a disinfectant solution after each client. You should also pay attention to the material from which the armrest is made. Sanitary rules oblige it to be treated with a disinfectant before each new client, that is, several times daily
Ordinary fabric will not withstand this and will very soon become unusable. In addition, the material that absorbs liquid will remain wet for some time after treatment, making the pillow unusable.
At first glance, it seems that setting up a manicurist’s workplace can be very expensive, but in reality this is not the case. The main, largest and most expensive piece of equipment is the table, but even it will not require large expenses if you carefully approach the process of choosing it. On various specialized websites, manicure tables are sold for incredible amounts of money (you can find them for 20, 30 and even 50 thousand rubles), but, in fact, this is the most ordinary furniture made from ordinary material. It is simply equipped with the necessary drawers and has certain dimensions that are optimal for accommodating the master and the client. In order to avoid unnecessary costs, but at the same time make the workplace as comfortable as possible, it is necessary to study in detail the features of its arrangement.
Tools
From the tools we prepare:
pencil and tape measure;- jigsaw;
- scissors;
- a screwdriver; if you don’t have one, a Phillips screwdriver will do;
- hex keys;
- drill;
- self-tapping screws and euroscrews;
- iron for cutting.
We will focus on the option of making a folding table from laminated chipboard. the following materials :
- laminated chipboard 16 mm;
- PVC edges for trimming. For the tabletop, a material with a thickness of 2 mm is required, and for the remaining parts - 0.4 mm.
- accessories (handles);
- guides (for pull-out cabinets);
- dowels;
- self-tapping screws;
- furniture glue.
How to make a folding table for manicure yourself?
The table is made in the following sequence:
First, prepare the parts of the required sizes. You can order cutting of chipboard sheets from a special company or do it yourself, armed with an electric jigsaw.- You should start by making a cabinet .
We drill holes for confirmations in the side walls and ends. We carefully study the drawing so as not to miscalculate the location of the holes. The cabinet is assembled using hexagons and Euro screws. - Next, according to the drawing, we cut out the tabletop .
- We process the cut areas with a jigsaw and sand them with sandpaper.
- Starts making the legs . They can be purchased ready-made at any construction or furniture store.
- Turn the tabletop over and place it on the leg. For this we use special fittings, since our design will be foldable.
Homemade manicure hood - a jack of all trades
Surely after reading this material you are thinking about purchasing such a necessary and important unit. We are ready to please you, if you have a soldering iron in your home arsenal, and your hands grow from the right place, then assembling such a simple device yourself is a feasible task even for a girl
A homemade vacuum cleaner is in no way inferior to a purchased one, but will allow you to save money on the purchase of new varnishes or nail files.
Scouring the World Wide Web, you can find a thousand and one videos on how to use improvised materials to make a built-in device for purifying dust from the air. To do this you will need:
- computer cooler or miniature fan no larger than 80x80 mm;
- power cord;
- a switch button or a special lever (can be purchased at a hardware store);
- power supply with cord (can be used from a laptop or any other autonomous household appliance). It converts the mains voltage to the value indicated on the fan. Typically this value is 12 V;
- non-woven fabric (needed for sewing dust bags);
- ventilation grille (for safety purposes and to prevent hand injuries).
Once you have everything you need, feel free to get to work. Fortunately, you have our detailed instructions:
- Having preheated the soldering iron, connect it to the power supply and cooling fan with the network cable;
- for greater comfort of use, install a previously purchased switch button or lever on the cable;
- On the dust suction side of the cooler, a protective ventilation grill should be secured to protect the client’s fingers and prevent foreign objects from getting into the fan blades. The grille can be glued or bolted;
- Now let’s remember our school cutting and sewing lessons: From non-woven fabric you need to cut a strip measuring 16.5x40 cm, fold it in half along the long side and sew it on both sides. Sew a border on top and thread an elastic band into it;
- The finished bag is fixed on the back side of the cooler, and the fan itself is installed in the place that is relevant to you. Voila, the device is ready for regular use.
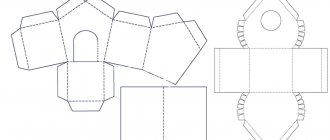
You can also slightly modify and improve your homemade vacuum cleaner by making a plastic case for it. To do this, use a small sheet of plywood, from which you need to try to make an impromptu roof for the birdhouse. The angle between the two slopes should be approximately 120°. You need to cut a hole in one of the sides and cover it with a protective grill. The assembled ventilation product should be attached to this hole from the inside. Place the dust bag on the cooler and start working.
Built-in hood
If you are going to install a special hood over the product, which absorbs all the dust and creates a safe working atmosphere, you should make a separate hole for it in the countertop.
The hood itself is purchased at a specialized store . It has compact dimensions and stylish design. You can install the hood within 10 minutes:
- Using an electric jigsaw, we make a hole in the tabletop according to the dimensions of the device.
- Insert the hood into the hole.
- We fasten it with self-tapping screws.
Important : to prevent chips and cracks from forming in the countertop when drilling a hole, it is recommended to use a file with fine teeth.
Video
Beautiful hands are always important. Coco Chanel called them her calling card. Manicure is an essential attribute of beautiful hands. Nails not covered with gel polish are bad manners today.
So the girls go in slender columns to nail salons for nail art rituals and a cup of aromatic coffee.
An impeccably done manicure and delicious coffee are not a guarantee that the client will return. Why are clients disappearing?
There are many reasons, and one of them is discomfort during the procedure. There was nowhere to hang my purse, I hit the sharp corner of the table, my knees rested against the master’s knees...
How to choose a comfortable manicure table
In general, it was inconvenient, but what about the competitors? Therefore, when opening a nail salon, nail bar or just a home business, pay special attention to the issue of purchasing equipment. The main character of the manicure salon is undoubtedly the table.
We will discuss how to choose it below.
The main character of the manicure salon is undoubtedly the table. We will discuss how to choose it below.
Beautiful, functional and comfortable - this is how you can briefly describe the right manicure table. It fits into the design concept of the room. All the tools on it are at hand.
Comfortable for the master and the client, easy to care for, attractive in price... He is impeccable, but how can you recognize him in a crowd of people standing? “Height, weight, eye color”?
Size that matters
Lamp, tools, liquids - all items necessary for work must fit on the table. The following are considered comfortable sizes: height of the manicure table
– at least 700 mm, width – 1100-1500 mm, depth – 450-550 mm. No one forbids ordering a smaller table, but the master may have problems - both with the arrangement of equipment and with the client’s knees, who will have to give up space under the table, turning theirs to the side.
Geometry of shapes
Manicure tables can be straight, “curved,” T-shaped, or corner. The diversity suggests rather that form is a matter of taste. When choosing it, you can focus on the style of the room and the location of the table.
No stains on reputation
The table may look “rich”, but in operation it will prove to be a bad one. We are talking primarily about solid marble countertops, which are extremely difficult to clean from dirt. The material of the manicure table must be resistant to “chemicals” (varnishes, solvents), easy to clean and disinfect, and only then – effective.
There are no ideal materials. Even glass, which is deservedly considered the best functional solution, has its drawbacks - it is cold, prone to cracks, and gives off “fingers.” Therefore, choose from a range of materials (chipboard, MDF, wood, glass, stone, etc.) based on your budget, preferences and stylistic concept of the room.
50 shades of grey
From this point of view, a white countertop is ideal, although it is very difficult to maintain. They are less capricious and also do not interfere with the perception of the color of gel polish on countertops in neutral (beige, gray) and pastel tones.
On the table and under the table
If you do not plan to move the manicure table around the room, give preference to stationary versions, equipped “turnkey” - drawers, shelves, stands, built-in appliances (hood, lamp).
Compact options - tables on wheels and transforming tables - are rarely encumbered with cabinets and a hood. Minimally “tuned” models will have to be completed. Hood for manicure table
- an expense item that should not be neglected. The client will not come to breathe nail dust a second time. The issue of placing tools is solved with the help of a cabinet on wheels.
So, no matter what configuration the manicure table is supplied with, you should remember the minimum set of accessories, without which the work of a nail artist is impossible, and these are:
- lamp with directional light;
- UV or LED lamp for working with gel polishes;
- built-in or mobile hood-vacuum cleaner.
- a soft cushion or support for the client’s arm.
VIDEO INSTRUCTION
Class inequality
Obviously, the difference between two bidders can be huge
And if novice craftsmen working at home are satisfied with the “economy” option, the owner of a prestigious salon will have to pay attention to furniture of a higher class
Will “classic” satisfy the social status of his salon or is it worth forking out for “premium”?
Finishing
After manufacturing and assembling the manicure table, it is necessary to give it a decorative appearance. If the furniture was assembled from laminated chipboard, it does not need finishing .
Such products themselves look aesthetically pleasing and have high technical characteristics.
If you are making a table from natural wood, then you need it:
- Sand it.
- Paint it.
- Cover with varnish.
All these procedures will not only make the furniture attractive, but also extend its service life.
Tip : You can increase the functionality of your workspace in the same way by making a laptop table or a sand animation table.
Subtleties of professional care
- The surface of the manicure table can be mechanically damaged by the tools used. Therefore, it is better to store them in special stands and place them on paper napkins.
- After each client, instruments and table surfaces must be disinfected with special means.
- Periodically, all furniture should be wiped clean from dust. This requires wet cleaning using cleaning wipes.
- All instruments must have their place and be returned to it after each procedure.
What needs to be taken into account when working at a manicure table, how to take into account all the subtleties of professional care for it, maintain convenience and cleanliness, the master will tell you:
