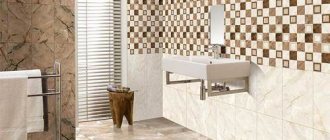
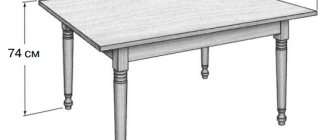
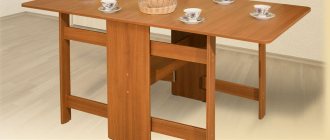
A table with a ceramic tile top looks very presentable in any room, and its practicality and convenience leave similar tables made of other materials unrivaled. A ready-made table with a ceramic top costs quite a lot, and you may not like its color. A good option for purchasing such a piece of furniture is to make it yourself. Moreover, anyone who is comfortable with tools can do such work. The result of your efforts will be an exclusive table, which certainly none of your neighbors will have.
Having used the following recommendations and prepared the necessary materials, feel free to get to work.
Pros and cons of tiles for kitchen countertops
Usually, ceramics are used to finish and decorate the surface of the table, which has many advantages:
- Aesthetics, large selection of shades and patterns;
- Strength, durability;
- Moisture resistance;
- Not damaged by hot objects (frying pan, kettle);
- Easy care: wet cloth, some cleaning products.
Minuses:
- If the installation is incorrect, then dirt will accumulate in the joints;
- Do not wash with liquid containing acids.
Grouting joints
No matter how hard you try, you will still get a thin line at the junction of the tiles, so purchase grout in advance. It is better to buy materials based on epoxy resin: they have increased resistance to all reagents, fats, oils and temperature changes.
You can buy them at any hardware store, it’s better to be guided by the cost. The price for quality products will be a little higher, but they will last longer.
Most often, products are sold in the form of two components, which are mixed together in a separate container and are immediately ready for application.
Grouting tips:
- Use small rubber spatulas to thoroughly coat the joint without damaging the tile.
- To simplify the process of cleaning the surface of porcelain tiles from grout, you can use masking tape. It glues easily and does not leave streaks: glue it along the entire length of the line you are going to process.
- It is better to remove dried grout after a day.
Which tile to choose for tiling countertops in the kitchen
When choosing a material to cover the countertop, you must remember that it should be:
- Strong, durable;
- Resistant to water and temperature changes.
Options for covering the table surface in the kitchen:
- Ceramic;
- Mosaic;
- Granite;
- Porcelain stoneware.
When choosing a material for cladding a countertop, you need to take a closer look at its size. Large tiles look bulky and are more difficult to install. The standardized size is easier to install and looks more attractive. Sometimes the surface of the table is covered with mosaics (it looks amazing). But for this it is advisable to have practical experience, otherwise it will not work out as it should.
To lay a mosaic you will need installation experience
Ceramic tile countertop for kitchen
Basically, the kitchen surface is covered with ceramics. Ceramic tile countertops for the kitchen have several advantages and several disadvantages.
Pros:
- Easy installation (everyone can do it).
- Moisture resistance.
- Withstands elevated temperatures.
- Easy care.
Disadvantages:
- After prolonged use it fades.
- If the coating is glossy, then all damage is visible on it.
- The material is durable, but if the coating is plain without texture or pattern, then small scratches will soon appear on it.
- Will crack under heavy load.
Mosaic
Mosaic is the same ceramics, only presented in a small format. It looks unusual and beautiful, but it is difficult to install and requires experience. For a complete image, you need tiles that are identical to each other.
If you have never done this before, then it is better for you to take a closer look at tiles of standard dimensions.
Granite
Granite is not often used to cover kitchen work surfaces, although this material is reliable and strong. True, you need to take care of it carefully, because after long use, granite tiles will lose their aesthetic qualities: they will no longer shine and will not be as smooth as at the beginning. Another disadvantage is that it is difficult to install because the material is heavy. You need to make sure that the base can support the weight.
Also, when buying granite, you should definitely pay attention to its safety class, since for the most part granite slabs are slightly emitted: this mineral has radioactivity. When purchasing, ask the seller if it can be used in the kitchen.
Is radiation from granite dangerous? Every day a person receives a certain amount of radiation from the environment. The average hourly total dose of radiation per person is 0.20 - 0.25 microsieverts per hour. This is the sum of cosmic radiation (0.035 microsievert/hour), incorporated radiation: food, water and air (0.16 microsievert/hour), and terrestrial radiation.
Most types of granite have radiation levels ranging from 0.02 to 0.05 microsieverts/hour. Natural stone corresponds to the range of normal terrestrial radiation values.
Granite radiation is safe for humans
So, in most cases, the radiation background of granite does not pose any threat to humans. It also does not pose a threat to food products stored or prepared on a granite countertop.
Porcelain tiles
If you cover your kitchen countertop with tiles yourself, then do it with porcelain stoneware. It has all the necessary qualities:
- Strength;
- Resistant to water, heavy loads, heat;
- Easy to install, comes in a wide range of shades, and is publicly available.
General tips for tiling countertops
The execution of work must be approached very carefully. It must be said right away that using tiles as finishing coatings for countertops is not the most optimal solution and has many risks, which we will talk about in this article a little lower. If for floor coverings such errors go unnoticed, then countertops react extremely negatively to them. What is the best tile to use?
Table. Types of tiles for finishing countertops
| Tile material | Brief description of technical parameters and operational characteristics |
| Ceramic tile | The cheapest and most common option in budget versions. In terms of mechanical resistance of the surface to various types of damage, it occupies a leading position and is far ahead of the properties of artificial and natural stone. The tile is covered with glaze, and this is glass, a very hard material. Ceramics have an unlimited choice of design solutions and linear dimensions. The disadvantage is great fragility. Ceramic tiles are completely non-plastic; when exposed to critical forces, they do not bend, but immediately crack. |
Porcelain tiles | In all respects it occupies a middle position between ceramics and natural stone. The tiles have different thicknesses and surface areas, the appearance most often imitates natural stone. The cost is cheaper than natural stone tiles, but much more expensive than ceramic tiles. It is made using synthetic resins - this is a significant drawback. Professionals strongly do not recommend using it for kitchen countertops. The lining has direct contact with food products, including hot ones. Under such conditions, porcelain stoneware releases harmful chemical compounds that end up in food. |
Natural stone tiles | The most expensive option, used only in exclusive interiors. Stone tiles are thick and are more often used as a countertop without various bases. Such kitchens are very prestigious and indicate the high social status of the owners. As for performance characteristics, natural stone is significantly inferior in all respects to the two described above. Its surfaces are easily scratched, the stone reacts with many chemical compounds, and cracks under the influence of moderate dynamic forces. |
Choosing tiles for countertops
We have outlined brief physical characteristics of the tiles, but there are also very strict requirements for the bases of the countertops.
Necessary tools and materials for tiling a kitchen countertop with your own hands
To cover the table surface with tiles you need:
- Material of the required format;
- Plywood;
- Special adhesive composition for laying out ceramics;
- Devices for filling gaps: rubber spatula, brush, non-rigid material, etc.;
- Level for construction (they use it to measure and change the arrangement of tiles);
- Roulette, pen;
- Apparatus for creating cuts on material;
- Wood saw;
- Hammer;
- Electric screwdriver.
How to choose the style of the room?
The tabletop cannot be called a “capricious lady”. The surface of the table can effectively emphasize the sophistication of the kitchen set or “dissolve” against its background. It seems that the simplest solution would be to choose a countertop that matches the color of the facades. But it's not entirely simple. It is not always possible to find materials of the same shades .
There are no difficulties when installing monochrome furniture. But black will be sad, and white will be impractical. In this case, the set will visually look large and “monolithic”. To destroy these feelings, you will need bright decorative elements.
The choice of contrasting materials should be thoughtful and determined by the style of the room. A high-tech or minimalist interior can be decorated in black and white. A soft rustic mood will be better emphasized by a range of similar shades (sand/brown, white/blue, light green/green).
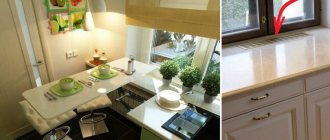
To create a harmonious environment, it is advisable to “link” the tiled countertop with other surfaces in the interior. A win-win way is to have the same finish on the table and window sill.
Rustic style
An excellent design move is to decorate the apron and tabletop with the same material. This duet in the kitchen can become one compositional solution.
The combination of floor finishing and work surface made of the same material looks original. Moreover, manufacturers often offer tile collections united by one shade or pattern. A stone union (squares of the same color on the floor and on the table) will give the kitchen a noble look. We must admit that such materials are not cheap.
Decoration with snow-white tiles
Making a tile base for a kitchen countertop: step-by-step instructions
As a rule, tiles for kitchen countertops are laid on top of the kitchen unit. It should not fail even with a large weight of the finish, so in its design it is necessary to consider the following points:
- We need to attach a few more legs to the furniture. This will strengthen the support and prevent the cabinets from being damaged under the trim, no matter what size it is. It is important to distribute them at the same distance from each other and from the middle so that the load is placed evenly on the plane.
- All cabinets must be connected to each other to obtain a straight, level surface.
- Either particle board or plywood is used as the base for the top layer (ceramics). We give this layer the dimensions of a bedside table. Initially, it should have an allowance of a couple of cm on 4 sides.
- We cover the wood layer with liquids that resist rotting. The main thing is to cover all areas and not miss anything. A coating of disinfectant compounds at the end is encouraged.
It is possible to make the base of a kitchen countertop from ceramic tiles with your own hands. To do this, use plywood sheets as a base.
Table top base made of two layers of plywood
Chipboard should be laid in two layers when the countertop is large. Base laying process:
- Place the first sheet of plywood. We give it a shape identical to the format of the bedside tables. Use the remaining board to fill in the gaps.
- We fasten with self-tapping screws. Treat with disinfectant and water-repellent liquid.
Assembling the base for a tile countertop
This stage is very important; its durability and appearance depend on how well you make the base for your countertop.
How to assemble a quality base:
- Level the bedside tables. Additionally, we fasten them to the wall with screws.
- We fasten the plywood sheet with glue designed for fastening wood. For strong bonding, spread the adhesive mixture in all directions and do not miss a single empty area.
- We secure it in the corners and in the middle of each side with screws (the main part does not need this, since it will receive the necessary fastening from the glue).
- We apply a liquid to the areas where the screws are located that repels water.
Ceramic coffee table
A small and old square table for tea drinking, which was about to be thrown away, can easily be turned into new exclusive furniture using ordinary ceramic mosaics.
After renovations in the bathroom or kitchen, several pieces of whole or split slabs are often left: they are quite suitable for mosaic decor.
Prepare for work:
- Sandpaper with grains of different sizes;
- Solvent for varnish and old paint;
- Ceramic tiles of two samples - light and dark shades;
- Hammer;
- Tile adhesive;
- Grout and spatula.
The work ahead is like this:
- First you need to remove the old paint and varnish with solvent. The liquid is carefully applied using rubber gloves. Leave for 20-30 minutes and remove the corroded varnish with a cloth or sponge.
- Next, the surface of the tabletop is treated with abrasive paper for better adhesion to the finishing material.
- The tiles are placed in a plastic bag and broken into pieces of different sizes with a hammer.
- On the tabletop, with a simple pencil, draw a pattern: waves of different sizes (you can lay out the pattern in three levels: the first light, then dark and again a light tone).
- The work of gluing each mosaic element is very difficult, painstaking and energy-consuming, but the result is worth it.
- The ends of the table are also covered with tiles.
- After all the mosaic elements are fixed with glue, it is necessary to go over the voids between the fragments with grout.
- They let the masterpiece dry and proudly bring it into the living room to the admiring exclamations of the household!
Laying tiles on the base
The finishing must be laid on a foundation that is dry and completely saturated with disinfectant liquids. For maximum reliability, we apply a cement mixture. It is the connecting link between the outer layer and the base.
Making a cement pad
To create it, you need to prepare a mixture of cement or use an adhesive structure for slabs instead. Dissolve the chemical composition in water in accordance with the proportions (the method of preparation is indicated on the package).
We distribute the beacons along the plane of the table (it is convenient to measure space using them). We place one of them on the wall, and the other on the side edge (end) of the planned tabletop.
Then carefully place the tile on this layer. Excess cement is removed with a spatula (the main thing is not to smear it on the wall).
Laying
The top area needs to be marked to ensure it is free of unwanted protrusions.
Making the marks correctly:
- Mark the middle part of the planned countertop. Draw 2 lines dividing the length and width in half. You should end up with 4 identical rectangles.
- Apply glue to the bond between the top layer and the base when it is dry. You need to start from the outer corner to maintain the integrity of the tile. Use a serrated spatula.
- Place in straight rows according to the marks. Change and correct the location at the building level.
- We cut pieces and use them around the edges and in inconspicuous areas.
How to cover the end of a countertop
The cut must be made neat and beautiful. The dimensions of the finish should not entirely correspond to the dimensions of the bedside table; it is necessary that the edges of the finish extend slightly beyond the boundaries of the base. Cut off the excess and attach to the sides.
Grouting joints
The final stage is processing the seams with a special material. You need to choose a colorless one or the same shade as the tile (so that it is not noticeable).
The seams are rubbed with a rubber spatula, applying grout evenly over all surfaces. To remove excess, glue paper (painting) tape (adhesive tape) onto the plane and gently peel it off. The tape must be removed 24 hours after installation.
Metal square garden table decor
Metal furniture is first painted with a special paint, using an aerosol for painting or dipping it into the paint with a regular dishwashing sponge. The dried table is covered with glossy varnish.
- Then glue is applied to the cleaned and degreased surface of the countertop with a wavy spatula and the tiles are laid out in rows.
- The glue dries very quickly, so apply to small areas.
- All seams and irregularities are grouted with black grout (if the furniture is painted black, and light grout if the metal is white/beige).
If you wish, you can radically update the color scheme of the furniture - paint it a different color (white, for example) and select the tiles for the tabletop taking into account the shade of the legs and the supporting structure of the table.
How to install correctly: features
To install correctly, you need to listen to the advice of experts:
- When adjusting plywood to the format of tiles or porcelain tiles, you need to leave a couple of cm “in reserve” on 4 sides (the tiles should slightly overhang the plywood).
- Cuts and corners of the tabletop must be processed at least 2 times. This should be done especially with the sink cutout to avoid rotting.
- In the cooking area, you need to go over the protective layer several times (to resist heat).
- To obtain a moisture-proof cement layer, when diluting it, add a little tile adhesive mixture.
Before laying the tiles, it is important to ensure that the base is level.
Preparatory work
You must disassemble the old table before you begin. If this is not possible, its surface must be processed and leveled as accurately as possible.
- The most important thing is to choose the finishing material. For a beautiful design, buy the same tiles as on the kitchen wall. The range of sizes is wide: from small mosaics or classics 10x10 to tiles of impressive sizes 60x120. If you have a certain skill, working with large tiles is much faster and easier.
- We take two sheets of FB or FSF plywood, 20 mm thick, which is impregnated with a waterproofing compound. We make protrusions along the cross-section to a width of 3-5 cm.
- We secure the first sheet on each side with several self-tapping screws for fixation. We use metal corners for stable fastening. Apply wood glue to this sheet using a zigzag motion. Choose moisture-resistant glue.
- Glue the second sheet of plywood on top and screw in the screws for secure fixation. We make small notches on the front surface of the second sheet. Press the painting mesh tightly onto the surface from above. Seal the joints of the countertop and the wall with sealant. We also treat the edge with sealant.
- As a result, we glued two sheets of plywood together and securely attached them to the kitchen sections. Treat the sides of the plywood with waterproofing compound. The painting mesh attached to the plywood surfaces should also be treated with a moisture-resistant compound.
- If you need to insert a sink into the countertop, you must cut the hole before placing the ceramic countertop on the base. The cut portion should not be thrown away as it will be needed.
The part cut off before pouring should be secured with resin and screws in the place from which it was cut, so that after the solution has hardened, this part can be easily removed.
Photos of do-it-yourself tile kitchen countertops
The smaller the size, the more difficult it is to install. The more textured its surface, the more difficult it is to care for. Tiles can be not only of different sizes and colors, but also textured or smooth, glossy or mirrored. The catalogs contain a wide variety of materials made of stone and stone imitation; you can also find tile imitation like wood and metal.
An apron made of the same material as the table surface looks good: you can choose a similar color or one that harmoniously matches it from the same manufacturer’s collection.
Tile composition
Tiles are made from durable material such as ceramic, stone, fired clay or even glass. Regular tiles include ceramic and porcelain, while stone-cut tiles include slate, granite, travertine and marble. The size and shape of the tiles vary depending on the material.
- Ceramic tiles and porcelain tiles come in different shapes and sizes.
- Natural stone is usually limited to squares and rectangles.
- Most kitchen countertops are tiled with ceramic and porcelain tiles.
Ceramic tiles are made from natural clay that is baked at high temperatures to remove moisture, causing the material to become hard.
Such tiles gained the greatest popularity in the 70s of the last century; today they are still used due to their availability and ease of installation.
Homemade countertops
The model of a table top made of wood, a cement backing and laying tiles without a frame or mesh is not the only one. Truly timeless, although very massive, countertops are made in a frame from an angle, with a reinforcing mesh, pouring concrete mortar with fiber into the frame, leveling it to zero, and finishing it with tiles of any kind, including filigree mosaics.
A budget option for a tile countertop is ideal for a “quick interior” kitchen using soft panels with tiled mosaics. Both for the table and for the apron, these tiles look cute and modern, are easy to clean, they are inexpensive and will not last forever - which is very useful for those who like to change the interior. The plastic base of the tiles does not require a cement backing; the panels can be mounted using glue on OSB, plywood and any strong and even base.
The tiles are used to decorate the tops of outdoor tables; the remains of the tiles make excellent borders and plinths for gazebos, seats for stools and many other crafts.
What glue to use
Using standard cement-based tile adhesive is not advisable. Cement mortar has poor adhesion to wood. It is better to use acrylic or epoxy based glue.
It is more flexible and does not crack upon impact. It does not peel off when the wood gets wet, it is easy to apply and dries quickly. Holds ceramic countertop tiles well.
A very good option is to use Liquid Nails glue in syringe tubes, which is squeezed out with a special gun.
The glue layer should not exceed 2-3 mm. A thicker layer takes longer to dry and does not improve the strength of the connection between the ceramics and the countertop. In addition, if you lay the tiles on a thick layer of glue (mortar), you will have to use a level to give it a strictly horizontal position. Otherwise, moisture may accumulate in the recesses, and the tile may burst under mechanical stress.
The glue must be leveled with a comb spatula over the entire surface. You cannot glue tiles by applying adhesive in stripes or dots.
Drying and stripping
For drying, the forms with the solution are placed in one row on racks. “Drying” is a common name for this stage, which does not reflect reality.
In fact, it is not the removal of water that occurs, but its reaction with cement, therefore it is important to prevent intense evaporation:
- forms protect from sun and draft;
- covered with polyethylene;
- In hot weather, periodically sprinkle with water.
It is also useful to line the walls of the drying room with polyethylene to maintain high relative humidity. The tiles are laid somewhat differently when using a hardening accelerator. As already mentioned, this additive causes the solution to heat up and to retain heat, several rows of tiles are placed one on top of the other, then the stack is covered with a tarp.
Plywood sheets are laid between the rows. Wooden and metal forms will withstand such a load; if they are made of plastic or silicone, each form is placed in a frame made of bars or metal profiles.
The modules are removed from the molds after the following period of time:
- when using a hardening accelerator: 24 hours;
- without accelerator: 2-3 days.
The formwork is removed carefully; the module should not be knocked out. A soft form made of plastic, rubber or silicone is slightly bent at the edges so that it comes unstuck from the tile
Next, the form is turned over, allowing the module to fall under its own weight onto a floor previously covered with a soft cloth. You can help it by lightly pressing on the bottom of the mold.
Metal and wooden forms, as was said, are best made detachable. One-piece forms are placed upside down on a frame specially made to fit the mold and lightly tapped with a rubberized hammer. The tile will fall to the floor under its own weight.
The advice of some users to remove modules on a working vibrating table has not been confirmed in practice: the tiles sit firmly in the molds and cannot be released without outside help. Forms with traces of solution are washed with acid before new use.

