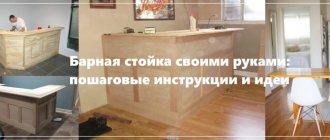
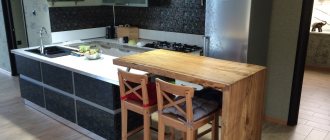
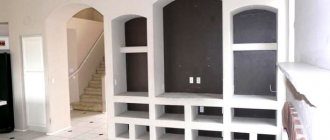
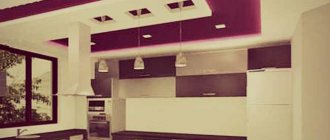
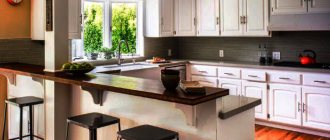
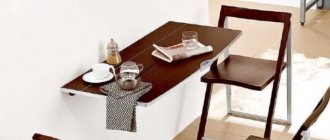
A DIY bar counter for the kitchen made of plasterboard will make the room stylish and modern. Making it yourself is suitable for those who have already installed a headset and want to supplement it. After installation of the structure, the finishing is selected based on the interior. You can tile the counter, paint it, or use self-adhesive materials.
In this article we will analyze in detail the nuances of bar counters and the features of their manufacture.
About plasterboard bar counters for the kitchen: pros and cons
Bar counters are often used in studio spaces. They are necessary to separate the dining and living areas. Designers distinguish between mini and classic module types. The latter are larger in size, have niches for installing small household appliances, and lighting. Like most custom pieces of furniture, bar counters have certain advantages and disadvantages.
Let's start with the pros:
- Installation in small spaces is allowed.
- The product is used instead of a standard dining table.
- Saving useful space when making corner posts.
- You can equip the interior element with shelves and niches.
- Ideal for quick snacks as no serving is required.
- Chairs can be tucked under the counter when not in use, saving space.
Along with the advantages, there are also disadvantages. There are not many of them, but you should still pay attention:
- installation at a height of more than one meter from the floor;
- Only 2-3 people can dine at the same time;
- impracticality of using a rack in a large family.
When developing a project, take into account all the details, think in advance about the number of drawers, shelves, and hidden niches. Remember that it will only be comfortable to sit on special high chairs with a footrest. It is not always convenient for older people to be in this position, and it is also dangerous for children.
Step-by-step instruction
- At the first stage, the dimensions are determined - parameters of height, length and width that are convenient for the owners.
- Then they create a frame from the profile. It is important to consider their location for maximum rigidity, for example, install the corners from a solid profile. To do this, two walls are cut, and the rest is bent in a straight line. Reinforce with self-tapping screws or a cutter.
- After creating the perimeter of the walls, they are fixed to the floor. Between them, at a certain distance, a transverse profile is installed for rigidity. The profiles are connected perpendicularly with crabs.
- If the project includes lighting, wiring must be done in the frame in advance. According to TB, the cable must be insulated and removed from metal parts.
- Sheathing with plasterboard is possible if the stability of the frame is beyond doubt. Pieces of drywall are cut to the size of the frame and screwed into the profile using a screwdriver and self-tapping screws with short pitches. The caps are slightly recessed to disguise them with putty.
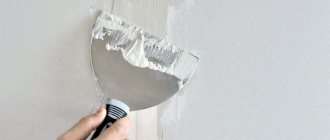
- The joints are sealed, the ends are sanded with a float. The holes for the screws are covered with putty, dried, cleaned with sanding paper and primed.
- It is convenient to paint with a roller or brush (in hard-to-reach areas).
- If necessary, install a plinth, and in places where there is a loose fit, treat the seams with sealant.
- Lighting for the bar counter plays a special role. Typically, halogen or LED lamps are used, placed in a beam installed above the tabletop, but lighting can also be provided using a chandelier on the ceiling. It is convenient to equip the lamps with a dimmer, which allows you to adjust the lighting intensity.
- If there are no outlets or a distribution box nearby, you can install an extension cord with a filter.
Bar counter for every taste
How to make a kitchen bar counter from plasterboard with your own hands: step-by-step instructions
Plasterboard sheet is a universal material used for interior decoration. Using the profile, a variety of, including complex, geometric shapes and compositions are created. Before you understand how to make a plasterboard bar counter with your own hands, you should prepare for the process.
Advice . Be sure to make a drawing or diagram of the product to scale. If this is difficult for you, contact the services of designers.
Making any piece of furniture requires time, patience and care. The kitchen bar counter is no exception. When the project has been studied in detail, we begin to prepare the workspace and necessary materials:
- plasterboard sheets;
- metallic profile;
- dowels and screws for fastening;
- putty;
- seam tape;
- sealant;
- building level;
- stationery knife;
- drill or screwdriver;
- tool for grouting putty.
Additionally, finishing materials are prepared. When painting, you additionally need a tray and a roller. If you plan to lay tiles, you will need special glue. Protective equipment (mask, gloves, goggles) must be used.
Next, we move on to step-by-step instructions for making a bar counter:
- We determine the length, width, height and depth of the product.
- Transfer the drawing from a piece of paper to the floor (in the place where the rack is mounted).
- We make a frame from an aluminum profile according to the specified parameters and dimensions (the more solid parts, the stronger the structure).
- We fix the product on the floor and install crossbars to increase rigidity (crab fastenings are used).
- We cover the created frame from the profile with plasterboard of the appropriate size (the material is cut effortlessly, with a simple stationery knife or jigsaw).
- We fasten the drywall parts using dowels or self-tapping screws (it is better to use a screwdriver to make the work faster).
- The cap should be screwed in using the recessing method in order to subsequently hide its presence with putty. The pitch width of the screws is 20-30 cm.
- At this stage, we install the wires for the lighting, carefully insulate them, and check the functionality and reliability of the electrics.
- We glue sickle tape onto all the resulting joints, and cover the heads of the screws with putty.
- After drying, we treat the areas with a grouting tool (dry method) until a perfectly smooth surface is obtained.
- Finally, we apply a primer, after which we install the baseboard, if the design requires it.
The main frame of the bar counter in the kitchen is ready. Then we proceed to its final finishing. As a top, you can use laminated chipboard sheets, a countertop, ceramic tiles or glass, mosaic tiles (it all depends on the design). The base is usually coated with paint. It is convenient to do this with a roller, and in hard-to-reach places a brush is used.
Photo design ideas
Separate corner
Desktop as a basis
Photo of a bar counter in a small kitchen
Zoning option
Interesting lighting
As a base for a coffee table
In the spacious kitchen))
Bar counter made of brick or stone - stylish
Non-standard appearance and color
Bar counter in a studio apartment
You can also have lunch
Two sketches for implementation
Bar counter for a small kitchen
Video on the topic
If you want to place a bar counter in an open summer kitchen, you can borrow the idea from this video. The guy built an interesting stand using driftwood and a thick board found in the forest.
Most often questions arise about how to make a countertop for a bar counter. You can decorate it with mosaics. And how - look in the video. In general, the technology for laying mosaics is simple: use a special white glue, followed by grouting the seams between the tiles. It can be difficult to form an uneven edge. Here's how to do it - watch the video.
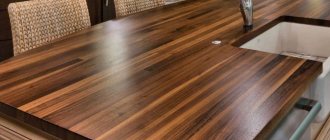
Tabletop glued from bars
Bar counter for the kitchen to divide the space
In studio apartments or living rooms combined with a kitchen, the bar counter copes with the function of zoning and dividing space. Separates the food preparation area from the seating area. Sometimes a sofa is placed close to it and thus partitions off an oblong room without any disruption to the composition of the interior.
Bar counter dividing the space
In small kitchens, the bar counter is often an extension of the window sill, which increases the hostess’s workspace and ideally completes the corner set.
Or it is attached to the wall and fits perfectly into niches and non-standard walls.
Wall bar counter
The rack is chosen due to its small surface width, which allows you to save space while performing all the necessary functions of the tabletop.
Corner bar counter
Modern bar counters are made from various materials, based on the design of the kitchen. It can be made from any solid material, including plywood and glass, however, the most common options are:
- Tree,
- Drywall,
- Fake diamond,
- Pallets.
If you don’t want to spend money on the work of a craftsman, then you can design and assemble a bar counter with your own hands. It can consist only of a table top and a pillar or can also contain shelves. Two-level structures look interesting. This is a modern infusion into familiar classical forms.
Also, bar counters can be of a console type, i.e. without support to the floor, they can stand on one pole or on one support, they can be framed with internal filling or in the form of an island. They can be combined with a window sill or wall.
Bar counter dividing the space
Purpose and types
If the kitchen area allows, a bar counter is placed in the kitchen for its intended purpose: to sit down for a cup of coffee or something stronger, or to have a snack. Then its “equipment” is appropriate: holders for glasses, wine glasses, glasses, next to it is a shelf/holder for juices, bottles, etc. They place it with one edge resting on a wall or the edge of a kitchen unit, sometimes they place it in the form of a frame - in the middle of a free zone.
Bar counter in a large kitchen
In small kitchens it is often multifunctional. It can also be used as a divider into zones - dining room and kitchen; in very small areas it is often used as a dining table. Moreover, it can be located non-standardly - against the wall.
Bar counter along the wall
In medium-sized kitchens - 10-12 meters - it is often made in the form of a peninsula - a small protrusion on the side. In order to make more efficient use of space, the space under the countertop is used for shelves or a cabinet. This design is very simple - the bar top is often supported by several pieces of straight or inclined pipes fixed to the cabinet table.
Bar counter in the kitchen - peninsula
Such multi-stage kitchens have recently become popular: it is more convenient to perform different operations in the kitchen on surfaces with different heights.
Two surfaces one above the other
The surface of the stand is slightly shifted relative to the table
But, nevertheless, more often a bar counter for the kitchen is present in studio apartments to delimit two zones: the kitchen from the living room or from the hallway - who has what is combined. Moreover, it is often a continuation of the desktop island or peninsula.
Bar counter for the kitchen as a continuation of the island table
They also make it in the form of a partition. In this case, the base is most often made of plasterboard, and a surface is “attached” to it - from above or to the side.
Bar counter-partition made of plasterboard
This option is easy to do
In general, there are many options, variations and different types. You adapt the idea that you like to your conditions, and you can begin to implement it.
DIY bar counter: where to start
First, we determine the dimensions of the stand: height, width of the table top and filling. The bar counter is located at the chest level of a person of average height, approximately 130 cm from the floor. When viewed in relation to the table, the table is at mid-thigh level, approximately 90 cm from the floor. Of course, if there are many tall family members in the family, you need to make the height of the support pillar larger.
If the counter will serve as a table for eating, then it is better to make it slightly wider than the standard 40 centimeters.
Next, proceed to the selection of materials. If the stand is without support or with one post, you can take a closer look at wood or artificial stone. But the stone is much more difficult to find and when working with it you need to be very careful so as not to chip the surface. And it weighs a lot, so you might not be able to do it alone.
Bar counter made of artificial stone
Wood, on the other hand, has more advantages: it is more accessible, easy to cut and weighs much less than artificial stone.
In the store you can choose a board of suitable width and thickness or glue several beams together.
Stock up on fasteners: steel corners, self-tapping screws.
If the stand is of a cantilever type, without support, then it is attached directly to the wall using steel corners or to a hidden mechanism.
Bar counter without support
Self-tapping screws will be needed when attaching the tabletop to the support and connecting the parts to each other.
Stock up on tools:
Make a drawing of the future bar counter with all dimensions and prepare all the details.
Bar counter diagram
Creating a wireframe
First, you should make a marking on the floor where the rack will be installed, and a counter marking on the wall. Along these lines, the base of the frame made of wooden beams or a guide profile is mounted. The second option is preferable, since metal U-shaped strips provide the structure with greater stability. The mounting rails are rigidly fixed to the floor with dowels.
Sections of horizontal jumpers and vertical rack profiles are attached to the formed contour. They must be located in each corner of the future structure, as well as on a long straight section - as additional stiffeners. The optimal step for installing slats is considered to be 60 cm. But since the bar counter is unlikely to be very large, you can make only one intermediate rib on a straight wall - in the middle.
The vertical frame is assembled from the outside and inside. In this case, the screws are simply fastened at first - they can be finally secured after you have set everything to the level. The outermost slats adjacent to the wall are secured to it with dowels. A short section of a U-shaped profile is also mounted here - it will play the role of a shelf, providing additional support for the cantilever strips under the tabletop.
The next stage of work is connecting the two perimeters of the walls of the bar counter with transverse jumpers. They are also cut from the profile and ensure that the dimensions match exactly. After this, the finished planks are installed in the upper and central parts of the frame between the vertical posts and, after checking with a level, they are screwed to the sheathing.
Longitudinal U-shaped profiles or bars are laid on top of the prepared frame. For reliability, their ends adjacent to the wall are inserted inside the mounted shelf and fixed there with self-tapping screws.
If you plan to make a spectacular bar counter with internal lighting, you need to lay the wiring inside the frame before starting work with gypsum boards.
DIY bar counter made of wood
When choosing a material, you can pay attention in the store to boards with an interesting pattern, with knots and saw cuts, because they give the wood that colorful pattern that many designers strive for.
All cut parts (table top, bottom bar for rigidity, legs) must be sanded well with sandpaper or a grinding machine.
Wooden bar counter details
The bottom is made with holes for the pillars and the pillars themselves are cut.
We paint all the parts or cover them with varnish and moisture-repellent impregnation. We fasten the tabletop to the wall with corners, and also at the base, where the post stands, we also fasten it with corners or self-tapping screws.
Be sure to check that the stand does not wobble. Otherwise you will need to add rigidity.
Another version of a bar counter made of bars with one support can be seen in the video.
Bar counter made of pallets
Pallets also consist of wood, are completely environmentally friendly, and are at the peak of popularity among lovers of non-standard interiors and “country style” designs.
Bar counter made of wooden pallets
The rack requires six pallets. We begin work by processing the pallets: we clean them from dirt and dust, and remove burrs and chips.
It is important that pallets need to be sanded along the grain so as not to tear up the wood.
We cover everything with water-based paint. If parts get in the way, you can easily remove them or saw them off.
We connect two pallets for the table top and three for the legs. We fasten the parts with corners.
This version of the bar counter has a disadvantage: it is bulky, so it is not suitable for all rooms.
The loft style will gratefully respond to a rack of pallets. The beautiful pattern of wood fibers, the unusual and expressive look in your interior will be remembered by guests for a long time.
DIY bar counter made of plasterboard
Drywall allows you to make all sorts of bends and indentations, as well as fulfill any request of the housewife. It is easy and quick to install, so making a plasterboard bar counter is quite simple.
Make a drawing with the dimensions of the finished product, for example, as in the photo.
Bar counter diagram
After this, you need to cut the profiles to size and make the frame of the future product. For reliability, fix the base and all parts with self-tapping screws. You can do without profiles and use only bars.
Drywall bar counter
And you cover it with pieces cut to size from a sheet of plasterboard. All joints and holes must be puttied, primed and painted.
The evenness of the tabletop is checked by level. It is covered with plywood in the same way as with plasterboard.
Covering the bar counter
Sometimes a bar counter is made from plasterboard that extends to the ceiling to zone the space. You can use your imagination and make slots for glasses, build in shelves and lighting.
DIY plasterboard bar counter
How to do
If you have enough time, prepare the materials and tools:
- GKL;
- metal profile;
- fasteners (dowels and screws);
- putty, paint and sealant;
- hammer drill or impact drill and screwdriver;
- knife and spatula;
- building level and cutter;
- brush or roller and tray;
- drywall float;
- protective equipment (gloves, glasses, closed clothing and shoes, hats).
DIY bar counter
Bar
Photos of bar counters in the kitchen
There are a huge number of designer and unusual solutions for bar counters. Everything is supported according to the wishes of a specific family and functionality. So, the photo shows a counter that completes the kitchen unit and separates the living room area from it.
The tabletop can have different shapes, expand, be rounded, and bend. This allows you to save space and provide the rack with additional functions, as in the photo.
The island type bar counter combines a work and dining area. Great for oblong spaces.
A bar counter made of wood looks expensive and natural. Has one support and fastening to the wall. The pillar has been replaced by a board. The photo shows the natural curves and grain pattern of the board.
A bar counter can combine shelves to divide space; in the photo, it performs its natural function as a bar with places to store drinks.
Using your imagination, you can create a compact and unusual stand made of wood.
A drawer in the rack allows you to store cutlery in it, which saves space in your kitchen set.
In the photo, the counter serves as a dining table and additional storage space, because... It has built-in shelves.
A countertop made of artificial stone is self-sufficient and looks expensive. Fits perfectly into modern glossy headsets with right angles and lines.
A two-level tabletop is now very popular; it allows you to zone the space without weighing it down.
I look forward to your comments, how many people have a bar counter in their kitchen?
A kitchen with a bar counter looks modern and dynamic. This is not just an interior decoration, but a useful and functional piece of furniture. When ordering a kitchen set, the production of an additional module can be negotiated separately. But if all the furniture has already been placed and you just want to refresh the interior, a hand-made plasterboard bar counter will help out. There is nothing complicated about it - just start.
Sheathing the stand with plasterboard
The sheets are marked with a pencil and cut into individual elements in accordance with the drawing. After that, each of them is screwed to the finished slatted sheathing. It is better to place the attachment points in short increments of about 20 cm.
The evenly fixed sheet will have to be “passed” again with a screwdriver in order to recess the heads of the hardware a millimeter into the cardboard.
After covering the frame of the bar counter on all sides, the joints between the gypsum boards are glued with sickle tape. The outer and inner corners can be strengthened with additional plastic pads - but this is optional. All recesses at the attachment points are covered with thick putty. As soon as it hardens, the unevenness is removed with sandpaper, after which the drywall can be primed and proceed to facing work.
What will you need for work?
First of all, you need to purchase materials and prepare tools. But first, it’s worth drawing up a sketch of the future design with all the dimensions, so as not to add too much or forget about important details.
Almost any type of drywall can be used to create a bar counter. Although for a better result, we advise you to understand its varieties and properties:
- Thick gypsum plasterboard wall sheets (12.5 mm) are used to create smooth and durable surfaces that can be covered even with heavy ceramic tiles.
- If you plan to make a radial base for the rack, purchase thinner plasterboard (9.5 mm) - it is easier to bend to get spectacular rounded walls, but it is also quite reliable.
- The bar counter, which will be located next to the work area (for example, with an island arrangement of furniture) can be made of moisture- or even fire-resistant plasterboard. In such a kitchen you will feel completely safe.
Tool preparation
When constructing plasterboard structures, as a rule, one set of tools is always used. It includes everything needed from cutting the profile to finishing the finished structure.
Namely:
- Pencil, tape measure;
- Metal scissors;
- Drywall knife (for shaped cutting - jigsaw);
- Impact drill or hammer drill;
- Screwdriver;
- Construction level, plumb line;
- Milling cutter;
- Wide and narrow spatulas.
Depending on the variation of the design itself and the chosen finishing material, the spectrum may change. It’s better to prepare everything you need in advance so that in the midst of work you don’t have to look for an item you suddenly need.
