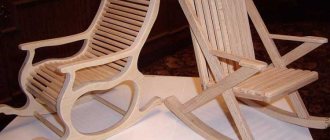
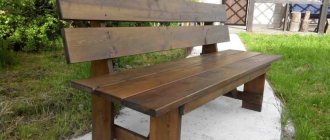
Many people prefer to create a variety of interior items with their own hands. In this case, they embody their ideas in them, and also ensure that they receive a high-quality product, since they use only suitable materials during work. A good solution is a do-it-yourself cabinet made from furniture panels, which is very easy to make, and is also highly environmentally friendly, durable and reliable. Every apartment or house certainly has a closet, which serves as the main element for storing numerous items, clothes or shoes.
Advantages
The advantages of creating such a structure yourself using furniture panels include:
- there is no need to spend a large amount of money on this process;
- there is an opportunity to realize your own unique ideas regarding obtaining an unusual cabinet;
- it may have a non-standard shape and design, but for this, before assembling a cabinet from a furniture panel, competent calculations should be made;
- the resulting cabinet will fit perfectly into the existing interior style, so it will become a real decoration of any room;
- you can choose any suitable fittings for it, as well as make the optimal number of shelves and drawers.
Thus, creating a cabinet yourself using furniture panels is the optimal solution for every residential property owner who prefers to do a lot of housework with his own hands.
Why shields?
Ordinary wood for making furniture will require more knowledge in the field of carpentry; usually the same wood boards, for example, are sawn only in a certain direction, depending on how the fibers lie.
It is necessary to know all the information about the tree species. A larger arsenal of carpentry tools is required. With furniture panels everything is much simpler. They are a kind of semi-finished product, ready for cutting and manufacturing.
Moreover, unlike chipboard, MDF and other wood-based particle boards, panels are more environmentally friendly, stronger, and more durable. True, they require a little more attention during finishing (sanding, impregnation, varnishing). But the result is worth it!
Preparation of material
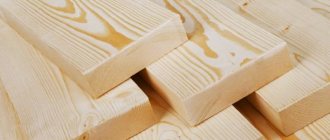
Creating a cabinet with your own hands from furniture panels begins with preparing the necessary materials for this work. Furniture board is a special material made from natural wood, and under pressure the wooden blocks are properly glued to each other.
Furniture panels are presented in numerous types on the market. They differ in size, thickness and type of wood used in their manufacturing process. The most popular are products made from spruce, pine, oak or birch.
The advantages of using furniture panels to create furniture include:
- environmentally friendly materials, which are completely free of any true or even dangerous components;
- are easy to process, so you can get designs that have an unusual and bright appearance, as well as a non-standard shape;
- the cost of the material is considered affordable for every buyer;
- it makes really attractive cabinets.
To create a cabinet from furniture panels with your own hands, prepare the following materials:
- the furniture board itself, and it is desirable that its thickness be 2 cm, and it will be used to create not only the body, but also the facade of the structure;
- plywood, with the help of which different shelves will be created, and its thickness should be 1.2 cm, and this material is also often used to save money for molding internal partitions in the cabinet and its rear wall;
- plywood 6 mm thick, used to create drawers if they are planned to be in the closet;
- furniture rod and various holders, ensuring effective and optimal arrangement of various clothes and other items in the structure;
- numerous fittings, which include handles, hinges, guides and other elements for comfortable use of the cabinet for its intended purpose.
Furniture panels are also usually used for the lid and bottom. You can first provide for the presence of lighting in the design, for which spotlights or a special LED strip are used.
Which ones to choose?
Furniture panels can be made from the following wood species:
- From beech,
- From oak,
- From ash,
- From pine.
For more information about furniture panels in general and each type in particular, see here. Prices are also indicated there. For example, coniferous species (which include pine) are the cheapest and quite practical. Ash is the most premium in color, style, and design. Oak is the leader in strength (and price). And beech occupies the middle price category, and is excellent for bent products, wood carving, and milling.
At the same time, furniture panels made of more durable materials, for example, oak, should be used for those furniture elements that will have to withstand the highest load. And for the rest, you can take cheaper varieties. Especially if you plan to repaint the resulting product in the future.
Grade AA or AB - determines the appearance of the final product (if the texture is not completely painted over). The first ones are without darkening from knots, the second ones are with darkening on one side. Although many people also like this option, when all natural defects are noticeable.
Spliced or solid-lamella panels will also affect the appearance of the product. The second ones are more like an array. And the first ones are considered a little more durable.
Tools
If you plan to assemble the structure yourself, you should prepare the necessary tools for this work in advance. These include:
- varnish for wooden structures;
- self-tapping screws for reliable fastening of individual elements of the product;
- an electric drill, which should have different drill bits;
- chisel, screwdriver, pencil and tape measure, as well as a hacksaw for working with wood;
- sanding machine for wood processing.
All of these tools are simple, so they are usually available to every man who does a lot of housework.
Tools
Drawing
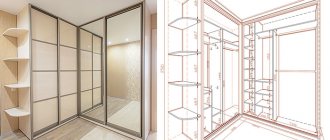
Any sliding wardrobe or other similar structure is assembled only after the preliminary creation of a special diagram presented in the form of a drawing. To do this, you should first decide on the main features of the future furniture, for which you decide:
- what height, width and depth the structure will have;
- what number of different doors, compartments, drawers and other compartments will it have;
- what height will the mezzanines have if they are planned in such a cabinet;
- what will be the filling of the cabinet, and it can be represented by numerous partitions, shelves, drawers, rods or other high-quality elements that increase the comfort of using this product.
After answering these questions, the procedure for creating a sketch of the future cabinet begins. To do this, you need to draw it. If you have experience in creating drawings, then the diagram can be made on a sheet of paper. If you do not have the necessary skills, then it is considered optimal to use special computer programs for design. All you need to do is enter predetermined data, after which the required drawing will be automatically obtained. It is on this basis that you can correctly assemble the cabinet yourself.
Thanks to a well-made drawing, you can get answers to many questions regarding the future cabinet:
- details are drawn up;
- the required amount of materials is calculated;
- it is determined what dimensions furniture panels intended to create an interior item should have;
- it is decided how they will be cut.
Often a new cabinet is created to replace an old design, and in this case it is possible to make exactly the same product. After creating the diagram, it is recommended to carefully consider it, since it will be possible to understand on its basis what appearance the future piece of furniture will have. It is advisable to make changes in advance, since during the actual creation of the structure this will no longer be possible.
Making furniture with your own hands: where to start
In order to begin such an exciting and responsible job , you need to carefully prepare. Namely:
- We decide on the type and composition of kitchen furniture;
- We select the material and accessories according to the plan;
- We prepare the tools necessary for the work. If you don’t have any tools, then we buy the missing ones, if, of course, there is a need for this. In principle, fulfillment of the above points already indicates complete readiness for work. You need to approach the process by thinking everything through. After all, some little things that you ignore can take up a lot of time during your work. Well, now let's get to work.
Cabinet assembly technology
After all the preparatory stages, you can begin to directly create the cabinet. You will assemble the structure quite simply if you strictly follow a certain sequence of correct actions. The entire cabinet assembly process is divided into several stages, each of which has its own characteristics.
Assembly
If the work is being done for the first time, it is recommended to start with the procedure for creating a standard double-door cabinet, equipped with a small number of internal elements. It does not have any specific elements, so you do not need to spend a lot of time or effort on its creation.
To form the structure, certain elements are certainly cut out, and for this it is recommended to use an electric jigsaw, which ensures truly smooth and high-quality parts. This tool creates structural elements:
- 2 walls, which are the side parts of the future cabinet;
- the bottom, and it must be highly durable if it is intended to store shoes on the bottom or other elements and structures of significant weight in such furniture;
- the lid, and it should not be too heavy, and it is also recommended that it be slightly larger than the width and length of the cabinet, as this ensures an attractive cabinet;
- a plinth that ensures the closure of the hole formed between the bottom of the cabinet and the floor of the room;
- two doors;
- the back wall, and furniture panels or standard thin plywood can be used for it;
- shelves, and their number should be determined in advance when creating the diagram of the future cabinet.
It is advisable to make grooves at the bottom of the sides of the structure for the plinth, and they can be rounded or rectangular, and thanks to such elements it is possible to move the furniture close to the wall of the room.
Before assembling the cabinet itself, it is recommended to coat all elements with a special varnish designed for working with wood. It is advisable to apply this product 2 times to ensure a truly high-quality and reliable coating. After applying the first layer, the surfaces of the structure must be sanded, but the second application can be performed after the cabinet is directly assembled.
Assembly is a fairly simple job, carried out in sequential steps:
- holes are marked for fastening elements and future fittings;
- in places where there are marks, holes of the required size are created;
- during the work, it is taken into account that the hinges are usually fixed at the top and bottom at a distance of 10 cm, however, in the presence of massive doors, it is recommended to use three hinges;
- the bottom is fixed between the two side walls using self-tapping screws;
- you can immediately start fixing the base, for which self-tapping screws are also used;
- a cover is installed at the top, and it is advisable to use a level or other measuring equipment during work to prevent any distortions or other shortcomings;
- if no problems with evenness are detected, then the rear wall is securely fixed, for which small nails are usually used, since this wall has a small mass;
- the process of installing the door begins, for which the hinge bowls are inserted into pre-made recesses, and the hinges themselves are fixed to the structure with standard self-tapping screws;
- door handles are fastened using ordinary screws;
- The doors are hung, for which hinges are fixed to the side walls, and it is advisable to use adjustable fasteners, which allow you to obtain a truly even fastening.
Thus, the cabinet assembly procedure is a simple job that can be easily done on your own. To do this, only simple sequential actions are performed. During the work process, it is necessary to constantly use a level or other similar equipment in order to quickly see various distortions or other problems, since they must be eliminated promptly.
Creating markings Fixing the base
Fixing the bottom
Holes
Filling
The assembled structure must certainly have different compartments and other elements to ensure ease of use for its intended purpose. To do this, it is necessary to provide for the presence of drawers, different rods or compartments. Boxes are easily made in successive steps:
- custom plywood is purchased, onto which markings are applied in accordance with the required dimensions of the main elements of the future box;
- holes are drilled, and to prevent the thin material from breaking during this process, it is recommended to make holes at a distance of approximately 10 cm;
- to create drawer fronts, a narrow panel of high attractiveness is used;
- the resulting elements are securely connected to each other;
- To make the drawers easier to use, it is recommended to install special guides, thanks to which the elements simply slide out and slide back in.
In addition to drawers, any closet must have a rod. It is intended for hanging various clothes on hangers. To fix it, special high-strength rod holders are used.
Marking
Creating holes
Connecting plywood
Installing guides
Facade
It is important to get not only a strong and durable cabinet, but also an attractive piece of furniture that fits perfectly into the existing style of the room. Various methods can be used for this. The initially obtained structure is certainly coated with a reliable varnish, ensuring a high-quality protective coating. Various methods are used for decoration:
- painting in different shades, for which it is necessary to use special paints designed for working with wood, and it is also taken into account that the resulting color must fit perfectly into the existing color scheme;
- creating different carvings with your own hands;
- use of various films;
- hand painting, which can only be done if you have the appropriate skills;
- the use of expensive, bright and beautiful fittings that attract attention and provide excellent decoration to the structure.
Thus, if you were going to purchase a wardrobe for any room in a residential building or apartment, then creating it yourself is considered an excellent solution. For this, different materials can be used, but the use of standard furniture panels is considered optimal. Designs made from them have many advantages. The procedure for creating a cabinet is considered simple if you carefully study the instructions in advance and use only high-quality materials.
Sliding doors for the Leroy Merlin dressing room: sliding and folding
Cost calculation
To find out the cost of the headset, you need to provide store employees with information about the desired configuration, sizes, and accessories. Often the final price differs from that presented at the point of sale, as it depends on several factors.
To draw up a project and clarify the cost, you can use the online planner on the company’s website or consult by phone.
When analyzing the data, the program will create a detailed cost calculation, which will take into account the set of modules and parts required to assemble the kitchen. If you do the design yourself, you can see price tags in the lower right corner or in the specifications section.
The next way to calculate the cost is to open the project gallery with exhibition samples. It contains examples of ready-made headsets with prices per linear unit. m. If the configuration parameters differ from the required ones, you can change them using the scheduler.
- Costs of frames, equipment, cabinet configurations. When estimating the parameter, the design and the presence of complex elements are taken into account. For example, a cabinet with 1 door is sold cheaper than a design with drawers.
- Costs of facades. Basic frames are made from laminated chipboard. But in some series, MDF or expensive solid wood is used.
- Dimensions of the kit. The modular system allows you to assemble a small set for a compact kitchen or a large structure for a spacious room.
- Elements of fittings. The use of handles, hinges, and expensive mechanisms increases the cost of furniture.
- A type of countertop. The structures are assembled from chipboard followed by lamination or application of a plastic layer. Budget kits are not moisture resistant and have a limited service life. You can evaluate the build quality when choosing furniture in the store. If the tabletop is made of solid beech, it will be reliably protected from adverse influences.
Expert opinion
Strebizh Viktor Fedorovich, leading construction foreman
Sliding doors for a dressing room differ from swing doors in their mechanism, which when opened does not take up free space. If you want to clarify something, please contact me!
