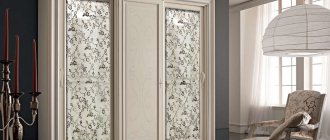
The filling of the wardrobe in the hallway should be thought out taking into account all the features of your wardrobe. This storage system accommodates not only outerwear, but also often serves as a permanent place to keep a vacuum cleaner, ironing board, iron or even tableware for the holiday table. It is especially important to think through every detail of the closet if you live in a small apartment.
Filling a wardrobe in the hallway: tips
What departments should there be in an ideal storage system?
Today you can purchase a ready-made wardrobe, with the contents provided by the manufacturer, or you can think through and fill the storage system with the types of shelves and rods that will be convenient for you, based on your lifestyle. Another factor influencing the internal layout of the wardrobe is the area of the corridor. If there is enough space in your apartment to install a spacious storage system, then there is nothing to worry about, but if the hallway is not large enough, then you can create additional space for storing things by choosing a corner wardrobe or adding mezzanines to a standard wardrobe.
Make a list of the compartments you need
Before you sit down and start drawing the layout of your ideal closet, you need to think about what compartments you will need in it.
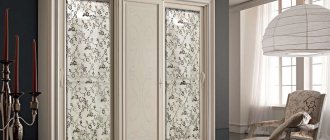
Materials for facades (doors) of sliding wardrobes
Compartment for household appliances
This compartment is usually made in the middle of the cabinet. It should be deep and wide enough to accommodate a model of your vacuum cleaner or any other household appliance that you are used to using all the time, but it is not intended for the eyes of strangers.
Equipment for daily use should be at hand, but hidden from prying eyes
Mezzanine for storing oversized blankets and pillows
It is usually located above the compartment for household appliances. These bedding items are put away on the top shelves of the closet before the onset of cold weather or the arrival of guests, and they will not need to be taken out often. The width and spaciousness of the compartment for household appliances will be harmoniously continued on the upper tier of the cabinet and will solve the problem of storing large textiles.
Pillows are usually stored on the highest shelves
Ironing board storage compartment
Many people often face the problem of storing an ironing board. They try to store it on the balcony (where it can be quite dusty), under the bed (which complicates the cleaning process), in the bathroom (the size of the bathroom does not always allow this). If the depth of your closet is sufficient to accommodate a board, then next to the compartment for household appliances, make a small compartment of a suitable size. And above it you can make a small shelf for the iron.
The ironing board will not require much space, but this will solve the issue of storing it
Storing suitcases, backpacks and travel bags
This compartment can be made at the bottom if the overall size of the compartment allows you such a luxury, but often such things are stored on the highest, long, roomy shelves.
Be sure to think about space for your suitcase
Outerwear compartment
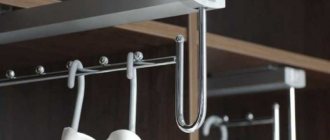
It is advisable that in addition to the wardrobe in your hallway there are also open hangers for outerwear. In the cold season, the weather is changeable, often the bright sun is replaced by heavy rain, or you may be caught in snowfall outside. It is better not to hang wet clothes in a closed wardrobe, so as not to stain other things and damage the furniture. Depending on the length of outerwear you wear, the height of the bar will be selected. If the closet is deep enough, then it is better to choose retractable rods. Thus, you will save space, increase storage functionality and create additional convenience for yourself.
Outerwear should be stored in a separate compartment
Compartment for bags, wallets, sports bags and purses
Depending on how many different bags you have for daily use, you should consider where to store them. It will be convenient if bags and shoes are located in the same compartment, but shoes are at the bottom and bags at the top. Deep shelves, pull-out baskets, and a bar with hooks where you can hang all the bags can be suitable for storing bags.
Bag compartment
Housekeeper
As a rule, the first thing each of us does when entering our apartment is to put down our bag and keys. Then he takes off his shoes and only after that takes off his outerwear. Therefore, it is recommended to make the first compartment of the closet, located from the door, for storing bags, shoes and place a compartment for keys there. Once the keys have their place, you won’t be able to forget them at home by simply choosing another bag.
Keep your keys in one place so they don't get lost
Shoe storage
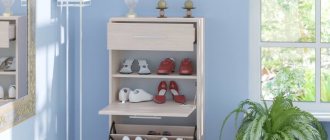
Shoes are usually stored on the bottom tier of the closet. Pull-out shelves, metal baskets, and closed shoe racks are suitable for this. Which option is right for you depends on the number and variety of shoes you have. If the size of the closet allows, then you can make a compartment in the form of a honeycomb, where each cell will be intended for a specific pair of shoes.
It is important to carefully consider the place for shoes
Compartment for casual clothes
It is not always possible to have a wardrobe or a dressing room in the bedroom, so the bulk of your wardrobe can be placed in the hallway. The filling of this compartment should be carefully selected to create maximum convenience and comfort for yourself. For example, to accommodate belts, you can build in a retractable hanger designed specifically for this item of clothing. For the convenience of choosing a suitable tie, there is an additional element - a tie. To prevent your trousers from getting wrinkled, place them on the trouser pant. Make sure that your scarves and hats also find their rightful place.
Tiemaker
Neatly folded straps
Laundry storage
Retractable closed shelves with distributors inside are suitable for storing linen.
It is better to store laundry in a closed drawer with delimiters.
Box for storing various small items
Such a drawer can store shoe polish, a brush for cleaning things, spare hangers and other small items that are important for everyday use, but are so difficult to keep in order.
You can store various small items in a purchased box with a lid or in shoe packaging.
Photo
Sources
- https://prihozha.ru/74-napolnenie-shkafa-kupe-dlya-prihozhey-shemy-chertezhi-i-fotografii.html
- https://fotollia.ru/shkaf/vnutrennee-napolnenie-v-prihozhey
- https://mblx.ru/holl/270-napolnenie-shkafa-kupe-v-prihozhuyu.html
- https://stroyday.ru/stroitelstvo-doma/interernoe-oformlenie-doma/napolnenie-shkafa-kupe-v-prixozhuyu-sovety.html
- https://dekoriko.ru/shkaf-kupe/v-prihozhuyu-dizajn-vnutrennih-variantov-napolnyaemosti/
Types of sliding wardrobes. Pros and cons of each type
In order to decide on the choice of a sliding wardrobe suitable for your hallway, it is worth remembering all the existing types of this furniture, and also think about the advantages and disadvantages of each type.
Table. Types of sliding wardrobes.
| Variety | Advantages | Flaws |
| Built-in | Fits perfectly into any suitable space. Embodies any design idea. Possibility to make it yourself. | Cannot be moved to another location. |
| Semi-built | Attaches securely to the wall. Fills empty niches in space. | Cannot be moved. |
| Hull | Can be used to divide space into zones. Easily disassembled, assembled and rearranged from place to place. | There is a lot of free space that cannot be filled with things. Suitable for people with few belongings. |
| Angular | Using corners, expanding the usable area of the wardrobe. | Often you have to make it to order, which is more expensive than other options. |
| Straight | Versatility and simplicity. | Suitable only for the simplest set of things. You may find that the standard design for your wardrobe is inconvenient. |
| Radial | Extraordinary. It will fit into any interior and become its decoration. | Expensive and not always practical. |
| Modular | It is convenient to create and supplement the storage system with various modules and options. | The cabinet will be limited to those modules that are in the manufacturer’s collection. |
Built-in wardrobe fits into any free niche
Semi-built-in storage system is wall-mounted on one edge only
Cabinet furniture from the manufacturer will not suit every client with its contents
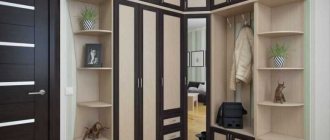
Corner solution will save space in the room
Radius sliding wardrobes look very impressive and modern
The modular storage system is assembled from different furniture elements sold separately
Hangers
The most spacious department, designed to store things in their most natural state - on hangers. They are located on a special crossbar, which is mounted at a height of 140-180 cm from the floor. The minimum transverse size of the section should not be less than 60 cm (preferably 70-80 cm).
If the compartment is wide enough, it is possible to install several rods perpendicular to the doors, but the convenience of such an arrangement is questionable - things located near the wall are invisible and difficult to access. On the other hand, it becomes possible to sort: dresses on one bar, outerwear on another. The most convenient, but quite expensive option is retractable mechanisms located perpendicularly.
The minimum length of a standard crossbar is 50 cm. However, the dimensions of corner structures usually allow enough space to be allocated for a full meter section. The most common size is 100-120 cm.
Filling straight wardrobes
Two-door storage systems
The filling of the closet depends on what exactly you are going to fill it with, how many shelves and rods you will need to keep all your things in order. The traditional filling of such cabinets is one compartment with a high rod and one compartment with shelves. In this case, you will have the opportunity to hang your coat on a hanger and put your bag on a shelf.
The best option for a two-door wardrobe
It is advisable that the closet have not only open shelves, but also closed drawers. It will be convenient to store various small things and those things that you don’t want to gather dust in.
Examples of cabinets with and without drawers
Examples of filling 3-section cabinets
Having the opportunity to put a storage system with three compartments in the hallway, you can differentiate between them based on which items you have more in your wardrobe. If you have a large collection of different pairs of shoes, then you can allocate the entire first compartment for storing them, adapt the second compartment for outerwear, and place your bags in the third. The three-section cabinet allows for space for a vacuum cleaner or ironing board.
Three-section cabinet with a rod in the middle compartment
Expert opinion: Masalsky A.V.
Editor of the “construction” category on the Stroyday.ru portal. Specialist in engineering systems and drainage.
If you don’t have a lot of outerwear, then you can allocate only one compartment for storing it and it will be more convenient to make it in the middle compartment.
An example of a three-section wardrobe with two compartments for clothes
Such filling for a storage system in the hallway will be convenient for a family. For example, the husband’s outerwear will hang in the right compartment, and the wife’s in the left compartment. Or one compartment can accommodate the clothes of both spouses, and the other compartment is dedicated to storing children's clothes.
Having the opportunity to install a four-door wardrobe, you do not necessarily need to make four different compartments inside it. Due to the free space inside the cabinet, you can make the central section more spacious by combining the second and third compartments. Or, on the contrary, make the compartment in the middle narrow, but increase the size of the side compartments.
It is not necessary to strive for all sections to be the same size
Layout Tips
Photos of various cabinet interior layouts can be seen below. Each owner of this piece of furniture independently decides which arrangement of items will be used. To get a truly beautiful design that will be easy to use, take into account the advice of experts:
- On the left there is free space for storing outerwear or formal wear on hangers;
- On the right side there are shelves on which various items and clothes are stored;
- The top is used for bedding, large bags, blankets, or other similar items that are not used very often by people and therefore rarely need to be taken out of the closet;
- Storing shoes at the bottom, for which narrow cabinets are used, often with a special plastic grid.
This layout is considered the most popular and used. Each homeowner independently determines which layout will be used for the cabinet, taking into account the chosen design, the number of people using the product, and user preferences.
Filling corner wardrobes
Examples of corner compartments of different shapes
Corner storage systems benefit from the fact that thanks to them, the maximum space in the room is filled, including the corner area.
Example of a corner storage system
If you make the corner closet deep, it turns into a mini dressing room. It is convenient to place not only a clothes rail, but also open shelves, closed drawers, shoe baskets and long upper shelves for storing suitcases or hats.
Inside the corner cabinet you can store an ironing board or vacuum cleaner
It is not necessary to cover the entire floor of the compartment; you can make a corner wardrobe of this shape
The corner storage system can be made in any shape to suit the design of your home.
Mezzanines or pantographs
The mezzanine is located at the top and is not easy to reach without a chair or ladder. This section is convenient for storing out-of-season clothes, blankets, pillows and other items that do not need quick access. Installing mezzanines is not necessary, but without them, the unused space between the ceiling and the top of the cabinet will be useless.
A pantograph is a kind of lift to facilitate access to the upper sections, which can be filled with either shelves, rods or baskets. This is a worthy alternative to mezzanines; with its help you can implement modern and easy-to-use designs. However, such solutions are expensive, and inexpensive analogues do not work for a long time.
TOP 10 best manufacturers of sliding wardrobes
| Photo | Name | Rating | Price | |
| #1 | Aristo | ⭐ 5 / 5 1 - voice | Find out more | |
| #2 | Cideco | ⭐ 4.95 / 5 | Find out more | |
| #3 | Komandor | ⭐ 4.9 / 5 1 - voice | Find out more | |
| #4 | RAUMPLUS | ⭐ 4.85 / 5 | Find out more | |
| #5 | Ronikon | ⭐ 4.8 / 5 | Find out more | |
| #6 | Ariani | ⭐ 4.75 / 5 | Find out more | |
| #7 | Stanley | ⭐ 4.7 / 5 | Find out more | |
| #8 | Best Furniture | ⭐ 4.65 / 5 | Find out more | |
| #9 | FRAN | ⭐ 4.6 / 5 | Find out more | |
| #10 | MnogoMeb | ⭐ 4.55 / 5 | Find out more |
Which wardrobe manufacturers would you choose or recommend to purchase?
Take the survey
Master Class. How to assemble and install wardrobe doors
Let's see how the process of installing sliding doors for a built-in wardrobe takes place. In this case, the interior of the furniture has already been assembled and installed; to use it, you only need to install the doors.
Step 1. The first step is to buy or rent all the tools. In this case, you will need a screwdriver, an aluminum saw (a miter saw will be used here), and a hammer drill equipped with a drill. Scissors and tape measures, drills and hexagons, etc. may come in handy.
Tools required for work
Step 2: The first step is to install the top rail of the coupe system on the ceiling. To do this, you first need to measure the width of the opening (for example, from wall to wall).
The width of the opening is measured
Step 3. Next, you need to measure with a tape measure and cut off the required piece of aluminum profile with a saw.
The required length of the profile is measured with a tape measure
Aluminum profile cutting
Step 4. Now you need to drill holes in the profile to mount it on the ceiling. There are three pairs in total, at the beginning of the profile, in the middle and at the end. But there may be more.
Holes are drilled in the profile
Holes are drilled in pairs
Step 5. Together with an assistant, you need to lift the profile and align it along the end of the cabinet, and then screw it using self-tapping screws. This will not be easy to do without the help of another person.
The profile is aligned along the end of the cabinet
Screwing the profile
Step 6. Now you can proceed to installing the bottom rail for the doors. Just like with the top rail, first you need to take measurements.
The width of the opening is determined from below
Step 7. Again, you need to mark the desired size of the rail on the metal profile, and then cut off the section with a saw.
Another piece of profile is cut off
Step 8. Next, in the place where the rails will be mounted, you need to lay the prepared section of the profile, without fixing it yet. At this stage, you need to insert compartment doors into it and make marks on the bottom rail in the places where the stoppers will be installed.
Laying the prepared profile
Places for installing stoppers are marked
Step 9. Then, after fitting, you need to install stoppers on the rail in the right places and then screw the bottom rail to the floor or bottom of the cabinet. The bottom rail can be fixed with double-sided tape. Then, before applying the sticker, you first need to degrease the surface, and only after that glue the tape itself.
Surface degreasing
Using double-sided tape
Fixing the bottom rail
Step 10. After this, you can install the doors in place. The wheels on the bottom of the doors should fit into the corresponding grooves.
Door installation
In this case, the wheels are already installed on the doors themselves. But how to fix them correctly if they were separate? There is nothing complicated here either.
Step 1. The cabinet must include special fittings. If the cabinet is made by hand, then such accessories can be purchased separately in the store. It consists of metal elements of different types - with and without a wheel. Those that do not have wheels are mounted at the top of the door at a short distance from its side edge, but flush with the top end. The fittings must be screwed on using self-tapping screws.
The fittings are screwed on
Self-tapping screws are used for this
Step 2. The second type of hardware, which has wheels, needs to be fixed at the bottom of the door so that the height is optimal. Two pieces of each type of element must be attached to each sash.
How to attach fittings with wheels
Step 3. Next, you just need to screw on the handles, and you can install the doors on the cabinet body.
All that remains is to screw the handles
Step 4. First, you need to insert the sash into the far upper rail, and then, carefully lifting the door, install the wheels on the lower rail. The remaining doors are installed in the same way, but on the nearest rail, etc.
Cabinet door being installed
Attention! Depending on the type of construction, the wheels on the doors can be located either at the bottom or at the top of the cabinet.
Wardrobe door leaf width calculator
Go to calculations
Voting: who is the best manufacturer of sliding wardrobes?
Which wardrobe manufacturers would you choose or recommend to purchase?
Aristo
50.00 % ( 1 )
Cideco
0.00 % ( 0 )
Komandor
50.00 % ( 1 )
RAUMPLUS
0.00 % ( 0 )
Ronikon
0.00 % ( 0 )
Ariani
0.00 % ( 0 )
Stanley
0.00 % ( 0 )
Best Furniture
0.00 % ( 0 )
FRAN
0.00 % ( 0 )
