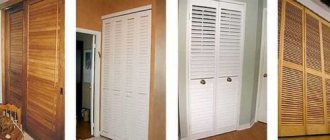
In order for a person’s health to always be in good shape, ventilation must work in the house. A constant flow of fresh air has a beneficial effect on your physical condition. This can be achieved by keeping all doors open at all times. But this is impractical, since interior partitions serve primarily to separate and isolate rooms. This is where installing louvered doors comes to the rescue. The room will be closed, and fresh air will flow into it.
Advantages and disadvantages
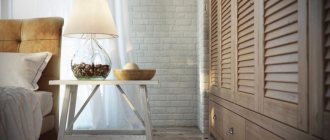
- Louvered doors can become a highlight in most interior styles, because their non-trivial design will decorate any room.
- Most systems have movable slats (slats), which allows you to regulate the supply of oxygen and light to the room.
- When repairing a blind structure, it is not necessary to dismantle the entire system; it is enough to replace individual damaged elements.
- The louvered door does not impede air circulation, providing natural ventilation. This option becomes especially relevant for kitchens, wardrobes and bathrooms.
But there are also several negative features of using such doors:
- The smells and light that louvered doors are able to transmit are not always pleasant or desirable.
- Due to the large number of elements in the design, and often the high cost of materials, the price of louvered doors cannot be low.
- The blind system is difficult to paint. If painting is still necessary, you will have to disassemble the entire structure. All elements need to be painted and dried very well separately.
- The sound insulation of this design is very low. This should be taken into account when choosing an installation location. Perhaps this is not the best option for a bedroom or children's room.
Types: wooden, plastic, metal
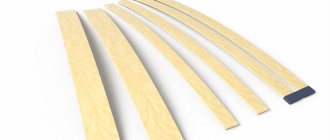
A shutter door is a durable frame into which thin slats are inserted. The slats are inserted into the frame at an angle to block the path of light, so the louvered door is impenetrable to prying eyes. But the gap between the slats allows air to pass through the canvas.
Since the lamellas are very thin, they are not able to provide high structural strength. The role of the load-bearing element in a louvered door is played by the frame. A handle, hinges and other fittings are attached to it. If necessary, you can even embed a lock into the frame, but a louvered door, for obvious reasons, cannot be a reliable barrier.
A number of materials are used to make doors of this type:
- Tree. Wooden slats look the most luxurious. This door will serve as a decoration for various interiors. The main disadvantage is the high cost, although the price of a louvered door will be somewhat less than that of the same door made of solid wood. This material is also afraid of high humidity, because... wood tends to warp and swell from water.
- Aluminum alloys. This is the most durable material used in the construction of louvered doors. The strength and durability of the material allows the use of such doors in technical rooms, storage areas, etc. In addition, aluminum is not afraid of moisture. Disadvantages: high price and relatively heavy weight of the structure.
- Polymer profile. This is the most budget option, which is inferior in strength to aluminum, and in aesthetics - to wood. The main advantage of plastic shutter doors is their affordable price for a wide range of people.
When designing doors, blinds can be combined with other elements. For example, doors look good if the two lower quarters are made of solid wooden panels, and the two upper segments are filled with slats.
The design solutions also differ. Blind doors can be hinged (with one or two leaves), sliding or folding like an accordion. Such a variety of design options allows you to fit louvered doors into almost any interior.
How to install louvered doors in a niche
Miscellaneous Features of installing louvered doors with your own hands
Constant indoor ventilation is simply necessary for human health and well-being.
Convection should be used when cooling and heating the room to create a normal level of humidity.
This aspect is so important for humans that modern manufacturers propose installing special nets between separate rooms.
Attention! In the cold season, if the interior doors are open, warm air will spread throughout the room much better and create the same temperature in the house.
But the door is designed to isolate the room. Therefore, it cannot always be open. At this point, ventilation stops. Modern designers have found an excellent solution to this problem - installing louvered doors. This option will be much better than keeping the door installation open all the time.
Louvered doors in the interior
DIY cabinet with louvered doors: preparation of materials, assembly
Recently, wardrobes built into niches have been in great demand. But, you can also think about furniture with hinged doors. It is no less aesthetically pleasing and, most importantly, you can make such a cabinet yourself.
Preparing materials and tools to create a cabinet with louvered doors
First you need to measure your niche. For example, let’s take the size: niche width: 120 cm, height: 240 cm.
REFERENCE: a very important parameter is the depth of the wall. If you are planning to organize a closet with a classic rod (when things hang perpendicular to the door), then you need to remember: the depth should not be less than 50 cm (standard hanger size).
Let's say that our depth is only 50 cm. It should be noted that the facade itself will take 5 centimeters, therefore, we will not be able to use the standard rod option. But, there is a Euro hanger on sale - it is located on its side, and things are placed with the front side facing the doors.
Technical use
Due to their high air permeability, iron shutter doors have become very widespread. Wooden structures do not provide sufficient protection against intrusion by criminals. And metal blinds combine the ability to create a good barrier and provide ventilation and maintain temperature conditions. Due to this, they are often used - steel blinds can be seen at substations, blind doors
used where there is equipment that generates a lot of heat.
At home, the property of blinds to allow air to pass through is also conveniently used. Use in the toilet to save from condensation and mold has already been mentioned.
Another popular case is decorative wood louvres.
panels on heating radiators. They allow warm air to flow freely, while at the same time serving as a wonderful decoration and part of the style of room decoration.
Wooden louvered doors for wardrobes, bathrooms and toilets, kitchens
All photos from the article
Louvre doors have been used by furniture makers, builders and other specialists in one way or another connected with interior design and building equipment for centuries. They are periodically forgotten, then again, having remembered, they are actively used in the most expanded range of areas. In our article we will describe possible options for using such products.
Doors with horizontal rivers improve ventilation of living spaces
Possible options for the location of wooden shutter doors
Standard wooden shutter doors for cabinets are installed on cabinet furniture as facades. Below you will learn how to apply them directly in this way and “outside the box.”
Bedrooms and living rooms
As you know, the best storage for clothes, linen and other things are wardrobes and chests of drawers.
So, a louvered cabinet facade has several advantages over solid doors:
- Possibility of ventilation (things can “breathe”), which significantly improves the quality of storage.
- As a result of good ventilation, moths will not appear in the closet.
For your information! The moth does not like dry and fresh air; its best habitat and breeding habitat is humid, warm nooks with a stagnant climate.
Two types of furniture are used for the wardrobe:
“Ventilated” furniture allows you to avoid the appearance of unpleasant odors on clothes
Regardless of the design features of the clothing and linen storage, louvered doors can be used, installed in various ways:
- Using furniture hinges for wooden door frames, the leaves of which open and close in the usual way.
- With a set of guides for wardrobes with sliding doors.
Wardrobe rooms
Now it has become fashionable and, I must say, affordable for large apartments to arrange entire dressing rooms. So, on the line between the space of the dressing room and other rooms (usually the bedroom), it is customary to install louvered doors. For dressing rooms, in addition to the two methods of fastening doors described above, the “accordion” option is possible.
These doors fit especially well in wooden rooms, where they blend with the interior
It is possible that wooden shutter doors can be installed inside a room – a wardrobe, or on separate parts of a “storage room”.
Bathrooms and toilet rooms
Doors with slats look very impressive in bathrooms and toilets.
In these rooms, blind doors are used:
In the photo - all unsightly communications under the washbasin are hidden in this way.
- Bathroom screens.
- Panels for decorating niches with pipes, shut-off valves and metering devices.
- Screen for water heating system.
Attention! For covering water supply and wastewater pipelines, as well as for the boiler piping system, ventilated structures with blinds are a priority.
The instructions recommend their use, as this will help avoid condensation on communications.
Kitchens
Following the same principle as in bedrooms, louvered facades are installed on kitchen units, usually made of natural wood. Cabinets for storing groceries, just like clothes, need constant access to fresh air to prevent the appearance of cereal bugs and moths.
In addition, it is worth noting that regardless of the installation location, louvered doors make the interior of the furniture and room extremely attractive and unique.
Design of openings
Separately, we should talk about the equally frequent use of such doors in the design of windows, balconies, and doors. This style “a la Provence” is in great demand today not only among the French.
Louvered wooden painted doors are installed as shutters both indoors and outdoors. In any case, they are not only a decorative element that makes the appearance of the openings from the outside completely complete and quite elegant.
Covered up on a hot summer day they:
- They will protect from the heat without interfering with the free circulation of air.
- They will not provide complete blackout like blind shutters.
Other Applications
The use of louvered doors does not end there.
You can make wonderful decorative elements from them:
- False shutters for openings and street buildings.
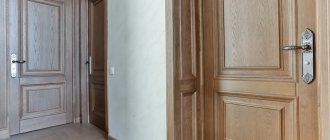
Louvered doors can be installed as both entrance and interior doors
- Screens - for dividing space, for small partitions separating, for example, a bedroom from a ladies' corner.
- Ventilation grilles for heating devices.
With the help of blind products, huge radiators will no longer confuse you and your guests
Purchase or self-production
Recently, simple door designs - blinds made of pine - have been sold in domestic stores. Their price is quite affordable, and, what’s even more pleasing, there are a variety of sizes of wooden louvered doors.
Here are some of them:
- Width options - 294, 394, 494, 594 mm for all door heights shown below.
- Heights – 606, 720, 993, 1100, 1700, 2013, 2422 mm.
As you can see, the range of dimensions is presented in abundance; anyone can choose the appropriate option for themselves and do the finishing and hanging on site with their own hands.
You can also purchase more expensive louvered doors made of valuable wood, painted at your discretion.
Without a doubt, there are woodworkers who can make similar cabinet doors to individual sizes on their own. (See also the article Wooden stools: features.)
Conclusion
The use of the above-mentioned products is not limited to generally accepted standards; in this case, only two things serve as the framework: financial capabilities and your ideas. To come up with something unusual, look at non-standard solutions using blind doors on the Internet.
Installation
You can install such blinds yourself. First of all, you will need to first remove all the dimensions of the frame structure before purchasing. Depending on the type of opening mechanism, make a small note.
After this, you should carefully drill a hole to fix the door hinges or guides. Then the mechanism is mounted on the body of the wardrobe system and the blinds are hung. At the final stage of installation, the shutters with rollers are secured to the guides.
How to paint
The main difficulty lies in the large number of planks. When painting them, there are a lot of drips and splashes. In order to avoid this trouble, there is a special procedure:
- We seal the frame on both sides of the door with masking tape. We cover the floor and adjacent areas of the walls, furniture, etc. with paper.
- Using a wide flat paint brush (7-8 cm), apply a layer of primer to the planks. Wipe the brush well on the edges of the jar so that there is a little composition on it. We process the planks on one side first.
Applying stain - creating the desired color and effect - Using a dry flat brush of a smaller size (5 cm wide), remove all drips and stains, rubbing the composition evenly.
- Let's go to the other side.
- After this, you can process the frame by removing the masking tape from it.
With this order of work, the quality of painting will be at least normal. It is important to remove drips in time, before drying. It is better to work with compounds that do not dry very quickly.
If you have a spray gun, the work will go easier and faster.
For those who want to make louvered doors with their own hands, the following video will be useful.
What to consider when choosing
- Thin slats will look attractive from an aesthetic point of view, but the most practical and durable slats will be 45-70 mm wide.
- Since the slats are thin, they can react sharply to contrasts in temperature and humidity. A high-quality coating of paint and varnish can protect products from deformation.
- The lamellas made from glued lath have the greatest strength and resistance to deformation.
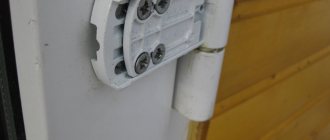
- It is important to pay attention to the fittings: hinges, driving mechanism. They should work smoothly, without jerking.
- Not all shutter doors are designed for installation in rooms with high humidity, so in bathrooms you should give preference to a plastic shutter design.
- According to the technology, the assembly of the structure must be carried out without glue, so when choosing, you must carefully inspect the surface so that there are no smudges or traces of adhesive on it.
Expert advice
- Professional manufacturers advise: before starting work, make a draft of the future product. This will allow you to avoid making mistakes with the sizes. Every little detail must be taken into account. For example, the width of the material.
- To fill the interior of the closet, you can select special baskets for things, place modern drawers, install nets and organizers for things.
- Choice of material: laminated chipboard is a standard economy class furniture option, it requires covering the edges and does not allow moisture to enter. MDF - made from tightly compressed chips, covered with PVC film, which protects the part from liquids, can be milled and does not require an edge. Plastic (PVC) is the most moisture-resistant option and can be easily cut and processed at home. Any of the materials is suitable for filling the installation.
Subscribe to our Social networks
Application area
The scope of use of louvered doors is determined by their properties. They are indispensable in rooms that require constant ventilation.
At the same time, the degree of sound insulation should not be important for these rooms. There are several such rooms in our houses and apartments:
- Technical rooms - storage rooms, laundries, wardrobes. In the case of dressing rooms, it is worth thinking about the feasibility of this option. After all, it is advisable to protect clothes from dust. A compromise is possible: make a louvered grille in the upper part, where there is less dust and the warmest air accumulates.
- Bathroom.
In the bathroom, it is desirable to quickly remove excess moisture and louvered doors will help with this. But this option is only good if the bathroom is separate, since a combined bathroom will become a source of not very pleasant sounds and smells. Louvered doors to technical rooms are an excellent option to achieve ventilation without organizing a special air duct - Boiler rooms facing the street. The street door for such a room may have a louvered grille. Only it should be adjustable so as not to make the room too cold in winter. One thing: before installing such doors, check with your local fire department. Just in case.
In addition to serving as doors between rooms, louvered structures can be used in furniture. They are good:
- In kitchen cabinets, both floor and wall mounted. In the dryer and the cupboard with cereals they provide quick ventilation, in the rest - more like decorative ones.
- In cabinets that cover the pipes in the toilet as an enclosing structure.
You can hang them on hinges, or you can put them on magnets. In bathrooms, toilets, kitchen cabinets can be used as cabinet doors - As blinds on windows. The problem of light scattering is solved very well. It does not cut off completely, creating twilight lighting.
- For wardrobes, chests of drawers and other furniture located in living rooms. The advantages in this case outweigh the disadvantages, and the appearance is interesting.
Another area of application is as shading structures with a large glazing area. On terraces, winter gardens, large balconies and loggias with continuous glazing. Why are louvered doors better than regular blinds? The fact that “fixed doors can be opened while leaving shutter doors closed. There will be free air access and there will be no too bright light.
Louvre doors can be used as shading
As a partition that delimits a room. For example, fencing off the sleeping area in a studio apartment. This option is ideal if there is no window in the fenced off area. Such a partition will provide air access, let in sufficient light and create privacy.
A partition made of blinds to separate the sleeping area
In principle, louvered grilles can be used for other purposes than their intended purpose - as a notice board, a screen, covering or separating something.
Required materials and tools
First of all, to make doors you will need high-quality dried wood. An importance of no more than 12% is allowed. Also, the presence of knots and other defects in the wood is not allowed. You will also need to stock:
- PVA glue.
- Finishing materials: dowels, varnish,
- Tools for assembly: mallet, hammer, screwdriver. Self-tapping screws are usually used as fasteners.
- To process wood you will need a sanding machine. You will need medium to fine grit sandpaper.
- For marking you will need a ruler, tape measure, and pencil. To install the elements correctly, prepare a level (bubble type, construction) and a plumb line.
- To make lamellas quickly you will need a milling cutter and a thickness planer.
As you can see, a fairly wide range of tools and the ability to use them at a good level are required. Therefore, it will often be a better decision not to make the doors yourself, but to turn to manufacturers.
Laminated varieties
As you can see from the reviews, side doors made of laminate are the most budget option. The decorative coating is applied to the MDF strip frame. The film material is created from prepared paper that imitates wood. To make the product stronger and more resistant to moisture, the base is impregnated with resins. It is worth noting that such modifications are not intended for installation in rooms with high humidity levels. In addition, laminated models are not recommended for installation if there is a high risk of external influence (small children, pets).
Manufacturing of louvered doors
Let's look at the entire process of creating louvre filling for door panels using a specific example. Before you start making doors, you need to prepare tools and materials.
Tools
- Circular Saw;
- thicknesser;
- manual frezer;
- grinder;
- jigsaw;
- conductor;
- clamps;
- marking tool (ruler, square, marker);
- brushes
Materials
- pine beams and boards;
- wood glue or PVA;
- stain;
- furniture varnish.
Helpful information! The list of tools includes a conductor. It must be done to accurately form the grooves of the blind slats. How to make a simple conductor can be seen in the video:
Assembling a cabinet with blinds
If you have read the article to this point, it means that you have some experience working with power tools and you can assemble a cabinet with louvered doors with your own hands. As you understand, the key point in such an assembly is the blind doors, and they can be hinged, sliding or made like shutters. In any case, blinds should not only serve as a beautiful decoration, but also as ventilation for the contents of the closet, which is very convenient in bad weather when you have to leave wet clothes on the hanger.
Closet
I will not tell you how to make the closet itself, since my goal is to explain how to make shutter doors with your own hands. However, I am posting several drawings for assembling cabinets so that you can use them if necessary. If you want to use these drawings, then instead of regular doors (solid or with a mirror), you will need to install a shutter door. In addition, you can use an old cabinet by removing the doors from it and remodeling it to suit your needs. But if you do assemble this furniture yourself from scratch, I recommend using laminated oriented strand board (OSB) for this purpose.
What do you need for work?
For work you will need materials:
- bars and boards (needles):
- any wood glue or PVA;
- wood varnish, clear or stained (to your taste).
Prepare the following tools:
stationary or hand-held circular saw (circular saw);
jigsaw;
thicknesser (may not be needed if the thickness of the workpieces matches the thickness of the parts);
manual frezer;
grinding tool (grinder or grinder with appropriate wheels);
clamps of any type;
tape measure, square, pencil;
conductor (you need to do it yourself).
Conductor
The assembly of the blinds is done according to the drawings, but first you need to make a jig (template) so that all the slats are symmetrical with respect to each other after installation. The top image shows the principle of making a jig, which will allow you to make grooves on two posts at the same time, which will lead to perfect symmetry. Of course, the holes in the form of a stencil can be placed at a different distance from each other, but this does not change the essence.
The photo shows that there are holes for dowels at the bottom. That is, you first arbitrarily cut the first two grooves, and then insert dowels into these holes and, clinging to the groove with them, cut out the next one, and so on until the end of the racks. In the center of the jig (along) there are two more holes for dowels, which allow you to fix a gasket of the required thickness - it will move the posts apart if there is a need for it. If the posts come into contact when cutting the grooves, then you can simply remove the jumper from the jig. Recommended groove length 30 mm and width 8 mm.
Shutter doors
Procedure:
- Take a 50x50 mm sanded block and cut two posts to the height of the doorway in the closet.
- Place the two pieces together and join them together.
- Place the jig randomly on the blocks, using a square to cut out the two bottom grooves, but secure the template with a clamp so that it does not move.
- Then insert the conductor dowels into the cut grooves and continue removing them to the end of the posts.
- Now you need to make lamellas 30 mm wide and 8 mm thick, which will correspond to the selected grooves, and round their edges with a grinder or grinder with a turtle disk.
- Insert the upper and lower slats into the grooves of the racks and temporarily tighten them with clamps. Now you can measure the crossbars for the door frame and cut the block to the required length.
- These jumpers will be fixed with dowels and carpentry or PVA glue.
- Now you can start assembling, but first coat all the grooves and dowel holes with wood glue.
- Insert the slats into the grooves and secure the jumpers (top and bottom) with dowels.
- Tighten the assembled structure in three places with clamps and leave for a day until completely dry.
- Open the product with the varnish that you prepared for this and after drying the doors can be installed on the cabinet.
