The arrangement of a personal plot is carried out using various methods: awnings and gazebos are installed, paths are laid, flower beds and flower beds are laid out. The final nuance is garden furniture. A DIY garden bench with a backrest is suitable for arranging a small recreation area: drawings and diagrams of beautiful structures, as well as recommendations for their creation, can be found in this article.
A garden bench with a back can be a key element in the design of the local area
Types of designs and photos of garden benches
The modern range of garden furniture is quite extensive. Product classification is carried out based on the following characteristics:
- characteristics;
- material;
- functionality.
Wooden bench located on the veranda of a private house
Photos of DIY garden benches, their functional side
The functional features of furniture are valued along with their practicality and durability. All products are divided into two large groups:
- benches used exclusively for sitting;
- multifunctional benches (the product can perform several functions - be a bench, rocking chair or table).
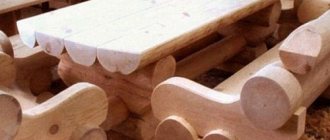
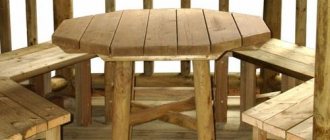
Bench with back, made of logs and boards
Many owners of their personal plots install swing benches. To create them, different types of materials are used, and the structures themselves can be given an interesting shape. To make such a bench convenient to use, you definitely need to build a canopy over it. It will provide protection from the sun and precipitation.
A swing bench is an excellent option for garden furniture
Benches with a backrest that have a stationary type of placement are popular for making with your own hands. Most often they are made of concrete or brick, and a special place is selected for installation. Such products are not afraid of the influence of the sun and moisture.
There are folding benches with small dimensions and a mobile design. They will come in handy if the dacha plot is rarely used. During the absence of the owners, folding benches are put away in the garage for storage or in the house.
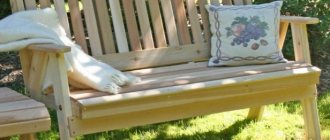
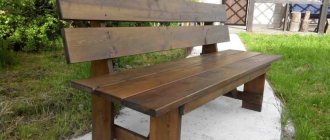
A wooden bench with a back is used to organize a relaxation area in the garden
Photos of do-it-yourself country benches made of wood and metal
Metal products have the highest strength characteristics. They are reliable, durable and can be used throughout the year. Metal structures are unpretentious in terms of maintenance. It is enough to periodically coat their surface with an anti-corrosion agent, which will protect the benches from the harmful effects of moisture.
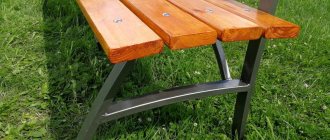
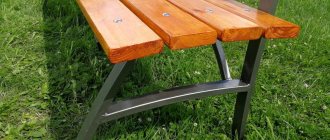
Example of a wooden bench with a metal frame
A bench made entirely of metal will have a very massive appearance, which is why modern designs are made using forged patterns. It should be remembered that for this you need to acquire a welding machine.
Most owners of suburban areas who decide to make a bench for their summer house with their own hands prefer wood. This material becomes the basis for creating benches with a beautiful design, excellent performance characteristics and a warm texture. Regardless of the design of the garden or yard, wooden products can always be harmoniously integrated into the landscape.
Combined bench made of wood and metal with forged elements
For protection purposes, the surface of the product must be coated with a varnish or paint. This will prevent damage to the wood caused by insects, fungi, mold, as well as moisture and sun. Using a varnish as a finish will help preserve the natural grain of the wood.
Metal products are characterized by high strength and long service life with minimal maintenance
Photos of do-it-yourself stone benches
If you prefer practical options for benches, you should pay attention to products made of stone. This type of material is characterized by low cost and long service life, and the structures are durable, reliable and aesthetically attractive.
Stone belongs to the category of materials of natural origin. Despite this, the designs of such benches will not always be able to support any design and style of the garden. The site must have stone elements as an addition. The benches look especially advantageous against the backdrop of a residential building, partly made of stone.
Bench made of natural stone, with soft mattresses and colorful pillows
A good ensemble will be made of stone:
- steps;
- paths;
- bodies of water;
- gabions;
- flower beds.
Supports for fences, gazebos and canopies can be made partially or completely from stone. If at least one of these elements is present on the site, stone benches will always come into place. However, it should be remembered that such products do not have a back.
Even the simplest stone bench looks elegant, noble and solid
Photos of DIY garden benches: successful homemade products made from plastic and other materials
Plastic products have a number of advantages, which include:
- simplicity and light weight of the design, so transporting the material does not cause difficulties, and the bench itself can be moved from one place to another;
- efficiency;
- a wide selection of colors, which allows you to produce a product that will subsequently fit well into the garden design;
- practicality (folding-type structures can be easily disassembled and stored in the trunk and also easily assembled on site).
Benches made of plastic are lightweight, which makes them extremely mobile and easy to transport.
Combined combinations of materials of different texture, texture, color and origin are used not only for decorative purposes. The most common option is a combination of stone and wood.
Combined bench made of metal and wood
Structures made of wood and complemented with stone or metal elements look original. In such projects, wood creates a soft and beautiful texture, while stone and metal provide strength.
Examples and technologies for creating garden benches with your own hands
The designs of benches and benches have some distinctive features. Building a bench is the simplest way to organize a seating area in the garden. The product does not have a back and, unlike a bench, has a simple external design.
Creating a bench is a quick and easy way to organize a place to relax in the garden
A do-it-yourself wooden bench with a back can have a more complex decorative design:
- non-standard shape;
- armrests;
- structure decorated with carved and forged elements.
Simple ideas for creating garden benches
To revive the design of a simple bench, it is not necessary to come up with a complex drawing and rack your brains over creating additional accessories for the garden. It is enough to use two wooden boxes and several boards.
An original wooden bench with a table, designed to seat two people
The boxes in this case will serve as supports. After making the benches, you can fill them with soil and organize a small flower bed. A seat is made from boards, which is installed between the drawers. The material must be sanded well with sandpaper, all irregularities and burrs must be removed.
Rice. 1-1. Diagram of a bench with wooden flower boxes: 1 - arrangement of the bench and calculation of materials: A - logs (2x4 boards 17 1/2" long - 6 pcs., 2x4 boards 20 1/2" long - 4 pcs.); B - bottom of the box (3/4 plywood 20 1/2" x 20 1/2" - 2 pcs.); C - trims (1x4 boards 23 1/2” long - 16 pcs.); D - side slats (1x6 boards 25” long - 32 pcs.); E - trims for cladding the top (2x4 boards 45” long - 8 pcs.); F – seat frame (2x4 boards 63” long - 2 pcs., 2x4 boards 17 1/2” long - 2 pcs.); G - cross strips (1x2 boards 17 1/2” long - 5 pcs.); N - seat (1x4 boards 60” long - 5 pcs.); 2 — side lining; 3 — installation of the walls of the flower box; 4 — installation dimensions of the box walls; 5 - diagram of the bottom of the flower box
Wood structures have a certain disadvantage. The material itself requires constant care, and in this case the tree is also in contact with the soil; it is necessary to water the plants periodically. To make the bench more practical, wooden drawers can be replaced with concrete or stone cabinets. You can make concrete flower beds yourself or purchase them in a store.
For the seat, you should use treated boards or half a rounded log. The choice of raw materials depends on the style of the garden or patio design. It is recommended to secure the seat with metal corners, fixed to concrete using dowels, and to wood using through bolts or self-tapping screws.
Rice. 1-2. Diagram of a bench with wooden flower boxes: 6 - installation dimensions of the seat frame; 7 — reinforcement of the bench structure; 8 — installation of seat slats; 9, 10 — installation of the box
Flowerpots with dwarf trees or decorative bushes can be used as supports. The only, but very important requirement is that the container must be very durable. A hole is cut into the seat in the shape of a flowerpot in the place where the legs of benches are usually located. The size of the hole should be sufficient to create conditions for the plant to grow and care for it, however, it should not exceed the size of the container. Essentially, a board seat is placed on top of the planters and is held in place by gravity and the weight of the occupants.
Corner wooden bench with flower boxes installed on the veranda of a private house
Making garden benches from wood with your own hands in ethno style
Ethnic and rustic design styles are often used in interior design. A country house, cottage or dacha is a great place to create an eco-friendly and natural corner suitable for a family holiday. This design can be continued in the garden. To do this, it is enough to make a bench with a backrest with your own hands from logs (Fig. 1) and other natural materials.
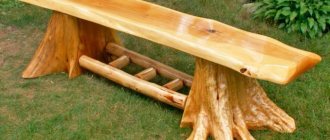
Benches made from logs are distinctive and environmentally friendly
Technology for making a country bench with your own hands from a log
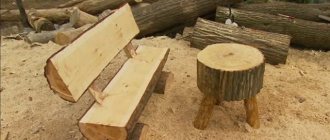
To form a seat, just saw the tree trunk lengthwise. This can be done exactly in the middle (in the diameter zone) or by moving the saw closer to the edge (in the middle diameter zone). The back is made from a thinner tree trunk, or you can cut it closer to the edge. As a result, this element must be thinner and lighter than the seat part.
Rice. 2. Garden bench made of logs in the courtyard of a country house
The legs can be made from leftover logs. They are connected to the seat part using metal pins. This is done like this:
- In the parts that need to be connected, holes are made for the pins in the appropriate places. The diameter of the holes should be slightly smaller than the diameter of the fastener.
- The pin is driven into one of the holes approximately in the middle of its length.
- The second part to be connected is placed on top of the free edge of the pin and is also driven in. In this case, the blows fall not on the pin, but on the wood.
Ethnic and rustic styles are great for decorating a personal plot
The fasteners are driven in using a sledgehammer or hammer. Since wood is a fairly soft material in structure, hammer blows can damage its surface. To avoid this, you need to place an unnecessary board under the instrument.
Pins ensure reliable connection of all parts. To strengthen the fixation, you can install 2-3 pins.
Bench with backrest made using logs
Ethno style in garden benches with backrest: additional ideas
In ethno style, you can create a design with a non-standard design. A highlight could be, for example, making a bench using curved branches of different diameters. Before assembling the product, these branches are processed and sanded. In other words, the bark is removed from them, and then the surface is sanded with sandpaper. An unedged board should be used to assemble the seat. It is processed in a similar way.
Various versions of wooden benches created in ethno style
If you have a wicker fence at your summer cottage, you can use the same design option with some modifications. Short seat boards can be replaced with long ones by placing them lengthwise. The back is formed according to the principle of weaving from branches of medium thickness that bend well.
A bench in a rustic style will become a unique object in the garden plot
To make a wicker back, you do not need to have any special skills. You may not end up with a very neat result, but that's not necessary. The back should be simple and unobtrusive; rough weaving will only increase its decorative properties. The branches can be placed tightly or, conversely, you can leave gaps between them so that your bench can “breathe.”
A bench made of logs is installed on the closed veranda of a country house
Drawings of wooden benches
Bench with back: drawing with dimensions
Bench made of boards: dimensions and drawing
Bench without backrest made of timber: drawing and dimensions
Bench as an alternative to a bench for a do-it-yourself garden
Despite the absence of a back, this diagram (Fig. 3-1) for making a bench looks quite attractive due to the characteristics of the material from which it will be made. The design itself has a very simple structure, so anyone can handle the technology of its creation.
For the legs you will need a rounded beam. If you have logs with a small diameter, you can save on purchasing material and trim them yourself. The original appearance of the bench is obtained due to the fact that the bars are stacked one on top of the other and fixed. The result is beautiful supports for the product.
Rice. 3-1. The procedure for making a simple wooden bench: 1 - drawing up a design drawing
Calculation of parameters and required materials
The height of the bench can be adjusted to suit your needs. This indicator also depends on the diameter of the timber that will be used in the work. To calculate the amount of material, you need to determine how many bars will be stacked one on top of the other to form the required height of one of the legs.
Size chart:
| Product Parameter | Indicator, cm |
| Length | 120 |
| Height | 38 |
| Width | 45 |
| Seat board (section) | 4x9 |
In our case, we will need 5 bars, the length of which is 0.45 m. Calculation formula: 5x0.45 = 2.25 m. Based on this, for the construction of two supports we will need 4.5 m of timber (2.25x2). The seat will consist of five boards 1.2 m long. To make it, the following amount of material will be required: 5x1.2 = 6 m.
Rice. 3-2. The procedure for making a simple wooden bench: 2 - cutting wood for the legs of the bench; 3 - drilling holes in the parts of the legs; 4 — preparation of boards for the seat; 5 - processing the edges of the seat parts
Initial stage: preparation of material
First, prepare the boards for the seat. The material is cut into the required number of boards of appropriate length and processed. Sharp corners should be rounded. To do this, use the capabilities of a router or grinder. If you do not have such a tool at hand, it will be enough to sand the edges with sandpaper.
Rice. 3-3. The procedure for making a simple wooden bench: 6, 7 - marking the parts of the legs; 8 — drilling holes at the intended points; 9 - applying a protective coating to the seat parts
Sanding with sandpaper is a long and labor-intensive process. To make your work easier, you can order the material to be sanded at a sawmill. After the boards are prepared, they need to be opened with a varnishing compound. It can be a completely transparent varnish or a composition with a tint (the choice of topcoat is up to you).
The bars intended to form the legs of the bench are placed tightly next to each other so that their edges form a straight line. Using a pencil and a square, mark the areas where the fasteners will be installed. The lines should be distributed along the entire length in increments of 7-10 cm.
Rice. 3-4. The procedure for making a simple wooden bench: 10, 11 - attaching the legs to the seat; 12 - view of the finished product
Assembling a wooden structure: installing fasteners
Metal pins will be used as fasteners. An alternative replacement for them can be dowels made of wood. For installation of fasteners, holes are made, the diameter of which is slightly smaller than the diameter of the pins, and the depth is half the length of the pin.
To fix the parts, the fasteners will be driven into one of the bars, and the next element will be pushed through the hole on top of it.
A simple bench without a back can be used not only for sitting, but also as a table
The pin connection is also used in the process of creating, according to the drawings, a bench for a summer house with your own hands made of wood, the design of which is equipped with a backrest. A high-quality result can only be achieved if all the holes are located strictly above each other. As a result, all parts should form an even edge line when assembled.
Wooden table and benches painted white form a cozy dining area in the garden
After drawing the marking lines, you need to measure the distance from the edge, which should be the same. It is recommended to create a template for these purposes. It is enough to take a piece of the strip, the width of which is 1.5 cm. It will serve as a kind of limiter. In other words, the holes will be separated from the edge by a distance equal to the width of this strip. Place the template exactly along the edge line and mark the intersections with the existing perpendicular markings.
The installation of the pins should be carried out in a checkerboard pattern, so you should not place the holes at each intersection of the lines, but every other one. Holes are also made on the other side of the block. They should be staggered in relation to the holes that were made earlier. As a result, when connecting the legs to the seat, there will be a pair of pins for each bar.
Simple bench with backrest built from wood
The final stage of creating a bench made of wood
From a technological point of view, the previously described type of connection can be considered correct. However, its installation scheme is quite complicated for a person who does not have the necessary skills.
There is a simpler way to fasten the structure:
An original bench made from an old wooden bed
The seat boards are then nailed to these legs (from the top) or you can do a pin joint at this location.
Option for a simple bench made of boards attached to a tree in the garden
When the assembly of the structure is completed, grind all parts. Their surface should be as smooth as possible. After this, the topcoat can be applied. For these purposes, use a varnish or wood paint intended for exterior use. It is better if the topcoat is translucent. This way you can leave the natural grain of the wood visible.
Wooden benches with comfortable soft seats, decorated with pillows
How to make a bench: photo reports
We won’t make benches out of stone—not everyone has the equipment, but we can make them out of different pieces of wood. Let's talk about making simple but unusual designs. So that a handmade bench can be a source of pride.
Bench without back
The design is simple, but looks interesting due to the specific material. For the legs, timber with rounded edges was used. If you have small logs, you can trim them on the sides. You'll get almost the same effect. THIS material is not so rare; the legs are assembled from it in an unusual way: the bars are laid flat on top of each other. This adds zest and appeal.
A simple bench looks interesting due to the material
This bench without a back has a length of about 120 cm, a width of about 45 cm, and a height of 38 cm. You can round the edges of the beam using a cutter, or you can find a similar profiled one. It costs more, but it will be easier to work with: it is already well processed and is easy to connect.
Depending on the found cross-section of the timber, calculate the length you will need. Determine how many bars will have to be stacked on top of each other to achieve the required height. In this case, 5 bars were used for one leg. Total 45 cm * 5 pieces - 2.25 m. Two legs required 4.5 m of timber. A board 40 mm thick and 90 mm wide was used on the seat. For the seat you need 5 boards 1.5 meters long. It turned out 1.2 m * 5 pieces = 6 m.
First we cut and process the boards for the seat. Their edges must be rounded. If you don’t have a sanding machine or a router, you will have to work with sandpaper, but you can find such a board or arrange at a sawmill to have it processed and sanded for you: it will be much less work. So, we cut the boards to the same length, sand them and varnish them (with or without tinting - your choice).
Treated boards
Place the bars for the legs one next to the other, aligning their edges. Using a square and a pencil, draw lines where the fasteners will be placed. The distance between the lines is 7-10 cm.
Lines where the pins will be installed
You can take metal pins, or you can make dowels - carved from wood. Holes slightly smaller in diameter are drilled for them; the depth of the hole is half the length of the pin. Then they are hammered into one part, and a second part is inserted into the same hole on top. The connection is reliable, but to be sure, you can add glue, although then the structure will turn out to be one-piece.
With a pin connection, the main task is to make the holes strictly one above the other so that the parts mounted on the pin give a smooth edge. We've done part of the work - we've drawn lines where we'll drill, now we need to measure the same distance from the edge. For this we will create a template. We take a piece of plank about 1.5 cm wide. We will drill holes at this distance from the edge of the bars. Having placed it exactly along the edge, we mark the places of intersection with the drawn perpendicular lines.
We make holes in the bars in a checkerboard pattern
We will install the pins in a checkerboard pattern, so we will drill holes through one intersection. We also make holes on one block from different sides in a checkerboard pattern. In a similar way, using pins, the legs are connected to the seat: two pins for each plank.
Technologically, this type of connection is correct, but it is complex and requires a certain skill. It could be easier. Place all the bars one on top of the other, secure with clamps, drill through in two or three sets - in the center and along the edges, connect with a long pin, with washers placed under the head and nut. You can nail the seat strip legs to the legs assembled in this way with nails from above or try to make a pin connection.
The bench is made by hand. Finishing work remains
If you nailed the seat, take some wood mastic of a suitable color, add some very fine sawdust and stir. Apply this mixture to the joints. When dry, smooth it with sandpaper. Sand all parts smooth and coat with varnish or wood paints for exterior use (preferably not covering ones, but those that leave the wood texture visible).
How and with what you can paint wood, read this article. It talks about lining, but the painting techniques remain the same, and the compositions must be taken for external use.
DIY bench made from broken chairs
In any household you can find two old chairs. They should be the same and still strong enough. We disassemble the chairs, leaving the part with the back and legs. We connect the two backs using bars of a suitable cross-section.
Bench made from old chairs
For greater rigidity at the bottom, at a distance of about 20 cm from the floor, where previously the chairs also had jumpers, we make another frame with transverse crossbars. It can be used as a footstool or to store some things.
We paint the completed structure
After sanding, we paint the resulting structure. This time the paint should be ordinary: different types of wood can only be painted over with covering paints. Apply with a brush or from a spray can.
All that's left to do is cut the seat to size from thick plywood (8-10 mm thick) and cover it with foam rubber and fabric.
Finished bench made from strusses
Garden chair/bench made from pallets
Everything is useful on the farm. Even cargo pallets can be used to make garden furniture. Moreover, there is no need to disassemble them: we use one for a seat, and from the second we will make a backrest. You will only need well-processed planks for the armrests and bars for the legs.
This is what should happen
In one of the pallets we strengthen the fastening points by inserting pieces of bars. Having inserted it, we fasten it with self-tapping screws on one side and the other.
Strengthening the corners of the pallet
From a timber with a cross-section of at least 100*100 mm, we cut four identical sections 80 cm long. We screw them in those places that we have just reinforced. We leave 20-25 cm on the legs. We fasten with four long screws - 150 mm and no shorter.
Screwing the legs-supports for the armrests
It is important to maintain verticality and leave the same distance on the legs. Then the seat will be level. If there are errors in height, you can try to file it down, but then you will have to cut it from the top too - so that the armrests are even. So try to screw it straight. Deviations from the vertical can only be dealt with by screwing the leg back on.
The legs are screwed
We attach a second pallet to the rear posts, and boards for armrests on the sides.
Almost done
All that remains is to cut a piece of furniture foam rubber and cover it with fabric. You can also make pillows for the back. If you are not going to process everything thoroughly, but make a loft-style chair, use sandpaper or a sander, sanding all surfaces until smooth. You can coat it with paint, giving the wood a dark color.
Finished product: pallet chair
