Good day to all! Installing wall cabinets correctly in the kitchen is very important. Otherwise, they may be positioned unevenly relative to each other, creating a not-so-pleasant visual effect, and interfering with normal operation. An adjustable canopy for a closet can be very helpful in this regard.
A similar canopy or suspension can be purchased by visiting almost any furniture store that sells fittings. At the same time, the fastener is rightly positioned as universal and practical.
When choosing, follow the key rule. It states that all internal elements must be made of high quality metal. Otherwise, you won't be able to get the full benefits of an adjustable awning.
Cabinet hanging mechanisms
Initially, furniture was mounted on the wall using nails or screws. The disadvantage of fasteners is their fragility and fragility. The cabinet could collapse at any moment. This is especially dangerous for glass doors on modern headsets. But such canopies are still used today.
Classic hinges
This is a pendant in the form of metal plates 1.5-2 mm thick. They are attached directly to the wall using a regular or L-shaped self-tapping screw (crutch) screwed into a dowel.
There are several types of loops available:
- Simple pendants differ in the location of the mounting hole: at the top and in the center. The most aesthetically pleasing devices are those with a pear-shaped groove in the middle. They are not visible after installation. But this complicates the installation: when hanging a cabinet, you have to aim for a long time to get onto the suspension. Attached to vertical racks, designed for cabinets with a small load. When the groove is located at the top, it is easier to install furniture. The number of holes for self-tapping screws can reach 5, versus 2 for hinges with central fastening. They can withstand furniture with greater load. Screw to the sides of the cabinet.
- The corner canopy is non-adjustable - bolted to the top shelf of the box and to the wall. There are no installation problems, but the suspension is visible from both sides. The shape allows the cabinet to be hung close to the wall or moved away.
- P-shaped - screwed onto the box with self-tapping screws in 2 places: the upper horizon and the vertical post. This allows you to strengthen the structure through screeding. The time required to draw markings is reduced, since the horizontal position of the cabinet can be adjusted.
It is impossible to combine aesthetics and ease of installation of furniture hinges. Either they attach easily and stick out on the wall, or they are not visible, making them difficult to hang.
Mounting strip
Modern suspensions are easy to attach and easily move in the horizontal and vertical plane. The adjustment block is attached to the side panel of the cabinet through 2 through holes. There are mechanisms designed for different capacities. The maximum load on weak suspensions is 35 kg, on reinforced ones - 130. A fixing hook comes out of the block. To attach it, you need a strip that is mounted directly to the wall.
Advantages of adjustable hangers:
- a single strip on which the cabinet is supported is more reliable than a point fastening with screws;
- Possibility of hanging alone;
- adjusting the cabinet relative to the wall and floor;
- no strict requirements for marking - an error of 1.5 cm is allowed;
- Possibility of attaching to a kitchen apron.
Adjustable canopy for furniture and for the site: installation technologies
The term “adjustable canopies” usually refers to either a folding canopy for a summer house or a special kitchen bracket that makes it easy to align cabinets mounted on the wall vertically and horizontally.
To avoid confusion and you have no questions about this, below we will look at both varieties.
This part is most often called an adjustable canopy.
Mobile protection from rain and sun
An adjustable universal canopy can be found today on almost any equipped summer cottage. It is a movable structure that is mounted on the wall of the house (usually at the entrance or above the terrace). (See also the article Country canopies: features.)
Roller canopy over the terrace
As a rule, the main elements of such a product are:
- Roller shutter, inside of which the roofing sheet is placed . Most models are equipped with canvas or polymer fabric: the main thing is that the material is waterproof.
Please note! If possible, choose tarpaulins or models of jute fiber with moisture-proof impregnation. In terms of water resistance, they are not inferior to polymer ones, but in the heat they heat up much less.
The only drawback of such varieties is the fairly high price.
- Sliding frame, which is a steel or plastic frame on hinges . When folded, the frame is pressed against the top of the wall, and when unfolded, it forms the basis for a tensioned fabric that automatically unwinds from the roller shutter.
- Some models are also equipped with support posts . These pillars support the far edge of the frame, which protects the hinges from breaking under the weight of the structure, and the canvas from sagging.
The principle of operation of the design
The advantages of such products include compact size, ease of use and fairly easy installation. The instructions usually assume wall fixation with 4 to 8 anchors.
As for the disadvantages, these include the high cost of high-quality models. In principle, you can try to make such a product with your own hands, but the parts (roller shutters, hinges, fabric) will not be cheap, so you are unlikely to save money.
However, even though the cost is not the lowest, designs of this type are popular.
Design features
Bracket on the bus
And yet, when we mention adjustable canopies, we often mean a special bracket for a cabinet or other furniture.
Typically, such a system consists of two elements:
- Steel rail mounted on the wall. The upper edge of the tire is equipped with a specially shaped hook that ensures reliable fixation of the hanging hook.
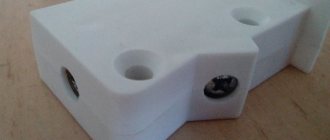
- An adjustable hanging device with a hook, which is mounted inside the kitchen cabinet. Thanks to the screw system located in the plastic case, we can adjust the position of the hung object after it has been installed.
Note! Today, brackets are produced in a fairly wide range of colors, which allows you to choose a model that is almost invisible inside the cabinet.
Adjustable awnings for kitchen cabinets in different colors
Despite the rather complex design, the adjustable bracket provides very reliable fastening of even the heaviest object. Naturally, it is necessary to perform the installation correctly, and we will describe below how this can be done.
Installation technology
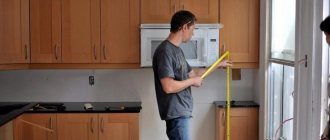
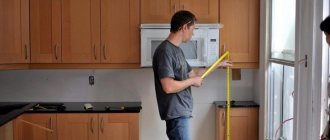
Before attaching the kitchen wall unit using adjustable brackets, you need to mark the wall. We do this in such a way that the bottom edge of the wall cabinets is no closer than 45 - 50 cm above the tabletop, otherwise it will be very inconvenient for us to work. (See also the article Lean canopy: features.)
Stainless steel tire
Next, we proceed directly to the installation:
- First, according to the applied markings, we attach a steel mounting rail to the wall. For fixation, we use anchors with a thickness of 8 mm, securing them at a distance of approximately 30 cm from each other.
Please note! The tire should only be attached to a permanent structure. If you covered the kitchen walls with plasterboard, then under the hanging furniture you need to install embedded parts made of thick wooden beams, rigidly fixed to the wall.
You cannot simply install a tire on a gypsum board: the material will not withstand the load and will collapse.
- When the tire is fixed, we proceed to installing the hangers. We attach the plastic cases to the cabinets from the inside using self-tapping screws. This operation must be performed as carefully as possible, since this unit, according to experts, is the weakest point of the entire system.
We fix the canopy in the cabinet as shown in the photo
- For fixing, it is best to use wood screws with a phosphated surface. The length of the self-tapping screw must ensure penetration into the cabinet wall by at least 8 mm.
- We put the hanging hooks into the holes on the back wall of the cabinet. It is most convenient to do them using a drill with a large drill bit, but it is fashionable to use a jigsaw, and even a mounting knife (if the wall is made of thin plywood or chipboard).
- After this, we hang the cabinet on the tire, making sure that both hooks engage with the mounting lug.
Screwdriver adjustment diagram
At the final stage of work, we make adjustments: by rotating the screws on the hangers with a screwdriver, we align the cabinets relative to each other so that the gaps between them are minimal.
Tip! To increase installation safety, you can connect adjacent kitchen modules with steel strip ties.
This way, the weight will be distributed more evenly, and the risk of any hook unraveling or falling out of the fastening will be minimal.
Conclusion
As you can see, you can install adjustable furniture canopies without the slightest effort. However, this largely applies to external canopies, which allow the frame with the canvas to be folded and opened only when necessary: their design also involves extremely simple installation. And yet, before starting any work, you need to carefully study its nuances, and the easiest way to do this is by watching the video in this article.
Source: https://krovlyakryshi.ru/specialnye-vidy/reguliruemyj-naves-637
Hanging height
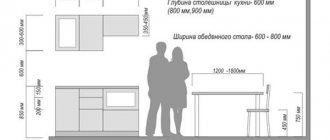
Consider the distance from the countertop to the bottom of the cabinet. Minimum – 45 cm, average – 90 cm. At a height of 110 cm, hang only one shelf.
You can also use the formula:
H=h1+h2+h3-45mm, where the letters are the height:
- H – from the lower stop (table top, floor) to the bar;
- h1 – furniture above which the box is hung;
- h2 – kitchen apron;
- h3 – wall cabinets.
Subtract 45 mm from the resulting sum of all heights - this is the standard indicator of suspension shrinkage.
Focus on the height of people who most often use things from the closet. The optimal distance would be when a person reaches with an outstretched arm to the top shelf and takes the item without the risk of dropping it. But also leave enough space above the countertop.
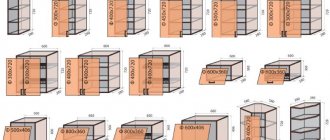
Standard parameters of a kitchen set
Expert opinion
Bashir Rabadanov
Technologist at the furniture company Woodband
If it is necessary to hang over tall equipment, place the lower part of the cabinet in close proximity to their upper limits, almost close to the ceiling. This applies to refrigerators and ovens.
Find out more about hanging heights for kitchen furniture.
Furniture canopies
Wall cabinets are used in the kitchen for drying dishes and storing food. Finding the necessary products and utensils in such cabinets is much more convenient than in floor cabinets, because everything is almost at eye level. However, their depth is on average less - about 30-40 cm.
Step-by-step installation instructions
Attaching hangers and cabinets requires no preparation. When hanging on furniture hinges, you will have to practice your accuracy. In the case of mounting on a bar, everything happens easier and faster. Below are detailed installation instructions.
Tools
For installation you will need:
- level – preferably for the entire length of the cabinet;
- pencil;
- knife;
- roulette;
- hammer;
- hammer drill or drill - when hanging on a concrete or brick wall;
- screwdriver;
- screwdriver;
- when installing several cabinets, clamps are needed - clamps that allow you to create the appearance of a monolithic structure.
Already at the stage of collecting tools, think about which awnings to purchase. If you purchased a ready-made cabinet and a complete set of fasteners, then there will be no problems. When purchasing spare parts for hidden installation, check the presence of all bolts, screws, mechanisms, and plugs.
Preparatory work
Before installing suspended structures, calculate the height and draw boundaries. Draw a line along the level with a pencil. Installation of the DIN rail and wiring must be completed so that you do not have to remove the cabinet and redo the entire design.
Align the walls as much as possible at the fastening points, even if you plan to install the box on a plank. When installing furniture at an angle, it should be 90 degrees. Paint the walls, wallpaper or install an apron. After installing the cabinet, it is difficult to perform these operations.
Installation of awnings
The process is the following algorithm of actions:
- Markings for system installation. On the inside of the cabinet, measure 1.3 cm from the side panels and 2.5 cm from the top.
- Drilling with a drill or screwdriver with a pen attachment with a diameter of 25 mm.
- Cleaning chipboard from chips.
- Trying on the suspension - the fixing hook should be located in the center of the opening. This makes it possible to adjust the position of the cabinet.
The final stage is screwing the screws. Before attaching the hanger, check the alignment of the holes in the decorative plug and the side walls of the cabinet. First lean and screw, then screw. This is necessary so as not to damage the furniture.
Metal guide fastener
The material of the wall determines what you need to attach the plank to:
- a self-tapping screw screwed into a dowel - onto aerated concrete and into a foam block;
- screws with a diameter of 5-6 mm - into wood;
- anchor bolts – for brick, concrete.
The profile length varies. There are planks around 19 inches or 50 cm, but most manufacturers produce 2 or 3 meter products. Each tire is cut at a certain distance. They can be easily broken by hand without using a hacksaw if the guide is longer than the cabinet.
After choosing the fastening tool, attach the strip to the drawn line. Using a drill, hammer drill or screwdriver with an appropriate attachment, drill holes in the wall through the prepared holes in the profile. It is enough to make indentations at intervals of 10-30 cm. There is no need to attach screws every 1.5-2 cm.
Kitchen set assembly technology
The disassembled kitchen set presents a set of boards of various sizes, as well as the presence of fasteners and other fittings. As a rule, kitchen furniture consists of floor and wall components. Assembling a kitchen set is not an easy task, since assembly is carried out in a certain order, although you can choose the assembly sequence yourself. You can assemble all the furniture at once and then install individual elements, or you can first assemble the wall cabinets and hang them on the wall, which will save useful space for further work. Despite the sequence of assembly of individual cabinets, it is necessary to adhere to the technology of assembling each cabinet separately.
The correct installation of the confirmat is in the middle of the chipboard
Assembly of wall cabinets
The best option is to start work by assembling wall cabinets. Wall cabinets consist of side panels, top panels, bottom panels, as well as rear walls, including a facade, which consists of two doors, usually laminated. As a rule, the set includes various accessories, such as hinges, handles, guides, etc.
Installing hinges
As a rule, doors, which are distinguished by the presence of decor, are installed last, after the cabinets are installed in their places. Hinges can be mortise (more reliable) or overhead.
Installation of cabinets
Lift the box and hook it onto the guide. Use the adjusting screws to secure the desired position. Use the top bolt to level the cabinet horizontally, and use the bottom bolt to reduce or increase the distance from the wall.
To assemble several cabinets into a monolithic structure, you will need clamps. Drill holes for the tie in the places where the clamps are installed. The chipboard can be damaged during this process, so use a smaller drill bit first. On both sides, expand the holes with a nozzle of the desired size, then make a through hole. Another way to avoid damage is to lean a wooden block against the side opposite the drill and press it as tightly as possible with your hand.
Start installation with a corner cabinet. Connect the boxes in pairs with clamps. To maintain the quality of the surface, place a wooden wedge between the clamp and the wall of the box. All that remains is to hang the doors.
When using a sliding system, we recommend that you read the article: “Adjusting wardrobe doors.”
Fastening methods
It is important not only to correctly determine all the parameters, but also to know how to hang kitchen cabinets. This seemingly simple process is associated with important nuances.
You can start by choosing fittings for attaching the upper modules:
- Pendants, which are popularly called “ears”. Thanks to the elongated eye, they make it possible to adjust the horizontal position of the fixed cabinet. But the height cannot be adjusted. The ears themselves are attached with a dowel and a hook screwed into it.
- Adjustable awnings. This mount for kitchen wall cabinets is fixed to the rear ends of the module racks. They allow you to move the cabinet horizontally, vertically and even deeper. In addition, such fastening is absolutely invisible from the outside.
Note. It makes sense to use a crochet fastening when the walls are uneven.
Since the second fastening option for kitchen wall cabinets is used in the vast majority of cases, the main attention should be paid to it. This hardware has two components:
- Directly the canopy itself, which can be adjusted. It is mounted inside the module, for which the rear wall of the latter is modified.
- Special tire or bar. It is fixed on the wall and subsequently acts as a basis for mounting the modules.
Features of hanging on drywall
The low strength of gypsum boards often leads to the cabinet falling to the floor. To prevent possible breakage of awnings, professional kitchen assemblers use 3 main fastening methods:
- Self-tapping screws with a large pitch and a wide head, impregnated with phosphates, expansion anchors. Ordinary screws, nails, bolts will immediately begin to put pressure on the drywall, and it may not withstand this load.
- Embedded beam - used at the stage of major repairs (during the installation of plasterboard sheets). The block is installed in a metal profile, which serves as a frame for drywall. The method is highly reliable. The disadvantage is the need to immediately allocate space for cabinets, or to adjust to the beam in the wall.
- Adjustable hangers using a metal strip. The most modern and popular fastening method.
For heavy cabinets, it is better to choose a place with a stronger wall. The maximum load on one self-tapping screw is 25 kg, the anchor is 35 kg.
Read on for other ways to attach cabinets to drywall.
