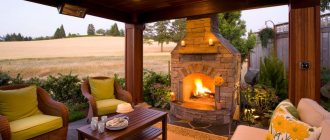
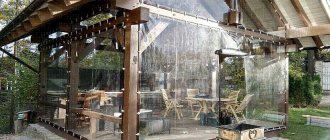
A garden gazebo is a cozy and comfortable summer area where you can enjoy the surrounding nature. When choosing a structure, it is important to consider not only its shape and size, but also the building materials used to build the gazebo. Brick is a high-quality material for creating solid and noble buildings. A gazebo with a barbecue and a brick stove is a place where you can not only relax, but also cook and gather your family around the dining table in the fresh air.
Advantages and disadvantages of brick structures
Brick buildings last longer, so it is recommended to build the stove out of brick.
A brick structure has a number of advantages.
- Durability - an open or closed pavilion made of brick will last much longer than a building made of boards, timber or polycarbonate.
- High strength - the gazebo is not afraid of the strongest winds and mechanical damage.
- The stone accumulates heat, so this structure is cozy in damp autumn and cool in hot summer.
- It is much easier to complement a brick gazebo with a variety of devices: barbecue, barbecue, Russian oven. Here you can arrange an open summer kitchen. And if you glaze and insulate the building, you can turn it into a full-fledged guest house.
Flaws:
- A brick structure, even an open one, weighs a lot. It is required to build at least a shallow foundation.
- Construction takes a lot of time. To lay bricks correctly, you need high qualifications.
A brick gazebo with a barbecue or barbecue costs much more than a wooden building with a brick stove.
Choosing brick as a material
All stone structures are monolithic and stable. They are built to last for many years. The advantages of a brick gazebo include:
- Strength and durability.
- Brickwork looks beautiful on its own, so there is no need for external wall decoration.
- If desired, you can cover the brick with any material: decorative tiles, artificial or natural stone, plaster, etc.
- The design of such a terrace will harmoniously complement the design of the site and the house in any style.
- There are no restrictions in the choice of roofing material. Such walls can withstand a lot of weight; you can cover the gazebo with ceramic tiles, for example. What is not available for wooden and metal frames.
- Brick is non-combustible, which is great for equipping a terrace with a fireplace.
- Fully enclosed and glazed terraces with a stove can be used at any time of the year. The fireplace will quickly warm up a small room, and additionally insulated walls, floor and ceiling will retain heat inside.
The disadvantages of the selected building material include:
- its relatively high cost;
- the need to lay a strong foundation to support the weight of the building;
- building a brick gazebo will require more time, effort and knowledge than simpler structures.
However, you need to think that in this case the pros outweigh all the cons. An owner who has chosen a gazebo made of stone is most likely ready to spend time and money in favor of reliability and durability.
Types of brick barbecue structures
Pouring the foundation for a barbecue
You can set up a barbecue in any building, both closed and open. However, the design of the fryer itself may differ.
- An option without a foundation - the grill is assembled with your own hands on a flat area. It consists of 3 brick walls in 1 row with protrusions for a brazier, more precisely, a metal box with coals, and a couple of grates of different sizes. Meat is fried on the lower one, vegetables or seafood are fried on the upper one. Sometimes a kebab shop is supplemented with a small compartment with a countertop, so that there is a place to leave semi-finished and ready-made dishes. Firewood is stored in the resulting niche under the brazier.
- The classic barbecue grill is somewhat more complicated. In this model, the brazier is a brick niche of complex shape - with a cap, and closed on three sides. Sometimes even with an additional threshold in front of the camera to create a semblance of a recess. The brazier is placed on a stone pedestal. This option is equipped with a chimney - brick or metal.
- A brick barbecue is essentially the same barbecue, but supplemented with a stationary grill grate. A “clean” grill usually only has protrusions for skewers.
- The stove complex replaces the summer kitchen. This design is multifunctional and includes a classic Russian oven in which you can cook bread, a hob, a grill with or without grates, and sometimes even a built-in cauldron and smokehouse.
The stove complex occupies a large area and is necessarily complemented by countertops, niches for storing firewood, and sometimes even a washbasin.
The simplest U-shaped design
It is better for novice craftsmen to stick to simple designs that do not require a large amount of materials and good masonry skills.
To begin with, we propose a U-shaped design.
- The already prepared concreted area must be marked, taking into account the size of the available bricks.
- According to the markings, they begin laying out the bricks. Given the simplicity of the design, it is not even necessary to adhere to any particular order.
- Please note: to lay out a barbecue oven with your own hands, two types of bricks are used - regular and refractory. The regular one forms the outer contour, the fireproof one forms the inner contour.
- Spacers between the blocks help you immediately determine the width of the masonry joints.
- After preliminary layout and marking, laying begins. The outer contour can be placed on a regular mortar, the inner – on a special one with increased fire resistance (for furnaces).
- To fasten the walls of the outer and inner contours, metal mortgages are used.
- Once the desired level is reached (approximately 75...80 cm), supports for the barbecue grill are built into the inner contour.
- The final stage of work is installing tiles on both walls and the space between them. This simultaneously decorates the structure, protects the brick from moisture, and creates a small cutting table/serving surface. Thanks to several rows of holders, the grates and the coal tray can be placed at different levels.
Gazebo projects
A gazebo can be an open frame wooden gazebo.
A brick gazebo with a barbecue or barbecue can have a very different design and appearance. The presence of a brazier has little effect on the type of pavilion. The only requirement: you need to build a foundation for a classic stone barbecue.
Brick projects can be implemented in a variety of ways.
- Open - may consist of brick columns and a canopy. At the same time, you can install not only a barbecue, but also a fireplace. However, to service the latter, you will need to build a separate foundation. The open gazebos are very picturesque. It’s easier to fit them into the landscape and decorate them with living greenery. However, such a pavilion does not protect against strong wind and rain. Therefore, time is spent here only in clear weather.
- Semi-open - requires the presence of at least 1 blank wall and brick partitions. Usually the barbecue is attached to a blank partition. The gazebo is built so that the wall serves as protection from the wind. It also prevents rain from entering.
- Closed - can do without a blank wall. However, all the window openings in it are glazed, and the doorway is closed with a sash. In such a building you can not be afraid of wind, rain and snow. The pavilion can be insulated and used even in winter. This option is most often equipped with a fireplace to admire the flames.
The grill does not affect the configuration of the gazebo in any way. Usually the pavilion has a square or rectangular outline, since it is easier to install the roof here. But there are also more complex shapes: hexagonal, irregular.
Manufacturing instructions
If you have basic experience in bricklaying, then you can make a stove for a gazebo with your own hands. All work is divided into several stages. Let's look at each in detail.
Materials and tools
Before starting the main stage of work, we will need to collect with our own hands the entire list of materials and tools:
- fireclay and ceramic finishing bricks in sufficient quantities;
- If you plan to make a foundation, we prepare a concrete solution from a mixture of cement, sand and crushed stone. Instructions for making the plate are given below in a separate chapter. The work is carried out in advance, the foundation needs time to shrink;
- We prepare the masonry mortar in advance from a mixture of clay and quartz sand. For 3 days, pour all the ingredients mixed in equal proportions with water. Before starting work, mix the solution and bring its consistency to the optimal level;
- steel parts for the manufacture of partitions, hob and combustion door;
- To lay the floor around the stove, we prepare ceramic tiles or other fire-resistant durable material;
- We order or cut out a blank for the tabletop according to the size of the cutting table;
- we buy a sufficient number of tubes with heat-resistant sealant to reliably seal the joints connecting individual parts with the furnace body;
- We install the tabletop with moisture-resistant sealant or mounting adhesive;
- grinder or jigsaw with stones or saw for brick and steel;
- mason's tool set;
- reinforcement for the construction of the foundation and a supply of tying wire;
- removable formwork or wooden boards cut to size;
- level, tape measure, jointing between bricks;
- shovel, trough for making mortar.
Making the foundation
Let's consider a complex option - there is a gazebo, but there is no foundation for the stove:
- We mark and disassemble the flooring according to the dimensions of the unit. We take into account that the foundation should protrude 300 mm beyond the true size;
- we go deep into the ground 500-600 mm and fill the bottom of the pit with sand and gravel backfill;
- We compact the cushion layer using a tamper and distribute the reinforcing mesh over the surface. In the places of jumpers we tie the rods with knitting wire;
- we install the formwork. We calculate the thickness of the slab so that it does not reach the floor level by 50 mm;
- We check the level of our slab and fill it with concrete. Using a board or profile pipe, we level the solution and compact it with a hand vibrator.
The concrete must stand; in the first days, when the temperature outside is high, we water it with water, not allowing the surface to dry out. We wet the surface of the slab and cover it with a thin, even layer of cement. We carry out this operation continuously for 6-7 days. We level the layer with a trowel, as if rubbing cement into the slab. This is how we make the outer surface durable. We leave the slab to shrink and only after 20-30 days we begin to continue work.
We cover the hardened concrete of the foundation with sheets of roofing material to waterproof the slab. We treat the joints and edges with melted resin or sealant. This simple work will protect the oven from moisture. After installing the stove, we close the remaining gaps with mortar and ceramic tiles, laying them flush with the main flooring of the gazebo. You can learn about laying tiles on our website in a separate article. We will not dwell on this operation.
Order
We use an ordering diagram and a drawing of a stove for a do-it-yourself gazebo. Below are 2 diagrams. The first is from 1 to 17 rows of bricks and the second is from 17 to 30 layers of blocks.
There is no need to lay out complex arches and configurations, so even a novice stove maker can handle the job.
Description of the masonry
| Row number | Description of work |
| 1 | The blocks are laid out flat over the entire surface of the slab. We constantly check the correctness of the masonry and use a building level. The geometry of the entire structure depends on the quality of the first layer. |
| 2 – 6 | In each row we make a dressing. To do this, we start the next layer with half a brick or lay the whole block transversely to the previous one. In the first row, it is important to monitor the geometry of the masonry, especially at the corners. We work strictly according to the scheme; at this stage we lay out the space of compartments for storing firewood and kitchen utensils. |
| 7 | We install the stove and cover the oven compartment. We lay the blocks in order. Where the slab is laid, you will need to add mortar, so we increase the thickness of the seam by the size of the overlap of the compartments. |
| 8 | We begin to lay out the bottom of the combustion chamber. |
| 9 | We form a firebox. Here we use fireclay bricks for laying the inner part, and lay out the outer layer with ceramic finishing blocks. At the end we mark and install the firebox door with a frame from the corner. We secure it with spacers strictly vertically. |
| 10 | We begin to gradually lay out the compartment for storing dishes and continue to lay out the firebox. We carry out the work strictly according to the plan. |
| 11 | We cover the compartment for storing dishes and install a tabletop cut to size. There is no need to secure it at this stage. We just try it on and put it away from dust. Various materials can be used for the countertop. Thick MDF or knocked together from boards will do. You can lay out a cutting table from decorative stone. It all depends on desire and capabilities. In this row we complete the formation of the combustion chamber. The door is covered with bricks strictly in order. To prepare the dressing parts and door lining, we use a grinder or a mason's pick. |
| 12 | We begin to form a frying space and prepare a place for installing the grill grate. You can buy it in specialized stores or make it yourself from steel rods of the required cross-section. According to the diagram, in the front part we lay out protection from one row of blocks. You can lay skewers on this base without fear of burns. |
| 13-16 | These rows are laid out according to the same pattern. We continue to form the frying space. The main thing is to constantly bandage the layers of blocks and ensure that the blocks are laid correctly and the entire seam is filled with mortar. |
| 17 | We completely finish the laying of the frying compartment and begin to lay out the roof of the oven. |
| 18 | We lay out the roof of the frying compartment of the unit. In this row you will need to place each block especially carefully. The work is difficult, but making a special template will help. It can be made from thick cardboard or plastic. Now we cut the vault pattern into separate parts corresponding to the size of the blocks and prepare them by cutting off excess parts and smoothing the surfaces. Don’t forget to number each part of the pattern and bricks and lay out the parts strictly by numbers. To create a support, you can make a mock-up of the vault from boards and place it under the blocks. This way the structure will be durable and easy to disassemble after the solution has hardened. When we lay out the visor, be sure to push it forward 50 mm. |
| 19-20 | We place these layers of blocks strictly according to the ordering scheme. The walls are practically compared to the vault. We cut the bricks for a tight connection with adjacent blocks. |
| 21 | In this row we completely cover the roof of the frying chamber. We work according to the scheme. |
| 22 | We lay out the canopy around the entire perimeter of our gazebo stove. Bandaging of corners is carried out taking into account the cutting of blocks according to the markings. It is performed only at the junctions of the side walls with the rear part. |
| 23 | We completely close the frying cavity and begin to form the exhaust gas exhaust pipe. Narrow the smoke channel to the required size. |
| 24 | We carry out the laying in order. |
| 25-27 | Laying out the beginning of the chimney with ligation of the first row of this part of the stove. |
A do-it-yourself brick stove for a gazebo is ready.
Drying
A summer stove in a gazebo requires compliance with the same safety rules as a house heating boiler operating on solid or other types of fuel. After laying the stove, you cannot immediately start cooking pilaf or shish kebab.
The oven will need to dry. This will take 2-3 days. During this time, we cover the area of the floor around the unit with ceramic tiles. We put 2-3 kg of firewood in the firebox and let it burn completely. Don't forget to open the firebox door and all the doors and windows in the gazebo.
During the first firing, a large amount of smoke is released. After the bricks have completely cooled, we repeat the operation. It will be possible to carry out 3-4 treatments per day. Only a completely, gradually dried brick oven will serve us for a long time.
During operation, remember the rules for safe use of heating devices. You cannot load long firewood into the firebox so that it sticks out. It is not recommended to allow children to prepare barbecue. All the rules are known and the comfort and safety of your holiday depends on their implementation.
How to place a brick grill in a gazebo
Semicircular barbecue with stove and sink
Since this design is equipped with a chimney, the choice of location is limited. The device can be installed in the center or near the wall.
- In the center of the gazebo - this is how a small barbecue is placed, often with a double-sided firebox. You can approach it from both sides, and place a bench near the back side and warm up on a cool evening. The advantage of this solution: the grill is protected from wind and rain even in an open gazebo.
- The lateral arrangement is much more common, since in this case most of the area is free. If we are talking about a stove complex, it cannot be placed in the center.
If you are building 2 structures - a barbecue and a fireplace, install them away from each other, dividing the pavilion into a kitchen and guest area.
Tools and materials
For a gazebo with a brick grill area, you need the following materials and tools:
- clay red brick for the brazier;
- fireclay brick, if a more complex firebox is equipped or the complex includes a combustion chamber;
- rubble, sand-lime brick for the pedestal, if a simple brazier is being built;
- crushed stone, sand, cement or concrete for the foundation;
- reinforcing mesh, metal valves, corners, doors, grilles;
- trowel, spatula;
- shovel, buckets and trough;
- plumb line, building level;
- circular saw or grinder with a stone disc.
Additional materials may be needed depending on the type of construction chosen, for example, a grate, stone for the countertop.
Which brick to choose and how much is needed to build a barbecue complex
Before starting construction work, it is necessary to calculate the amount of brick that will be used in the installation of an outdoor stove. This parameter depends only on which model you choose: simple, with a minimum of functions, or a whole complex.
The order drawings, which are developed along with the design project, will be of great help in this. These drawings indicate how many bricks, what brand and in what sequence will be installed during laying. The standard dimensions of a brick block are 25x12x6.5 cm, so based on this data and the dimensions of the future structure, it is easy to make a fairly accurate calculation.
According to the order, the amount of brick will be known exactly even for a stove of complex shape Source sadovayaferma.com
How to make a brick grill in a gazebo
Order for an outdoor brick grill
Gazebos for a summer house with a barbecue or a brick grill are quite complex buildings. The design includes a detailed drawing of the structure, a diagram of the arrangement of elements - not only the stove, but also the fireplace, chimney, table with bench, communications. You can calculate the order for the barbecue yourself or use a ready-made diagram. In this case, the dimensions of the structure can be changed, but the proportions must be maintained exactly.
Set up a barbecue during the construction of the gazebo. However, you can add a stove later.
Foundation
A brick barbecue, and even more so a stove complex, weighs a lot. Such structures are placed on their own slab foundation, independent of the base of the gazebo. Step-by-step instructions are standard.
- They dig a hole for the stove. The depth is no more than 30 cm, the width and length exceed the dimensions of the grill around the perimeter by 15–20 cm.
- Compact a sand cushion to the bottom. 10 cm thick, and 5 cm of crushed stone.
- Arranging the formwork. It should rise 10 cm above ground level. If necessary, reinforcement is laid.
- The foundation is poured with concrete.
- The base should dry for 3–4 weeks. Periodically, the concrete surface is moistened with water.
After complete drying, waterproofing is carried out: 2-3 layers of roofing felt are laid.
Furnace laying
The construction of the brazier consists of 2 stages. First, the foundation is built. These can be just brick columns, but more often they lay out something like a niche of 3 walls, and then store firewood in it. The height of the pedestal depends on the design of the furnace. When laying walls, every 3rd row is reinforced with reinforcing bars. This part of the furnace can be built from any brick, even cinder blocks and silicate.
Ignition can be carried out when the clay is completely dry
The step-by-step instructions for laying out a barbecue are somewhat more complicated.
- The walls of the brazier are placed on the base. It is made from a reinforced concrete slab or, more simply, from a metal profile.
- In the last 2 rows of the pedestal, a solid steel sheet is fixed or jumpers are cut out of rolled metal and rested on the side walls. You cannot embed the sheet.
- Fireclay bricks are placed on the lintels or sheets.
- According to the order, he builds the walls of the brazier. The outer row of the building is made of red brick, the inner row is made of fireclay.
- A rim of 2 rows is placed on the front side of the roasting pan - it serves as a stand for skewers.
- The walls are raised from rows 12 to 25. Then the firebox is blocked, reducing the size of the upper hole in each row. This way they get a cap and gradually go out to the chimney.
- To improve draft, a tooth is installed in front of the chimney. This is a brick protrusion that is formed onto the back walls of the cap.
- A chimney is being erected. A cleaning hole is placed above the cap and equipped with a valve.
The height of the chimney reaches at least 2.2 m from ground level. It is recommended to block the pipe with a spark arrester. You can install a metal chimney and bring it to the roof of the gazebo.
Foundation design features
In general, due to the heaviness of the material, a brick gazebo needs a foundation in the form of a strip foundation. Only in cases of dry, stable soil, and when the project involves an open type structure in the form of pillars with a roof resting on them, is it permissible to install piles or pour a solid concrete slab.
In other cases, it is better to make a strip-type foundation. You should dig a trench for it up to the sand layer.
The optimal foundation height for the gazebo will be from 30 to 50 centimeters. The procedure for its execution is usual for such bases with some features taking into account the installation of the stove:
- mark a place 10-20 cm larger than the size of the proposed building;
- remove the top layer of turf, clear it of weeds and large stones;
- dig a trench;
- add a layer of sand, compact it, add crushed stone;
- make formwork from edged boards or moisture-resistant plywood, lay reinforcement with a diameter of 8-10 mm;
- in the place where the project involves installing a furnace, a separate foundation is required for it: soil is removed according to the size of the fireplace (800x1050 mm is sufficient) to a depth of 15-20 cm; pour about 7 cm of sand and gravel; they also make formwork and reinforce it with mesh;
- both separate foundations are poured with concrete and left to harden completely.
The process of stabilizing the foundation takes about a month, depending on the time of year and weather conditions. After a week you can remove the formwork.
Fire safety measures during operation
The floor in the gazebo must be made of concrete.
A brick barbecue in a closed or open gazebo must be used, observing certain rules.
- Wooden benches and sofas cannot be placed near the brazier.
- When removing the chimney, the place of contact with the roof is isolated with an asbestos sheet. If the chimney is metal, install a capsule with waterproofing, non-combustible material.
- It is not recommended to lay a wooden floor in such a gazebo. Sparks from the firebox can hit the deck and cause a fire.
- You can prevent fire by finishing the floor around the stove with iron or asbestos sheets.
Not far from the gazebo you need to place a fire shield and keep a container with sand.
How to fold a stove
Bricks for the hearth are laid on the foundation. Any material that does not emit harmful and toxic substances when heated is suitable. After all, there are plans to cook food there! The firebox itself and all elements that come into contact with fire are made of refractory bricks (fireclay, clay).
Masonry mortar is a mixture of clay and sand. The proportion depends on the fat content of the clay. Before laying, it is recommended to soak each brick in water for several minutes. This will improve adhesion to the solution.
The furnace construction project with all the drawings and diagrams must be worked out especially carefully. Any error will affect the performance of the structure. Complex structures with several fireboxes (for frying, boiling, baking, smoking) require several blowers and separate smoke outlets.
At the top, the furnace narrows and goes into a pipe. The smoker must be higher than the roof level; its size depends on the required draft and is taken into account by the design. It would be a good idea to cover the top of the pipe with a metal umbrella from precipitation.
At this stage, you can immediately equip the gazebo with a brick work table with a sink and niches for food and firewood. Immediately provide the necessary communications: water, sewerage, electricity.
The surface of the hearth can be plastered, decorated with ceramics and tiles. The cladding with artificial or natural stone looks organic. The brickwork itself also looks beautiful with neat jointing.
