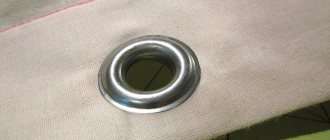
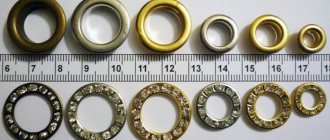
Since the ancient times of the invention of navigation, humanity has known such a thing as eyelets, which have become an integral attribute of sails used by sailors. Externally, this device consists of two rings of equal diameter, fixed into a hole in the target material and serving to strengthen and hold the entire structure on the base.
Eyelets are the basic method of attaching awning canvases
Where are eyelets used?
Eyelets are needed to make a smooth hole in any material and protect the cut edges from chafing . In 1901, the fittings were invented for fastening ship sails; over time, eyelets began to be used in sewing clothes, belts, curtains, as well as for assembling documents or other papers into ring folders.
Small eyelets are installed on almost all models of sports shoes, for example, sneakers. The laces are passed through the metal rings. Thanks to this fittings, the item will last longer, the cord will not fray, and the material from which the shoes are made will not deform.
What other fasteners exist, besides grommets for awnings
The performance characteristics of automobile and construction awnings, household tents, banners, etc. depend not only on the properties of the fabric from which the product is made, but also on the quality of the fittings used, among the wide variety of which we highlight the following elements:
Rivets for awnings
Blind rivets are widely used both in the production of household awnings and canopies, and in elements of clothing and footwear. The choice of material for these fixtures depends on the material of the parts being fastened and the environment in which the fastener will be used. A separate operation of painting the rivet is also allowed, so choosing fittings that match the color of the main product is not particularly difficult.
All materials from which rivets are made are regulated by GOST and can be as follows:
Duralumin with or without coating (anodized, varnished). Galvanized steel. Stainless steel (A2, A4, or imported analogues: DIN 7337). Copper. Monel copper-nickel alloy. Contains 70% nickel, 30% copper. Polyamide. Plastic that is widely used in the textile industry.
When selecting material for fasteners, you should avoid so-called galvanic couples between the fastener elements, hardware and the fastened part, as well as the fastened parts among themselves. For example, when aluminum and steel come into contact, the former oxidizes and then destruction occurs. Therefore, for fastening steel parts, it is better to use rivets made of stainless steel grades A2, A4 or DIN 7337. Galvanized steel for rivets is used less frequently, since the zinc coating wears out quite quickly.
The most universal hardware is a copper (copper alloy) rivet. The main disadvantage of copper is its price, as well as the formation of a green coating (copper oxide) on the surface of the fastener over time. To be fair, it should be noted that oxidized copper rivets do not affect the strength of the fasteners in any way. Polyamide does not create galvanic couples, but it also cannot provide high fastener strength.
Hooks for awnings
Even such a simple element of awning accessories at first glance, like a hook for fastening the awning, has its own specific technological features. The most common are galvanized devices for fastening awnings with two or more holes. The standard shape is round, oval or S-shaped, and the sizes vary greatly.
Recently, plastic hooks have become especially popular. Most of them have a flattened (flat) shape and two holes for fastening. Their price is lower than iron ones, but their service life is also much shorter.
Advantages and disadvantages of application
Why eyelets are considered a good invention:
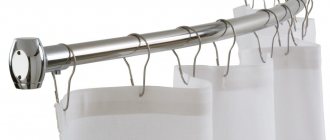
- Curtains with eyelets glide well on a special round curtain. They open silently and easily. The same can be said about paper with eyelets. Such sheets are easy to turn over in a folder.
- Reliable fastening. If curtains on hooks can be accidentally touched and the loops broken, then the eyelets will withstand such a load.
- Aesthetic appearance. Thanks to the fittings, the holes look neat. You can choose eyelets by color, to match the tone of the product, and also choose an unusual shape.
- Clothes and curtains can be washed in a machine without removing the accessories.
The only drawback is that the material on which the eyelets will be installed must be chosen correctly. Many fabrics shrink after washing, as a result of which the hole is deformed, and threads or the edge of the cut material come out from under the fastening of the fittings.
Application area
The part is widely used in the production of clothing, shoes and accessories. Shoelaces for tying shoes, belt tongues, and laces for bags are threaded into it. Another area of application is parachuting, where fastening reliability plays a very important role. The awning fixing cables are also threaded into the eyelets. This use case can be seen on tourist tents, marquees, and large trucks. The device is also known to signal makers who are familiar with the arrangement of street advertising: banners with large format printing, banners, etc.
Eyelets have not bypassed the office, where sheets of paper are sealed with the help of these parts. Heavy draped curtains are also hung on these holes. At the same time, the product is still relevant for sailing ships, but now these are either private yachts or sports vessels. The device is also called a block, which is not entirely correct, because the design consists of a ring and a bushing, which is also called a block.
The grommet sleeve is also called the leg and block, the washer is called a ring, sometimes a cap.
Types and materials
Eyelets can be classified according to several criteria.
The table describes in detail the types of fittings and their characteristics:
| Distinctive features | Description |
| Magnitude | From 4 mm to 8 cm in diameter. Small eyelets (up to 2 cm) are used for sewing clothes, for making shoes, and also in office supplies. Large rings are installed on curtains and awnings. |
| Form | The outer edges may have an unusual appearance. For example, for children's rooms and bathrooms, you can purchase accessories in the shape of a flower or animals. Triangular and square grommets are sold for living rooms. For ribbons and flat laces, you can purchase oval eyelets. |
| Material | The fittings are made of metal, wood or plastic. |
| Color | The rings should be in harmony with the shade of the product on which they will be attached. You can buy matte or chrome metal eyelets. A special coating protects the metal from corrosion. Plastic fittings come in a wide range of bright colors, and wooden rings come in dark and light colors, usually coated with a layer of varnish to ensure good glide over the curtain. |
It is important to select the size and color of not only curtains, but also cords or ribbons. For example, shoe fittings should either match the base material or be the same color as the laces.
Characteristics
When choosing new eyelets, pay attention to several important characteristics
Diameter
The main distinguishing characteristic of such parts is the diameter of their holes. Determining the optimal diameter directly depends on the purpose for which the part is purchased. In stores you can find designs with a diameter from three to forty millimeters.
Depth
Another important parameter is depth. To determine it, you need to measure the distance between the end of the sleeve and the top cap. Before choosing a part, it is necessary to determine its depth, since this indicator determines the thickness of the installed structure.
Material
It is known that eyelets are made of various materials and therefore this must be taken into account when choosing them. If they will be installed outdoors, it is better to use structures made of plastic or metal coated with copper. Any materials are suitable for residential premises.
Form
Some people believe that such hats can only have a round shape, but this is not so. There are manufacturers who produce fittings in rectangular, oval or square shapes. There are also unique uniform models made in the form of dolphins or fur seals.
How to choose a mounting option
You can install eyelets yourself only if they are plastic or wooden rings. These products are designed to be installed manually. The bushings are easy to unfasten and, conversely, snap into place. Metal fittings are attached using special tools.
The choice of the type of eyelets depends on the material on which they will be attached. For light and elastic fabrics, plastic rings are suitable. They can also be used to attach paper and laces to summer shoes.
Wooden fittings are installed on dense materials, for example, cardboard, leatherette, or curtains of medium thickness. Metal eyelets are used to make holes in rough and thick materials such as leather, jeans or canvas, as well as for thick blackout curtains.
Classification by place of use:
Eyelets are the most widespread and practically irreplaceable method of framing holes for fabric materials, such as:
- banner fabric;
- awnings;
- tarpaulin fabrics;
- tent materials;
- advertising banners and banners;
- covers and capes for vehicles and equipment;
- camouflage nets;
- artificial (synthetic) and natural fabrics;
- also used in leather products and linens.
Self-installation without special tools
You can install the eyelets yourself, without special tools. It is important to smooth the material well before installation.
What else is needed:
- sewing threads matching the tone of the main material;
- sewing needle;
- scissors;
- a piece of chalk or soap for marking;
- roulette.
You can install wooden or plastic eyelets yourself without using special tools.
Algorithm of actions:
- Place about 3 cm down from the top edge of the curtains. Make markings (how to determine the optimal distance between the fittings, you can read later in the article) with chalk or soap.
- Attach the eyelets to the fabric and trace along the inner diameter.
- Use scissors to carefully cut holes.
- Remove all protruding threads and fabric fibers.
- The crumbling material can be carefully hemmed.
- Place the lower parts of the fittings under the canvas, and place the upper parts on top. Press the ring with your fingers until you hear a slight click. Repeat with all holes.
In order for the curtains to slide well, the eyelets must be at least 1.5 cm wider than the rod. Paper folder staples, cords and ribbons, on the contrary, must be narrower than the holes in the rings.
Calculation of the distance between eyelets
The distance between the rings depends on the texture of the material on which they will be attached. The thicker the fabric, the further apart the rings are placed . The exception is paper. Here, the distance between the eyelets depends on the location of the staples in the folder, which will pass through the hole.
For attaching eyelets to tulle or other thin fabric, a distance of about 16 cm is considered optimal. On coarse and dense material, the gap should be about 20 cm. Particular attention should be paid to the rule for calculating the distance between the rings when installing them on thick curtains.
The same spacing will contribute to the formation of even and beautiful folds on the curtains.
It is also important to calculate how many rings will need to be installed.
To do this, you need to use the formula A = (b - 2x): 18 + 1, where:
- A – number of holes;
- c – curtain width;
- x is the distance between the center of the first or last eyelet and the edge of the curtain.
It is recommended to place the outer rings 3-7 cm from the edge of the curtain. This way they will look beautiful and the fabric will form an even wave.
Using grommet tape
Eyelet tape is needed to strengthen thin fabrics where the rings are fixed. If the base material is dense enough, then you can attach the eyelets without compaction.
The tape is a strip of fabric with finished edges. One or both sides are impregnated with a special glue, the fixing properties of which are activated at high temperatures.
How to attach ribbon to a curtain:
- Measure the width of the tape and place a point down from the top edge of the curtain, doubling the measurement result.
- Fold this part of the material in half, wrong side inward, and iron well.
- Apply the tape to the edge of the resulting fold, with the glue side down.
- Iron.
- Wait for the fabric to cool, cut off the excess tape on the sides.
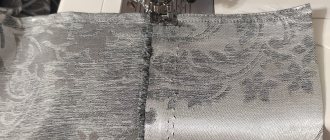
- Use a sewing machine to stitch the top edge of the tape to secure it more securely.
For curtains that cannot be ironed, you can purchase grommet tape that matches the color and simply sew it to the top edge of the curtain. Transparent but dense ribbons are sold for tulle.
Preliminary work
Preliminary preparation is important in any business to obtain a quality result. Before you think about how to make eyelets for curtains, you should:
- Make the necessary calculations.
- Buy material of the desired color for curtains and lining.
- Buy dublerin or grommet tape, eyelets. The width of the tape should be 2 centimeters larger than the outer diameter of the fastener.
- Find a flat surface to work on: you can work on the floor or use an ironing board.
Fabric yardage calculation
To calculate the required amount of fabric, you should find out the length of the cornice and determine the height of the finished product. The length of the cornice should be multiplied by a factor to give the product beautiful folds. The coefficient will be equal to:
- For light fabrics - 1.5.
- For dense materials - 2 or 2.5.
The calculation also includes material for side allowances (up to 15 cm), top and bottom allowances (at least 25 cm). The calculation looks something like this for a cornice length of 1.5 meters: 1.5 2 + 0.15 = 3.15 meters or 315 centimeters.
Counting the number of fasteners
To purchase the required number of fasteners, a preliminary calculation of materials should be carried out. To calculate the required number of eyelets, you need to measure the internal and external diameters of the fasteners, taking into account the standard properties:
- It is necessary to purchase an even number of eyelets.
- The rings should be attached at a distance of about 18 centimeters. The optimal distance for attaching them ranges from 15 to 20 centimeters. When using a double curtain rod, consider the distance between the rods so that the curtains do not touch.
- The distance between the side edge and the center of the first eyelet should be at least 7 centimeters. This parameter depends on the width of the hem and the outer diameter of the fastening. To securely fasten the fittings, you should place them so that the fasteners do not touch the seam.
Preparing fabric for cutting and finishing seams
The curtain is prepared in advance for installation of eyelets. Before installing the rings, you should:
- Decorate curtain fabric. This procedure is carried out by wetting, drying until damp, and ironing the fabric. After this treatment, the fabric does not shrink after washing.
- Sew on the lining and finish the seams.
The seams are processed in strict sequence. The top seam is treated first. The material is processed in compliance with the technology:
- The material is laid out on a flat surface.
- The wrong side is folded and ironed 2 cm.
- Another fold is made to fit the width of the grommet tape.
- Having released the width of the hem from the edges, lay the tape between the layers of fabric.
- The strip with tape is glued using an iron. Iron small sections of the tape until the sides are completely glued. Only after obtaining a high-quality result do they move on to the next section.
- The fabric is sewn along the edge of the lapel, departing 2 centimeters from the edge.
You can sew the side seams using a hem stitch. It is not necessary to use grommet tape - you can use regular curtain tape, after removing the tension cords from it. You can hem the bottom of the product after installing the eyelets at home in order to measure the desired length of the curtain to the floor. In order not to spoil the fabric due to lack of experience, you can carry out all the necessary work on a small piece of fabric.
Installation using specialized tools
You can install the eyelets yourself if you have special tools. Metal fittings are more difficult to fasten; hand strength is not enough for the eyelets to snap into place. Much depends on the width of the ring.
For heavy and thick fabrics, rings with a thick stem are used. In this case, the pressure on the grommet should be very large.
Installing eyelets with clips
There is a type of metal grommet with clips that can be installed by hand using a small hammer. The disadvantage of such rings is the presence of a front and back side. They are usually installed on bags and shoes.
Algorithm of actions:
- Press the ring onto the material so that a dent remains.
- Using the extruded lines as a guide, cut a hole.
- Place part of the eyelet with clips under the material.
- Place a ring with recesses on top.
- Bend the clamps using a hammer.
Then you need to remove protruding threads and fibers of the material.
Installing eyelets using pliers
In specialized stores you can purchase pliers for installing eyelets. The tool resembles pliers. The kit comes with removable attachments of different sizes. They are called punches and matrices.
How to install eyelets using pliers:
- Reinforce the material with grommet tape.
- Attach a nozzle of the required size to the pliers and punch a hole.
- Insert the part of the ring with the leg from below.
- Close with the top half of the ring.
- Install the nozzle into the pliers to close the ring.
- Place the grommet between the closing parts of the pliers and slowly press them down.
It should be taken into account that such eyelets also have a front and back side. It is important to position them correctly relative to the sides of the material.
Press installation
You can install the eyelets yourself using a special press. This tool has a lever and a pressure plane. It is used for eyelets with short and long legs. The set includes punches and dies for rings of different diameters.
How to use the press:
- Strengthen the material with adhesive tape or fold it in half.
- Select a punch of the required size and make a hole.
- Place part of the ring with the leg under the material.
- Place the washer on top.
- Place the desired matrix in the press and gently press the lever.
It is important to ensure that the washer does not slip or move, otherwise the grommet will be installed crookedly. You'll have to remove it and install a new one.
How to make an awning with your own hands
Manufacturers of awning products offer to order ready-made awnings and tents of various sizes, shapes and designs. Instead of ordering one of the expensive ready-made models, you can save a lot of money and create a protective awning yourself.
Manufacturers of awning products offer to order ready-made awnings, canopies, tents, car covers, tents of all sizes, shapes and designs. Instead of ordering one of the expensive ready-made models, you can save a lot of money and create a protective awning yourself. It’s not just a matter of financial gain; self-tailoring will allow you to make a canopy with unique parameters, select the density of the fabric yourself and control the quality of fixation of the fasteners.
Preparing to sew an awning
Before you make an awning for a camping trip, protecting a car body or a trading platform, you need to choose the right fabric. Before going to an awning materials store, you should decide on the functions expected from a finished awning. Typically, a canopy is necessary to protect an object from moisture and mechanical influence of extraneous factors, so moisture-resistant canvases are suitable:
The width of the material is standard, so before starting sewing it is worth calculating the expected dimensions of the canopy. For example, 8 meters of fabric with a width of 1.5 m will allow you to sew an awning with dimensions 3x4. In some stores, materials are not cut, but torn along the fibers, but in most rolls, the weave of the cut threads does not correspond to the axes in the roll. If you need to sew a product with the most precise geometry, you should take fabric with additional margin to cut it at right angles.
Before you start sewing, you need to think about the fastenings. The most practical for use in tourism, covering car bodies and creating tents are fabric strips, metal hooks and eyelets. The fabric and fasteners must be suitable for the expected loads, since most fabrics are sensitive to intensive use.
How to quickly make an awning with your own hands?
The first stage of tailoring is the correct cut. It is enough to cut the fabric into two identical pieces so that the fabric remains perfectly flat at the seam. It is advisable to fold the canvas face down and leave a protrusion of the upper part 5-6 mm from the bottom. The remaining 6 mm must be folded up and stitched using a sewing machine.
The top layer is folded towards the seam and stitched so that the seam is stitched along the edge of the folded strip with an indentation of 2-3 mm. It is advisable to treat the finished seam with a special waterproof impregnation to prevent moisture. In the instructions with clarifications on how to make an awning with your own hands, it is recommended that you also process the fabric around the perimeter.
On the front side, the edge is folded 5 mm and stitched. Special fasteners – loops, eyelets – will help to strengthen the edges. It is advisable to reinforce the fastening points with special stripes made of tarpaulin. Hinges or eyelets are installed in designated areas. If sewing an awning at home seems complicated and almost impossible, you can simply buy a finished product.
Installation technique for curtains or tulle
Before purchasing fabric and curtain rings, you must correctly calculate the material consumption. Considering the fact that when installing eyelets, the canvas will not hang evenly, but will become wavy, more fabric will be required than the width of the window.
Since the standard distance between eyelets on thin fabrics is about 15 cm, to calculate the width of the tulle, you need to multiply the result of measuring the width of the window by 3. A narrow and often repeating wave hides a lot of material.
Thick curtains will require less fabric because the eyelets will be far apart and the wave will remain large and sparse. The width of the window must be multiplied by 2.
Further procedure:
- Calculate the required number of rings.
- Install grommet tape if the fabric is not stiff enough.
- Punch holes and install eyelets.
- Thread the rod from the cornice through the holes.
If the curtain or tulle fabric is elastic, but there is no grommet tape at hand, you can install the rings without it. You should make the holes a little smaller than necessary, then the fittings will not fall out.
Let's find out how to properly install eyelets without tools with your own hands at home?
An ideal element that has a decorative and functional purpose is the grommet. It comes with hats of different sizes and has a variety of colors and themes.
A grommet is a cylinder made of plastic or metal that has a removable cap. Sometimes a washer or a pressure ring is added to the kit. They are installed almost everywhere - on clothes, curtains, shoes, etc. How to install eyelets without tools on various types of fabric? This question worries a lot of people.
Installation on leather materials, shoes
When fixing the eyelets on the rings, it is better to use pliers or a press. It is important that the hole is smooth, so you should punch it with a special nozzle. It will not be possible to carefully cut it out with scissors, as creases and cracks will appear on the skin.
Algorithm of actions:
- Strengthen the area where the fittings are installed by folding the material in half, with the wrong sides facing each other.
- Mark the location of the rings with a marker.
- Select a punch of the appropriate size and make a hole.
- Insert the matrix tool of the required diameter, place the eyelet and secure it.
You need to work with leather only on a hard and flat surface so that the material does not deform and the fittings are fixed correctly.
Classification of eyelets by type of application:
In the case of using grommets in the automotive industry, awnings are divided into 2 types according to application: 1 option for using the grommet: for a cord or rope; Option 2: eyelets for staples.
Accordingly, the first ones are intended for threading a cord or rope through them. And the subsequent fastening of the awning to the side hooks. Therefore, it is necessary to first compare the internal size of the eyelet and the fastening cord.
The second is for putting an awning with a grommet on a bracket, followed by threading a cord or sealing cable through the bracket and further sealing the trailer. Similar to the previous option - it is necessary to select the grommet and bracket for dimensional compatibility.
Installation on paper products
The easiest way to install eyelets yourself is on paper or cardboard. Those who have never installed such accessories are recommended to practice on paper before attaching the ring to fabric or leather.
Algorithm of actions:
- Use a ruler to measure the distance between the staples that will pass through the holes. According to the result, mark the location of the rings on paper.
- Use a hole punch to punch holes in the sheet. If the hole punch blade is too narrow. You can widen the hole by twisting the tip of a stationery knife in it. Excess paper needs to be cut off.
- Insert the fittings with the foot on the wrong side. Cover the top with a washer.
- Secure the eyelet with pliers or a press.
Since the small paper rings are made of thin metal, they can be secured by hand. To do this you will need some kind of cone-shaped object, such as a nail. It should fit in diameter. Using a small hammer you can secure the grommet. However, you will have to get used to it. The first attempts may be unsuccessful.
Eyelets: history of appearance
The likely timing of the grommets' appearance remains unknown. It is known that this happened a very long time ago, perhaps during the times of Ancient Greece. Scientists do not know the language in which this word appeared, much less the inventor of this device. The appearance of the grommet is associated with the use of wind power, and the term itself refers to the hole in the sail for threading the fastening threads. In ancient times, this is how the rigging of a ship was formed. Nowadays, the term has expanded its meaning. Now this is an option for strengthening the edges of holes that are less strong than the cable passing through them.
The grommet is often used as a decorative device rather than a means to strengthen the material. Examples include linings in leather products, fiberboard, and foam board. A modern grommet is a mechanism made of a washer and a shaped sleeve. In this case, the material used is mainly metal or plastic.
Tips for installing grommets on a canvas awning
Tools you will need to install the grommet on the tarp by hand:
- hammer;
- bumper;
- pencil;
- roulette.
Algorithm of actions:
- Make markings, determining the optimal distance between the rings.
- Use a punching tool and a hammer to make holes.
- Place the parts of the eyelets with the leg under the material. Place the washer on top.
- Using a hammer, secure the eyelets to the awning.
It is advisable to fold the tarpaulin in half at the location where the fittings are installed so that the fastening is secure.
Awnings require rings made of durable material. Eyelets must be chrome-plated or galvanized so that the quality of fastening is not affected by aggressive weather conditions.
In addition, a special coating makes it easier for the awning to slide along the rod. You can buy plastic rings. They are easier to install and do not corrode. The main thing is to buy special eyelets for heavy materials so that they fasten well and are made of thick, wear-resistant plastic.
The manual installation method is suitable for those who have experience working with eyelets. The rest are recommended to use professional equipment that reliably solders the parts of the rings together. To attach fittings to a tarpaulin awning, flaring and nozzles for punching holes are often used.
Different types of rings are processed with appropriate rollers. If it is not possible to install the fittings professionally, you can use a hand press. Various dies and punches are always sold complete with this tool, so choosing bits for a specific ring size will not be difficult.
If the awning is intended for frequent use and there will be a heavy load on it, such as shelter from rain and wind during a hike, then reinforcement of the eyelets will be required.
To keep them even stronger and not come off during a sharp gust of wind, you need a lining made of coarse fabric. It is inserted between the 2 halves of the ring before snapping them into place. In specialized stores you can buy reinforcing tape for eyelets. It is sold in rolls of 5-15 m. You can choose the desired color and width.
It is possible to install eyelets on any material yourself. The main thing is to choose the right rings and auxiliary tools.
However, the manual installation method is suitable in cases where the fittings have to be inserted 1-2 times; for constant work with eyelets, for example, when sewing bags or clothes, professional tools will be required.
Which is better for tourist awnings: loops or eyelets?
One of the areas where awnings have found their application is tourism. Tents, awnings, and marquees are very popular among those who love outdoor activities. However, tourist awnings are subject to much more stringent quality requirements than ordinary inexpensive products intended, for example, to cover trucks or things on the street.
Tourist equipment must provide high tensile strength during sudden jerks, which largely depends on the design of the fastening points. Usually, eyelets are placed in the fastening points of simple and cheap awnings. In order to make a grommet in an awning designed for high loads, you need to strengthen the place where the tent is fastened. This can be achieved by installing the grommet through a plastic or additional brass washer. Then the fastener will look something like it is shown in the figure below.
Strengthening the structure inevitably leads to an increase in the cost of the final product. On cheap awnings, they simply punch a hole and secure a ring of two washers in it. Here the eyelets perform not a power function, but a fastening function.
An alternative to quality reinforced eyelets are eyelets, often used in camping gear. These are small pieces of slings sewn into the fastening points, forming devices for awning guy lines. They are, of course, cheaper than high-quality eyelets, but their performance characteristics are lower.
High-quality installed grommets do not have the problems that appear on cheap awnings. Therefore, there are usually no complaints against them. Problems arise when things are used for other purposes. The same shelter canopy is not intended for tourism. Thus, when choosing an awning, think about the conditions in which it will be used.
How to assemble and tension the structure
To prevent precipitation from accumulating, the canopy should have a slight slope, for example, towards the flower bed. Or the frame on which the banner will be stretched can be made curved or in the shape of a triangular roof. Depending on the plan, the canopy is assembled in stages.
Near the wall
For a canopy near a building you will need only two supports, which can also be trees growing close to the intended location. If the support is wood, then be sure to make a lining under the cable from a bicycle or car inner tube, wooden blocks or several layers of thick fabric or cardboard so that the cable does not grow into the wood.
It is better to remove such a mount for the winter so that pests do not nest under it.
First, a beam is attached to the wall of the building, on which one side of the banner is fixed.
The beam is fixed at the planned height
The banner is hung from hooks that are attached to a beam or the hooks are mounted directly into the wall.
When attaching, each hook is tied in order to keep the banner at an equal distance from the wall
If the banner does not have eyelets, then it is attached to the beam with screws and washers or nailed with a lath placed on top so that the wind does not tear the fabric.
After fixing one side to the wall, the other side of the banner is pulled using the corner grommets to the supports.
This type of fastening requires strong tension so that the banner does not dangle.
Attaching to trees or buildings is the fastest way to mount a canopy.
On racks
It doesn’t matter how many posts the canopy has, one or four, but they must be well reinforced. After all, in a strong wind, the banner will work like a sail.
Article on the topic: How to ban by IP in SAMP
A wooden canopy must be treated with antiseptic impregnations against moisture, rot and insects.
If over time you plan to use the land on which you installed the canopy for crops, then it is better not to concrete the supports, but to cover them with stones and fill them with earth. In this case, the support must have a T-shaped base.
Concreting the supports will securely hold the canopy
The frame from an old tent can still be used to build a canopy.
This frame is quickly assembled and installed anywhere
Do not forget that the tent frame requires additional fastening to the ground with ropes at the corners, like a regular tent.
The canopy on cables is easy to move depending on the position of the sun. Cables can be stretched between structures (dacha and garage), posts or trees:
- fasten on one side;
- put the banner on through the eyelets;
- fasten it on the other side.
To prevent the banner from coming together, the ends are secured with ordinary clothespins.
For a temporary seasonal shed, take an idea from the video below. The banner is attached to PVC or metal-plastic pipes five meters long using a ribbon tied to eyelets or sewn to the fabric itself. The pipes are bent and their ends are dug into the ground. To avoid catching such a canopy in strong winds, the ends of the pipes are placed on metal pins driven into the ground.
Methods for joining banner fabric
There are at least three ways to connect canvases to each other when creating banners of the required size. This suggests that gluing is not the only way to join fragments of a given composite together or to fix banners on any basis. Let's look at them in order.
Article on the topic: In which bathhouse was Brother 2 filmed?
Gluing
Adhesive for banner fabric is used in cases where there is a need to connect two or more fragments of fabric to each other or when creating hems around the perimeter. For outdoor placement of banners, the use of glue, which will be discussed, does not make sense, since it cannot provide adequate fixation strength on metal panels or any frame (weather and atmospheric factors interfere).
The composition of the adhesive for banner fabric must meet certain requirements:
- will darken);
- the composition should not corrode or somehow deform the composite fabric;
- dried glue should not react to moisture and natural temperature changes;
- the initial bonding time is at least 10 minutes, which allows you to adjust the edges during connection.
By and large, to join composite fabric you can use any glue that is used for polyvinyl chloride (PVC) products, these are Bostik Vinycol, Cyanoacrylate, Super-NN, Cosmofen for vinyl. The technical characteristics of the composition are always printed on the packaging (tube or bottle), so you can easily navigate this description when purchasing.
To glue banner fabric you will need:
- glue;
- solvent (646 or white spirit);
- double-sided tape for banners 20 mm wide;
- wallpaper knife and scissors;
- long ruler;
- a piece of glass or laminated OSB for precise cutting;
- wallpaper roller;
- level table (floor);
- a clean napkin for wiping off excess;
- banner fabric.
Banner fragments are printed with a white mounting strip along the edges (previously, paper wallpaper was produced this way). On the part of the banner that will be on top, cut off the white strip with scissors, but do not throw it away - then use it on the back side for gluing. Now turn the banner upside down and stick a strip of tape along the edge without removing the protective film.
Now on the front side you need to carefully trim the edge with a wallpaper knife, just make sure that the blade is sharp or immediately break off one segment to be sure. The cut must be made under a ruler on a dense and hard surface. Glass, as in the photo above, or laminated OSB/plywood are very suitable for this (if you don’t mind, you can use a laminate board).
Spread a piece of banner with an uncut mounting strip on the table. On the other piece, remove the film from the tape and carefully join both parts so that the image matches exactly. Now the most important thing: manufacturers claim that banner tape will successfully serve as a fixative, but this is not true. I checked it in practice - it comes unstuck, especially on the street, although it is excellent for temporary fixation. Therefore, turn the banner face down, apply glue to the joint and press the previously cut white mounting strip to it. Remove excess glue with a clean napkin and roll the joint with a paint roller.
Note: the time for complete hardening of the glue before the start of use of the fixed segments is indicated on the packaging by the manufacturer.
Welding banner fabric
At home, you can use the welding method to join banner fabric if you are dealing with PVC canvas. Here you can use old banners to make a car cover or an awning, which you will use for relaxing during rain or for protection from the sun.
Article on the topic: What does it mean to insist on a water bath?
To weld banner fabric you will need:
- pieces of banner fabric;
- construction hair dryer;
- a can of household chemicals or hairspray for making an attachment;
- wallpaper knife and scissors;
- marker or pencil;
- long ruler;
- a piece of glass or laminated OSB for precise cutting;
- tape measure, wallpaper roller.
To make a nozzle for a hair dryer, take a can of household chemicals or hairspray and cut off the blind parts on both sides, leaving only the cylinder. Flatten this cylinder on one side, leaving a millimeter gap for the passage of hot air. The attachment is ready - put it on and use it.
To weld fragments of PVC banner fabric, it is best to turn it over so as not to heat up the paint, but if this is not possible, then the paint stains can then be removed with 646 solvent. First, cut the canvas for its intended purpose, for example, for a beach or country awning and get to work.
The canvases can be welded overlapping or end-to-end, but then you will need to lay a mounting strip 10-15 mm wide on each side on top. That is, on the front side the fragments will be joined end-to-end, and a strip will be welded on the back. You need to cook PVC at a temperature of 600-700°C and for most construction hair dryers, this is the maximum power. It is advisable that two people participate in the process - one will heat the vinyl to a state before melting (softening), and the other will roll the seam with a roller. But, of course, one person can handle such work.
Eyelet fastening
Banner fabric can be used to make excellent curtains for a summer shower or changing room if you install grommets in it to move the curtain along the wire. First, you need to bend the edge of the fabric so that the double fabric is twice the diameter of the grommet and solder it, as described in the section “Welding banner fabric.”
To install eyelets you will need:
- vinyl cloth;
- eyelets;
- notch (tube sharpened into a cone);
- cone straightening (reinforcement sharpened to a cone);
- hammer, tape measure, marker.
Article on the topic: Which interventional insulation is better for a bathhouse
Place the double-folded and welded edge of the panel on a block or board, having previously marked the places for punching holes. Then, using a notch from a tube sharpened to a cone (it is important that the cutting edge coincides with the diameter of the eyelet tube), punch the required number of holes.
Insert the grommets into the holes made, put the grommet washer sticking out of the PVC onto the tube and, using a cone straightener (a piece of reinforcement of a larger diameter ground into a cone), flare the tube. Then use a hammer to complete the flaring process, breaking the edge of the tube so that it fits tightly against the grommet washer, like an overlap - this is clearly visible in the top photo. Do this for all eyelets that need to be installed.
Sewing Banner Fabric
Let's start with the fact that you cannot use a regular electric sewing machine that you may have at home to sew banner fabric. To do this, you need a manual sewing machine such as “Chaika”, “Podillya” or “Zinger”. You can also use a machine with a foot drive, or, instead of a manual one, install an electric drive. In addition, you need to purchase a sewing needle for leather products.
Regular threads are not suitable for stitching PVC, and for this you will have to purchase thick nylon threads (also called “shoe threads”), which are available in almost all hardware stores. I would like to note right away that there is a spring on the left end of the machine through which the thread will pass, and by default it is almost completely clamped (designed for ordinary thin threads) - release it by unscrewing the nut almost to the end of the pin.
As you know, when sewing on a machine, the thread is fed from two sides - from the spool placed on the pin at the top and from the bobbin, but it must first be wound. To do this, take the bobbin in your right hand and press the thread to the right side, and with your left hand at this time make a dozen turns towards you (when viewed from the left, this will be clockwise). Cut off the protruding end, place the bobbin, without changing its position, on the horizontal winding pin and wind the thread until the presser foot swings up, indicating that enough has already been wound.
Thread the thread from the spool in the usual way, only there is a wire antenna near the pressure spring - you should not thread a thick thread through it. Insert the bobbin into its place and make several rotations with the wheel to get the inner thread, after which both threads must be pulled in the opposite direction from you. On the left side of the machine there is a foot that switches the stitch pitch - lower it to the very bottom to the largest value. After sewing the seam, move the foot to the very top - this is the reverse position. Sew a few stitches back along the seam to prevent the edge from unraveling later.
Article on the topic: How to make a hatch to the attic in a bathhouse
Price list for post-printing processing
| Type of processing | price, rub. |
| Gluing pockets, p\m | 15 |
| Front gluing or banner gluing, p\m | 45 |
| Cutting, p/m | 20 |
| Installation of eyelets (diameter 10 mm), pcs. | 15 |
| Installation of eyelets (diameter 12 mm), pcs. | 15 |
You can find out all the necessary information by calling
8
Questions to ask the banner advertising customer:
— Where will the banner be hung: indoors or outdoors? — How long will it be used as an advertising medium? — What are the weather conditions at the installation site? — On what surface or structure will the banner be mounted (on a wall, between two supports, etc.)? — Where will it be installed (on the wall, between two supports, etc.)? — Are there local government regulations governing the placement of banners and building codes (rules or regulations) governing installation methods? — What is your budget?
Need to measure your object?
During the day we will go to your site, take measurements and provide high-quality consultation. Contact us and leave a request for measurements.
Banners
When placing banners over roadways and pedestrian parts of streets, Nick Puleo advises stretching metal cables between the supports and attaching banners equipped with carbines along the entire length of the canvas along the lower and upper edges to them. He also recommends installing spring mounts at each of the corners of the tie that attach to poles or buildings on both sides of the street.
According to him, it is better if the maximum banner format for placement above the street does not exceed 0.9 x 9.1 m. “A larger banner will create a sail effect,” said Nick Puleo.
Usually clients want to place a banner in a larger format. But, according to Jim McCulloch, the size of this type of banner should not be greater than the space occupied by the text.
According to Jay Snyder, many cities have restrictions on the use of street banners. Often, guide wires are already installed above busy streets for frequent placement of banners. When installing banners or banners in areas with strong wind loads, he recommends contacting professional installers. Simple small format banners can be installed by end users who have been advised by professionals.
Banners on poles
According to Nick Puleo, the "pockets" allow the banner to be stretched between two tubes that are mounted on road poles or street lighting poles. In this case, he recommends using canvases whose length does not exceed 91.5 cm. Tubes for placing banners are fixed on poles using brackets or clamping hoops.
Article on the topic: How to ban by IP in SAMP
Installation Methods
The Quick Signs company and its division BannersOntime.com talk about methods for installing various banners:
use 283gsm banner fabric. m or 367.9 g/sq. m. The canvas should be equipped with eyelets so that it can be fixed to the building using anchor bolts and washers;
— On mesh metal fences:
banner material with a density of 367.9 g/sq. m, it makes sense to reinforce it with nylon tape, which is passed under the hem. Nylon rope or wire is passed through grommets and fences;
— On a free-standing banner support:
The banner for the three-sided design is made of material with a density of 367.9 g/m2. m. If the format of the advertising area of the structure is large enough, slots are made in the canvas to allow the wind to pass through. If desired, the spring fasteners can be passed through the eyelets and secured to the frame of the structure;
— Between supports or trees:
They use a banner with a density of 367.9 gsm. m or 452.8 g/sq. m. A cable is passed along the entire length from the top and bottom of the canvas. This allows you to pull only the rope during installation, and not the banner itself;
use heavy banner fabric (from 452.8 g/sq. m to 622.6 g/sq. m); Usually, a nylon tape is sewn into the hem (single folded, double stitched, with reinforced corners and equipped with eyelets). There are slits in the canvas to allow the wind to pass through. A cable will be stretched along the top of the banner. The banner above the street can also be installed using pull rings, O-rings or carabiners;
— Banners on street lighting poles:
images are applied to both sides of heavy light-blocking (“blockout”) banner fabric; stitched “pockets” are provided in the upper and lower parts of the canvas for mounting on brackets.
Interior installation
Banners designed for indoor use do not have to withstand wind or weather. These ads are viewed from a closer distance than street banners, so the lettering or printing on the material can be more detailed.
Depending on the chosen installation method, it is determined what the post-printing processing of the canvas will be.
Installation of banners on the wall can be done using screws with washers, eyelets, screw-in dowels, etc.
Short-term advertising is installed using special mounts, systems, brackets and stands, which are produced by various manufacturers. To quickly install small-format banners on the inside of shop windows, use suction cups attached to the grommets.
Wind and weather conditions
Wind is the enemy of banners, this is the main reason why they refuse to use them. The larger the banner size, the greater the potential wind load. The canvas transfers this load through fastenings to the building or support. Strong winds can destroy even a properly installed and tensioned banner structure or the support to which it is attached. On the other hand, as strong storm winds approach, access to some banners may become significantly more difficult. It's not easy to predict winds in advance, so taking down banner ads on the eve of a storm is usually not possible. It is better to make every effort to reduce wind loads on the stretched fabric. One option is slots in the annular that allow the wind to pass through. And yet, there is no consensus among signal makers about the advantages of this method of reducing wind loads. Crescent-shaped slits, cut into the banner using a special tool at a certain distance from each other, allow the wind to pass through the material. Opponents of this method believe that in reality, reducing wind loads due to slits in the banner does not justify damaging the appearance of the advertisement. Nick Puleo advises against using wind holes because the holes can cause visible rips and holes.
Article on the topic: Why you can’t go to the bathhouse after laser hair removal
Perforating the banner may void the warranty, so please check with the manufacturer. An alternative method is to use building mesh as a material, if conditions permit. The entire installation process may be disrupted due to weather conditions. At low temperatures, banner fabric tends to become stiffer; this complicates installation. If it's very cold outside, Al Bolek advises that you carry the banner to the installation site just before stretching it so that the banner doesn't have a chance to cure first. The service life of a banner directly depends on exposure to wind. Therefore, Nick Puleo chooses not to provide a warranty on the durability of outdoor advertising. Sometimes customers intend to use the banner as a permanent facade sign throughout all seasons, which banner fabric is generally not designed for, oh. But if installed correctly they will last quite a long time.
Photo grid prices on the market
The price range is quite wide. “Serial” models, that is, those that are produced on a conveyor belt and are almost always available, can be found for 1000 rubles per canvas measuring 158x250 cm. Custom models with your own image and high print density can reach 3000-3500 rubles per the same canvas 158×250 cm. Therefore, your own “customization” and the corresponding introduction of a fence into the exterior can result in a good amount of money.
A photo grid is an excellent solution for country houses and dachas, allowing you to decorate the fence adjacent to buildings. But there are a couple of nuances that should be taken into account before installation and purchase in general. Firstly, an incorrectly chosen tone or picture as a whole can not only not decorate the fence and the entire appearance, but, on the contrary, make it unattractive. Therefore, you need to have an understanding of the compatibility of themes, shades and compositions. The same goes for seasonal images - winter or autumn will look a little awkward at other times of the year.
Secondly, although PVC is a fairly resistant material to various types of influences, a large canvas still has a certain “vandal appeal” against which there is practically no protection. This means that the scope of its use is limited. It is better to decorate fences in closed, guarded holiday villages or private houses with good neighbors. In any case, this solution is quite interesting, which in the right hands can become a real masterpiece.
Article on the topic: Why you can’t go to the bathhouse after laser hair removal
If you have already encountered a photo grid in practice, you can share your life hacks and tips in the comments.
