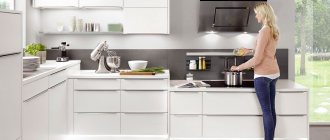
Kitchen plinths and baseboards for countertops finally form the appearance of the sets and give furniture structures an effect of integrity, while at the same time hiding possible cracks, plastic legs and other flaws. The Stayver-100 company uses a wide range of these products in the production of custom-made kitchens, which allows them to maintain a harmonious, uniform style of products, producing furniture that is aesthetically perfect.
As for small cracks and other minor flaws, clients should not be alarmed by such information. Their presence is explained not by manufacturing defects, but by installation nuances. For example, if the angle between the walls differs even slightly from the prescribed 90 degrees, then when installing the set in a certain area, there will definitely be a small gap between the countertop and the kitchen apron - these are the rules of geometry, and it is not the fault of either the builders or furniture makers. Moreover, such gaps 1-3 mm wide are perfectly decorated with furniture skirting boards.
In addition to the aesthetic value, plinths and baseboards perform an important protective function, preventing the penetration of water and small food debris under the cabinets of the lower tier of the kitchen unit. Considering the fact that cleaning in these areas is carried out extremely rarely, such decorative and protective fittings help maintain cleanliness in hard-to-reach places. In addition, skirting boards provide additional protection for postforming tabletops from swelling in the area of the rear end unprotected by laminated plastic. In places where the washing center is inserted, the baseboard base is usually treated with colorless silicone sealant, which is guaranteed to retain water.
This article is devoted to a description of the plinths and baseboards for kitchen worktops presented on the furniture market and used by the Stiver-100 company. You will find here practical recommendations for choosing these components, and also familiarize yourself with their range. More specifically, the issues of choosing these components of the headset are resolved during the measurement, since there are some nuances in this matter, but preliminary information is never superfluous, as it provides clients with a good opportunity to prepare for the visit of our designer-technologist.
How to install a plinth in the kitchen
You can decorate the bottom of the kitchen set in two ways: cover the legs along the front part with a plinth or leave the furniture legs open, installing decorative supports in visible areas.
The choice of one or the other option depends on your preferences, style and interior design of the kitchen. The kitchen plinth creates visual unity of the kitchen unit. Also, if there is a plinth, there is no need to frequently wipe the floors under the lower modules. But if you still need to wash the floors, the base can be easily removed and then put back. The kitchen plinth can be made of plastic, aluminum or chipboard. All these materials have their advantages and disadvantages. Installation of a kitchen plinth , regardless of its types, is similar.
Since the kitchen plinth is attached to the lower supports of the kitchen unit, before installing the plinth in the kitchen, you need to correctly install the kitchen legs on the lower modules. The legs for the kitchen set are supplied with special clips, with the help of which the legs and base are fastened together.
The kitchen furniture legs along the front edge and on the sides, if the plinth will also be installed there, should be installed as accurately and evenly as possible, at the same distance from the edge. The approximate distance from the edge to the front row of legs should be 8 cm - 10 cm, so that the installed kitchen plinth is not flush with the kitchen facades, but is slightly recessed under the lower modules. This is necessary so that if you are too close to the worktop, there is a small distance for your feet. If the design of the kitchen unit provides for the installation of a kitchen plinth on the sides of the modules, then here too a small distance should be left between the plinth and the edge of the cabinet. You may not approach the kitchen unit from the side, but visually this arrangement of the plinth will make the kitchen unit more unified and attractive.
installation of a kitchen plinth
Before installing the kitchen plinth, you should mark the location of the legs on it and screw the fasteners to the self-tapping screws in these places. It is better to use self-tapping screws with small heads to attach the clips to the base. It is not necessary to mount fastening clips for all legs; it is enough to fasten the base to the legs at the edges and to a pair of legs in the center if the length of the kitchen set exceeds 2 meters. Since it is quite difficult to install the legs on kitchen modules at the same distance in a straight line, the base attached to all the legs at once may bend, and this will affect the appearance of the base.
Once the necessary fasteners are screwed into the kitchen plinth, it can be installed on site. For plastic and aluminum plinths, do not forget to purchase the corners, plugs and connecting elements necessary for the kitchen set project.
Source: proekt-kyhni.ru
How to approach the kitchen plinth using a plinth? It won’t open close
Then the base if anything.
It won’t look dense and smelly. The kitchen is straight all along one wall. I'm afraid that if I lock it on both sides, then I won't be able to get into the kitchen floor without dismantling the baseboard. Option: How is the kitchen plinth attached to the bottom? You can make a cut in the base according to the shape of the baseboard and remove the baseboard under the kitchen. Like everyone else. Snaps onto the legs with clips. The base is to cut the gimor. Putting it on the bridge is still a gimmick. Maybe there is an option to somehow secure the baseboard so that it is not difficult to remove!
In principle, it doesn’t take long to unscrew it, but how to remove the insert that covers the wire channel is a mystery to me :-///
Trim the gimor? Is it not a big deal to disassemble the baseboard? ) What if you accidentally break either the insert or the baseboard itself? Should I buy a new one? If you have a jigsaw, work for 30 minutes. You need a file with a fine tooth, a piece of sandpaper and a pencil) Attach the assembled plinth to the base, trace, saw out and sand. That's all. No problem. Is it worth 30 minutes? A? )) It’s just not possible to do it beautifully. In order for the base to be removed normally, there needs to be a gap, that's it. And two in the photo you can see that the base has a plug. cutting the plug is generally trash. She's beautiful,
Well then, a completely bad option: Make a part of the plinth adjacent to the plinth using a magnet. In the wall, a mating part from the detector (this is a magnet) to the plinth, a mating part of a furniture magnetic latch.
Plastic kitchen plinth versus aluminum: who will win?
A modern kitchen is a set of furniture made up of heterogeneous components, united by common façade elements. A plastic plinth for the kitchen is a strip installed at the bottom of the kitchen unit, hiding the lower supporting elements. Its goal is to complete and refine the appearance of the furniture.
The plinth for the kitchen is the lowest level of the set
What materials is the plinth made of?
There are two ways to decorate the lower part of the set: make the kitchen legs decorative or cover them with a special strip. In the first case, dust and dirt falling under the floor cabinets will complicate the daily cleaning process. The use of a plinth strip solves two problems at the same time - it gives the structure an aesthetically neat appearance and protects the furniture from debris getting under it.
The plinth for kitchen furniture is not necessarily made of the same material as the set itself. It performs not only a practical, but also a decorative function, so it can be made of any other material and provide a stylish contrasting furniture frame. The base is made from the following materials:
Yes, yes, the base on the headset is also made of metal
Advantages and disadvantages of each type
It is easy to make planks of any height and length from chipboard - this is an advantage of this material. They are edged around the perimeter and secured with self-tapping screws. The base made of chipboard has a significant drawback: the seams at the junction of the edge and the laminate are a vulnerable place for moisture. When water penetrates there, the plank swells and the element requires replacement. The chipboard structure requires additional sealing of the seams. Advantages of the plinth:
- ease of self-production;
- variety of sizes;
- a large number of colors;
- the ability to choose the laminated surface of the plinth exactly to match the tone of the furniture.
- low moisture resistance, the need to seal the seam.
The plastic base is practical in terms of water resistance and ease of cleaning. It is attached using special fasteners. Its advantages:
- practicality - easy to clean;
- water resistance - does not deform under the influence of moisture.
- a small number of colors - it is difficult to choose exactly the tone of the furniture;
- limited size range: kitchen plinth height – 10, 12, 15 cm.
Features of fastening the planks
Installing the plinth strip is the simplest step in assembling the entire kitchen set, but it should also be done according to the rules. Attaching the bar to the legs is possible in two ways:
- on self-tapping screws (this is how the chipboard plank is attached);
- fixation in grooves.
To work, you will need the following tools (the set depends on the material of the element):
- measuring instruments: tape measure, marker;
- hacksaw, knife;
- screwdriver, screws, nails, hammer;
- adhesive sealant, sealant;
- base, connecting, finishing elements (round corner elements, ventilation grilles and others).
If the plank is made of chipboard, then to prevent it from getting wet from below, a sealant is pre-glued to the lower edge. It is desirable that the edge of the element rises 3–5 mm above the floor without touching the surface.
If plastic is used, then connecting elements and corners will be needed to decorate the edges.
Installing a plastic plinth in the kitchen is easy
Kitchens with legs are equipped with a special fastening for the plinth strip. They need to be installed in such a way that the subsequently attached plinth is “recessed” deep into the cabinets. If this is not done and the bar is installed flush with the plane of the doors, then it will be impossible to get close to the sink or table. Moreover, it is unacceptable for the plank to protrude in front of the facade. The acceptable distance at which the base is located deep from the surface of the facade is 7–10 cm; accordingly, the legs are placed at the same distance from the facade during installation. From the sides of the kitchen the distance may be smaller.
The kitchen plinth is not attached to all the legs of the cabinets, but to the outer ones, provided the length of the set is no more than 2 m. Additionally, a fastening is made in the middle. It is usually impossible to ensure that all legs are aligned along one line; if you attach a plastic base in a row, you will end up with a wavy line rather than a straight line.
The plinth strip, ready for installation, is tried on and, if necessary, cut to size. Markers are made on it with a marker where it comes into contact with the legs. Fasteners are screwed here - clips that come complete with the legs: two clips on opposite edges of the bar.
Advice. The clips are attached to the chipboard plank using self-tapping screws with small heads: they will not create obstacles when adjusting the structure.
The installation is completed by placing the base against the kitchen and snapping the clips onto the legs.
Types of materials for plinth strips
The market offers kitchen plinths for every taste. They come in different shapes and are made from different materials: the planks are selected to match the furniture in the room or the overall design of the kitchen.
Plastic sockets
Such plinths are now especially popular on the market.
Low price is not the only advantage:
- plastic is moisture resistant;
- to keep the material clean, you only need a sponge and detergent;
- bends are formed using plastic;
- The plastic base has grooves for clips, and their installation is quite simple.
They also have a wide range of colors . The profile can be transparent, mirror or stainless steel in color, which creates an imitation of a metal base.
But plastic also has its disadvantages.:
- Over time, the material loses color. For example, white strips become yellow.
- Plastic should not be cleaned with detergents that contain fine-grained substances, as scratches may occur.
- Thin material is easily deformed.
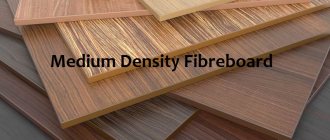
Products made from chipboard or MDF
Only high-quality chipboard models can withstand high humidity . Plinths made of this material have corners with adhesive edges, which peel off over time.
Attention. In order for laminated chipboard planks to last a long time, their surface is protected from moisture and the panels are sometimes removed to dry.
This type of base also has advantages.:
- Imitation wood.
- Large selection of colors.
- Resistance to mechanical stress. If you accidentally touch the base, there will be no dents left on it, but if the damage is significant, fungus will appear inside.
Installing an MDF base will cost almost twice as much as a plastic one . But most of them are moisture resistant. In addition, MDF copies the texture of wood well. The protective layer on such panels lasts much longer due to the absence of large sawdust in the composition.
Practical metal
Aluminum kitchen plinth is considered the most reliable . This plank will last for many years without being affected by temperature and humidity.
The kitchen aluminum plinth is a durable and lightweight material . Its height is 150 mm or 100 mm. It is easy to install; there is a silicone seal between it and the floor, which eliminates even barely visible gaps.
The kit includes plugs, corner connectors and ventilation grilles . The aluminum base can be matte or glossy, while the matte base can be grooved or smooth. It looks good in a high-tech or modern kitchen, especially if the color is in harmony, for example, with a chandelier or table legs.
Protection and decoration
To make the usual protection of the basement system also a decoration for the kitchen, take note of a few interesting ideas :
- If it's hard to choose, consider the option with a mirror finish. It looks stylish, but will require careful care.
- Lighting gives the kitchen interior some fabulousness. To create this effect, the LED strip is attached to double-sided tape. If the base is high, install spotlights.
- Built-in drawers are a great option for those who value every corner of free space. The fronts of such drawers and the base are lined with the same material. They are used for various kitchen utensils and household chemicals.
Features of the plastic base
The plastic strip is mounted by fixing it in grooves that are made in the product on the reverse side.
The standard height of the plastic strip is 10 cm, length 4 m. If the ceilings in the house are high, then the kitchen legs can be adjusted higher, and the base can be used with a height of 12 or 15 cm.
To complete the appearance of the plastic strip, the following elements are used: connecting elements, end elements, rounded corners. Elements with radius curves of 90, 135, 180 degrees are available. If desired, you can additionally install a plastic ventilation grille.
The plinth for the kitchen is a necessary finishing touch to the overall furniture ensemble. It is not difficult to install it yourself, and the choice of material is a matter of individual taste and preference.
Source: obzorkuhni.ru
What is the best way to connect the base of the cabinet and the baseboard in the hallway?
In the niche of the hallway we plan a built-in wardrobe with hinged doors, from wall to wall. There is no baseboard behind the cabinet or on its sides. The base of the cabinet is the height of the plinth (10 cm), flush with the doors (not recessed). You can do:
a) the entire width of the plinth and “rest” the plinth against the plinth. Something like in the photo (there is a cabinet without a base, but I hope you get the idea).
b) make the plinth extend from the sides under the doors and narrow the width of the plinth to the plinth.
I can't figure out if there's a difference. And if there is, what is the best way?
Email Save Comment 10 Subscribe Suitable answer
Irina Lo
last year
Many thanks to all participants in the discussion!
Furniture makers offered, but in two places it was different. And I was confused by the base flush with the facade in this particular case.
As a result, we will make a plinth from the same baseboard and slightly recess it under the cabinet. There will be a continuous colored border in the hallway and a joint that will not be visible under the cabinet.
Thanks for the discussion, your comments were very helpful!
- Like | 3
- Save
Sort by: Oldest first
- New ones first
- Old ones first
Kitchen plinth, types, installation instructions
The kitchen plinth is a special fence that helps keep the kitchen floor clean even in places where a mop or vacuum cleaner cannot reach. Dust, dirt and food often accumulate under furniture. To prevent this from happening, a base is used, which is attached to the headset, or rather, to its legs.
A special clip is installed on the furniture legs, thanks to which the kitchen plinth is attached. Materials for the production of the base
The most popular types of plinths are plastic (PVC), MDF and chipboard plinths, and aluminum. Each of them has a number of features that need to be taken into account when choosing.
Plinth made of chipboard
If you want to save a little money, choose a chipboard plinth. It should be borne in mind that this material absorbs odors and moisture, and changes color to darker with regular washing. Therefore, it will very quickly lose its original appearance and become unusable.
When exposed to moisture, the chipboard is subject to distortion, so this base will have to be replaced immediately. A special seal in such cases is completely useless.
It has a standard height of 100 and 150 mm.
You can attach the plinth before installing the furniture, but it’s better after
With the growing popularity of built-in furniture, ordinary floor and ceiling plinths can be attached to already installed furniture. But not always!
Let's consider all possible options for “bundling” furniture and baseboards.
Ideal when there is virtually no baseboard
Previously, the plinth along the edge of the floor covering was a mandatory “accessory”. In fact, with its thickness it covered the so-called technological gap between the wall and the floor itself. Well, he also covered the shoals of installers and “levelers” of walls. They also pulled cable channels through it for wiring.
Now, of course, technology has leapt far ahead.
Stable PVC coatings have appeared that do not “walk” and do not require the notorious technological gap; they are installed butt-to-edge to the wall and do not need a plinth. And many people like the look of finishing without a plinth or with a very conventional edging along the edge of the walls, which can hardly be called a plinth.
They also groove the walls along the level of the floor covering, hiding cable channels and technological gaps for “walking” floors in the grooves. There are also special finishing profiles that allow you to design the joint between the floor covering and the wall in a fundamentally different way.
These are all options that do not in any way affect the installation of built-in furniture. Well, as a last resort, you can slightly grind off the barely noticeable protrusion for a tighter connection and treat it with sealant.
If you still have a plinth, you can use it to “bypass” the built-in furniture
The main thing here is to adjust the height of the furniture plinth to the height of the baseboard, then the built-in furniture will look like it’s truly “built-in”.
This does not always work out with kitchens where the base, as is known, is 100-130mm high. We still need to look for such a plinth.
Plastic base
A PVC base can easily replace a wooden one in the kitchen. Even a beginner in finishing work can install the bar without outside help.
Most often it is used in kitchens with geometric asymmetry and curved facades. This choice is completely justified, because the plastic base bends easily without cracking.
It should be noted that it will be easy to select all the necessary components for a PVC base.
Plastic plinths are available in various colors, so they easily match any set and interior. And to make the furniture more floating, you can choose a transparent plank option for finishing.
A mirrored plastic plinth will help visually expand the kitchen space.
The height of the base is standard and is 100 and 150 mm.
Installing a plastic base
Even a person without experience can install the plastic strip correctly. In this case, you won’t even need to study the instructions or look for a video with all the nuances of the work.
The first step is to choose the right base. It must have a seal that fills the space between the furniture and the floor. A silicone seal with a long service life is best suited for such purposes.
When purchasing a base, you need to pay attention to the package contents. Standard components include snap clips with clamps, corner joints and PVC end caps.
The procedure for installing the base is identical for all types of dies. After preparing all the necessary elements, the structure should be secured with adapters.
The last step is installing the clips. They need to be placed in the grooves on the back side of the plug, and then simply snapped onto the legs of the headset.
The corner structure is mounted if it is necessary to rotate the bar in a certain place.
After all the manipulations done, you only need to install the end caps.
You don't need a ton of experience to install a kitchen plinth that will help keep your entire space perfectly clean.
Source: shik-meb.ru
Do you need a plinth (18 mm thick) behind the built-in kitchen cabinets?
Hello everybody! It’s not clear whether to make a baseboard where the lower cabinets (on which the countertop lies) will be in the kitchen? Personally, I would do it (since the kitchen will not be ready soon), and so that it would be monotonous everywhere, but I don’t know if this would be a mistake (wouldn’t an 18 mm thick plinth interfere with the installation of cabinets, just in case - Maria is planning a kitchen, well-known factory).
04/15/2015 at 13:13
Will the sockets for the PMM fit?
04/15/2015 at 13:25
Yes, thanks for reminding me, the sockets there are very low, for the sockets I thought about making a break in the baseboard, i.e. it will be to the right and left of the sockets. And under the socket (there is about 1-2 centimeters in total), you can probably glue a thin piece of plinth. The main thing is whether the baseboard will interfere with the installation of the kitchen?
04/15/2015 at 13:30
frominfotek, usually they don’t put baseboards behind cabinets, because only cockroaches, if there are any, look at it. And the kitchen plinth will rest against the plinth - either cut out the plinth or plinth. It does not interfere with the legs - the legs are closer to the fronts. You decide.
04/15/2015 at 13:45
frominfotek wrote: The main thing is whether the baseboard will interfere with the installation of the kitchen?
It shouldn’t interfere, because kitchen cabinets stand on legs, and these legs are screwed in place by assemblers, and therefore not at the very back edge. And the decorative strip that covers the base can be placed under the baseboard and filed in place.
04/15/2015 at 14:47
I don’t like decorative strips, they get in the way of my legs and I have a kitchen without legs. The plinth is visible from the sofa in another corner of the studio. You need a plinth, it's easier to shovel the dirt out.
04/15/2015 at 14:57 04/15/2015 at 15:40
Attached to the wall
04/15/2015 at 23:22
Thank you, I realized that there is no special ban on baseboards behind cabinets, so I will do it.
This is on the back, and what is it holding on to the front?
04/15/2015 at 23:40 04/16/2015 at 06:08
In case of leaks, the baseboard will also prevent water from penetrating under the floor.
04/16/2015 at 11:26
semur, I still don’t understand. Are there such powerful channel angles that they hold this colossus? What if a 150 kg guest sits on a tabletop in the area of, for example, a stove? Well, or if you lean your hands on the tabletop and rock it - it’s not as monolithic as it is on legs? And the solution is unusual, I didn’t even think about it. I'm not criticizing (don't think so), I'm just trying to understand how it was made there. The photo doesn’t give the answer (to me personally), it just shows that your kitchen is very good. beautiful
sergmih wrote: In case of leaks, the baseboard will also prevent water from penetrating under the floor.
I agree, and this is also one of the reasons to do it there, especially since there is no money for a kitchen yet, we will live without a kitchen, and a floor with a plinth will be more pleasing to the eye than without it
How to choose and install a kitchen unit plinth?
The base of the kitchen set performs several functions: decorative, protective. It is not considered a mandatory element during installation, but thanks to this detail the possibilities are expanded:
- a barrier appears at the bottom of the furniture, preventing dirt, children's toys and other items from getting under cabinets and cabinets;
- the amount of work during general cleaning of the premises is reduced;
- money is saved on finishing the lower section of the headset.
This part can be purchased and installed together with the rest of the furniture or separately.
Design and characteristics
If you are interested in the answer to the question of what is the plinth located at the bottom of the kitchen unit, you need to learn more about the structure of this element. It consists of main parts:
- external bar is always in sight;
- clip-on fasteners are used to secure the entire structure;
- plugs located at the ends;
- seal - this structural element is used to ensure tightness, due to which dust and dirt penetrate under the furniture less intensively.
The design is subject to change. If you are deciding how to install a plinth in the kitchen, you should also consider auxiliary elements that are not mandatory during installation, but improve the appearance:
- elements with roundings, radius fragments;
- corner parts, they are presented in 2 options: 90 and 135°;
- an adapter that allows you to install the front panel, even if the standard height of the plinth changes in some areas;
- fine-mesh ventilation grilles, thanks to them it becomes possible to protect the space under the furniture from large debris, and at the same time maintain natural air circulation under the set mounted on legs.
The base may differ in the color of the front panel. It is characterized by minimal thickness. For this reason, such a structural element is not characterized by increased strength. In addition, there are many voids inside the front panel, which means that a pinpoint impact can cause damage to the integrity of the product. Considering that there is quite a lot of free space behind the front panel under the kitchen unit, it can be put to good use. So, wiring is laid under the cabinets; it is not visible from the outside thanks to the external strip.
The base is quite easy to install. For this, special clips are used. The advantage is ease of fixation. To dismantle the front panel, it is enough to act on the clamps. Most often, structural elements with dimensions are used: 100, 120, 150, 200 mm. If you plan to install the base unit in the kitchen, take into account the quality of the horizontal surface. Thus, it is not recommended to carry out installation if the floor is uneven. If desired, you can use the design on adjustable hangers.
There is also the option of installing a special base for the plinth in the kitchen. It is transparent and secured with silicone sealant. If such a need arises, this structural element can be removed for cleaning or replaced with a new one. The height of the base of the base in most cases does not exceed 5 mm.
Design features
The plastic kitchen plinth is a simple design. The plank serves as the main part here. It has mounting clips installed. They provide fixation on furniture legs.
The structure consists of the following elements:
- Radius bars that allow you to make turns.
- Adapters for slats of different heights.
- Side connectors for 90° and 135° angles. There are also straight lines that connect two planks on a line.
- Ventilation grilles that allow air to circulate under the kitchen unit.
- End caps for arranging the ends of the planks.
A plinth is also a great way to hide electrical wiring and install additional outlets . They are usually made from the inside so as not to accidentally spill water.
It is necessary to select the height so that the base fits snugly against the furniture. It depends on how level the kitchen floor is.
If it is not completely level, choose a plank with pendants. The structure is installed several centimeters deep to remove cracks. Standard plinth sizes are 100 mm, 120 mm and 150 mm.
Attention. The plinth system consists not only of fasteners and strips; in addition there is a sub-base, which takes up approximately 5 mm of height.
The plinth is a kind of lining (metal or plastic) that is attached to the bottom of the plinth, ensuring its connection to the floor. Many people fill the space under the bar with silicone. But this is not entirely convenient, because if you need to remove the bar, the silicone layer will have to be restored again.
How to choose the right base?
To get an attractive and functional headset, it is selected taking into account a number of parameters:
- dimensions, which allows you to choose the most suitable option for the kitchen;
- appearance: texture (if any) and color, it is not always necessary to purchase a base of the same color as the furniture; you can use neutral (steel, gold, gray) or contrasting shades;
- the distance between the countertop and hands is 15 cm while working in the kitchen;
- determine the dimensions of built-in household appliances: stove, dishwasher, etc., which will prevent errors when installing the lower front panel in these areas.
The appearance of the base is important; for this reason, such products must be intact. You should also check the quality of the base in the store. Install it only if there are no chips or cracks. It is necessary to calculate the type and number of auxiliary elements. In this case, the total length of the kitchen unit is taken into account. Having determined the basic parameters, you can consider products of different price categories.
Comments: 10
Galina
last year
Let the furniture makers draw you two options and then make a decision.
- Like | 1
- Save
Evgenia Nemirovskaya
last year
Irina, is the fact that the baseboard is flush with the doors, not recessed, a principled position? It’s just that when building in, the picture looks “cleaner” when the baseboard goes slightly under the cabinet, and the base of the cabinet is slightly recessed.
- Like | 2
- Save
Irina Lo thanked: Evgenia Nemirovskaya
Related discussions
tiles on the floor in the kitchen
Comments (20) The designer is immediately visible in the “semicircle” rabushka97 1. ask the tiler - what will he use to cut this semicircle? Bulgarian? and then hide it with a plastic “sill”? and generally ask, what will he use to cut your tiles/porcelain tiles using a water-cooled machine or a grinder = a manual machine without water cooling? along the contour of the furniture + approximately 60 cm (so as not to cut porcelain tiles, it is 60 x 60 - i.e. 120 from the wall) - perhaps this would not be a bad option 2. electric heated floors are not expensive, look at Thermo thermomats (Sweden), they are designed for a certain volume of electricity consumption, have electronic programmable control - they will heat up at a strictly specified time. you don’t need to heat up the entire tile - only the main paths where you will most often pass are along the furniture with an indentation of 10 cm (there is still a base there and you won’t put your feet under the kitchen cabinets) and a spot under the table along the contour of the table with an offset of 60 cm 3. diagonally tile from corner to corner - I don’t really like visually sharp corners.
Selection of doors (entrance and interior)
Comments (4) I agree with Valeria. You just need to add some pieces of furniture of the same color and structure as the entrance. Usually, it is acceptable if the entrance differs from the interior. Sometimes it even differs radically. But, yours are too close in color and at the same time different in texture. Therefore, it is better to support this oak with some other objects. Perhaps the doors of the built-in closet in the hallway, if one is planned.
Design of a square bedroom 10m2 (aka office)
Comments (28)
116674385) In addition, I would suggest some calm dark blue. Plus, if desired, you can add a little dark wood, a couple of bright accents (yellow, red). It might look something like this: I wouldn’t make a glass screen for the battery, I looked at your link - to be honest, it looks uh. Not good. Make it a simple white wooden lattice, it will be much better. And further. If your balcony is not insulated and/or you don’t go there every 5 minutes, I would make curtains inside: it will be more comfortable, and your chimney will be covered, and you won’t have to worry about jumping out onto the balcony every time to close or open something there. As for the lighting, given your low ceiling height, I wouldn’t stick ceiling lights there, they will only emphasize it. You could, for example, try a track one - it’s not too noticeable, and the lighting can be directed differently, some on the headboard, some on the passage at the foot. As for crooked builders, it’s better not to trust them with anything at all. And, by the way, they may also start recommending a suspended ceiling, simply because they can’t bear to bother with plaster. If you don’t have very noticeable differences in the slabs in the middle of the room, then why would you sleep with a piece of oilcloth 10 m2 above your head? (And even for this case there is drywall). Ask here on the forum - many pros have their own proven teams, maybe they will recommend you someone in your region. Good luck with the renovation!
Types of kitchen unit plinth
There are several varieties of similar products on the construction market; they differ in properties and appearance:
- plastic;
- products from MDF and chipboard;
- structures made of natural wood;
- aluminum.
The first of the plinth options on the kitchen set looks less attractive than some other analogues. However, these products look neat and perform the tasks assigned to them. In addition, the cost of this option is low, and installation is easy. Products of this type are characterized by low weight. Plastic front panels are quite durable and do not lose color. This is a moisture resistant material.
Analogues from chipboard and MDF are more susceptible to the influence of water. This means that either additional processing will be required, or the possibility of moisture affecting the structure will have to be eliminated. Such products are presented in a wide range of options, different in color. Sometimes there are leaks between the set and the kitchen plinth of this type.
Wooden analogues are more expensive. They are susceptible to the influence of liquids, which shortens the service life of such a base. In terms of attractiveness, this option is superior to its analogues. Another expensive type is aluminum construction. The main advantage is called high strength, which, combined with moisture resistance, makes this option a leader among other bases.
A plastic baseboard will kill the entire design. 5 rules for the perfect baseboard
How can one ill-thought-out detail kill the entire design? Install a plastic baseboard!
How to make the simplest interior sophisticated and expensive? Put the correct one
baseboard! Which baseboard is right? Let's figure it out.
I don’t know how I managed to pick up this terrible horror on an oak parquet board. I justify myself only by the fact that I did the repairs at a difficult time for the family, and I simply did not pay attention to such details. I want to provide for all the nuances in a new apartment, and I have come up with 5 rules for an ideal baseboard. I am sharing them with you.
Why is plastic skirting bad?
Despite all its advantages (cheapness of the material, ease of installation, variety of colors), the main disadvantage of plastic skirting boards is its unaesthetic quality. The plugs, corners and fasteners are noticeably different from the base. And this really spoils the appearance of the room. The cheapness just catches your eye.
In addition, the plastic plinth is matched to the color of the floor. But the plinth is like the base of a building. This is part of the wall, not the floor.
Therefore, there is no need to match the plinth to the floor, make it from wood or “look like wood”. This is an outdated technique. Personally, I prefer skirting boards made of polyurethane, MDF, gypsum or solid wood.
Installing a kitchen plinth
To work you will need silicone sealant, self-tapping screws, and adhesive. It is recommended to install the plinth in the kitchen according to the instructions:
- You need to attach the front panel to the legs of the headset and make marks: along the edges and in the middle (if the product is of significant length).
- The base made of plastic and aluminum is fixed using special fasteners, which are included in the kitchen set (clips). For products made from chipboard, it is possible to install them using self-tapping screws.
- If the kit includes special linings, they are used to ensure the tightness of the structure. An alternative option is silicone sealant around the perimeter.
- The structure is installed in a recess up to 15 cm from the edge of the front panel of the headset.
Source: remkasam.ru
Plinths for the kitchen: varieties and tips for choosing
join the discussion
Share with your friends
To make the kitchen interior look laconic, when arranging the room and arranging furniture, you may need additional components of the set. Such attractive and functional components include kitchen plinths, which stand out with a number of features.
The height of the baseboard matters
Is the height of the plinth important?
How often do skirting boards have an exclusively aesthetic purpose? Which one should I make - high or low? Textured, “bold” or neat and subtle? And certainly few people think about the plinth at the planning decision stage. So! Stop! Just Repair, what are you talking about, you yourself wrote that the baseboard is at the very end of the renovation, what does the layout have to do with it?
Didn't you say that:
