One of the popular design solutions used when decorating a kitchen is installing a corner. This piece of furniture has earned popularity due to its functionality, attractive appearance and the ability to optimize the use of space.
This is especially important for small rooms. However, even in spacious kitchens, a corner will not be out of place - it will perfectly perform zoning of space.
DIY kitchen corner - drawings and diagrams
Deciding on design and construction
Before making a corner yourself, you need to decide on its dimensions. This will help to use the space of the room with maximum efficiency. A U-shaped set is appropriate in a spacious room. It is recommended to install a corner from individual modules in studio apartments. In a cramped kitchen, it is better to install only an L-shaped structure.
Before you make a kitchen corner with your own hands, you need to purchase materials for the frame and cladding, taking into account that the set will be used intensively. Its appearance should not be discordant with the design of the room. The upholstery is selected from materials that are easy to clean from dirt.
When designing furniture, it is advisable to make a sketch that will help you imagine how it will look surrounded by other interior items. It is better for an inexperienced craftsman to make kitchen corners according to ready-made drawings.
Modular corners
Furniture of this kind is of interest to those who like to experiment with its placement in the room. The items of the set are not fastened to each other. More often, a modular corner consists of 2-3 sofas. Sometimes they are supplemented with corner seats, which are a chair on 3 legs or on a 3-corner base.
The modular set belongs to the category of straight kitchen corners, the main disadvantage of which is the discomfort experienced by a person sitting in the corner part.
With sleeping place
You can build corners in the kitchen that will sometimes be used as beds. The classic design of the set is complemented by a couch. During the day it serves as a seat. If necessary, it is moved closer to the other elements. It is important not to make a mistake with the size of the couch. Its height should be the same as that of the sofas. It is better to place it on furniture wheels, the size of which must be taken into account when developing the drawing. A kitchenette with a sleeping area can be modular.
With storage drawers
The best option for a kitchen set would be a corner with sofas equipped with drawers for storing things. They should be spacious and easy to open. It should be borne in mind that drawers may not allow people sitting on the sofa to sit comfortably. Boxes standing on the floor should not interfere with the legs, so it is recommended to make their front walls beveled or recessed.
Often, when making a kitchen corner with their own hands, craftsmen place drawers not only under the seats, but also behind the backs of the sofas. In this case, the area occupied by the headset increases. Sometimes, instead of storage boxes, the frame is equipped with drawers. Assembling furniture of this type, compared to installing sofas with cover seats, is more complicated.
For a small kitchen
When making a kitchen corner with your own hands, intended for use in a limited space, you have to think about saving space. The dimensions of the room allow you to build a rectangular corner with small sofas.
Furniture is made in such a way that things, utensils, etc. can be stored in it. The design is limited in width and length so that it does not clutter the room. It is complemented by light chairs or stools. For a small kitchen you can make a modular set.
Silent history
The ancestors of small-sized kitchen corners are corner sofas, which appeared in the postmodern era and firmly entered into fashion as an indispensable piece of furniture for saving space and being easy to use.
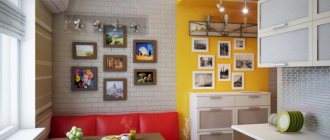
A little later, in Europe and the USA, small canapés and sofas for kitchens began to be sold, eventually improved to accommodate corners. And soon similar products appear in the post-Soviet space - far from the trends of exquisite design. For example, if in the West the corners were already decorated in the Art Nouveau style, and the material for their assembly was natural wood, then in our country it was chipboard, painted and upholstered in red fabric (
Required materials and tools
To work on making a kitchen corner from wood, you will need the following tools:
- circular saw, hacksaw or jigsaw;
- drill;
- screwdriver;
- square;
- roulette;
- pencil and chalk;
- mallet;
- stapler;
- surface grinding tools;
- scissors;
- construction knife.
The fasteners will be:
- self-tapping screws;
- confirmations;
- furniture bolts with washers and nuts;
- dowels.
You need to purchase materials such as:
- foam rubber 80 mm thick for seats;
- thin polyurethane foam for finishing the backs of sofas;
- leatherette, jacquard fabric, etc. for upholstery;
- camouflage fabric;
- piano or furniture hinges;
- plywood or chipboard;
- Fiberboard;
- bars 40x40 mm;
- staples;
- ABS or PVC edge for finishing ends;
- steel corners with holes.
For a kitchen corner made of solid pine, you need to buy 100x40 mm boards and plywood. The wood is planed with an electric or manual planer. Final sanding is done with sandpaper or a belt machine. Only smooth, dried wood without signs of rotting or cracks is suitable for work.
Step-by-step making of a tabletop with your own hands
Measurements are taken and the estimated dimensions of the future countertop are recorded.
Sheets of chipboard and plastic are purchased, which will be needed to decorate the finished product, which will give it a finished look. Chipboard thickness is at least 2 cm.
Using a grinder or an electric jigsaw, blanks for the table top are made according to size. The ends of the prepared sheets are treated with sealant.
At the base of the tabletop there will be 2 sheets of chipboard, which are connected to each other with self-tapping screws. Plastic sheets are cut slightly larger by 3 mm than the size of the chipboard base.
It is necessary to wait time for the plastic to dry completely. Now the extra mm are cut off with a knife. The ends are decorated with strips of plastic. The product for your kitchen is completely ready.
Drawings and diagrams
A detailed drawing of the kitchen corner will allow you to avoid waste of materials and design errors. In addition to the general diagram of the product, the drawing must indicate the exact dimensions of the structural elements, the diameters of the holes and the cross-section of the fasteners. It is recommended for a novice master not to deviate from fulfilling the technical conditions proposed in the drawing. It should be taken into account that replacing materials will affect the performance characteristics of the headset.
Taking the drawings for making a kitchen corner as a basis, an experienced carpenter can make changes to its design, but you should not experiment with the height of the furniture. You can equip the sofas with additional storage space or adjust the length of the seats. When increasing the size of the headset, it is necessary to strengthen the frame parts. Reducing the length does not affect the structural strength of kitchen corners.
Sofa restoration
After removing the old upholstery and disassembling the structure, you can begin the repair itself. The extent of work to restore the sofa will depend on the complexity of the damage; below we will look at the most common of them.
Frame repair
You will need to prepare the following materials and tools:
- wooden blocks (to replace damaged ones);
- plywood sheets;
- metal dowels;
- wood glue;
- vice;
- nails.
Step one: replace damaged frame elements with new wooden blocks
Replacing old unusable bars
Step two: take a wooden frame using the same tenon and groove principle, using glue. It is better to further strengthen the structure with the help of metal caps.
Use of metal chokes
Step three: for the base of the spring block, you can take sheets of plywood 150 centimeters wide and about 200 centimeters long. Next, you need to cut out two rectangles according to the dimensions of the structure, then place them on the frame (pre-coat them with glue). Then the plywood should be carefully nailed
Plywood for base
Repair and fastening of the spring block
To work you need to prepare the following:
- U-shaped brackets (you can buy them at a hardware store or make them yourself from wire);
- nylon banners;
- strong thread;
- awl;
- hammer;
- felt or any durable fabric.
Brackets for fixing springs
Step one: we fix the springs using metal brackets with sharp ends, after which they need to be driven in with a hammer. An ordinary stapler cannot cope with such a process.
Fixing the springs
Step two: the springs must be additionally secured with nylon constrictions. You can use a thick rope, which is secured using the same brackets
Nylon thread for attaching springs
Step three: felt should be placed as the top layer. If you don't have one, you can even use old carpet. For greater density, it is advisable to take a double layer of material and then cut it to size. It is fixed using the same dense thread, and holes are made with an awl or a nail. A distance of 35 millimeters is maintained between stitches.
Holes can be made with an awl
Step four: a layer of foam rubber is laid next, and then padding polyester. Along the entire perimeter, the materials are fixed with glue and then hammered in with nails.
Assembly
Exactly following the step-by-step instructions for assembling furniture will help a novice craftsman complete the job without unnecessary material and time costs. The process is divided into several stages, including:
- frame construction;
- cutting and sewing covers;
- upholstery of backs and seats;
- headset assembly.
Before you make a kitchen corner with your own hands, you need to clear the room of furniture and foreign objects.
Installation and fastening of the frame
The frame of the kitchen unit can be built from oriented strand board, chipboard or plywood. When assembled, the wood panels form a spacious and strong box. To make the frame, you need to choose laminated chipboards. The ends of the elements prepared for assembly must be sealed with edge tape. This will protect the chipboard from moisture, and the room from the release of harmful fumes from the chipboard.
Only the sides of the frame are often made from wood panels. These parts of the structure are connected to each other by bars. To securely tighten the sheets with each other and the crossbars, through connections should be used. It is better to use steel corners when making a set of boards. In these cases, its elements are assembled using bolts.
Before screwing fasteners into OSB, chipboard and plywood, it is necessary to drill holes slightly smaller than the cross-section of the confirms or self-tapping screws. Dowels will add additional strength to the structure. It is better to join the parts after treating the holes, fasteners, spikes and contacting surfaces with glue.
Installation of fronts and seat bases
The bars between the sides of the kitchen corner can be sheathed with plywood or fiberboard. The facade sheets are attached to the frame with self-tapping screws. For the base of the seat, plywood with a thickness of at least 10 mm and 16 mm chipboard is suitable. The lid is connected to the body using piano or furniture hinges. The non-removable seat can be secured with confirmations and self-tapping screws.
Get to work!
Which corner of your kitchen is best suited is up to you. And here we will see what difficulties you will encounter when making it at home without experience, and how to cope with them. The analysis will be based on the example of a design known in RuNet, the drawings of which are given below; The main materials are laminated and simple sanded chipboard with a thickness of 16 mm.
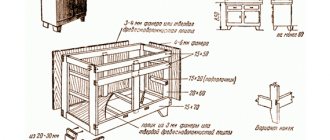
Drawings of a kitchen corner made of laminated chipboard
Specification for kitchen corner drawings
On the one hand, this corner requires minimal materials and labor and can be made much more convenient, see below. On the other hand, the prototype is oriented towards industrial technology, its design is rational and well-developed, but we need to get a product no worse than that, assembling it at home on the knee and in weight. This particular sample was also chosen because it is capable of acquiring all the best qualities of a corner with a beveled corner, plus the ability to serve as a sleeping place, but technologically it is not much more complicated than a right corner. In addition, there is a generally correct specification for it with statements of material and fittings, see fig. on right.
Note: if you check/refer to other sources with descriptions of this sample, keep in mind that in some of them, and quite a few, in the drawings of the parts the dimensions are given mixed for sofas with a length of 100 and 60 cm. Assemble the blanks cut out from them into the product, of course, impossible.
For example, in the top row of Fig. Assembly diagrams are provided with the drawings, clear as day to a factory technologist. But what to do with them if you don’t have production equipment? The sample under consideration is a panel box-shaped structure, similar to the power circuit with load-bearing skin in the aircraft industry. Box-panel structures save material and labor as much as possible, resulting in very durable products, but their manufacturing technology is subject to a number of specific requirements. There are a lot of invisible tricks here, but we can deal with them, and we will do it. First for the sofas, in this order:
- Selection of fasteners;
- Adjusting dimensions for a specific room;
- Cutting laminated chipboard and chipboard into blanks, marking and drilling holes;
- Trimming the edges of beveled parts and edging;
- Covering the parts for which it is required with soft covering;
- Assembly.
Next, let's see how we can simplify the manufacture of a corner section (corner) and make it more convenient. The original design is modular, but in our apartment the corners of the walls do not change places by themselves. Knowing exactly where the corner will go, whether it will be right or left, the corner can be made hanging (see below), and this will make the work much easier and cheaper.
Fasteners
The main fastening elements of this kitchen corner that absorb operational loads are confirmed furniture screws and steel corner connectors; dowels play a supporting role, keeping the parts from moving. The specification above contains a list of accessories for assembly in an industrial environment, but for home use, some things will have to be changed in it.
Note: in products made from laminated chipboard and chipboard, it is possible to replace confirmats with wood screws to connect parts through the face into the edge occasionally. In this product - under no circumstances is it possible, because... the boards are very thin, 16 mm. The connecting corners are attached to the parts using wood screws, see below.
Confirmations
The standard size of confirmats 7x50 specified in the specification is the maximum permissible for a given chipboard/laminated chipboard thickness. This makes it possible to transport the corner modules in assembled form and reduce its cost somewhat, because there is no need for on-site assembly, and any of the modules is carried into the apartment by hand by a person with the physical development of an office type. But marking and drilling for the thickest possible fasteners also requires production precision (see below), which cannot be achieved by working at home with your hands. For example, can you, when working with a hand-held electric drill, feed the drill perpendicularly or parallel to the face of the board with a deviation to the side of no more than 0.1 mm? The question is rhetorical. Therefore, for manual work, provided that the product will not be transported over long distances with shaking and jolts, the size of the confirmats should be reduced to 6x50 or even 5x60. Otherwise, i.e. If you take fasteners according to industrial specifications, some of the parts may delaminate during drilling or assembly. If the chipboard/chipboard is taken from eco-friendly brands E0 or E1, then it will definitely delaminate, so the chipboard/chipboard should be taken from the household brand E2, and if you want E0/E1, then the thickness of the boards needs to be increased to 24/20 mm, adjusting accordingly. dimensions, see below.
Fasteners and connecting elements for the kitchen corner
The height of the screw neck H is important for the strength of the confirmed connection, see pos. 1 in Fig. H must be exactly equal to the thickness of the overlay board, on the right in pos. 1. Sometimes H is indicated by the 3rd digit in the name of the screw size, i.e. you will need confirmations 6x50x16 or 5x60x16 for the original structure or 6x50x24/6x50x20 or 5x60x24/5x60x20 in the case of using boards of greater thickness.
The confirmation drill must be taken exactly for the given screw size. The height of its skirt should be equal to H (in the center in position 1), the diameter should be equal to the diameter of the screw body without thread, and the length of the spiral part of the drill L (without cutting tip) should be equal to the full length of the threaded part of the screw. If the heel of the screw rests on the residual conical hole in the hole, then hidden delamination in thin boards is guaranteed, and it is only a matter of time before it spreads outward. Small.
Dowels
In all sources on the topic of the kitchen corner in question, photos of wooden dowels are given as illustrations with enviable consistency, but without proper understanding. This is a gross mistake in this case. Wooden dowels are designed for connecting wooden parts: they dry out along with the base material, and the connection remains strong for many years. Or centuries, if the furniture was made by an outstanding master.
Chipboard/chipboard do not dry out and are therefore connected with plastic dowels. If you take slightly more expensive propylene ones, then there is no need for rather labor-intensive and careful gluing of joints. For the reasons stated above, the diameter of dowels for manual production must be reduced to 6 mm, leaving their length the same. In the edges of the boards, holes for dowels are drilled only along the jig (item 4 in the figure); diameter - 5.3 mm, drilling depth 22 mm in the edges and 12 mm in the faces.
The seats (see below) can be made not folding, but removable, by placing them on dowels with round heads for detachable connections (above, position 2). This will allow you to avoid the rather complex installation of piano hinges, the costs of them and fasteners for them. And if they decide to rearrange the corner in a hurry, then the likelihood of damage to it is reduced: they grabbed the seat without thinking, it remained in their hands, and the sofa did not jump or hit anything. Getting something out of the chest under the seat on piano hinges is no more convenient, because... The seat cover reclines less than 90 degrees. It’s easier to remove it and lean it against the back than to rummage through the chest while holding the lid with your hand. But in the design under consideration this, unfortunately, is impossible, see below.
It is better to take other dowels for our kitchen corner with faceplates, at the bottom at pos. 2. Washer thickness 0.5-0.7 mm; At first such gaps will not be visible. After some time, the washers will be pressed into the chipboard (the parts are tightly tightened with confirmats), the gaps will converge, and the entire product will acquire additional strength. Another advantage of dowels of this type is different corrugations on the long and short parts, which provides even higher strength of the connection without the danger of delamination of the boards. You just need to select dowels of the required size: with a 20 mm long part and a 10 mm short part (for 16 mm boards). For boards 20/24 mm, the long part needs 30 mm, and the short part 12/16 mm.
Corners
For the design in question, you will need steel isosceles corner connectors 30x20x2 (for fastening obliquely) or 30x15x2 for fastening in a row. The first number indicates the length of the corner shelves, the second their width, the third – the thickness of the material. During assembly, the corners will have to be partially bent to install inclined parts, so you need to take them white or gray from viscous “raw” or moderately annealed steel. The presence of stiffness stamping on the bend for bent corners is unacceptable, pos. 4 in Fig. The internal and external folds of the corners should be smooth, without tears or wrinkles. The corners of burnt steel, yellowish with spots of tarnish, even if they bend, will then crack. Black phosphated corners from the so-called. Overdried steel is very strong, but when bent, it breaks immediately.
Note: just so you know, plastic furniture corners can be bent by thoroughly heating them with a household hairdryer at full power. But plastic corners last no more than 3-5 years, and then they dry out and crack.
Dimensions
Let's look again at Fig. with drawings (duplicated on the right). The dimensions have been corrected: the length of a sofa 1 m long is shown in black; red and blue next to the “black” ones for a small sofa 60 cm long. The green marks will come in handy later when we get to the corner seat.
The “red” dimensions are basic: you need to add to them the missing amount of 600 mm for longer sofas. For example, for a sofa 1.3 m long, you need to add 700 mm to the “red” dimensions. The longest possible length of a sofa of this design is 1.5 m. “Blue” dimensions are relevant for sofas up to 750 mm long. If the sofa is longer, you need to take “black” sizes instead of “blue” ones.
6th position
There is no 6th part in the drawings. This is a seat blank, a simple board without any holes. Its length is equal to the length of the lengths of the sofa (968/568 mm in the drawings) minus the double thickness of the upholstery fabric, it is kept within 1-3 mm. The thickness of the optimal flock and microfiber in the kitchen is approx. 1.5 mm taking into account folds, so in this version the seat length will be 965 mm for a large sofa and 565 mm for a small one. Minimum seat width 297 mm, including fabric upholstery and installation on piano hinges, see below. If the dimensions of the kitchen allow, the width of the seat can be increased, then an overhang will form in front. With the corner seat option discussed below, the maximum width of the sofa seats is 444 mm; then the seat bevel of the corner section is reduced. In this case, the width of the bed can be up to 900 mm.
Cutting and Sawing
Sawing chipboard/laminated chipboard sheets into parts is done using a jigsaw along the contour. The contour is drawn according to the template, so the jigsaw file must be guided along the inner edge of its line. The upper and lower edges of parts 2 (chest front) and 8 (back base) in Fig. with the drawings you need to cut it obliquely, for which you need a jigsaw with a tilting shoe or you will need to buy a shoe for the existing one. The angle of inclination of the front of the chest is 10 degrees, and the back is 5 degrees. Some shoe scales are graduated in units of relative inclination; for an angle of 5 degrees it is 0.085, and for 10 degrees it is 0.177. Not 0.175, as it might seem, since the relative slope is nothing more than the tangent resp. corner.
The jigsaw file for trimming is beveled inward from the edge to be trimmed. For children 2 (facade), the upper edge is cut from the face so that the upper outer corner remains intact, and the lower edge, on the contrary, from the underside (wrong side), so as not to cut off the inner lower corner. The edges of the backrest, because it is tilted back to the facade, cut in the reverse order: the top one from the back, and the bottom one from the front.
Edging
The free edges of the kitchen corner parts need to be covered with something that matches the overall tone. Edging PVC kitchen furniture with a T-shaped edge is undesirable, not because the groove for the edge needs to be selected with a milling machine, but because dirt will accumulate in the gaps of the edge. By the way, for the same reason, it is advisable to make a kitchen table under a ready-made postforming tabletop: it does not require edging at all and is equipped with a drip tray.
The visible and touchable edges of kitchen furniture are covered with a tape made of complex ABS plastic (ABS, acrylonitrite butadiene styrene) up to 2 mm thick, and the back ones and those above the floor are covered with crepe paper tape. ABS is absolutely safe, hygienic and environmentally friendly; medical equipment is also made from it. ABS and paper edges are produced dry and self-adhesive. The first ones are intended for industrial use with a separate supply of glue, so you need to get self-adhesive ones. Edging a kitchen corner with self-adhesive edges is done as follows:
- The edge strip is cut from the roll to the required length plus 2-3 cm. It is convenient to measure the lengths of curved edges with a tailor's meter.
- Peel off 2-4 cm of protective film from the end of the segment without touching the adhesive layer with your fingers.
- Place the end of the tape on the edge exactly lengthwise and press.
- Holding the tape with your hand, with the other hand you pull out the protective film from under it by the original “tail”. The tape should lie on the edge itself.
- When the tape is all on the edge, it is rolled with a rubber roller.
In general, the procedure is the same as for high-quality self-adhesive gluing. By the way, this is a good finishing option if you decide to make the entire kitchen corner from inexpensive sanded chipboard: there are few visible parts in it, and the textured self-adhesive under acrylic varnish from natural wood will not be immediately distinguishable even by an experienced carpenter. Self-adhesive gluing is done after sawing and trimming the edges before edging. In this case, the inside of the chest can simply be varnished.
Marking and drilling
The accuracy of marking parts of box-panel structures made of chipboard/laminated chipboard is required to be no worse than +/-0.5 mm, but how can it be maintained on edges and sanded chipboard if the size of the material fibers is of the same order? There are no problems with this at the factory; there are no markings as such - they cut and drill using automatic machines. In handicraft production, they use templates, but in order to check each one, you have to ruin up to 2-3 blanks. For piece production at home, this is unacceptable, if only because you need a lot of templates and so much time is required to make them that it is easier to buy a ready-made corner. Moreover, the quality of the product made from parts marked according to templates turns out to be 3+ at best.
Marking calipers
Firstly, the marking of holes on the parts of the kitchen corner made of chipboard/laminated chipboard should be done so-called. a marking caliper with sharp jaws for measuring external dimensions and a vernier for precise installation of the carriage (on the left in the figure). Experienced mechanics sometimes make a marking caliper from a regular one, sharply and very carefully sharpening the tightly knit outer jaws on fine sandpaper, but manually align the tool carriage exactly according to Vernier is difficult.
Note: electronic booms, incl. The marking ones (on the right in the figure) are actually not so convenient to use, and the marking accuracy is worse. Here electronics have not yet caught up with good old mechanics.
Next, marking the holes on all parts is done from the bottom. When marking asymmetrical sidewalls, keep this in mind so that it does not turn out to be a mirror image. The right and left sidewalls are, of course, mirror marked.
Then, between the centers of the outer holes for fastening the mating part, axial lines are drawn into the edge with confirmations and beaten from them to the sides along half the width of the attached board. The extension of the attached part is marked along the center line and is also marked to form the contour of its edge. On the bottom of each board, you need to mark the contours of all attached edges in this way, this is necessary for accurate assembly. The accuracy of beating edges is required +/-0.5 mm, which in this case is ensured by a fitter's angle with millimeter divisions and a steel fitter's ruler.
Sverlovka
Drilling of blind holes for dowels is carried out immediately along the required diameter to the required depth, as described above. But for now we drill holes for confirmations only through the faces of the boards and only with the spiral part of the drill, i.e. not to full diameter. We will drill it completely later, in the order of assembly, so the entire kitchen corner will turn out without distortions and cracks.
Upholstery of backrests and seats
It is sometimes more advisable to upholster the headset elements before assembling them. Thin fabric is often used to cover the inner walls of boxes and cover the backs of seats and backs. Masking material is nailed with furniture nails or staples after upholstery.
Filler for soft kitchen corner
Those who make a soft corner for the kitchen with their own hands use foam rubber as a filler. You can put a 20 mm thick sheet on the back. It is better to cover the seat base with foam rubber with a thickness of 40 to 80 mm. Polyurethane foam with a density of at least 30 kg/m³ is durable and elastic. Softer foam will wrinkle after a short time.
The filler is fixed to the base with glue, which is applied to the contact surface of the wooden slab in a zigzag or checkerboard pattern. Along the edges of the base, polyurethane foam can be secured with a stapler.
Sometimes original mattresses and pillows serve as the seats and backs of the corner. The covers can be filled with crushed foam rubber, siliconized fiber, etc.
Which fabric to choose
The most common upholstery fabric for the kitchen corner is leatherette. Contaminants are easily removed from it. The material imitating expensive leather is cheap, wear-resistant and does not fade for a long time. For upholstery, you can choose microfiber. It is not inferior in basic characteristics to leatherette, but, unlike it, “breathes”. The disadvantage of microfiber is its short service life.
Those who choose flock should know that the inexpensive material is not practical, since its pile accumulates dust well. Beautiful, durable jacquard upholstery is expensive. Teflon fabric is not cheap either, although its properties are superior to other types of upholstery.
Natural fabric is least suitable for finishing sofas: it gets dirty faster. It is more difficult to clean. The material wears out quickly.
Fabric cutting and assembly
Before you make the upholstery of the corner with your own hands, you need to accurately determine the dimensions of the seats. When cutting fabric, you need to take into account the thickness of not only the base, but also the lining. When designing the development, you need to add 1.5-2 cm to the dimensions of the material. The side parts of the upholstery are sewn together. You can make a coating by combining fragments of materials of different colors and compositions.
Upholstery material
Place the seat or backrest slab on the upholstery fabric lying on a flat surface (face down). The material is stretched and attached to the base at 2 points, in the center of the long sides. Then, without allowing distortions, it is fixed with staples or furniture nails in increments of no more than 3 cm.
Sofa for a small kitchen
At first glance, it may seem that a sofa for a small kitchen is too bulky and an absolutely unnecessary element that will only take up precious square meters. But in some situations this is a better purchase than several chairs or armchairs. The following recommendations will help you choose the right model:
1. Although corner views save space, it is rarely possible to find a free corner in small spaces. In this case, straight sofas along the wall are perfect.2. It’s ideal if you can place it under the window, since other items besides it won’t fit here.3. Try to select options with a minimum amount of details. A sofa without armrests and pillows will attract less attention. But the most optimal solution would be wall-mounted structures that do not form a gap.4. If you have enough storage, it is better to go for a sofa bench with free space under the seats.5. A sofa in a small kitchen should not stand out in color. It is better if it merges with the wall, forming a monolithic volume with it.
Corner
The most difficult task may seem to be making the corner of a kitchen set with an arched back.
Corners in a corner
Steel corners will help simplify the work. The seat, which is a right triangle or an isosceles trapezoid, is fixed to the profiles attached to the sidewalls. The back frame is 2 horizontal wooden slabs in the shape of a right triangle with a concave base. The frame elements are connected to each other with jumpers made of boards, plywood or chipboard. Several rectangular panels upholstered with material can be attached to the arcuate part with corners and self-tapping screws.
To securely fix the backrest, you can use corners and furniture bolts. Its back part is covered with thick cardboard or masking fabric.
Main part
The main part of the process involves several steps. To know exactly how to properly upholster a sofa, you should do everything step by step and carefully.
Repair of internal parts
Repair
You should start by repairing the frame, namely the spring block:
- faulty elements are carefully unscrewed with pliers;
- install new springs;
- insert the block back and secure it with nails.
It is possible to make old springs more elastic using pieces of foam rubber or an old blanket. We stuff the springs with pieces of cut foam rubber. If an old blanket was chosen, then they cover the entire block from above and stitch it with a needle and twine. To ensure that the foam sheets lie tightly, they are first coated with glue. To make the foam look more voluminous, you can lay a padding polyester on top of the foam.
Sewing covers
Regardless of whether the sofa will be upholstered with leather or fabric, the procedure is very simple:
- on the floor, with the wrong side up, we lay out the fabric, on which we lay out the elements of the old upholstery on top;
- we fix it with needles so that the elements do not move;
- We outline all the components with chalk, not forgetting the seam allowances;
- cut out the material;
- We sew everything together on a sewing machine.
We cover the sofa elements
Fix with a stapler
When everything is ready, the sofa is directly upholstered, or rather its individual components:
- we put sewn covers on the back, seats and armrests;
- the places where the new covers will be fixed must be exactly where the old covers were placed;
- We fix the new covers using a stapler, and the material must be tensioned each time we drive in subsequent fasteners.
- for matching marks;
- the lock is secured first to the back, then to the seat and drawer;
- install the sidewalls and then the armrests;
- at the end we fix the wooden panels, having previously varnished them, if necessary.
Procedure for changing upholstery
Professional advice for direct kitchens
We save space: a kitchen corner for a small kitchen, photo, manufacturing technology
The optimal length of a linear kitchen is 2.5 m.
A direct kitchen project always begins with a sink, since the pipes are already installed. Traditionally, the sink is in the corner, so for the convenience of your hands you need to step back 0.5 m from the wall, especially if the sink is located on the right, your right elbow will constantly hit the wall.
If the length of the set is less than 2.5 m, you can move the sink between the stove and the refrigerator. With a long kitchen it will be difficult to redo the communications; a pump is needed.
The washing machine or dishwasher should be closer to the sink. The drain will work much more efficiently if the water drain is close. You won't have to carry dirty dishes far.
In a narrow kitchen, it is more practical to have deeper cabinets on the lower tier (at least 60 cm). If there is less than 1 m between the furniture and the dining table or wall, it will seem very cramped.
If the refrigerator is located near the stove, then a gap of more than 15 cm is required. Especially if it is a gas stove, the side of the refrigerator should not heat up and suffer from constant splashes of grease.
In a long kitchen, it is better to have cabinets up to the ceiling; they hide a refrigerator, microwave oven, etc. To add volume to the room, it is better to buy a straight white kitchen. Cabinets up to the ceiling are comfortable and fit well into a kitchen-studio or kitchen-hall.
When ordering a kitchen, it is better to replace wall shelves 0.7 m high with 0.9 m. The space for kitchen needs will increase, long cabinets will visually raise the ceilings. Another interesting option is to hang cabinets in 2 rows.
To increase the area of a small kitchen, it is ideal that the facade blends with the color of the walls. Choose only light shades.
Taking into account simple recommendations, you can adjust the space of even small rooms. By correctly choosing the size, color and depth of the cabinets, you will create the best straight kitchen in your apartment (house).
How to choose wood
The choice of material is huge; dozens of species are used in furniture production, but not all are suitable for making furniture yourself. Wood is divided into two large groups - soft and hard. Soft trees include conifers (spruce, pine), cherry, poplar. This type of wood should not be used to make a frame; it is intended for decorative elements, sashes and facades. Parts that bear the main load should be made of hard wood - oak, yew, maple or beech. Light apple and walnut trees are also suitable for this task.
It is worth considering a number of features when choosing the type of wood for a kitchen set:
- Pine is not very durable, but it is easy to process. Suitable for making light shelves and small wall cabinets.
- Beech is almost as strong as oak and has a beautiful natural color. It is suitable for any furniture in the kitchen, but it absorbs water too quickly, so before you do anything with your own hands, the wood should be treated with water-repellent agents.
- Oak is durable, does not rot and is not afraid of moisture. Despite the fact that it is one of the hardest tree species, oak is easy to process.
If annual rings are visible, they should be uniform and dense.
Varieties
Kitchen corners can be produced in various variations. The differences between their models are identified by the following characteristics:
- constructive;
- functional;
- dimensional;
- stylistic.
The design of a separate kitchen corner may differ from the designs of other models and depend on the characteristics of the room in which it is installed.
Design parameters determine the methods of connecting component parts to each other, the presence/absence of certain constituent elements, and a set of components.
The functionality of the corner is a characteristic that allows you to use it with maximum efficiency. A high level of functionality requires additional storage compartments, shelves, armrests and other elements. A component property of this parameter includes the wear resistance of the surface of the housing and the soft part used for the seats. The higher the degree of resistance of such furniture to operational loads, the higher the coefficient of its functionality.
The dimensions of kitchen corners are determined by the individual parameters of the room. The more free space, the larger the corner you can place on it. Size criteria are also taken into account when calculating the number of seats sufficient for everyday use.
Making the corner to order allows you to ensure the best correspondence of the size to the stated needs.
The style of corner furniture is determined by the design features of the entire room. When choosing a corner, the following are taken into account: its shape, the presence/absence of straight or curved lines, the color of the body coating, shades of the soft layer and other characteristics.
A corner made in the High-Tech style will not be combined with an interior decorated based on the basic principles of the Art Nouveau style. A similar combination scheme applies to all stylistic directions.
Factors influencing furniture placement
When choosing a set and arranging its elements and household appliances, the size of the kitchen itself is of great importance. The layout mainly depends on this. However, in addition to the dimensions of the room, it is necessary to take into account:
location of communications, windows, doors, kitchen layout features;
Location of communications in the kitchen
- number of household members;
- the time usually devoted to cooking;
- physiological characteristics of those who will be engaged in cooking (height, weight, etc.);
- the nature of the use of the premises (only for preparing meals or as a dining room);
- walk-through room or not.
When choosing a headset, a number of factors are taken into account
It involves proper placement of food preparation (stove), storage (refrigerator) and cleanliness (sink) areas, which allows you to provide comfortable conditions for those who prepare the dishes. Ideally, the distance between the main points in the kitchen should be within 1.2...2.7 m.

