Office chair repair
Organizations often send chairs for repair. Reupholstering is a simple task, but when the amount of work is large, only professionals can handle it quickly and efficiently. They can come to your office or home, take measurements for free and calculate the exact cost of the work. Also pick up products for repair and bring them back at the appointed time. Often the entire work takes no more than 2-3 days.
Not only upholstery replacement is included in the work of such companies. They can repair the chair frame itself, replace casters and legs, foam rubber and plywood. The cost of the service will depend on the volume and urgency of the work performed. The calculation is based on what parts were used and how much time was spent.
How to update old furniture: ideas
Old chairs are often very strong and durable. But after a long period of use, they lose their attractive appearance. Do not rush to throw away such furniture, as it can be easily restored.
The technology for updating a chair depends, first of all, on its design. This can be done using several approaches:
- Pieces from the 60s can be restored simply by changing the upholstery.
This process is relatively simple. The main thing is to choose the right fabric style. Some designers recommend using several color shades that will fit into the overall interior. - Restoration of the external covering.
This approach involves changing the paint layer on wooden or metal surfaces. It is used for chairs made of rattan, wood, wicker and other natural products. This also includes restoration of natural or artificial leather (painting, cleaning, etc.). - Replacement of certain elements.
An old chair will look original if you replace the armrest with a product of a different shape. You can do the same with the legs or back. Here everything depends only on your imagination and capabilities.
Selection of upholstery material and filling
Before reupholstering a chair, you will have to study some information about what exactly to use when restoring a chair or armchair. Please note that you can use not only the materials listed in this paragraph. We have described the most common, synthetic, inexpensive, with acceptable characteristics. If desired or necessary, you can use natural analogues - copra in mats or rolls, batting, dried sea grass, horsehair, burlap and other materials that are exotic today and once traditional.
Most common materials
What materials are needed to reupholster a chair?
When restoring a chair or armchair, foam rubber or polyurethane foam (PPU) is used for the soft part. We are talking about foamed polyurethane foam, not sheet. There is also furniture latex. It and polyurethane foam differ from foam rubber to the touch. They are more like rubber (latex is generally like rubber); when stretched/compressed, they tend to return to their previous shape.
To be soft enough, the density of these materials should be 30-35 kg/m³. Foam rubber and polyurethane foam are sold in large sheets - the minimum size is 1*2 meters. So that's enough for more than one chair. Latex is usually available in some standard sizes, but is most often made to order.
Different thickness, density, rigidity, different manufacturing technologies
What is better to use for upholstering chairs - foam rubber, latex or polyurethane foam (PPU)? If we talk about quality and durability, then latex or polyurethane foam is better. They will last up to ten years or more without signs of wear, they absorb better and wear out less. The best of this pair is latex, but it is much more expensive than even polyurethane foam, not to mention foam rubber. Therefore, if you are on a limited budget, choose foam rubber. If durability is important - polyurethane foam or latex.
Now on the thickness of these materials. For the back, a thickness of 3-5 cm of foam rubber/PPU/latex is sufficient, depending on the degree of desired softness/hardness, but for the seat it is better to use materials with a thickness of 7-8 cm or more. If the base is solid - made of plywood, without springs or tapes - a thickness of 10 cm is needed. Otherwise the base will be felt.
The three most common materials are foam rubber, polyurethane foam and latex.
A padding polyester is laid on top of the foam rubber. Its thickness is small - 1 cm in a free state or so. It’s easier to navigate by density: 150-200 g/m². This layer is needed so that the foam/PPU/latex rubs less. This way, restored upholstered furniture will last longer.
If you want the chair or armchair you have reupholstered to last longer, another layer of spunbond is stretched over the padding polyester - this is a non-woven material made from a polymer melt using a spunbond method. Spunbond costs very little, but significantly extends the life of the seat. This layer is found in expensive furniture and increases durability (foam rubber/sintepon does not rub) and comfort of use (upholstery fabric does not fidget). A possible disadvantage is the accumulation of static electricity. But this is observed only when natural wool or silk is used in upholstery.
How to cut and fasten
The foam is cut to fit the size of the seat. The easiest way is to make a template at the initial stage: attach a sheet of cardboard to the seat, trace it and cut it out. This template will be needed more than once, so it’s better to make it.
It’s better to make a template right away, especially if you will be dragging several identical chairs
We cut out foam rubber and padding polyester strictly according to the template. In some cases, it is worth making it wider and longer by 3-5 mm so as not to feel the edges of the base. The cut foam rubber is glued to the base using furniture glue. There is a special glue in a can for foam rubber. It is more convenient to use, but it is not easy to find everywhere.
The padding polyester is laid on top - one side is more “rough”, so we place it on the foam rubber/PPU/latex, level it and smooth it with our hands. After this, it is problematic to separate the laid layers (you can try). If this method does not seem reliable enough to you, you can glue the connection by applying a mesh of suitable universal glue or the same glue for foam rubber.
Latex is usually made to order, so the edges are rounded for greater convenience.
One point: if the base of the chair is not rigid - springs, tapes, a snake - the glue you should use is not the one that forms a hard crust after drying, but the one that remains elastic.
If you decide to also use spunbond, it must be cut out with a margin, attached with staples to the base, evenly straightened and stretched. You should not pull too hard - the material is non-woven and is easily damaged. It just needs to lie without folds. Carefully trim the excess to the level of the chair/chair frame.
Accessories
Modern chairs are made from various materials. The design of such modifications consists of many elements that can be replaced if necessary. Often these chairs include office models that are equipped with a gas lift mechanism. To restore such products, you may need several types of components:
Rollers. This mechanism is made from various types of plastic.
When choosing this product, it is important to consider its purpose, connector type and fixation method.
Gas lift. Almost all office chairs are equipped with this element, which allows you to hold the chair at a certain height. Today there are several types of these designs on the market. It is important to pay attention to the type of mechanism that was previously used in the damaged chair.
Cross. Acts as a supporting element
They are made in the form of a 5-ray star, to which rollers are attached. When purchasing, it is important to pay attention to the quality of the material and the method of connecting the parts.
There are many other components that will be needed when repairing such furniture. This can include everything from small handles and bolts to specialized fabrics.
Features of a computer chair
The main feature of the chair is practicality, comfort and absence of harm to health.
Before purchasing, pay attention to the material and structure
- Choose a durable frame, which can be metal or polyamide.
- Stable and practical base. It is a 5-ray base with rotating rollers along its axis.
- Convenience should be complemented by the possibility of smooth swinging, rotation along the axis, height adjustment and a powerful gas cartridge.
- The backrest is of high quality when it follows the curve of the back in the lumbar region. A bonus will be the presence of a fixed tilt level with a backrest tilt regulator depending on the weight of the seated person.
- The back should not be very low. The best option: either at shoulder level or above the head.
- Don't forget about hand comfort, the armrests provide it.
- The color scheme and fabric or leather depend on the personal preferences of the person sitting.
A computer chair must be selected taking into account certain criteria.
All these factors are important when choosing an item not only for your home, but also for your office. Comfort and a healthy back should be in any case.
Back restoration
In order to restore a chair with your own hands, you will need a special furniture stapler and fastenings for it. Regular office staples will not work as they are made of softer metal and their legs are much shorter. It is best to use 6mm and 10mm staples. To reupholster a chair, you will need approximately 2 packs of fasteners of the first type and 1 pack of the second.
If the tension of the tightening tapes on the back has simply weakened, then they can be tightened. To do this, the fastening tapes are removed from one side, the tightening element itself is tightened, and its free end is targeted with a stapler. The staples need to be driven in, changing their position relative to each other, and not fastened exactly in a row. This technique will help avoid delamination of the plywood. It is necessary to restore tension on all elements.
If rubber bands become rough or cracked over time, they must be completely replaced with new ones.
In the design of old chairs, the longitudinal tape is passed crosswise between the transverse ties (alternately above and below the transverse tapes). If the back of the chair is curved, then it is better to place the transverse tie on top of the transverse strips. This way the load on the furniture will be distributed more efficiently, and the chair will no longer be squashed.
Be sure to trim all the tape allowances along the frame block or slightly away from its edge. Otherwise, bumps and unevenness may appear under the new upholstery, spoiling its appearance.
Removing old upholstery
Next, you need to remove the old upholstery from the back wall of the chair. Usually its edge is glued and removing the fabric is not difficult. Using a flathead screwdriver, pry the edge and tear it away from the base. If the glue holds the upholstery tightly, trim it with a utility knife.
Old fabric can be reused. It is pulled over the back so that the new foam pad does not tear along the tightening tapes. In addition, the worn upholstery will become the basis for fixing the new softener. Therefore, it should be removed very carefully.
Now the old upholstery needs to be fixed again. Align the fabric on the back frame, then place the frame on its end. The upholstery is secured starting from the lower left corner, targeting it with a stapler. Having secured the fabric with 1 fastener, slightly pull the upholstery to the right and place another 1 fastener approximately 1 cm from the previous one.
The fabric must be stretched so that it does not sag, but also does not form diagonal stretched folds. Small waves are acceptable. You will align them when you adjust the tension of the upholstery on the second side. But large creases will be difficult to remove.
We fasten the fabric and turn the frame with the opposite side towards you. We stretch the upholstery as tightly as possible and fix it again. Next, we secure it along the entire perimeter of the frame, constantly slightly pulling the fabric.
At the corners we place counter folds (folding the fabric into an envelope), cutting off the excess so that the upholstery does not stick out. We fasten the staples, grabbing both sides of the fold with one fastener at once. This will prevent the fabric from fraying. Secure all 4 corners by shooting 2-3 staples.
Method 1: Painting a chair
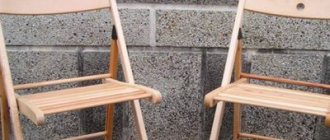
Even the most old-fashioned or simply ordinary chair, say, a “Viennese” wooden, plastic, folding or office chair, can be transformed by painting. The main thing here is to choose the right color. Here are some inspiring examples where color alone saved furniture from ending up in a landfill.
Viennese chair before and after coloring
Folding chair before and after painting
Chair before and after staining
Chair before and after painting
Old Viennese chair before and after renovation
A few more examples of remaking the most common Viennese chairs made of bent beech, which can be found in almost every home or cottage.
Here are some cool ideas for painting stools.
Inspired? Then let's get to practice!
To paint the chair you will need:
- Acrylic paint, or preferably chalk paint, in one or more colors;
- Synthetic flat brushes (separately for primer, paint and varnish);
- Protective gloves (better to buy at a pharmacy);
- Primer for wood/metal (depending on the frame material);
- Wax or matte varnish (polyurethane or acrylic);
- Medium to fine grit sandpaper.
How to paint a chair with your own hands:
- Prepare the chair for painting: wash it to remove any rough dirt and dust, then sand it with medium-grit sandpaper to remove the top layer of old varnish or paint. The surface should be slightly rough.
- If you want to update a metal chair, then it is not necessary to sand it (although it is safer to sand off the top gloss), but before priming/painting, the frame must be degreased with white spirit.
- Also, you can avoid the tedious sanding step if you use chalk paint, but you won’t be able to do without a primer.
- If your chair is varnished, it can be removed with a special varnish remover.
- If the chair has any damage, such as scratches, chips or cracks, fill them with furniture putty.
- Wipe the chair from dust, wait for it to dry and apply two layers of primer to the entire frame, allowing each layer to dry for about a day. Between layers, it is advisable to sand the primer with fine-grained sandpaper (no. 220 is suitable).
- Take a new brush and paint the chair in 2-3 layers, allowing each layer to dry completely. Make sure that the paint does not smudge.
If you want to paint a chair with a distressed effect, then first apply a dark paint, say dark gray or dark blue, to some places (for example, the edges of the seat, back and armrests), and then cover them with wax. Next, you should paint the chair with the main paint in 2-3 layers. And finally, lightly work with fine-grained sandpaper to expose the dark “substrate”.
- Do you want to achieve the effect of a perfect factory paint job? Then be patient: each layer of primer and paint (except for the finishing layers) will have to be sanded with fine-grained sandpaper. This way the coating will be as smooth and reliable as possible.
- To paint only certain parts or parts of the chair, use masking tape.
- Treat the chair with wax or matte varnish. Voila, your “four-legged friend” has found a new life!
Helpful Tips:
- Don't know what color to paint your chair? You can't go wrong if you paint it white, because this color is the most versatile and goes well with any bright upholstery;
- Before painting, you can glue the stucco decor to the back of the chair using wood glue;
- You can achieve the effect of a very old and dirty Provence style chair using dark brown wax;
- Chalk paints are a relatively new type of paint that are not yet widely available. However, we recommend using it, because due to its thickness, increased adhesive properties and super-fast drying (in 30 minutes), it saves a lot of time and effort. In Russia, you can purchase chalk paints from designer Daria Geiler, and in Kazakhstan – from Vernenskaya Manufactory. You can also always order paints from foreign manufacturers - Annie Sloan and Rustoleum.
This video master class will help you better figure out how to paint an old chair with your own hands.
How to sheathe it yourself?
The process of upholstering a chair is slightly different from reupholstering, although in many ways it is very similar to it. This operation involves covering the chair with fabric. For such purposes, only furniture is used that was not originally equipped with fabric upholstery.
Upholstery technology involves performing several sequential operations:
Before upholstering a chair at home, you should stock up on some tools and materials. To perform such operations you will need fabric. Products made from bamboo, cotton and other natural materials can be used as this substance.
It is important that the fabric can withstand constant loads and retain its properties for a long time. You will also need a construction stapler, scissors, etc.
d.
At this stage you need to disassemble the chair into separate parts. This will significantly speed up the sheathing process. At the same time, try to remember in what order the elements were dismantled, so that in the future it is easy to assemble the structure back.
After this, fabric blanks are made. They are cut out in accordance with the dimensions of the individual element of the chair. Try to use substances with a small margin in order to be able to adjust the location of the material on the surface. If you are planning to make an upholstered chair, foam rubber is placed inside it. This substance also takes up a certain volume, which should be taken into account when forming a fabric blank.
The final stage is sheathing. They start with small parts, such as the armrest. The plating algorithm is quite simple. Initially, the fabric is placed on the surface of the product and stretched a little so that it is level. It is advisable to do this with an assistant, which will significantly speed up the process. When everything is in place, the material is nailed to the frame from the inside. It is important to constantly monitor the tension to prevent distortion.
Common breakdowns
As noted above, an office chair is a rather complex device and any of its structural elements can fail.
Damage to the cross
The problem with this element may be destruction at the junction of the beams. The material from which the cross is made is important here.
As a rule, the base is a hollow structure into which a polypropylene pipe of suitable size and cross-section can be inserted. It, in turn, must be rigidly fixed to the base and the damaged beam.
In order to dismantle the crosspiece of an office chair, you need:
- Remove the rollers. As a rule, they do not have a rigid fixation and are quite simply removed from the mounting sockets. To illustrate the process, it is recommended to watch the video:
The process technology and dismantling device are shown in the video:
Destruction of the swing mechanism
If the chair does not hold the “horizon”, then the problem is most likely in the destruction of the swing mechanism.
Fastening to the seat is done with four screws using a shaped screwdriver. The element is dismantled as follows:
- The bolts that secure the rocking mechanism from the seat are unscrewed
- The gas lift is knocked out of the device mount.
This element is made of metal.
It should be noted that most chairs originating from the Middle Kingdom are not suitable for domestic spare parts. This concerns, first of all, the swing mechanisms (size discrepancy).
- Chinese mechanisms: 200 x 200 mm.
- Domestic: 200 x 150 mm.
In order not to re-drill holes when replacing an element, we suggest using adapter plates. How it looks assembled can be seen in the figure below.
Air chuck failure
The pneumatic cartridge of the chair is a two-chamber structure filled with air. When you press the adjustment lever, the valve stops the flow of air between the chambers.
If, when pressing on the valve, the gas lift rod does not extend, it means that the integrity of the piston, seal, etc. is compromised.
The dismantling process is described above. To clarify the process, watch the video about replacing the gas cartridge on office chairs:
A fairly common cause of gas lift failure is the bending of the adjustment lever, which does not allow pressing on the cartridge valve. In this case, the repair can be easily carried out independently: you need to bend the lever to its original state.
Reupholstery and assembly
The chair must be reupholstered step by step in disassembled form. For example, first cover the seat, then the back and small parts.
Place the frame of the part in front of you and place foam rubber on it. The edges of the softening layer may protrude slightly beyond the frame: this will soften the ribs and make the use of the updated furniture more comfortable. If you purchased thick and dense foam rubber, the corners can be cut off, making the transitions rounded.
Figure 4. Example before and after reupholstering a chair.
A layer of padding polyester will protect the foam from displacement and will greatly simplify the process of installing new upholstery. This non-woven material must be placed on top of the foam rubber and secured to the base using a stapler.
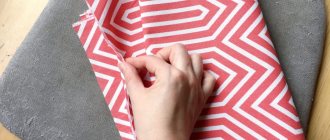
Then you can move directly to the upholstery. The fabric part must be placed on the base and carefully straightened. You need to start fastening according to the diagram, this will avoid displacement and skewing of the material. First, use 4 staples to secure the fabric to the ribs, approximately in the middle. Next, proportionally, stretching the fabric, fasten with staples. For example, 2 - on one side, 2 - on the opposite, and so on.
After the last bracket is secured, you can move on to tightening the next part. To make the updated chair look presentable from all sides, the back part can be covered with lining fabric, also secured with staples.
After tightening the last soft part, you can begin assembly. It is at this stage that a detailed photo of the furniture will come in handy. Remember how you disassembled the chair and repeat all the steps in reverse order. All screws and fastenings need to be tightened. If the chair has wheels, it makes sense to replace them with modern bearing ones.
If all the steps were carried out correctly, you should see a beautiful, updated chair (Fig. 4).
Knowing how to upholster a chair with your own hands is a very useful skill. Once you spend time and effort studying the technology, tomorrow you will be able to update the interior of your house or cottage on your own and without significant expenses.
Step-by-step instructions for reupholstering
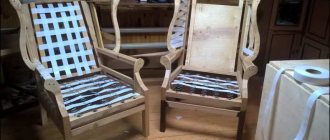
The exposed wooden frame of the chair is restored first. First, strengthen and glue all loose parts. Then remove old varnish or peeling paint using coarse sandpaper. After this, the surface is sanded with fine sandpaper and covered with a new layer of furniture varnish or paint.
Foam rubber is attached to the frame parts and covered with padding polyester on top. If the softener layer is too thick and sticks out, cut off the excess at an angle.
Fastening the fabric to the parts in stages:
- The cut parts are placed on a base with a softener and straightened.
- Using staples, secure the fabric first in the center.
- Then evenly tighten and shoot 2 more staples on each side.
- In the corners of the material, counter folds are laid and excess fabric is cut off so that it does not stick out.
- Fasten the bracket so that it covers both sides of the corner.
- Shoot another 2-3 staples to securely secure the corner.
- The reverse side of the part is also covered with fabric for a more aesthetic appearance.
After covering all the parts, the chair is assembled. The parts are installed on the frame in the reverse order of disassembly. Then tighten all screws and fasteners. To do everything correctly, you can photograph the dismantling process in advance. If all the parts have been put together correctly, the chair will look like new.
Disassembling the chair
To begin, remove the back wall and bottom of the plywood chair, secured with small furniture nails or self-tapping screws.
If the material is in good condition and suitable for future use, it is dismantled carefully, being careful not to damage it.
Then remove the foam pad on the seat, which gives the chair elasticity. Unscrew the nuts holding the furniture legs. If the fasteners do not yield due to rust, they are treated with a special anti-corrosion liquid.
After this, remove the upholstery and pull out the softening foam layer from the backrest. To do this, use a screwdriver to pry out the old staples holding the fabric to the frame. After one side of the staple comes out, grab it with pliers and remove it completely. When all the staples are removed, remove the fabric and take out the foam.
Important!
Worn foam rubber falls into pieces and crumbles. Therefore, before work, they spread an oilcloth on the floor so as not to spread garbage.
Tips for choosing materials
To reupholster furniture, various types of textiles, leather or its substitute are used. The choice depends on individual preferences and financial resources. However, if you choose fabric upholstery, it is not necessarily cheaper than leather. For example, imported silk, brocade and some types of satin can even exceed it in cost.
Let's consider the most popular materials:
- Leatherette. The most inexpensive, but at the same time the most short-lived material. As a rule, its “lifespan” is 1.5–2 years with active use of the chair. This is even less than budget options for fabric upholstery. Of course, there are high-quality leatherettes, the quality of which is almost as good as natural material, but they also cost almost the same as genuine leather.
- Textile. According to the increase in cost, the material can be classified as follows: chenille (fabric made from synthetic threads and cotton fibers), flock (a substitute for velvet), jacquard with an adhesive layer (smooth, durable and dense fabric, has water-repellent properties, characterized by a mixed composition of threads), microfiber ( the texture is similar to suede) and tapestry (dense, thick fabric). Such a wide selection helps you find upholstery textiles that fully suit both your needs and financial capabilities.
- Genuine Leather. The most expensive, prestigious and high-quality material. However, it is worth considering that working with genuine leather requires special equipment and skills, so the cost of reupholstery should include not only the price of the material itself, but also the cost of the necessary tools.
To upholster an armchair or bar stool, it is recommended to use genuine leather or thick textiles. It is better to attach the material to the base using a construction stapler or glue. The process will take no more than 15–20 minutes (with a certain skill).
To qualitatively update the genuine leather upholstery on a chair, you will need the help of professionals.
As for a leather piece of furniture, in this case the work will take much more time and effort. The fact is that the “executive chair” is more difficult to disassemble and assemble. In addition, often reupholstering leather furniture involves removing old upholstery and cutting out new upholstery, which is fraught with some difficulties and will require certain skills. To avoid possible breakdowns or other troubles, it is better to entrust work with such an item to professionals.
We suggest that you familiarize yourself with the easiest way to update furniture. We are talking about upholstery with artificial Alcantara.
Recommendations
To ensure that your computer chair lasts as long as possible, when planning reupholstery, you should choose the right type of material. You should focus on the following parameters:
material possibilities - fabrics can have a wide range of prices, so it is important to understand what you can count on;
interior design - when choosing the color, structure and print of the fabric, you need to take into account the interior of the room in which the furniture is located;
degree of use of the furniture - the choice of material should be made based on how often the chair will be used.
If a computer chair is completely upholstered with material, then it must be replaced everywhere so that the appearance of the product remains presentable. In addition to the seat and back, the armrests, which are also upholstered in fabric, often get very worn, so when purchasing material, it is worth including their dimensions in the size of the future canvas. The upholstery of the armrests is no different from working with other parts of the chair; they are immediately disassembled, then the old materials are replaced with new ones and the finished product is assembled. If the handles have wooden elements, it is recommended to update them by covering them with varnish or stain, which will make the appearance of the finished product more presentable.
To ensure that caring for the chair does not cause great difficulties, it is worth choosing not only durable and strong fabric. In addition, it should repel water and be easy to clean. If there is a question about choosing a color, it is better to buy a plain material, since the presence of a pattern may necessitate the selection of elements, which will increase the consumption of material, and accordingly, the cost and duration of the work.
An equally important point will be the choice of foam rubber, which is located under the upholstery. If its thickness or density is too small, then the comfort from using such a chair will be minimal. The choice of thickness should depend on the type of chair and the weight of the person who will sit on it. To increase the shock-absorbing properties and keep the soft parts of the chair elastic for as long as possible, you can lay a sheet of polyethylene foam on the base, which has greater elasticity and will not sag over time. By placing polyethylene, high-quality foam rubber and upholstery material, you can create a more comfortable computer chair than it was originally, and use it comfortably for a long time.
You can watch a detailed video about reupholstering a computer chair with your own hands below.
Upholstery
Foam rubber should be laid only when all the parts are ready. The zippers are designed to make it easy to change the filling. After all, over time it sags, and sitting on it will no longer be so comfortable. For internal seams, fabric edging is used, which must first be sewn on a machine. It is also necessary to protect the future chair from dust and dirt. To do this, you need to make an additional outer cover for the chair-bed with your own hands with a zipper. If necessary, it can be quickly removed and washed.
What are the advantages of this design? First of all, it is a variety of shapes and colors. For example, for a child you can make several colorful beds in the shape of different animals. Moreover, the round frameless design in white colors will add aesthetics to your space. After all, it all depends on your imagination. The main thing is not to be afraid to experiment, and everything will work out for you.
Stool care rules
Regardless of whether there is contamination or not, you still need to take care of your stool. Follow simple rules:
Don't eat at the computer desk
This is positive for both computer equipment itself and furniture. Periodically pay attention to the wheels; they need to be wiped free of dust and lubricated so that sliding remains normal. It’s also not a good idea to rotate and roll around on the chair, bending the back. This causes damage to stool elements. When washing the chair, do not use excessive amounts of liquid, as this will cause the upholstery material to stretch. Clean dirty stains carefully with soapy water.
All stains should be washed from the edges of the stain to the center, so as not to spread it over a large area.
Everything done with your own hands is a pleasure, and looks no worse than the work of a professional. In addition, you can know exactly what materials were used and what step after what was done.
Required set of tools
Necessary tools and materials for sewing a cover
Let's look at the set of tools needed to reupholster a chair. Prepare them in advance so as not to waste extra time.
A furniture stapler is the main working tool with which upholstery is attached to the frame. You can purchase it at any construction or hardware store at a low price. You need to buy special staples of the appropriate size for the stapler. It is better to take them with a reserve so that you do not have to interrupt the work process.
Foam rubber or batting - if the old filler has lost its former elasticity, it is necessary to replace it with a new one. Sold at a hardware or construction store.
Furniture filling – foam rubber
Batting for filling upholstered furniture
A flathead screwdriver or pry bar for removing old staples.
Minimum set of tools for furniture repair at home
A hammer, pliers, tailor's scissors, an adjustable wrench - all this will be needed to completely assemble and disassemble the chair.
Sewing machine, tailor's chalk or bar of soap, for sewing new upholstery.
You will need a sewing machine to sew a new chair cover.
A wire brush, coarse and fine sandpaper - for updating external wooden elements, as well as varnish or paint of the required shade.
The benefits of making it yourself
It’s a big plus if the sofa has a high-quality base. Old pieces of furniture are much better quality than those that are produced now.
Replacing the upholstery will not take much time and effort.
Restoring furniture at home has several benefits.
- You reupholster the sofa with any material you like, and you can add picturesque elements to your liking.
- When performing work to replace the upholstery, you can repair the frame or spring unit if necessary.
- Outdated sofas, as a rule, are the strongest and best quality, prevailing in all properties over modern furniture.
- By doing this work yourself, you won’t spend a lot of money, but a new sofa or chair will cost much more.
- You don’t have to throw your favorite soft corner into a landfill because it has become unusable.
It’s worth deciding whether you will reupholster the sofa yourself, in which case the work will take more time, or trust the specialists, they will do it in a short period, perhaps at your home, without transporting it to a workshop.


