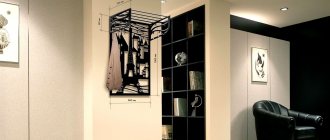
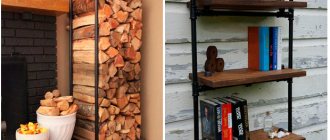
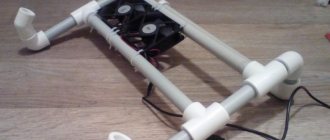
How to make a wardrobe hanger with your own hands from pipes and connectors of the Joker system. I needed to install a hanger in the dressing room. Studying the issue showed that it is much more profitable to make a hanger for your wardrobe yourself than to order it with installation. The difference in price between materials and labor varied by an order of magnitude. The master shares the secret of building a hanger in his dressing room with detailed instructions, photos and videos. It is based on pipes and connectors of the Joker system purchased at a construction hypermarket.
Determining the size of the hanger for the wardrobe and purchasing materials
Without much trouble, I tried on standard hangers on the end of the wall and determined a convenient position for the hanger crossbar so that the clothes would hang without touching the wall and floor. Distance from the wall 280 mm, hanger height 1550 mm. Marked the desired point on the wall. The length of the hanger pipe is 2400 mm. It is clear that a pipe with a diameter of 25 mm or 32 mm will not support the weight of clothing and will bend. Therefore, it is necessary to install a support in the center. At the same time, there may be lateral impacts on the pipe. This means you need a pipe to attach the hanger pipe to the side wall. Studying the issue of components for such a project showed that the project can easily be solved using pipes and connectors of the joker system. Purchased at the nearest construction hypermarket:
- chrome pipe with a diameter of 25 mm and a length of 3 meters;
- chrome pipe with a diameter of 25 mm and a length of 1.5 meters;
- connector of three pipes of the Joker system;
- four flanges for attaching the hanger to the walls.
Three types of hanger components
If you are sure of the dimensions, then the pipes can be cut right in the store. On the other hand, there shouldn’t be any special problems with cutting pipes with your own hands; a pipe cutter, angle grinder or metal saw will do. There are no requirements for the quality of the cut; everything will be hidden. In my case, a piece of pipe 2400 mm long was used for the side mounting pipe of the hanger. Side pipe length 250 mm.
The connector holds the pipes together using two countersunk socket screws. The flanges also have a countersunk machine screw with a sharp tip to secure the pipe.
Three pipe connector
Three Pipe Flange Connector
Assembling and installing hangers in the wardrobe
The master used the tools he had to assemble and install the hanger in a wooden house:
- screwdriver;
- laser level (float level will also work);
- set of bits and socket wrenches.
The instructions for installing a hanger based on the Joker system are as follows:
- Using a laser level, I marked a distance of 280 mm from the side wall on the opposite wall.
Leveling when attaching hanger flanges - In the center of the point previously marked on the wall, I secured the first flange with self-tapping screws.
Attaching the first flange of the hanger - I put a second flange on the crossbar pipe. I inserted the pipe into the first flange and secured the second flange with self-tapping screws to the wall. Watch the video.
- I assembled the pipe fastening unit in the center of the crossbar.
do not forget to place the third and fourth flange on the free ends of the pipes. Three pipe hanger connector - After the center post is aligned vertically, the connector is tightened and the post clamp is secured to the floor.
my brother (a stand with shelves strung on it). I was interested in the idea of stringing, because the cost of flanges (even 2 per connection is less than a clamping shelf holder, there is less hassle with installation, and, in my opinion, the aesthetics are higher). I also collected it once before... I won’t do it again).
In general, a client was found - the man needed something inexpensive, but nice and functional. In general, the project got underway.
Unfortunately, due to the extremely untimely death of my hard drive, almost all the materials for this project have sunk into oblivion, fortunately I managed to give it away for cutting. And cutting, and detailing and the PRO100 project itself, so don’t blame me....
I remember that the materials required were exactly 2 6-square sheets of 16 mm laminated chipboard Milky Oak, 1 sheet of fiberboard. The rest is optional (I don’t want to recalculate).
I sawed a bunch of pipes to size and assembled stands for the chest of drawers. I will write an article about various options for cutting Joker pipes a little later.
Let's move on to manufacturing itself. First, I drilled holes in all shelves except the top one with a 25 mm Forstner cutter at the same distance from the corners. In the shelves of a straight section, and in the center. I’ll make a reservation right away that it’s better to drill with a 26-28 mm milling cutter (a crown or perk would also work great - I’ll get to that a little later... but more on that later...)
I opened each hole by screwing a piece of 25 mm pipe into it - a lot of time and fat was wasted, which could have been used more profitably.
A box with drawers is assembled using (only the back wall in this box is load-bearing, and therefore is made of 16 mm laminated chipboard).
Having attached the shelf, which is located above it, to the upper horizon of the chest of drawers, I marked the installation locations of the flanges. I attached the last ones and filled the holes.
I didn’t bother hanging the facades in the workshop - it was so difficult and inconvenient to hang them up. I just marked and drilled holes for the handles and carefully wrapped everything with film. Then I ordered Gazelle and delivered everything to the place.
I started with the straight section. First, I began to screw the pipes into the holes, stringing flanges onto them in parallel so that they were “as it should be.” But on the third shelf I realized that this was a road to a dead end, a lot of effort, of little use.
I flew home and took a 30 mm crown from my gift set (thanks again to everyone who took part in that drawing).
Having made such a simple template, I drilled out all the unfortunate holes in the straight section to 30 mm.
After that the assembly went much more fun. I placed supports under the chest of drawers (so the bottom shelf turned out to be level with its bottom edge) and positioned the bottom shelf. Next I added the rest, not forgetting about the flanges. Then, raising each one to the required height, he first secured the flanges themselves to the pipe, and then screwed them to the shelves. I constantly checked the evenness of the shelves and racks with a level.
The downside of the 30 mm holes is that even with a slight displacement of the pipe from the center of the hole, not each of the three screws can be screwed into the shelf - one often ends up in the void.
After completely assembling the straight section, I moved on to installing the side section. First I set the chest of drawers on its feet. This must be done carefully so as not to break them; lateral displacements of the structure can easily lead to this. Then he began to display the shelves. As a marker I used boxes whose height is 150 mm. I didn't drill any holes here. I strung it onto pipes and so on.
So I gradually brought it under the upper tier. I decided to form the joint itself using . I placed the shelves next to each other, drew a line (due to the geometry of the wall, the edge of the long shelf had to be cut with a jigsaw and marked the centers of the ties. I screwed the rods into one end.
The second one was cut and drilled for eccentrics.
I put on the shelf, tightened the ties and screwed it to the flanges.
The photograph is so fresh, taken so timely that even the sawdust and drill bits, still warm, are still lying on the shelves. In this section we will talk about the Joker chrome pipe system.
Everyone has probably noticed that beautiful metal structures are often used in furniture production. One of the options for elegant metal structures is the “Joker” system, be it sliding wardrobes, tables, glass counters in showrooms and shops. I also decided to use shiny chrome pipes for my cabinet. I bought a 3-meter piece for about 160 rubles and several chrome-plated flanges. Now I will write about what I did with them.
I don’t remember where I saw such an example, maybe in some magazine.. I decided to use such pipes as supports for small shelves with rounded corners. The joker pipe can be cut with a hacksaw. But I saw that in the store they were cutting it with a pipe cutter. Some friends lent me approximately the same pipe cutter. I think that this expensive tool is not worth buying specifically for this purpose. But it’s very good at cutting chrome pipes, no metal shavings or noise. The cut is very neat and even. The flange is placed on the pipe and attached to the surface of the chipboard with three self-tapping screws. In addition to the flange there is also a screw that secures the pipe. In general, everything I did can be seen in the photographs. It was around then that I had the idea of creating a blog. So I started taking pictures of my closet =). A little late, but better late than never.
As you can see in my photo, the shelves of the cabinet with and using “Joker” pipes are made in two places: at the top and at the bottom. A mirror is glued between them with double-sided tape. In my opinion it turned out quite well, didn’t it?
As you can see, everything is simple. We cut off the pipe, screwed the flanges to the shelves (with three self-tapping screws each), inserted the pipes, secured the shelves, tightened the clamps on the flanges, swept up the sawdust... and everything was ready =)
Now a little about another type of chrome pipes. Chrome-plated oval-section pipes can be used for hangers in wardrobes and wardrobes. I also purchased a piece of chrome oval pipe and two brackets for attaching it to the wall. Each bracket has 3! holes for fastening with self-tapping screws. It takes a lot of effort to tear it off. A hanger on two such brackets should be able to withstand a decent load of clothes.
You could use a standard closet hanger that fits into the closet as a spacer, but this turned out to be about twice the price and had limitations for installation. In general, it simply wouldn’t fit into the place where I wanted to insert it. This is exactly the compartment where the crossbar on which the hangers hang is inserted. In my closet it is quite narrow, but the clothes are arranged in 2 rows. Short jackets and shirts on top, long coats and raincoats below. And they decided to hang clothes up that would rarely be taken out. In fact, stores sell a special bracket that has a handle by which you can pull and lower the crossbar with hangers. In our country, in order to remove the outer jacket, you need to use a stool (if your height is below 175 =)). The price of such a bracket is over a thousand rubles, I felt sorry for this money.
Cabinet upgrade hardware
Increase the capacity of the wardrobe, make the furniture more ergonomic and functional. The following accessories are provided for this:
- Ball and roller guides;
- Rising rod - pantograph;
- Holders for trousers, skirts, ties, belts.
Guides – for mounting drawers or baskets. Roller – usually for boxes with a load of up to 25 kg. Ball (telescopic) ones, unlike roller ones, can be operated under loads above 25 kg, full extension, operate quieter, and are complemented by soft closing and automatic extension mechanisms after pressing the facade.
Pantograph (wardrobe lift) - a rod with two slats (U-shaped holder) attached to the lifting mechanism, and a handle. To utilize the cabinet space at the top. To hang or remove clothes, we lower the bar with a handle, then a spring mechanism or gas lifts smoothly lift the bar up. A wardrobe lift allows you to save a lot of space in your closet; it is an excellent solution for tall wardrobe furniture.
Specialized holders - for trousers, skirts, ties, belts. Retractable and rotating ones have proven themselves well. Systems made of steel and aluminum tubes and hooks. Attached with screws to the wall or door of a cabinet, retractable type, equipped with reliable guides for easy and smooth removal.
You can view the entire range of dressing room accessories and place an order on our website.
Dressing room based on a structure made of chrome-plated steel pipes
Advantages:
- Optimal use of interior space.
- Mobility and versatility: there is no clearly defined step between nodes.
- Simplicity and convenience.
- Great strength and durability.
- The correct room geometry is not required.
- The ability to create your own design using ready-made developments or your own inventions.
- Relatively low cost.
- Just like in the UNO system, it is easy to make changes to an already assembled structure, for example, in the process of redecorating a room.
Required sizes:
- Over a meter horizontal span, the pipe can withstand a distributed load of up to 60 kg.
- The maximum length of the pipe without support is up to 1200 mm.
- Pipes are supplied in three-meter lengths. For structures higher than three meters, connectors must be used.
Joker - a universal solution for interior filling of a dressing room
“Due to the large number of components, durability and service life of several decades”
The Joker wardrobe system consists of:
- Round chrome plated steel pipes with a diameter of 25 mm
- Shelf systems made of laminated chipboard on which things will be placed
- Horizontal clothes rails
- Fastening connections
Do-it-yourself children's chair made of plastic pipes Office table with a plastic frame Shelving for the garden Various interior elements made of PVC pipes
Building a house or renovating an apartment is always accompanied by a lot of leftover consumables.
Dressing rooms in Khrushchev instead of a storage room
The main difference between modern dressing rooms and storage rooms is the presence of an ordered system of shelves, mezzanines, drawers, hangers and other components for convenient storage of not only personal belongings, but also items and equipment of various shapes and purposes. In addition, such systems are designed in such a way that all objects and things are visible and easily accessible. There are hundreds of options for dressing rooms, the layout and content of which depends on the area and budget of their owners.
A compact way to store things in a Khrushchev-era pantry
Before making a dressing room with your own hands, it would be useful to familiarize yourself with the basic planning solutions for dressing rooms. The fact is that in large apartments, as a rule, separate rooms are already provided for dressing rooms. The owners can only equip them with suitable storage systems. But in apartments of the old housing stock, storage rooms are allocated for such needs, the dimensions of which are quite small.
Convenient storage system for things, shoes and accessories
In order to organize the space of a small room as correctly as possible, designers offer various methods for arranging dressing rooms from storage rooms in Khrushchev-era buildings. Many different projects are offered for independent implementation. You can choose the most suitable one by reading the drawings, diagrams and photos of dressing rooms in a Khrushchev-era building instead of a storage room.
Dressing room instead of pantry
If initially there is no storage room in the apartment layout, a dressing room can be arranged anywhere. This can be a combination of a dressing room with a bedroom, hallway, hall, nursery and other rooms. Experts recommend dedicating several areas for storage systems, for example, in the bedroom and hallway, if possible. In an ordinary Khrushchev-era building, the space for a dressing room is determined at the stage of redevelopment, which is pre-approved by the relevant authorities.
Separate storage area in the apartment
Depending on the location in the apartment, configuration and area, the dressing room can be arranged along one wall, formed at an angle, or given an L- or U-shaped outline. The latest technologies make it possible to plan the optimal storage system for any, even modest, dressing room. After all, the main advantage of internal filling is a huge range of components for every taste.
Dressing room along one wall
How to make a wardrobe hanger from pipes and connectors of the Joker system with your own hands
Pipeline repair is also no exception, because after replacing metal pipes with plastic ones, a lot of scraps remain, as well as connecting elements - fittings, which many owners simply throw away.
However, there are also creative people who can make durable and original furniture from such trash, for example, tables or chairs, as well as other household items such as an organizer. In this article we will examine in detail some similar ideas from PVC pipes.
Wardrobe made of metal pipes
Used to create a mesh wardrobe. The main advantage is the strength of the frame and good ventilation of the room. The disadvantage is that the master must have certain welding skills.
A small but original dressing room can be built from old furniture.
DIY children's chair made from plastic pipes
Polypropylene is a hypoallergenic and non-toxic material, so you can make various children's furniture from it without worrying about the health and well-being of the child. By implementing ideas from plastic pipes with your own hands, you can easily assemble a table, playpen, chair, etc.
One of these simple projects could be a comfortable children's high chair, which is assembled from pipes and fittings like a construction set. The size of each part will depend on the size of the desired result, but below we will provide instructions in which we will tell you how to make a chair for a five-year-old child.
To make a high chair you will need the following materials and tools:
- PVC glue;
- Approximately 3 meters of polymer pipe;
- 6 T-fittings;
- 8 corner fittings (90°);
- Durable fabric;
- Fine tooth saw;
- Sewing machine;
- Scissors.
Building a chair:
- First of all, you need to cut the pipe into pieces: 7 pieces. 33 cm each (A), 4 pcs. 20 cm each (B), 4 pcs. 13 cm each (C) and 2 pcs. 18 cm each (D);
- Take two parts A and secure them at each end with an angle fitting;
- Insert all elements B into each of the fittings;
- Place T-shaped connectors on each element B, turning their perpendicular part perpendicular to element A;
- Connect the T-fittings in pairs with elements A.
As a result, you should have parallel chair legs; - Insert all elements C into the free ends of the fittings;
- Next, you need to place the structure so that the ends of the legs “look” at you;
- Take the two corner fittings and slide them onto the C parts closest to you;
- Slide the two T-pieces onto the C pieces further away from you, rotating them so that the center joints are facing you;
- Next, you need to connect the inserted fittings with parts A parallel to the chair legs;
- We insert parts D into the free ends of the T-shaped fittings and put corner fittings on them, turning them “facing” each other;
- We connect them with element A, ending with the back of the chair;
- Make a seat out of fabric by stretching it between parallel bars;
- Glue all connections, then let the chair dry.
Having completed the children's chair, you will acquire the necessary skills, after which you will be able to design and assemble other children's furniture from PVC pipes with your own hands, for example, a table or a tent. Read also: “What furniture can be made from plastic pipes with your own hands.”
Where to place the dressing room
There are several options for placing a dressing room in an apartment or private house:
- In a storage room or building niche.
- In the bedroom.
- Under the stairs to the second floor.
- In the attic.
- In the hall.
The choice in each specific case depends on the circumstances and various factors (room area, number of family members, financial capabilities of the home owner).
Office desk with plastic frame
Buying even the cheapest office desk can be a big hassle for some people, so we'll show you how to make a desk out of plastic pipes. This project differs from the previous one in its complexity, so you will have to think through some parts yourself, but we will try to explain everything to you as clearly as possible.
First of all, you need to decide on the size of the table. In our case, we take a ready-made tabletop (915×2030 mm), under which we will assemble the frame. When choosing a tabletop for your own table, pay attention to its weight and follow the rule: the lower the weight, the better for your table. The best solution for a countertop would be a hollow door leaf. You can also assemble the tabletop yourself using flat boards, fasteners, a saw and a drill.
First of all, prepare 12 meters of plastic pipe and cut it into the following parts:
- 5 parts of 7.5 cm;
- 10 pieces of 30 cm;
- 4 parts of 50 cm;
- And 4 pieces of 75 cm.
Among the other parts for the frame you will need the following:
- 4 T-fittings;
- 4 four-way fittings;
- 2 cross fittings;
- 10 plugs for pipes and fittings.
Having prepared all the necessary parts, you can begin to assemble a table from polypropylene pipes. It is better to perform the first assembly without using glue, and after assembly, glue all the connections one by one. Begin assembly by constructing the sides of the frame on which the tabletop will rest.
Next, assemble the back part, which will connect the two already assembled. To give the table additional stability, we recommend adding a third leg to the back wall. When assembling the table, carefully monitor the parallelism of all elements in order to ultimately obtain an even structure.
At the final stage, it is necessary to connect all the parts into a single structure, obtaining a table frame. Check it for strength, correct any unevenness, and then glue all connections.
Having made the frame, you can begin installing the tabletop. This can be done in many different ways, but we will consider the most reliable and aesthetically correct of them.
Shelving for the garden
After renovation, not only polypropylene pipes may remain in the house, but also a metal profile, from which you can try to make a shelving for your summer house without using welding. To work, we only need a tape measure, a pencil, a screwdriver and a hacksaw.
First of all, it is necessary to design the future rack. Draw a diagram on paper, observing all dimensions.
Let's look at the manufacturing process using a specific example:
- Take the profile and cut it into pieces: 4 vertical posts, 8 front and 8 rear crossbars;
- Assemble 4 frames that should become shelves in the future;
- Using self-tapping screws, secure the resulting frames to the vertical posts;
- If you wish, you can screw the rack to the wall and paint it, after which you can lay plywood on the frames to make shelves.
Various interior elements made from PVC pipes
To decorate the interior, as well as create useful structures from PVC pipes, you can use very short sections of pipes. So, you can make organizers from short pipes, where you can put shoes, writing utensils and other small things in the holes.
You can also easily make wine racks from PVC pipes with your own hands. To do this, simply glue several pipes together and screw the resulting structure to the wall.
In a similar way, you can make a glass holder. To do this, just cut the plastic pipe lengthwise and then fix it to the wall. The stem of the glass fits perfectly into the cut hole, and the rigidity of the polymer pipe does not allow it to fall out.
If you don’t have enough space in your home for outerwear, then a hanger made of plastic pipes is an excellent solution to this problem. You can design and assemble such a hanger based on the examples with a table and a children's chair.
In conclusion, I would like to say that plastic pipes are a cheap and lightweight raw material for creating various decorative elements. Any item you create can always be painted, covered with glitter, or decorated with various elements, for example, shells glued to glue. Polypropylene rings can also be used for seasonal decoration of the apartment, for example, for the New Year you can make a wall panel and fill it with New Year's paraphernalia, for example, balls and figurines.
As you can see, in order to create a cozy atmosphere and decorate an apartment, it is not necessary to spend a large amount of money, because the main thing is a creative approach that will allow you to create the desired result with minimal costs.
RETAIL STORE EQUIPMENT
offers JOKER TRADE EQUIPMENT at the BEST PRICES IN MOSCOW
offers prefabricated trade pipe systems joker, uno, tritix (tritix), chrome pipes and chrome grilles produced by Joker 4, perforated and GLOBAL profiles, tritix trusses, hangers, clothing racks made in China, Taiwan, Italy, trade panels and hanging elements (China), wholesale and retail at WHOLESALE PRICES
.
Our products are purchased by customers from all regions of Russia: from Murmansk to Krasnodar and from Smolensk to Yuzhno-Sakhalinsk. Join us too!
Hotline: +7 903 2-800-800
Railing system of chrome-plated pipes D=16 mm. Railings for the kitchen and kitchen accessories, connecting elements for railings, Joker and Uno systems for chrome-plated pipes with a diameter of 16 millimeters.
JOKER system UNO fastening system for pipe D=25 mm. Joker system (joker system), chrome-plated pipe d=25 mm. Jokers, components, fasteners, units, connectors, holders, components of trade and exhibition equipment joker (chrome). Joker (chrome) metal steel pipes diameter 25, 32, 50 mm. with a wall thickness of 0.7 0.9 1.0 1.2 mm.
