5394 0 0
MesterulManole September 25, 2018Specialization: many years of experience in finishing works of residential and office premises, dachas, country cottages, etc. Hobby: cycling in all its forms
Kitchen design for efficient use of indoor space
In most modern standard apartments, the kitchen is still not the most spacious room. That is why it is so important to fill the kitchen with useful furniture to the maximum without using up the free space. You can achieve this result using corner cabinets. I will tell you what this furniture is and how to make it yourself.
Features of the corner design
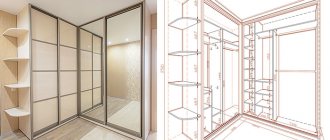
Typically, in rooms with non-standard dimensions or a small area, corner-type structures are installed. Such furniture is designed to provide comfort and add originality to the interior. Corner cabinets have design features, among which there are pros and cons.
To assemble this cabinet yourself, without installers, you need to highlight the product features:
- The cabinet has 4 walls, unlike standard models: 2 of them are pressed against the wall, the rest serve as support strips on the sides of the cabinet;
- Dimensions must be accurate - before choosing a model that will fit the room, it is necessary to accurately measure all dimensions: depth, height, width of the furniture;
- Patterns can have different shapes: g-shaped, pentagonal, triangular and trapezoidal;
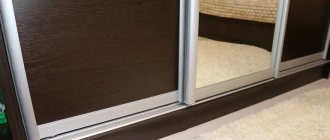
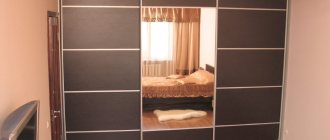
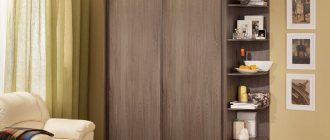
- The corner wardrobe is equipped with hinged or sliding doors.
For self-assembly, it is best to buy corner models with folding wings. They are hinged and screwed to the body.
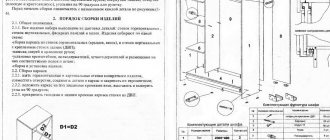
Each product usually comes with installation instructions—some companies insist on calling assemblers rather than completing models with diagrams. If this is the case, this should be reported to the dealer at the time of purchase.
Installation of lighting fixtures on the kitchen set
Let us immediately note that it is quite difficult to independently install lighting for the work area. But we’ll still tell you how this can be done in the most popular way. Lighting fixtures are built over the top of the upper cabinets. One of the simple ways to add a board on top of the drawers that protrudes above them and install lamps on this improvised canopy. The protrusion is left approximately 20 cm wide, then any type of light bulb can be used as lighting.
To illuminate the lower edge, you can use an LED strip, which will greatly simplify the task of installing lighting above the work area. In addition, lighting with spotlights looks very massive and will significantly reduce the already small space between the wall cabinet and the countertop.
It would not be amiss to remind you that such lighting can only be used as an additional source of light when preparing food. There must be a general light bright enough to work in the dark, as well as a lamp for the dining area, if there is one.
Instructions for assembling the corner cabinet body
Place the base on the legs, insert the vertical inner panels into the top. Part 61 is attached to the center, and part 71 is attached to the rear edge. They are attached to each other with a corner piece.
Next side panel 07. Close the locks. Hold this part.
Position the upper corner 01, secure the part with all vertical panels. Installation is carried out using a ladder.
Secure the left vertical panel and secure the locks.
Place shelves 02 and 03 on small rods. Rear wall 20 and 19. Add shelves 21.
Step by step installation
Step one: Assembling the corner frame of the cabinet (plinth), which is located at the base. This is an important part of the frame, since if it is missing, the doors of the swing closet will hit the floor. As a rule, the base is located at a distance of about 5-10 cm from the floor. The main material is chipboard. It has the shape of the cabinet frame itself, but does not stand out outside of it (compact).
The parts of the base are connected to each other with self-tapping screws or Euro-screws. Sometimes this additional element is made high, which allows you to create a lower shelf for storage.
Installation of skirting boards
Step two: assemble the body parts. At this stage it is necessary to connect the side, top and bottom parts of the entire structure. They are attached using Euro screws, plastic and metal corners. The place where the parts overlap each other is additionally reinforced with wooden wedges. In addition, at this stage, partitions must be fixed to provide stability to the fence.
If the design includes a base, all elements of the housing are attached to it. If there is no plinth, then the cabinet is installed on a flat floor, then the cabinet is raised and fixed in a vertical position.
Installation of housing parts
Step three: installation of the back wall. This is an important part of the cabinet design, which not only serves to limit the internal space, but also provides stability. Typically, sheets of durable plywood or fiberboard are used to make this part. The first option is more expensive, and the second is cheaper (less durable).
Attach the back piece so that the sides form a single piece. Secure it with self-tapping screws around the edges. This part can only be connected to the internal partitions if they are securely fastened.
Rear wall installation
Step four: installing shelves and rails. If desired, you can securely attach the shelves or leave them movable. The second option allows you to delete them and exchange them in the future. Reliable fastening involves installing parts using corners and screws directly on the cabinet walls. In another case, the supports are attached to the walls of the structure, and then the shelves are installed.
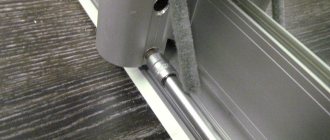
Guides must be installed in cases where the structure includes moving doors (cabinet). This will require aluminum profiles fixed at the top and bottom. They will be invisible in the finished structure. Sometimes, if there are boxes, additional rails are installed so that they slide smoothly.
Installation of shelves and rails
Step five: installing doors. After installing the guides, you need to secure the sliding gate. They are installed first from the top and then from the bottom edge. Door leaves should be positioned relative to each other so that they can be easily separated.
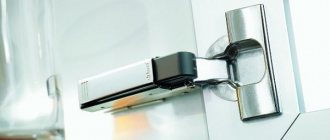
Hinged doors hang on furniture hinges. The hinges are pre-set with a shaped groove. At the same time, they will be secured inside using Euro screws.
door installation
Step six: door installation. Thanks to the presence of hinges, swing doors can be moved slightly. Screw #1 allows you to move the door horizontally in different directions. Screw #3 allows you to move the door as close to the cabinet as possible. The remaining screws are not adjustable; they are only needed during installation.
Door installation
Cabinet model doors can be adjusted by pressing or loosening the bottom wheel. This is done using the screw at the bottom.
Lower wheel adjustment
Step Seven: Cover the connections with end caps. If after installation the fasteners are visible from the outside, they can be covered with special furniture caps. They are available in various colors at any furniture store.
conclusions
Crafts for storing something
Surely there is a box in the house where all household members put necessary and unnecessary things, with the idea of disassembling them later. A box divided into sections will come in handy in the kitchen. What's the first thing that catches your eye? Clutter in your cutlery drawer? Or a lot of spice packets that just want to get mixed up? Or maybe these are various little trinkets that are definitely needed, but now there is no time for them?
Spice jars
The most relevant, without a doubt, can be called containers for spices. Everything is neatly tidied up and placed on shelves. There is no need to “look through” all the bags in search of what you need. In the store you can purchase special plastic or glass containers and decorate them at your discretion. Paint with acrylic paints or make inscriptions with a permanent marker.
If you have children at home and baby puree in glass jars is a frequent purchase, this is a great find. Small jars are great for storing spices. Paint the lids, as the inscriptions on them are made with paint, and decorate the body as desired. This container holds about 30 g of seasoning.
Baskets for various small items
Boxes for small items are never superfluous. Often, small things that need to be repaired, or things that have not found a place, are put there. A pen from a locker, a spare battery, a small notepad and a pencil. There will always be something to put in. A beautiful box with a lid will fit harmoniously into the interior and allow you to keep your “kitchen stuff” in one place. Boxes can be large. For example, for storing vegetables. Material for production – any.
Another option is a tea bag house. It can be made from cardboard or plywood. This solution looks much more interesting than a simple box of tea.
Cutlery organizer
A mess in kitchen appliances will infuriate anyone, because the search for a teaspoon can take a long time. How do you store cutlery? In a desk drawer or stand? If everything in the house is routinely put away in a closet, then the best solution would be to make an organizer that fits the size of the kitchen drawer. Plywood works great.
If cutlery is in plain sight, then an organizer made from cans would be an interesting solution. To do this, wash the jars, paint them and decorate them as desired. Draw a pattern through a stencil or leave it plain. Afterwards, secure the cans to a wooden base. This design looks unusual and attractive. You can take four, five or six cans and make a composition to your taste. Dry utensils must be placed in such organizers.
Assembling corner cabinets in the kitchen
If there is a free corner in the kitchen, then you can install a corner cabinet there. This will save a lot of space for storing small household appliances or kitchen utensils. Supplied as standard:
- on the left and right side;
- Organ table and back panel;
- upstairs;
- at the bottom.
A set of internal elements - shelves, rods, built-in baskets. From these parts it will be easy to assemble a corner kitchen cabinet according to the instructions:
- Familiarize yourself with the furniture design, place all furniture components on the floor.
- Assemble the large parts - the base and the bottom.
- Install the side panels, then the top panel.
- Start attaching the interior shelves, which will also hold the frame in place.
- The finished body is upholstered on the reverse side.
- Install the doors. There are 2 options here. If the design is a coupe, then the rails are attached to the roof and bottom. If the model is wall-mounted, then the hinges must be attached to the walls, and the doors must be suspended on hinges.
- Place accessories inside: racks, pull-out baskets, shelves, etc.
- Finally, all visible self-tapping screws should be covered with colored caps.
Tip: Pass-through drawers, pull-out baskets and rails should be installed using a spirit level.
Features and differences of assembly for the IKEA model
Assembling IKEA furniture is a great way to test family relationships. After all, it takes a lot of patience to assemble a stylish corner cabinet for the kitchen or hallway so that it looks like in the catalog. Let's look at the assembly features and differences of this brand.
Tip: To assemble an IKEA corner cabinet, do not do it on a bare floor. The product is made from medium density fiberboard, also called “chipboard”. The material has excellent strength and is resistant to damage, but chipboard is susceptible to chips and scratches.
Therefore, experts recommend installing the IKEA cabinet on cardboard (the box in which it was delivered) or on an old blanket or other fabric.
- The difference between IKEA furniture and other brands is that they put a lot of resources into developing their products. Therefore, if parts somehow do not fit during the assembly process, it is most likely due to an error in a previous assembly step.
- Another feature when assembling IKEA furniture is that the use of a drill is prohibited, as drilling to insert bolts and screws often damages the parts. Ikea furniture already comes with pre-drilled holes.
- An interesting feature of IKEA wall blocks. When installing them, brand employees recommend attaching them not to the wall itself, but to hanging rails. This will make it easier to keep the cabinets at the same level. Ikea products will be able to move on the sides before attaching them to each other.
Basic rules for creating furniture yourself
Before you figure out how to make a kitchen corner with your own hands, you need to clarify the basic nuances of furniture assembly:
- The accuracy of the work directly affects the functionality of the products, and the final result depends on many factors.
- At the design stage of a kitchen corner, individual tastes and preferences of people are taken into account.
- If ready-made circuits are used for manufacturing, then you will have to work with the specified materials. Otherwise, backlashes and gaps will appear in the structure. Strict adherence to the assembly order will be required, as well as the selection of high-quality fittings.
- If you have no experience in creating furniture, you should give preference to the simplest, linear models of kitchen corners with laconic decor.
- When selecting suitable kitchen corner drawings, you must be guided by the available tools. Thus, making a wooden model is not complete without a grinding machine or jigsaw.
To ensure high-quality assembly, you should think in advance about the appearance of the kitchen corner and determine the place where it will be located. This information will help you choose the most suitable materials and accessories.
The secret to the popularity of the kitchen corner lies in its aesthetic self-sufficiency. A corner sofa with a table form a separate comfortable area.
Corner cabinet made of plasterboard
Before manufacturing and assembling a plasterboard cabinet, it is necessary to prepare the following materials and tools:
- plasterboard sheets of the required sizes;
- metal profiles (racks and guides);
- Accessories;
- yardstick;
- Scissors for metal and drywall;
- corners for fixing protrusions;
- self-tapping screws (for drywall);
- set of dowels;
- Construction level;
- Screwdriver;
- plaster;
- putty knife;
- sandpaper;
- jigsaw (for cutting sheets);
- additional articles;
- punch (for screw holes);
- decorative plaster for finishing.
If you have the materials and tools listed above, you can begin the construction process.
Frame installation
Step by step instructions.
Step 1: You need to make markings on the walls. At this stage, you need to use a pencil to mark the installation points of the structure on the wall. You may want to double check these values several times to be sure.
Wall markings
Step 2: Start attaching the metal profiles to the wall with self-tapping screws. Accuracy is especially important at this stage, so there is no need to rush. Each element must be securely fastened, since the metal structure will bear the entire load. The screws are tightened in increments of no more than 100 millimeters, so the entire structure is stable.
Each element must be secured
Step 3: The post profiles should be inserted into the guides. Self-tapping screws or European screws are used for this. Since this is a corner cabinet, the profiles must be bent so that they fit into the structure without obstruction. To do this, a notch is made on the beams with metal scissors. This will allow you to quickly bend any profile.
Installing profiles
Step 4: If you are planning to install a large cabinet, you may want to further strengthen the profile structure. This can be done with the remaining profiles that are used to form the cross members.
Reinforcement of structures
Step 5: Before you begin the process of covering the structure with plasterboard, you need to secure the corners. They are made from fragments of the remaining profiles, but if desired, they can be purchased at any hardware store.
Locking corners
Important point! Instead of metal profiles, sometimes wooden beams are used to make the frame, but this is not the best solution. After all, wood tends to shrink, which means drywall construction can warp, causing the plaster to crack.
Sheathing of the structure
Once the frame is ready, the coating process can begin. It's pretty easy to do if you follow the instructions.
Step by step instructions.
Step 1: Attach the drywall to the inside of the cabinet using self-tapping screws. After this, you should completely cover this part with the sheets. It is important to remember that the distance between self-tapping screws should be more than 150 millimeters. At the same time, deepen them into the sheet by 1.5 millimeters so that the fasteners do not peek out. You can read more detailed information on how to make shelf mounts with your own hands in our article.
Fix the sheet
Step 2. Then the outside of the structure should be finished with plasterboard. This must be done with extreme care to avoid mistakes.
Exterior finishing of the structure
Installing a countertop on a kitchen unit
In the case of a floor-mounted modular kitchen design, the countertop is included. They are joined together with corner profiles, and the edges of the slabs and the holes for the sink are treated with sealant. The edges adjacent to the kitchen stove are sealed with metal (aluminum) plugs. This will protect your new kitchen from water saturation and subsequent swelling.
For those who like smooth surfaces, first cut the tabletop itself to the required size and prepare holes for the sink and built-in appliances. Of course, you have to think through your work areas thoroughly; place a cutting table with a sink and stove. Leave a reserve under a small canopy to hide the cabinets under the tabletop. To do this, holes are cut in the finished tabletop slab with a jigsaw (in the case of laminated chipboard) and the edges are coated with sealant. Next, the cut edge is covered with an edge tape or profile.
We will describe in detail the procedure for installing a sink: first you need to mark the place for the cutout on the countertop, cut a hole with a jigsaw and work it thoroughly with sealant. After this, attach fasteners to the sink itself, with which it is connected to the countertop and install a siphon. Finally, insert the sink into the prepared cutout and fasten it with screws.
Despite the fact that built-in appliances are becoming more and more popular every day, their installation in cabinets is still quite difficult. For installation to go smoothly, it is necessary to have ideal dimensions, neat assembly of cabinets, and the presence of bends or protrusions is unacceptable. Doors on cabinets are undesirable for such equipment.
Furniture dowels are well suited for attaching the tabletop itself to the kitchen cabinets. The main thing is to drill a seat in the canvas and cabinet. Metal corners can also help out during installation. However, if the tabletop and the equipment placed on it weigh more, it will be necessary to mount special brackets on load-bearing walls. The resulting gap can be covered with a decorative plinth.
Advantages and disadvantages of a corner cabinet
Each design has its own advantages and disadvantages. The corner cabinet is very popular due to its many advantages.
Corner furniture has many advantages.
The benefits of a corner cabinet include:
- Compact design.
- Space saving.
- Thanks to a well-thought-out layout, cabinets of this design are large in size.
- Capacity.
- Convenient storage of all things and their location.
- If the design is done independently, then additional storage space is specially installed.
- Versatility.
- Great design choice.
- Practicality.
Furniture installation is carried out directly at the installation site.
The disadvantages of the project can be taken into account:
- The cabinet is not movable.
- To order, you will need to purchase a large number of spare parts.
Specialists know exactly how to assemble the product correctly and quickly.
Assembling a corner cabinet yourself is a process that requires time and concentration. Any wrong action can lead to serious re-alignment of the structure. It is important to observe all the nuances and follow clear instructions for assembling a corner cabinet.
