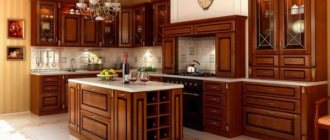
Wall cabinets are an important element of kitchen sets. Thanks to such furniture you will save space, at the same time it is spacious.
It is worth remembering that such furniture is often filled as much as possible with items that are different in weight, but so necessary for preparing food.
Therefore, the locking mechanisms of kitchen cabinets have to endure heavy loads. It is for this reason that the reliability and quality of fastening of each part of the headset to the wall is considered an important factor.
Hanging height
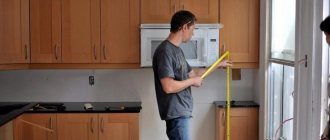
Before you start assembling the set into a single “wall”, you need to decide on the height at which the furniture will be hung. To correctly carry out these manipulations, preliminary calculations must be made.
In addition, it is worth deciding on the mechanism that will hold the row of kitchen cabinets.
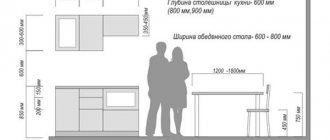
It is necessary to correctly determine the gap from the tabletop to the bottom of the set. This primarily provides convenience to the owners of an apartment or house in using furniture.
Often, GOST is used to determine this factor and the main value is taken to be a distance of 45 cm, but this is not entirely correct.
The boxes should be located at eye level of the owner to create the most comfortable conditions for their use.
The main measure for determining height is often the height of the household.
For people with average height, this value varies from 55 to 65 cm. The optimal height is considered to be the one when a person, without third-party devices, reaches the highest shelf and takes the desired item without risking letting it go from his hands.
The most important thing is comfortable use of kitchen cabinets.
If you do not plan to install the lower part of the set or tabletop, then you should take into account the calculations presented in the table:
Human height/mount height (in centimeters)
- 155-165 / 175-180
- 165-175 / 185
- 175-190 /200
You need to remember: attaching wall cabinets is a serious procedure; due to incorrect calculations, all mistakes will be noticeable.
Let's take a closer look at some of the issues that we will have to face during the installation of wall-mounted furniture.
Bolts, anchors or tires?
To ensure that the fastenings are reliable and the filled cabinet does not fall at the most unfortunate moment, you should take into account the material used to make the walls and furniture. Carefully consider the type of fastening.
How to fasten and what fittings are most optimal for a brick, concrete, wooden wall?
For a wooden wall of a country house, fastening with countersunk screws made of hardened alloy would be optimal. The most effective installation is with self-tapping screws with a large pitch and double-start thread.
It is better to attach shelves to a concrete and brick base using dowels, plugs, metal bolts, and plastic fasteners. You can strengthen the fittings in the holes after the drill with gypsum mortar.
Molly or butterfly screws will securely secure hanging furniture to a plasterboard wall.
For open shelves with light loads, decor, and lighting, you can use plastic butterfly dowels and drill dowels.
Hanging storage systems for dishes, food, and equipment should be mounted on classic metal fittings. For example, you can buy regular dowels made of durable alloy or molly (butterfly dowel in a metal version).
If it is impossible to reach the wall through the sheathing, you can use wooden bookmarks. The thickness of the embedded beam should be equal to the thickness of the transverse frame. If these numbers do not match, the structure may become deformed. The thickness of the timber is adjusted according to the profile sample. A metal butterfly screw is optimal for fastening hardware.
The attachment is attached directly to the bar made of bars. To enhance the load-bearing capacity, use the longest length of the plank: for example, along the width of the entire set of hanging furniture.
The two most proven types of fasteners are:
- mounting rail;
- classic bolts and screws.
Mounting options
There are 2 methods by which fastenings for kitchen cabinets are made. Installation is carried out:
- One line, that is, the location of the fastener is equidistant from the ceiling;
It is considered the most common type of accommodation. This way you can easily secure the cabinets yourself. - Different levels are used for hanging, that is, objects are at different heights.
This method is used much less frequently, since its implementation is much more complicated than a linear fastening scheme.
The first method is popular because you can use only your own strength to attach kitchen cabinets, without turning to outside help.
The choice of option is determined by the number, size and depth of wall cabinets.
The second option for attaching fixation items is less common among ordinary people. This is because the roof of this furniture is used as an additional surface.
Any of the proposed variations is perfect for both a room with a small area and a large one.
And all because they do not have any effect on the fullness or compactness of the room.
When choosing a method, only the interior and design change.
Simple universal hangings for cabinets
Types of simple hangings for cabinets:
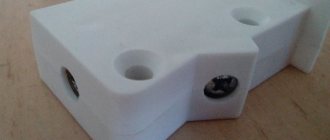
Oval hinged eyelet
A hinge for cabinets, with the funny name oval hinged eye , is one of the most common ways of hanging cabinets and shelves on the wall.
Installation is carried out by screwing the hinge to the rear edge of the cabinet or shelf. It is necessary to make markings on the wall and drill holes for installing dowels, the heads of which will catch on the holes in the hangers.
During installation, the plate is positioned with the large hole down; the head of the self-tapping screw will be inserted into it, which will pass through the groove and lock in the upper part of the hinged oval eye. In Figure 1, it is upside down; when screwing it on, do not forget to turn it around.
| Rice. 1. Drawing of an oval ear |
Hinged plate
The hanging plate or open hanger is made of galvanized steel 2mm thick. Functionally, this hinge corresponds to an oval eye, only the dowels will be visible from above.
For installation, holes for dowels are again drilled, hooks are screwed into them as in Figure 2. The plate itself is attached to the back of the cabinet, so that the through groove protrudes from above.
| Rice. 2. Mounting the hinge plate |
Pros and cons of hanging cabinets on the wall using an oval eyelet and a hinge plate
Pros of using simple attachments:
- low price
- ease of installation
- versatility.
Disadvantages of using simple attachments:
- precise marking is required for drilling for dowels
- not aesthetically pleasing
- no adjustments
- unreliable, cannot withstand heavy loads.
Press-fit cabinet hanging
The press-fit cabinet hanger can withstand a load of 20 kg. Since you need two pieces per cabinet, you can hook up a cabinet weighing up to 40 kg.
The suspension is pressed into a hole with a diameter of 30 mm in the chipboard. To do this, the cabinet design must have a longitudinal drawer or a back wall made of chipboard at the rear.
| Rice. 3. Cabinet hanger |
| Rice. 4. Suspension installation diagram |
Pros and cons of hanging cabinets on the wall using a round mortise hanger
Pros of using a round pendant:
- low price
- ease of installation of the finished product
- versatility
- It is allowed that the markings for drilling for dowels are not accurate
- reliability
- hidden from view, nothing spoils the appearance of the cabinet
Disadvantages of using a round pendant:
- it is necessary to change the design of the cabinet so that it has a back drawer or a back wall made of chipboard
- no adjustments
- To press the attachment in, you need to make a hole with a diameter of 30 mm, and for this you need a cutter of this diameter.
Preparatory actions
To begin the process of installing kitchen cabinets, you need to follow these steps:
- Alignment of vertical walls, please note that for a corner kitchen the angle of the walls at 90 degrees is provided (most often this process is carried out using drywall, and thanks to this alignment occurs);
- Applying markings (this stage must be performed using a plumb line, pencil and level);
The points at which the kitchen cabinets will be fastened must indicate the required height. - Electrical installation (installation and connection of all sockets and lamps);
- Wallpapering or painting walls.
These points will be the basis for the work ahead.
The next step is to prepare tools and consumables.
Necessary materials and equipment
To perform installation work, you need to prepare the following tools:
- ruler;
- a simple pencil;
- construction corner;
- screwdriver;
- set of bits;
- screws;
- screwdriver;
- cutter for attached parts (Ø3.5 cm);
- drill;
- set of wood drills;
- building level.
It is also necessary to organize high-quality lighting. When working inside furniture, it is recommended to use a small headlamp.
Installing the top of the furniture
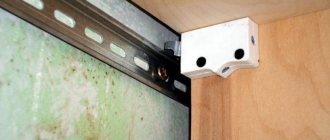
The first priority is to fix the hooks in the middle position. For this, adjusting screws are used. After this, you need to fix them from the inside on the side walls so that the hook is on the outside by 2-3 mm and it is possible to fix them on the fastening bar.
The design of the hinge allows you to adjust the mount in height and depth.
The next stage is applying markings to the wall. But for this you must follow a number of rules.
- It is necessary to determine in advance how the drawers will be installed - tightly to the apron or overlapping.
- The location of the fastening strip is 3-4 cm below the upper edge of the section. To correctly calculate this distance, you need to attach the plank to the rear wall of the object in the same way as it will subsequently be attached to the wall.
This is done for clarity, so that you can see the number of centimeters that need to be taken into account when making the final marks.
The next step is to make holes in order to install the rail. Here are some useful tips that will come in handy:
- If the drill "jumps", make small notches using a nail or punch and hammer;
- If the wall crumbles during work, then first you should make a small hole, and then drill it out to an acceptable size;
- If you need to change the drilling depth, you need to use a prepared dowel;
- If you need to make a hole in a concrete wall, but there is no hammer drill, you can do it with a hammer and a punch.
Wiring locations require special attention.
Upon completion of all actions, the dowels are placed in the holes. Next, the mounting strip is installed on the fasteners. The cabinets are fixed to the mounting plate. To adjust their position, screws of mounted mechanisms are used.
To make the set look like a single “wall”, they need to be connected closely to each other.
The elements are fixed with clamps, starting from the corner, avoiding chipping (in accordance with the above instructions).
Thus, alignment of the overall ensemble of cabinets in one plane is achieved.
The next step is to drill holes between the tightly fitting parts of the headset to then fasten them with intersectional ties.
At the final stage, shelves are installed and doors are secured.
Step-by-step installation instructions
Attaching hangers and cabinets requires no preparation. When hanging on furniture hinges, you will have to practice your accuracy. In the case of mounting on a bar, everything happens easier and faster. Below are detailed installation instructions.
Tools
For installation you will need:
- level – preferably for the entire length of the cabinet;
- pencil;
- knife;
- roulette;
- hammer;
- hammer drill or drill - when hanging on a concrete or brick wall;
- screwdriver;
- screwdriver;
- when installing several cabinets, clamps are needed - clamps that allow you to create the appearance of a monolithic structure.
Already at the stage of collecting tools, think about which awnings to purchase. If you purchased a ready-made cabinet and a complete set of fasteners, then there will be no problems. When purchasing spare parts for hidden installation, check the presence of all bolts, screws, mechanisms, and plugs.
Preparatory work
Before installing suspended structures, calculate the height and draw boundaries. Draw a line along the level with a pencil. Installation of the DIN rail and wiring must be completed so that you do not have to remove the cabinet and redo the entire design.
Align the walls as much as possible at the fastening points, even if you plan to install the box on a plank. When installing furniture at an angle, it should be 90 degrees. Paint the walls, wallpaper or install an apron. After installing the cabinet, it is difficult to perform these operations.
Installation of awnings
The process is the following algorithm of actions:
- Markings for system installation. On the inside of the cabinet, measure 1.3 cm from the side panels and 2.5 cm from the top.
- Drilling with a drill or screwdriver with a pen attachment with a diameter of 25 mm.
- Cleaning chipboard from chips.
- Trying on the suspension - the fixing hook should be located in the center of the opening. This makes it possible to adjust the position of the cabinet.
The final stage is screwing the screws. Before attaching the hanger, check the alignment of the holes in the decorative plug and the side walls of the cabinet. First lean and screw, then screw. This is necessary so as not to damage the furniture.
Metal guide fastener
The material of the wall determines what you need to attach the plank to:
- a self-tapping screw screwed into a dowel - onto aerated concrete and into a foam block;
- screws with a diameter of 5-6 mm - into wood;
- anchor bolts – for brick, concrete.
The profile length varies. There are planks around 19 inches or 50 cm, but most manufacturers produce 2 or 3 meter products. Each tire is cut at a certain distance. They can be easily broken by hand without using a hacksaw if the guide is longer than the cabinet.
After choosing the fastening tool, attach the strip to the drawn line. Using a drill, hammer drill or screwdriver with an appropriate attachment, drill holes in the wall through the prepared holes in the profile. It is enough to make indentations at intervals of 10-30 cm. There is no need to attach screws every 1.5-2 cm.
Features of hanging on drywall
The main difficulty when fixing a headset to drywall is its inability to maintain strength under heavy loads. For this reason, the use of standard fasteners is not recommended. Even the small weight of a cabinet installed using a mounting anchor will easily damage the plasterboard lining.
Therefore, only decorative shelves and paintings are allowed to be hung on plasterboard walls.
If the set needs to be fixed on a plasterboard surface, then a wooden beam or a thick board, which is fixed to the wall thanks to anchor bolts, will come in handy.
Where to buy a high-quality plastic plinth for the kitchen?
Our store provides customers with ample opportunities to purchase the necessary goods at a low cost. A large selection, the presence of all the components and a variety of shades will allow you to find and buy a plastic plinth for the kitchen that will suit any furniture.
If you forgot to purchase a false panel when buying a cutting table, decided to choose a more suitable color, or are looking for a replacement for an old or broken structure, then contact our store consultants for help in purchasing. 24-hour sales, convenient payment system, fast delivery - everything necessary for the comfort of customers.
You can buy kitchen plinths in Moscow at a low cost by simply placing an order with us on our website or calling us by phone: +7. For individual or wholesale orders, please send your request to us by email
You might also be interested in: cabinet frames at competitive prices!
Types of hinged mechanisms
Kitchen cabinets have always been fastened to the wall using metal fasteners in the form of lugs. The device was attached to the cabinet through one hole, and to the wall through the other. This type of fastener is still used today because such fasteners have proven themselves to be reliable products. In addition, such fasteners are also distinguished by their decent cost. But they also have one drawback - the complexity of the fastening process.
In order to secure wall cabinets using lugs (furniture hinges), you need to perform the following steps:
- Attach hinges to wall cabinets. The main requirement for this stage is installation of fasteners at the same level. In other words, the mounting hole through which the cabinet will be attached to the wall must be located at the same height from the top surface of the cabinet. In addition, the height of the kitchen cabinet should be such that it is convenient to screw a screw into the wall.
- Draw a horizontal line on the wall. Its location is determined by the installation height of the hanging elements of the kitchen unit. This mainly depends on the height of the kitchen owner. After all, the main requirement for cabinets is ease of use. But there are standard sizes that are taken into account by GOST; they are determined by the distance from the tabletop to the bottom plane of the cabinet. It is equal to 45 centimeters, although this figure can be maintained up to 60 centimeters. The height of the upper kitchen cabinets and the distance from their top plane to the center of the mounting hole are added to it.
- Place one cabinet against the wall exactly at the installation location and make two notches through the holes in the hinges using a marker or pencil. Holes are drilled in the serifs, and plastic dowels are inserted inside. Then the cabinet is installed, which is secured with self-tapping screws.
- Hang adjacent cabinets in the same way. In this case, each subsequent element of kitchen furniture must be pressed tightly against the previous one.
- Connect all the wall elements of the set with furniture bolts and install a cornice (canopy), which will visually unite all the cabinets together into a single structure.
- Hang facades, install shelves.
- Check cabinet doors for proper operation. Correct any inaccuracies using the adjusting screws.
A significant disadvantage of this method of fastening is that two people will be required to install and fasten the elements of the kitchen set.
