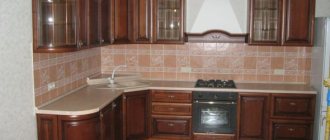
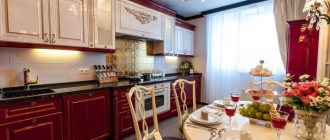
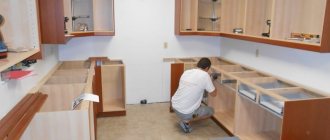
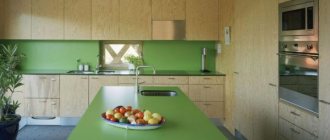
Buying a ready-made kitchen set today is not a problem. The industry offers consumers a huge selection of sets made from various materials - from cheap laminated OSB boards to expensive natural wood or artificial stone. But for several reasons, the purchased option cannot be considered optimal for everyone. Let's consider how to make a kitchen set yourself, which designs are the most convenient and reliable.
DIY kitchen set, drawings and diagrams. Step-by-step kitchen manufacturing technology
DIY kitchen design
The production of a kitchen set begins with a project. The project requires the overall dimensions of the place where it will be installed. After which you can begin to select the component elements.
Fig.1.
Drawing of a kitchen set with dimensions.
The kitchen set consists of drawers that can have different contents, from shelves to pull-out baskets. For compartments in both the upper and lower rows, standard width sizes are established, starting from 15 cm to 100 cm, in increments of 5 cm, i.e. 15, 20, 25, 30, 35 cm, etc. You need to know them for design.
When preparing a project, you should be guided by standard dimensions, because... All accessories are manufactured taking them into account.
When determining the layout, you should take into account that the standard height of the bottom row drawers is 72 cm, the top ones can be 60, 72 or 90 cm. The depth of the bottom row is 55 cm, the top row is 30 cm.
Of course, when making a kitchen set with your own hands, you can set arbitrary sizes, but then you will have to abandon ready-made kitchen components (for example, the facade), and make all the elements individually.
If standard drawers do not fill the entire space allocated for the kitchen, then in the remaining space they make either shelves according to individual sizes.
The corner kitchen set has a distinctive feature. A corner kitchen cabinet can have several options: straight (Fig. 2) and with an angle of 135 degrees (Fig. 3). The same feature applies to the top row (Fig. 4).
Fig.2.
Straight corner kitchen cabinet drawing. Bottom row.
Fig.3.
Kitchen corner cabinet drawing. With an angle of 135 degrees.
Fig.4.
Corner wall kitchen cabinet drawing.
A corner cabinet for a sink (see drawing above) is often used if the space of the room allows it; for small kitchens, a straight cabinet. Thus, a rectangular or round sink is installed in a straight line, and a corner or round one in a corner.
When preparing a kitchen furniture project, you should follow the following recommendations:
- The space for installing the slab should be equal to the width of the slab itself, usually 50, 60 cm.
- For a built-in stove, the cabinet must be 60 cm wide and at least 55 cm deep. The same applies for the oven.
- The space for the hood should be 60 cm for built-in and 90 for other types.
- The distance between the hood and the stove must be at least 70 cm. The height of the cabinet for a built-in hood must be 30 cm less than the others.
- The space under the refrigerator must be at least 60 cm.
- Roll-out baskets are installed in standard-sized kitchen cabinets only.
We take measurements of the premises
To make a kitchen set, you need to check the quality of the surfaces: evaluate how smooth they are, in which areas there are depressions, curvatures, and bumps. For this reason, measurements are taken at three points: under the ceiling, at shoulder level, above the floor surface (5-10 cm). It is necessary to correlate the actual dimensions of the room with those determined from the documents. Based on these data, a decision is made on what type of set should be made (corner, straight), how many cabinets will fit.
In addition, you need to decide on the height of the headset. When choosing a suitable option, be sure to take into account the average height of the residents of the apartment/house. A set of small height looks inorganic. The structure almost always occupies a significant part of the wall; free space is left under the ceiling in case a suspended, suspended ceiling is installed. In the case when the choice is made on a corner headset, measurements are taken using a laser rangefinder. Otherwise, a simple roulette will be enough.
How to make your own kitchen from chipboard
It is easiest to make a kitchen with your own hands from chipboard, since this material can be called traditional for such furniture. Laminated chipboard, abbreviated as laminated chipboard, is used with a thickness of 16 mm. All elements except the tabletop and apron are made from chipboard.
The facades of kitchen units are made from laminated chipboard, from chipboard covered with plastic (postforming technology), and from MDF.
The back wall of the cabinets is made of fiberboard or laminated fiberboard, 4.6 mm thick.
The countertop of the kitchen set is made using postforming technology. It can be 28.32 and 38(40) mm thick.
How to build a kitchen with your own hands? Three approaches can be distinguished. The first is to make all the parts yourself from laminated chipboards, the second is to make them to order, the third is to buy ready-made elements and assemble kitchen furniture from them. Ready-made cabinets can be purchased in stores such as IKEA, Leroy Merlin, etc.
The most economical and moderately complex option is when you do the detailing of the kitchen cabinets yourself and all the elements are made to order, after which the assembly is done by yourself. The advantage of this method is that you can make parts to individual sizes and at the same time save a lot of money.
To order parts, you need to draw a kitchen and determine all the dimensions, as well as the need for edging material and the presence of mounting holes.
Kitchen cutting is carried out based on the following considerations. The dimensions of the side walls of the cabinets are the height and depth of the cabinet. Dimensions of the bottom and lid: width equal to the width of the cabinet minus 32 mm, height equal to its depth.
The edge is made of plastic with a thickness of 0.4 and 2 mm. It is necessary to protect the ends of the laminated chipboard from moisture and mechanical damage. It is advisable to glue it on all ends of the parts. To save money, edging tape may not be used on invisible ends.
Ready-made holes for fasteners (additive) greatly facilitate, but introduce additional costs for the manufacture of parts. If saving is not your first priority, then before cutting the kitchen you need to prepare drawings of kitchen cabinets with details.
The tabletop and façade, as well as the drawers, can be made to order or purchased ready-made.
Required Tools
To make a kitchen from wood, you prepare the equipment yourself. If the user does not have the required tool, it can be rented for a while. This is advisable to do in cases where there are no plans to engage in similar activities again in the future. Required tool:
- screwdriver;
- electric drill;
- jigsaw;
- rule;
- building level;
- tape measure, laser range finder;
- hammer;
- file;
- screwdriver;
- pliers;
- hacksaw;
- plane.
For work, sandpaper of varying degrees of grain is prepared. It is necessary to connect elements made of wood and wood-containing sheets with each other using screws, nails, and self-tapping screws. Fasteners of the required size and type are selected taking into account the type of material. For example, nails are more suitable for a solid mass. Screws, self-tapping screws - universal fasteners. The good thing about a homemade kitchen is that you can create a durable structure using the type of fasteners, as well as their quantity, in accordance with your own preferences.
DIY kitchen furniture assembly
Assembly begins with the cabinets. Their parts are connected using a confirmat (Fig. 8). Holes for it are drilled at a distance of 8 mm from the end, with a slab thickness of 16 mm. It is convenient to assemble using a special device as shown in Fig. 5. It is easy to make it from scraps with your own hands. To simplify drilling holes for confirmat, it is convenient to use a special drill (Fig. 6). The additive can be made in each part separately; for this it is convenient to use a jig (Fig. 7).
Fig.5.
Fig.6.
Fig.7.
Fig.8.
The back wall is installed on the assembled cabinets. Next, the legs are mounted. They can be decorative or adjustable plastic, then the kitchen plinth is attached to the legs. Their standard lengths are 100, 120 and 150 mm.
Fig.9.
Adjustable legs. The first row of legs should be offset 7-10 cm deep into the cabinet.
The cabinets are installed in their places one by one and pulled together. For tightening, a special intersectional screed is used. Alternatively, you can use 30mm long self-tapping screws. They will work just as well. The caps of the screws can be hidden with a self-adhesive plug; the caps of the confirmat are also masked.
Fig. 10.
Screeding cabinets. In the photo, the screed is made with self-tapping screws 30 mm long.
The upper cabinets are tightened after installation in place. An adjustable suspension is used to install wall cabinets. It allows you to set all elements horizontally and vertically.
Fig. 11.
Adjustable hanger and strap. Used for hanging top row cabinets. The load capacity of the hangers is 80 kg.
The final stage of assembling the frame is installing the tabletop. The tabletop is attached to the cabinets with 30 mm long self-tapping screws.
Fig. 12.
The assembled frame of the lower row of cabinets with the installed countertop.
Placement of household appliances
The basic rule for placing household appliances in a corner kitchen is to create a working triangle. The refrigerator, stove and sink should form its tops among themselves. This complies with the principles of ergonomics and allows for a comfortable and safe working area. The recommended distance between the appliances and the sink is no more than 1.2 m. Otherwise, it takes a lot of time to move around the kitchen.
Experienced housewives recommend placing the oven at eye level. It’s convenient; you don’t have to bend over several times while preparing a dish. The refrigerator is located away from the radiator and other heat sources. If your kitchen has a bar counter, you can install a compact freezer underneath it. This technique saves space, which is especially important for small kitchens. The stove is placed near the worktop, away from the refrigerator, doorway and window with curtains.
Attention! It is recommended to think about the placement of small household appliances in advance. To store a blender, mixer and toaster, roll-out carousel shelves are used; they are located in the lower corner cabinet. The coffee machine, microwave oven and kettle are placed on the countertops or placed on special wall shelves-organizers.
Installation of facade, sink, plinth
You can install a façade, plinth, sink, etc. on the finished frame.
The façade is secured with hinges. Recesses (milling) are made on the doors for the hinge cup. Depending on its size, the diameter of the recess is different. It is advisable to order milling for hinges when cutting. It is not expensive, but it will avoid additional work, possible errors and the need to purchase a special Forstner drill.
Fig. 13.
Installation of hinges for fastening the facade.
When installing doors in corner cabinets, it is necessary to use hinges with a non-standard opening angle.
Fig. 14.
Features of installing a door in a corner kitchen cabinet. Special loops are used.
After the doors are installed, you can install the handles.
For the kitchen plinth, a piece made of chipboard or a special plastic strip can be used. Using the latter is preferable, as it is protected from moisture and will last much longer.
The plinth strip is attached to the legs of the kitchen unit. It is advisable to recess the base into the body of the kitchen unit by 7-10 cm, so it will be more convenient to use the kitchen.
Fig. 15.
The base is secured to the legs with special fasteners that come with the legs.
Most sink models cut into the countertop. Using the template that comes with the sink, mark the cut line. After preparing the hole, the sink is installed using special fasteners.
Fig. 16.
How to install a kitchen sink.
How to choose a shield? Varieties and prices
What does category mean? It reflects the manufacturing technology. Knowing the characteristics of each variety allows you to make the right choice in favor of the highest quality material.
The main material for production is pine.
Furniture panels of the following categories are sold in hypermarkets:
Variety "Extra"
It means that the product has no knots, chips, or resin stains. The surface of such a sheet is ideally flat, smooth, uniform, and polished. The risk of cracking is minimal. The most moisture-resistant and heat-resistant option in comparison with other analogues. This type of shield is the easiest to work with, because... no additional processing or defect removal is required. No wonder they come with a lifetime warranty.
Due to its quality, it is more expensive than other varieties. For boards in the “Extra” category, the price starts from 212 rubles per sheet measuring 80x20 cm. A large wide sheet measuring 240x60 cm will cost 1,910 rubles.
A surface that is ideally uniform in color and texture even allows the use of transparent varnish or stain in the finishing of facades to preserve the natural wood shade.
Grade "A/B"
In this category of panels, the presence of “live” knots of no more than 5 mm in size is allowed (no more than three pieces per sq.m.). Those. Only the top layer of the product (layer “B”) has minor defects. The lamellas or bars, as in the “Extra” category, are ideally matched in color and texture, which makes the surface uniform and allows the use of transparent varnishes that highlight the natural shade of the product.
This option is the most popular among buyers, because... It costs a little less than “Extra”, but the quality is much higher than grade “B”.
Grade "B"
Among all the shields presented, this one is the cheapest option. In production, not solid lamellas are used (as in the “A/B” or “Extra” grades), but spliced ones. Consequently, such a sheet is less resistant to damage, less durable, and susceptible to cracking. The material has a uniform shade over the entire surface, but the wood grain may not match.
Apron for kitchen set
An apron is an integral element of any kitchen that decorates and protects the wall between the countertop and the top row of cabinets. It can be made of MDF or ceramic tiles.
An MDF apron can be purchased ready-made or made to order. It is attached to the wall with self-tapping screws, which are later hidden with corner covers.
Fig. 17.
Apron for kitchen set made of MDF.
How to make a kitchen apron with your own hands? It’s very simple to make it from ceramic tiles. However, this approach takes longer, because Installation work may take several days. At the same time, a tile apron is more durable and fundamental, which cannot but affect the design.
Fig. 18.
Ceramic tile backsplash.
The final element is the wall plinth. It also has a functional purpose - it covers the junction of the apron and the kitchen unit, thereby preventing dirt and moisture from entering unprotected areas.
Planning procedure
When planning, it is important to collect all the necessary information in advance. The diagram needs to show the exact shape of the kitchen space, the dimensions of each wall, the location of communications, ventilation, window and door openings.
The diagram prepared in this way will become the basis for further planning. It contains drawings of each cabinet. After this, you need to determine the location of various household appliances. Their dimensions must be accurately measured before indicating their place on the drawing.
The dimensions in the drawing must be accurately calculated Source derevyannie-doma.com
The next step is to indicate the location of the remaining items and furniture in this room. In this case, you need to think about installing tabletops, chairs or stools. The kitchen must have the required number of cabinets. There should be enough space for everything the housewife needs.
In the video you can find out where it is convenient to start making a kitchen:
Kitchen furniture lighting
The lighting on the kitchen set is not only a decorative element, but also illumination of the work area, which directly affects fatigue, so it is important to make good and functional lighting.
Fig. 19.
Kitchen furniture lighting.
As can be seen from the infographic (Fig. 19), the most functional is the lighting under the kitchen cabinets. You can make lighting for your kitchen work area using LED strips. To do this, it is glued to the bottom wall of the top row of cabinets. Kitchen countertop lighting can be done using special boxes with a diffuser for ice strips.
Fig.20.
LED lighting for the kitchen.
Types of layouts
L-shaped kitchen
An L-shaped corner kitchen is a very common option due to its convenience and space saving.
Corner kitchen layout is the most classic and popular option for placing furniture. The set allows you to profitably and rationally organize space by combining two perpendicular walls into one aesthetically composed ensemble.
This layout is suitable for large families who gather around a large table, but it will be no less convenient for one resident or a small family.
With a peninsula
An L-shaped kitchen is often complemented by a line of countertops, forming another corner. This type resembles the letter “P”. It is often used by designers, as it significantly saves space and, thanks to its shape, looks very creative.
The corner kitchen, complemented in the shape of the letter “P,” looks interesting. This arrangement of furniture increases the seating area or work surface.
The set can be installed even in small kitchens and studio kitchens; it is compact and roomy.
With an island
A kitchen with an island is a high-end option, as you can often see it in films, expensive layouts or exhibition centers. This option is preferable for medium and large kitchens, but it can also fit very well into small ones if the plan is properly drawn up.
A corner kitchen with an island is an interesting solution for both small and spacious rooms.
As a rule, this is a kitchen unit and an additional island in the form of a high countertop. It is convenient because it can also save space, but the main thing to consider is that the distance between the island and the headset should not be too narrow to move. Standard – 1 meter.
The island can accommodate a sink and additional storage cabinets, as well as use a countertop for food preparation.
Corner kitchens with bar counter
The corner kitchen can be continued with a bar counter. This option looks the most modern, stylish and is suitable for completely different rooms. There are different layouts and it may well be that your kitchen has an unusual shape or small size that would make the dining table look cramped. It is for them that this species will be a godsend.
A black and white corner kitchen with a bar counter looks creative.
A corner bar counter can be placed near the window, firstly, this will instantly solve the problem of lack of space, and secondly, you must admit, it’s nice to have lunch or drink coffee while looking out the window.
Or, if you have a studio kitchen, then by placing a counter, you thereby zone the space, dividing the room into a dining area and a relaxation area. In the diagram of a corner kitchen with a sleeping place, you can additionally depict it.
Drawings of kitchen units
Fig.21.
Drawing of a kitchen with a corner sink.
Fig.22.
Drawings of kitchen modules.
Fig.23.
Drawings of kitchen sections.
Fig.24.
Drawing of a corner kitchen.
Interior styles
A corner kitchen in a classic style looks elegant and easy.
Advertising and the Internet are replete with an abundance of different examples of stylish furniture, a harmonious combination of colors, shapes, textures, and all this is combined into authentic compositions - interior styles. There are 3 largest categories of styles - classic, modern and ethnic.
The never-aging classic remains relevant and loved by designers from all over the world. This category includes English, Victorian, Rococo, Baroque, Antique, Empire and many other styles. The classic style is distinguished by its rich materials, high quality, luxury and at the same time elegance. Such kitchens look expensive and representative.
Modern style provides enormous scope for imagination; it has no restrictions, unlike the classic one, and is accessible to everyone. This class is represented by such styles as: art deco, fusion, loft, grunge, minimalism, hi-tech, boho. Each of them includes a certain character and direction, be it elegant, restrained and laconic, or creative, bright and creative.
A beautiful design solution for a modern kitchen – dark bottom and white top.
Ethnic styles include Japanese, Mediterranean, Scandinavian, Italian and many others.
A corner kitchen made in ethnic style will give the house a special family coziness.
In order to evaluate which style suits you best, you can take one category and choose from the many available styles the one that resonates with you.
A modern kitchen can look bright and positive if you choose an unusual color combination.
It is worth figuratively assessing the space, for example, in a small kitchen the fusion or boho style will look very overloaded, due to the abundance of all kinds of details. But high-tech, modern or minimalism could advantageously emphasize the advantages of the kitchen.
A corner kitchen in a modern design is the most chosen option. This design will fit perfectly into the interior of a small apartment.
If you want to install a bar counter, it may not be suitable for a classic style, however, if you design it correctly, taking into account the material and appearance, then this is quite possible.
Decorative elements
In order to make the kitchen even more cozy and attractive, we use various decor in the interior. After choosing the main style, choosing kitchen accessories will be easier.
Go straight to the store and look at the assortment. There are many different types of decorative elements. These include shelves, stickers, decorative tiles, and lighting.
The decoration for the kitchen can be lighting around the perimeter of the set or beautiful accessories on the shelves.
Stickers and decorative tiles will help smooth out unevenness or cover up defects on the walls. You can put beautiful jars, dishes, decorations for your kitchen on the shelves and thus save space. Lighting will help create volume, a pleasant atmosphere and, of course, add more light where it is needed.
Additional Information! The decor should match the main chosen style.
