Recent trends in interior design increasingly dictate that owners of houses and apartments abandon luxurious styles, choosing more minimalist and restrained ones. Such trends have not spared kitchens either. The first thing that catches your eye when looking at photos of modern headsets and pencil cases is a large number of built-in and hidden household appliances.
It may seem that it is unrealistic to implement such projects in an ordinary “Khrushchev” apartment or small-sized new building. But if you know all the nuances of choosing and placing such equipment, you can easily arrange such a kitchen in any room. Next, we will talk about installing a built-in refrigerator.
What is the difference between a built-in refrigerator and a regular one?
A built-in refrigerator is a special design that differs from the classic model in some details and characteristics. The main distinguishing feature of such a device is that it requires a special cabinet to accommodate it. The dimensions of the furniture attribute are carefully selected for the specific model of the refrigeration unit. It is manufactured according to the dimensions specified in the product passport. It is very important that the depth of the cabinet and refrigerator are identical. The equipment is installed on the bottom of the cabinet; in some cases, it is recommended to install the device in a furniture module without a bottom.
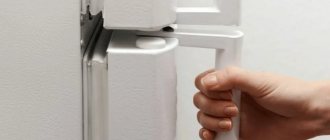
The refrigerator doors are connected to the furniture doors using special clamps. It should be noted that the design of a conventional refrigeration unit does not allow this. Also, the built-in system is characterized by increased thermal insulation, good ventilation, and it meets the highest fire safety requirements.
Expert advice
So, installing a built-in refrigerator in a pencil case is not an easy and time-consuming process. To complete the job correctly, you need to take a responsible approach to studying the installation instructions, follow the recommendations of experienced specialists and not “do-it-yourself.”
The most common mistakes when installing built-in refrigeration cabinets yourself:
- The use of massive decorative panels that create additional load on the refrigerator and front door.
- Failure to comply with the rules regarding the presence of ventilation gaps and the lower ventilation shelf.
- Placing the refrigerator near heating appliances.
- Incorrect connection of the device to the electrical network.
In case of improper functioning or complete breakdown of the refrigerator due to such errors, specialists will not accept the device for repair under warranty. You will lose both time and money (on repairs at your own expense, buying a new refrigerator, calling technicians and new installation). If you are not confident in your skills and strengths, it is better to immediately entrust such work to professionals.
There are two types of installation of cooling equipment that fits organically into the frame of kitchen furniture: inserting the device into a cabinet niche or under a countertop and partial installation, in which the front panel is not hidden by a decorative overlay. Built-in refrigerators are functionally no different from classic ones. The difference between some models is the lack of external design of the device body, which is constantly hidden inside the kitchen unit.
Self-installation of this type of equipment by the owner is possible only with appropriate experience, otherwise there is a danger of damaging the device.
Built-in undercounter refrigerators
Advantages and disadvantages of installing a refrigeration unit
The advantages of refrigeration equipment hidden behind a furniture door include:
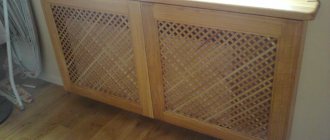
- Aesthetic interior. Not all interior styles can accommodate appliances with an enameled or steel surface. It looks especially ugly in classic, ethnic interior styles. By hiding this necessary element of the kitchen behind the facade, we can create a unique design in which every detail corresponds to the overall style and effectively fits into the furniture ensemble.
In addition, electrical wires will be securely hidden, which is also very important for creating an attractive environment. - Ergonomics . The equipment can be placed at any height and anywhere. This is very important for the correct organization of the “work triangle”. To reduce cooking time, experts recommend minimizing the distance between the three main elements of the kitchen: the refrigerator, stove and work surface. Hidden technology allows you to create an ergonomic space and rationally use every corner.
- Silence . Due to the fact that the unit is located in a box, the noise level is significantly reduced. This is also facilitated by reliable fixation of the equipment to the body, as reproduced vibrations are damped.
- Economical . As you know, the design of the unit is characterized by increased thermal insulation. This is facilitated by a protective layer that isolates the device from the external environment. Thanks to this, the refrigerator operates in economical mode and consumes less energy.
- Easy care . Hidden side walls and wires do not need to be cleaned, which significantly saves time on maintaining the kitchen appliance.
- Large selection of models . The buyer is offered various product variations to choose from. Household appliances can be built under the countertop, mounted in an island or other place convenient for use. There are various models of devices: with a bottom, side, top freezer or without it at all. Each buyer has the opportunity to select individual equipment parameters and its configuration.
Unfortunately, there are some disadvantages of “hidden” appliances, which should also be taken into account when planning your kitchen space:
- Small useful capacity of internal chambers . Compared to conventional models, built-in ones have a smaller capacity with the same dimensions of the equipment.
- Inconvenient controls . Settings cannot be adjusted when the door is closed.
- Impressive value. Not only does the device cost more, you will also have to pay more for installation of the product.
Underwater rocks
To avoid possible refusal of warranty repairs, you should carefully read all the points in the manual included with the unit upon sale. The installation instructions for a built-in refrigerator contain a list of supplied fasteners, the sequence of use of parts, requirements for installation work and operation of the installed device.
Facts of violation of operating techniques that lead to refusal of repairs under warranty may be:
- The use of heavy decorative panels leading to improper distribution of load between the appliance door and the cabinet.
- No gap or “podium” at the bottom of the niche for sufficient heat transfer.
- Place the device near heating devices (under the oven, near the microwave, etc.).
- Connecting the device to the electrical network through an outlet that does not comply with the requirements of the instructions.
If the buyer is confident in his own abilities and if he wants to connect the built-in refrigerator with his own hands, regardless of the brand (LG, Atlant, Liebherr or Electrolux), he should plan from an hour to two free time, be patient and careful when working. Before starting installation, you should familiarize yourself with the proposed video demonstrating the step-by-step placement of the device, securing the facade, connecting and checking its functionality.
Refrigeration equipment is an essential component of any kitchen. It can be made as a separate device, or built directly into the headset. To install a built-in refrigerator without problems, you need to familiarize yourself with the nuances of this procedure and requirements.
Types and models of built-in refrigerators
The modern market of household appliances offers many options for kitchen “helpers”. Depending on the location of the unit relative to the furniture body, the following types of devices are distinguished:
- Fully built-in . The appliances are hidden behind the facade of the kitchen; the presence of a refrigeration unit can only be guessed by a special grille.
- Partially hidden.
The device is completely “recessed” in the box, only the doors or control panel are visible from the outside.
Depending on the number of cameras there are:
- Single chamber models . These are products without a freezer, or it is located inside the main chamber. Usually these are small models that can be easily integrated into the bottom row of a kitchen set. Often a dishwasher or washing machine is installed at this level.
- Two-chamber . These are separate refrigerator and freezer compartments, they are equipped with separate doors.
- Multi-chamber . They consist of several sections, in each of which the optimal temperature is set. Typically, cameras are not located vertically, but next to each other. The doors of such models open in the same way as the doors of a hinged cabinet.
Depending on the location of household appliances, there are models designed for installation:
- Under the table top . An ideal solution for small kitchens where every centimeter plays a decisive role. To save space, the unit is mounted under the dining table. This non-standard solution ensures a comfortable and convenient pastime in the kitchen.
- On the work surface . Usually these are small-sized devices, the height of which does not exceed 85 cm. As a rule, offices, cottages and small kitchens are equipped with such devices.
- In the closet . The most common type is suitable for kitchens of various sizes and configurations. It is a column that fits perfectly into the overall style of the interior.
- On the island . An interesting option that is preferred by owners of spacious kitchens. In this case, all equipment is located in the center of the room. This is where the work area and washing area are organized. This area is also used as a bar counter. It is very convenient to place a refrigerator here in order to provide convenient and quick access to food and drinks.
- In a niche . The method is suitable for rooms where there is a well-ventilated corner. In this case, all work is carried out at the initial stage of repair.
External door
Installation of façade elements on a built-in refrigerator is a mandatory operation. Simplified installation is only possible when the unit is located with a door made of decorative material or special glass. Such models are represented on the market by Bosch, Siemens, LG and Liebherr. By choosing such refrigeration equipment, you can avoid installing additional facades.
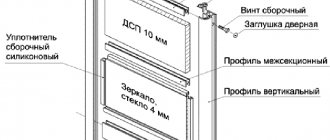
Installation of facade surfaces on a built-in refrigeration chamber can be done using special fittings or a fixed fastening element equipped with a hinge-roller system. The second option is considered the most reliable, but it is associated with additional financial costs and labor-intensive installation.
Requirements for installing a built-in refrigerator
The work of installing a refrigeration unit involves installing it in a special cabinet. As a rule, it is part of a kitchen set and is made in the same style. The box is equipped with a front door, which is attached to the unit door in such a way that when one opens, the other one also opens.
However, simpler designs of pencil cases are available, the doors of which open independently of the doors of the device. The pencil case can be made independently; in this case, certain requirements must be met:
- To avoid overheating of the device, you should organize unimpeded removal of warm air. That is why the back of the box is made open.
- The distance between the walls of the household appliance and the furniture should be several centimeters.
- Ventilation holes are equipped at the bottom of the structure.
When it comes to choosing a suitable location for installation, we follow the following rules:
- We install the device relative to the wall so that there is a distance between the back wall and the partition necessary for normal air circulation.
- Opening and closing doors must be free, without any obstacles.
- Parts of the structure must not come into contact with elements of the heating system or other heat sources.
Installation process
Let's consider in order how to install a refrigerator:
- Unpack the unit, remove protective films and packaging parts. Inside the device there are instructions for installing a built-in refrigerator. You should familiarize yourself with it in detail, check that the number of fasteners and small protective parts supplied in the kit corresponds to the stated quantity.
- Using a tape measure, measure the dimensions of the niche for the refrigerator. The amount of free space in depth and on the sides should be from 3 to 7 cm according to the instructions.
- Using a level, check the base of the niche for absence of slope; if necessary, compensate for it when installing the ventilation platform.
- After removing the transportation restraints, place the refrigerator in its permanent place, not retracting it to a depth of 10 cm (for ease of installation of the facade).
- Using a tied thread or twine, pass the power cord coming out of the back wall over the refrigerator installed in the niche.
- Mark the decorative hiding element.
- Having sealed all the required metal parts and holes with plastic protection, install the device to the required depth and fix it.
Re-hanging the refrigerator door
Instructions for installing a built-in refrigerator in a kitchen set
When performing work, we follow the following sequence of actions:
- We dismantle old equipment, if relevant. We try to work extremely carefully and carefully.
- We remove the purchased device from the packaging and remove the transport fasteners. It should be noted that when choosing the appropriate device, we must take into account the dimensions of the cabinet and the location of the fastening elements.
- We carefully inspect the device, then carry out a test run. We pay attention to how the motor works and check the functionality of the internal circuitry of the device.
- Pay attention to the direction in which the cabinet doors open. If practical, install the hinges on the desired side.
- We move the unit to its intended place, ensure vertical installation by changing the position of the adjusting elements located at the bottom of the product. It is advisable to use a building level for this purpose.
- To ensure a fixed position of the device, we use special foam pads and carefully select the required thickness. It is advisable to place them near the rear of the unit.
- We install the facade part and all the provided mounting elements. We check the smoothness of door opening, stability and reliability of the structure.
- We connect the unit to the electrical network and make sure it is fully operational.
It is recommended to perform the work if you have certain skills. If they are not there, then it is better to contact specialists who will competently and promptly perform all the actions. Otherwise, the work may result in complete failure and significant financial losses.
Everything for comfort
Maunfeld equipment is thought out to the smallest detail to ensure ease of use. Such devices do not require complex maintenance. You can buy an option with mechanical, electronic or touch control. The manufacturer produces equipment with the usual manual defrosting, which is a familiar and understandable classic. But No Frost is also available.
For maximum convenience, traditional functions are complemented by numerous valuable auxiliary options. For example, such a small thing as an open door alarm actually prevents food spoilage and unnecessary electricity consumption.
Source
Assembling the cabinet for installation
You should take care in advance to prepare for installing the refrigerator. Prepare all the necessary materials and tools for work.
Sometimes, when planning a kitchen set, you realize that the refrigerator does not quite fit into the interior of the kitchen, and the budget does not allow you to purchase a built-in one. The solution to this problem will be the ability to build it into the kitchen yourself.
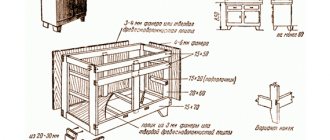
To build in a regular refrigerator, you need to make a box into which the refrigerator is then built. You can use the services of professionals or make a cabinet yourself, because this way you can save a lot.
Before you start making or purchasing anything, you need to decide on the size. It’s best, of course, if you plan to build a box for the refrigerator at the kitchen design stage. This way you don’t have to look for a material that will match the color of your existing kitchen set. You also need to immediately select the place where the refrigerator will be located and take measurements for the cabinet.
It is important to remember when taking measurements: to cool the refrigerator, air must always circulate around it, so the cabinet must be larger.
Measuring parts must be approached with special care. Below we will look in detail at how to correctly calculate the dimensions for a cabinet. The first step is to measure the depth, width and height of the device. In addition, we will need the distance from the floor to the gap between the refrigerator doors. Determining the dimensions of the box itself is a little more difficult.
First, let's decide on the external width of the furniture. For hinges, you must leave at least 30 mm. If we assume that the width of the refrigerator is 500 mm, and the width of the side walls of the box is, say, 15 mm, then the external width will be at least 560 mm.
The height of the pencil case can be any, the main thing is that the refrigerator fits. Ideally, it should be equal to the height of the rest of the kitchen unit. It will look beautiful, and besides, there will be space on top for shelves.
The side walls of the cabinet should be at least 50 mm longer than the depth of the refrigerator. This is necessary for installing hinges and future cabinet doors. Let’s say if the depth of the refrigerator is 500 mm, then the side walls should be 500 + 50 = 550 mm.
The shelf above the refrigerator is calculated using a simple formula - the total thickness of the side walls (15 mm) is subtracted from the external width of the cabinet (in our case 560 mm). For our situation it will be 560 – 15 * 2 = 530 mm. It is worth considering that the shelf should not reach the back wall of the cabinet, because it is necessary to leave a gap for ventilation. Otherwise, the refrigerator will overheat. You need to leave about 100 mm, and it turns out 550 – 100 = 450 mm.
The rear wall of the shelf is equal in width to the shelf itself, that is, in our case it is 530 mm. The height of the wall depends on the height of the niche, and, in principle, you can make it any height, most importantly, do not forget to take into account the thickness of the top cover and the panel above the refrigerator.
The top panel of the box is needed if you plan to build a cabinet above the refrigerator for storage. You can completely close the top, but in this case you will have to make a hole there for air circulation. Or you can leave a space of 100 mm to the wall.
Also, don't forget about the spacers. Their width should be 140-160 mm, and their length should be equal to the internal width of the cabinet.
The base should be slightly less than the distance from the floor to the bottom door of the refrigerator. For example, if the distance between them is 60 mm, then the height of the base should be approximately 45-48 mm. The length of the base and the width of the cabinet must be the same.
Alternatively, you can pull out the bottom and back wall, but in this case the cabinet will lose its stability, which can lead to bad consequences. You can screw the cabinet to the wall, but then, again, the air circulation will worsen.
Also, the refrigerator itself has large dimensions, and the cabinet will be even larger, so it will seem bulky, and the cabinet doors will take up a lot of valuable space when opened.
Method 2. Imitating a built-in refrigerator using decor
The first method was for those who are not afraid of manual labor and mathematical calculations. But you can harmoniously fit the refrigerator into the interior and create the illusion of a built-in refrigerator using decorative methods:
- Painting with enamel paint to match the furniture or walls. Car paint in cans or enamel in jars are suitable. Before painting, the surface of the refrigerator must be wiped with white spirit and coated with a primer.
- Painting with acrylic paint using a stencil. Before painting, the surface of the painting must be wiped with white spirit and coated with a primer. After this, the ornament should be coated with transparent varnish.
- Pasting vinyl PVC film.
- Attaching a magnetic chalk board. It is not suitable for every interior, but this decor of the device will also bring practical benefits - you can leave notes and draw on it.
You can see more photo ideas for remodeling refrigerators, as well as step-by-step master classes on how to implement them, in the article: 8 ways to decorate a refrigerator.
Support the project - share the material with your friends on social networks:
Preparation
A serious approach to the preparatory stage will help to avoid problems with the operation of the built-in refrigerator.
An important condition is to comply with the dimensions of the structure: the length, width and height of the cabinet elements must exceed the parameters of the household appliance by 2-5 cm. If it is decided to leave the lower part of the box so that its stability is better, then a hole is cut from below to ventilate the household appliance, and then they put him on a podium
In order not to compromise the strength of the cabinet, it is not necessary to remove the load-bearing back wall. But holes are drilled across the entire surface to allow air access to the refrigeration unit.
The box material can be laminated chipboard, MDF, or plasterboard. The last option is difficult to work with. MDF is suitable for those who have the skill to work with this material. Laminated chipboard is suitable for beginners - processing and joining parts will require minimal experience.
If you plan to install a built-in refrigerator in an existing niche in the kitchen, also take into account the distance between the wall of the room and the appliance.
Selecting a location
The location for installation should be selected based on the specifics of the selected model of equipment. First of all, you need to take into account the dimensions of the built-in refrigerator plus the dimensions of the cabinet for it. Remember that the main goal is to save free space in the kitchen, so take into account that the future refrigerator should not interfere with free movement around the room.
Pay attention not only to the appearance of the refrigerator, but also to the design of the cabinet underneath it, because it will become an integral part of your kitchen set. Therefore, choose colors and textures that match the rest of the furniture.
Just like stationary appliances, built-in refrigerators are not recommended to be placed in close proximity to heating appliances and open fire.
How to deepen a niche yourself and do the finishing: installation instructions
The thickness of the walls of a brick house according to GOST varies from 0.51 m (2 bricks) to 0.64 m (2.5 bricks). During the construction of multi-story buildings, the thickness of the walls in a brick house decreases as construction progresses. The thickness of the brick outer walls of the building is about 0.6 m, and the thickness of the brick wall in the recess is 0.45 m (therefore it is cooler in the niche). In Khrushchev's buildings, well masonry was used (slag was poured into the resulting voids). It served as insulation. You can knock down the plaster, dismantle one row of bricks, deepen the space under the window and increase the capacity of the refrigerator.
Concrete lintels in the brick walls above the window maintain the integrity of the structure, so careful outside interference will not cause anything to happen. As a result, the wall will become 0.2 m thinner, that is, the outer wall will have a thickness of only 0.25 m. A ventilation hole with a damper is left in the wall. With this device, the temperature in the niche is increased or decreased.
The resulting thin partition between the street and the room is plastered with cement and sand. It is not recommended to apply putty directly to the masonry. Otherwise, a problem may arise that the wall freezes. There may be microcracks and gaps in the masonry itself, through which moisture can penetrate in the fall. In frosty weather it will freeze and tear off the putty.
A practical option for finishing the interior walls of an outdoor refrigerator is ceramic tiles. It is placed directly on the plaster using tile universal frost-resistant adhesive.
It is not necessary to buy expensive tiles to cover the device. The main requirement is the smoothness of the tiles. You can buy defective tiles, leftovers, or use scraps left over from a bathroom or kitchen renovation.
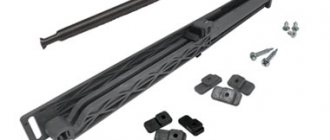
Sliding guides for refrigerators, for KIM. KIE. KIV.. 00491367
Including VAT, excluding delivery
Delivery from 350 ₽. Read more here. Free delivery from 3700 ₽. Before ordering, check whether the article matches your device here. 24/7 support service: 8
Best products with discounts! Find out more 160 years since the birth of Robert Bosch!
We are giving an additional 16.0% discount using promotional code RBHB160, the offer is valid from 09.23.2021 to 09.26.2021 Consultations and free delivery of goods to Bosch stores in Moscow: Tsvetnoy Blvd., 2; Airpark 3 floor; Vernadsky Ave., 41. More details>>
Looking for one of these categories?
Impeccable service before and after purchase.
Immerse yourself in our world - learn more about Bosch's history and awards.
Find the store closest to your home.
Register and receive a variety of privileges and discounts.
Subscribe to the official Bosch communities!
