Advantages and disadvantages of chair reupholstery
Before you update an old chair with your own hands, you should understand all the pros and cons that the owner of such furniture receives.
If you know how to work with your hands and have a rich imagination, then moving a chair with your own hands will not be difficult, especially if you follow the instructions.
Among the positive aspects are:
- For little money you can get a completely new and attractive looking product.
- When there are no financial possibilities, you can modernize furniture, saving the family budget.
- You can practice working with your own hands, perhaps after this you will have a desire to do something and repair it yourself.
Flaws:
- This way you can’t buy completely new furniture. Therefore, in this case we cannot talk about updating the interior style.
- If you act ineptly, you can ruin the product. And then you will have to make even more efforts to restore it.
Furniture restoration means restoring not only its functionality, but also its appearance.
Perhaps restoration, based on the pros and cons, does seem like a winning endeavor. So why not try it yourself. To do this, you need to first prepare the tools and purchase a fabric that you like on the outside and fits on the inside. At the same time, do not forget to take into account the class that will allow it, based on its mechanical characteristics, to work for a sufficiently long time and not break after a short period of operation.
Such a thing will certainly attract the attention of guests and decorate your interior.
Basics of restoration
Of course, you can contact specialists. Sometimes only a pro can recreate original coatings and shapes. This way you can save time and effort. But you will definitely lose the pleasure of transforming, creating, doing everything with your own hands. The restoration process itself does not involve partial replacement of parts or upholstery; all this can be called ordinary repairs.
Restoring an old easy chair means giving it a new look. You receive furniture that may bear little resemblance to its previous appearance. If its aesthetics are disappointing, but technically the chair can still be used, it’s worth a try.
What you can do yourself:
- remove the upholstery;
- make a constriction;
- replace or repair legs.
Of course, professional services guarantee results. But home restoration allows you to save money and control the entire process.
What materials and tools are needed for reupholstery?
As tools for reupholstering, you need to prepare:
- Furniture stapler or staples for attaching material to the base.
- Special tools that will allow you to disassemble and reassemble the chair. This includes hammers, wrenches, pliers and wire cutters.
- A stationery knife or a sharp thin hacksaw.
- Sewing machine for processing fabric. If it is not there, you will have to work with a needle and thread, which will require much more time and effort.
- Chalk for sewing clothes.
- Sharp scissors with long blades that can cut through thick material.
When choosing materials for such work, you should stock up on:
- Dense foam of appropriate thickness.
- The material you can play on is chenille, flock, rugs of various compositions, nubuck (natural and artificial), tapestry or jacquard fabrics, leather or eco-leather. The choice depends on individual preferences, the overall style of the interior, and the effect you want to achieve from the chair.
When choosing a finishing material, first of all you need to pay attention to how to reupholster the chair, as well as strength and wear resistance indicators.
Selecting and preparing fabric for upholstery
Of course, when choosing a chair upholstery material, many rely solely on their own taste. When considering fabric or leather, from the point of view of the upholstery material, we evaluate the texture, color scheme, presence or absence of a pattern. But at the same time, many people forget that the furniture will have to be covered with this fabric. But you will have to sit in a chair and subject it to mechanical stress and additional friction.
If you have pets such as a dog or cat, the herd is great. This material is resistant to scratches and sharp claw holes.
It is for this reason that the coating must meet the following conditions:
- You can only cover it with thick material. Thin fabric will tear quite quickly, and the entire manipulation will have to be done again.
- Duration is another important parameter. There are materials with strong fibers. Therefore, it is worth choosing fabric or leather materials that are created specifically for finishing work.
- Another important factor is practicality. Remember that furniture sometimes needs to be cleaned. Therefore, it is best if the fabric is easy enough to clean with a vacuum cleaner, brush or damp cloth.
Choose the right place
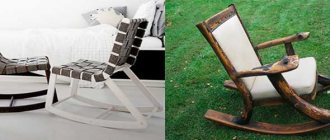
Even with the right color, cushions and accessories, a rocking chair won't be as cozy as it could be if you put it in the right place. If the house has a fireplace, a chair should be placed directly in front of the fireplace. Then you will be able to feel the warmth and, above all, the comfort of the fire while relaxing or reading in a rocking chair.
You can also place a chair in front of a window with a beautiful view to enjoy the view. A small alcove with plenty of peace and quiet, and a nearby reading light is another good spot for a rocking chair.
A side table on which you can place coffee, tea or cocoa without leaving your chair will complement the cozy atmosphere.
Step-by-step instruction
The process of replacing upholstery consists of several operations: disassembling furniture, measuring parts, assembling a model, cutting material, trimming and assembling. It is important to take into account the specifics of the selected fabric and work with it according to the recommendations. Instructions for transporting the chair home with a detailed description of each step will help you do everything correctly.
Disassembling the product
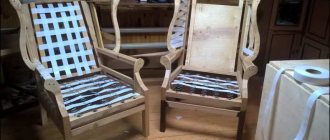
Before upholstering an old chair with your own hands, you need to disassemble it into individual elements. Most models have a wooden structure, consisting of a seat base, armrests, and backrest. Procedure:
- Remove all removable items and decorations (blankets, pillows).
- Move the chair to gain access to the bottom.
- We remove the legs.
- Remove the fasteners that secure the seat back to the base. We unscrew the screws with a screwdriver and unscrew the nails with a suitable tool.
- Remove the old brackets around the plywood bottom.
- Pull out the bottom.
- Locate and remove the screws holding the armrests in place.
After disassembling the remaining staples, carefully remove the fabric, being careful not to damage it - this will make it easier to design a new upholstery pattern. Be sure to label every detail, mark where is top and where is bottom. Before disassembling, it is recommended to take photographs of the product from different angles so that there are no difficulties with assembly in the future.
Self-upholstery of chairs can be combined with restoration of the product. It is necessary to assess the condition of the upholstery and frame. If the bolts are loosened during operation, they are tightened and the nails are driven in until they stop. Yellowed, tarnished or severely deformed foam must be replaced with new one. If the filler is normal, you can leave it or add a new layer on top.
Before re-tightening the chair with a rag, the frame is cleaned of dust, if necessary, damaged fittings are replaced and covered with a protective compound. Wooden elements not hidden by textile material (legs, armrests) are cleaned of the old paint layer with a wire brush and sanded first with coarse and then fine sandpaper. Cover with stain, paint or varnish.
Cutting fabric
You should purchase fabric by measuring each piece with a measuring tape or by measuring old upholstery removed after disassembling furniture. 10% is added to the total cost and the resulting length is cut. Before pulling the chair yourself, you need to accurately cut the material. This can be done in two ways: paste old wallpaper or build a new pattern from newspapers, leftover wallpaper, tracing paper or large sheets of paper.
If using removed upholstery, place the new fabric face down on the floor or other flat surface. All parts of old covers are laid out on it, taking into account the common thread. If the material has a pattern, arrange the elements so that the pattern matches. On fluffy fabric, the parts should lie so that the thick fluff is directed downwards. Use chalk or soap to outline the contours of the pattern, take seam allowances of 5-7 cm.
The second method is more complex: you need to attach the paper to the part, forming folds where they are required by the intended project. Pin the edges together if necessary. Having traced the contours with a pencil, remove the paper, straighten it and cut out along the drawn lines. Transfer to fabric in the same way as described above.
Complex parts consisting of several elements are sewn on by machine or by hand. It is recommended to hem the edges of each piece. Using pins, form folds and draw a line. If you plan to replace the padding when the chair stretches, use foam and padding. They can be purchased at the construction and housing and communal services departments. The spacer will be used to hold the foam piece in place, so it is cut from old slipcovers or a template you built without leaving a large seam allowance.
The upholstery of the leather chair is done a little differently. It is important to consider the type of coating - the material is 1.5 mm thick, elastic, and easy to work with. There are practically not enough denser options; not every home sewing machine can sew them; you will need a special needle. Before pulling the chair by the leather, blanks are placed on the product to ensure that they are cut correctly. If the part consists of 2 or more elements, they are first connected with a clothespin or in another way that does not damage the material, and only then sewn together. If the point is not routed correctly, the holes will remain on the surface after breaking.
Making models
Cut out the parts
Reupholstery and assembly
Simple and clear step-by-step instructions for transporting the chair:
- The work starts from the back. Apply foam rubber, cleaned of old putty, to the inside. If the material is thick, cut off the corners to make the contours even.
- Place the joke higher. Use a stapler to attach the edges to the back of the back. Staples are placed every few centimeters, the material is slightly stretched, making sure that there are no distortions or folds.
- Place the cut fabric, align it, secure it with 4 staples, placing them on the sides. After this, checking the degree of tension, gradually lay the material around the entire perimeter.
- This way all parts are covered: seat, armrests.
- Glue the remainder onto the backrest, securing with staples.
If the seats are upholstered, the elements of which have a rounded shape, then in these places shallow recesses should be made in the foam rubber.
The seat upholstery of a leather chair has its own characteristics. If it is necessary for the material to be dense, it is moistened before work. Wet skin stretches, so once it dries it will return to its original size without wrinkles.
After replacing the upholstery of all parts, proceed to assembling the product. Repeat the same steps as for disassembly, but in reverse order. In case of difficulties, you should refer to photographs taken before restoration. By learning how to pull a chair step by step with your own hands and following a given sequence of actions, you can update your furniture without breaking the bank. The main thing is to work slowly, carefully cut the fabric and securely fasten the upholstery to the frame.
Replace synthetic winterizer or foam rubber
Attach a new cover
Secure the inside of the seat with brackets
Making holes for the legs in the case
The chair is ready
Stages of work
Assembling the product at home is not difficult. The whole process comes down to disassembly, fabric cutting, braiding and assembly. Even beginners can do this in one day. Recommendations will simplify the process.
If the design of the chair is too complex, it would be useful to follow the rules for disassembling the product in the video instructions.
Step-by-step instructions provide a complete guide to action. Before starting work, you should read it to the end, then arrange your tools. After completing the work, the product can be decorated to your liking.
Features of fashionable glider chairs, advantages of their use
Disassembling the product
Before upholstering an old chair, it must be disassembled into separate parts. If you do not have experience assembling such models, it is recommended to record the process on paper or in the form of a photo report. So at the final stage there will be no problems with assembly. Disassembly comes down to the following algorithm:
- disassemble all decorative elements;
- turn the product upside down, remove the legs;
- we take out the fasteners, unscrew the screws and take out the nails;
- remove old staples;
- remove the bottom.
Gradually unscrew all parts of the structure. The fabric is carefully removed to serve as a template for the new upholstery. Free-standing upholstery can be part of restoration work. At this stage, you can replace rotten and damaged parts and repair damaged areas.
A good filler can be left alone, but a damaged one will need to be disassembled. Use a flathead screwdriver to pry up the brackets and remove the foam. If it is glued, carefully cut it in layers. All waste and unusable material is sorted into bags so as not to clog the work area.
Before continuing work, the product is cleaned of dust and damaged fittings are replaced. If necessary, coat the structure with protective compounds.
If you have to drag an office chair, the procedure will not change. Initially, all parts and decorations are removed, the back and bottom are disassembled. Remove the liner, remove the filler. The only difference is in the design.
Cutting fabric
Replacing an old sheet with a new one involves a preliminary cut. The product can be transformed with flock, jacquard, tapestry, leather, nubuck, chenille. The cutting method does not change depending on the type of material. The model can be created in two ways: tracing the old version, creating it from scratch by taking measurements. The first method eliminates the possibility of error. The process boils down to the following steps:
- Preparation. Old upholstery is ironed and laid out on a flat surface. For convenience, you can mark which part belongs to which.
- Open it. Place the pieces on the new fabric, frame it, and mark the fold allowance. It is advisable to overcast or hem the edges. This will extend the life of the coating. Cut out the pieces with tailor's scissors.
- Assembly. Attach the parts to the chair, bend the edges for folds, and check for correctness.
- Making adjustments. If necessary, trim off the excess, add darts if the shape of the product is complex.
What are the criteria for choosing computer chairs for adults and children
You can also cut the foam rubber in the form of old putty yourself. Otherwise, the structural parts are cut to shape, leaving a few centimeters for fastening. An important condition is met: the installation of the lining is carried out only on the structure using putty.
Reupholstery and assembly
When all the decorative elements are up to date and the details are cut out, you can move on to transport. Dust is removed from the structure and the parts are prepared for assembly. Detailed instructions will tell you how to drag a chair with your own hands:
- foam rubber is applied to the inside of the backrest and fixed;
- fill cut corners to obtain even corners;
- apply a gasket and secure with a stapler;
- elastic materials to avoid folds and distortions;
- attach the fabric and secure with a stapler;
- repeat the sequence of actions with the armrests while sitting;
- attach the lower part and fix it.
Once the seats, armrests and backrest are tightened and the bottom panel is screwed down, the updated decorative elements can be replaced. Transporting leather chairs is more difficult to work with, since the leather must constantly stretch, avoiding the formation of voids, folds and distortions.
Upholstering a chair is a simple step-by-step process that even a beginner can do. The main thing is to stock up on tools, choose the right upholstery fabric and follow the instructions. It is useful to write down all the disassembly steps so that there are no problems during reassembly.
Furniture disassembly
In order to disassemble the chair, you will need the following tools:
- pliers;
- keys;
- Phillips and regular screwdrivers;
- pliers.
First of all, you need to remove the back wall and plywood bottom of the chair. They are usually secured with small nails or screws. If the plywood is suitable for further use, then it should be removed carefully.
Remove the foam padding that is located underneath the seat and gives the chair its elasticity. Tighten the nuts securing the legs to the back of the furniture. If the fasteners are rusty, use a special liquid to remove corrosion from the metal.
Next, you need to remove the old upholstery and remove the softening layer from the backrest. To do this, use a flat-head screwdriver and pliers. Use a screwdriver to pry up the old brackets so that one of the fastening legs comes out of the wooden surface. The staple is then finally removed with pliers.
By prying several fasteners at once, you will avoid damaging the plywood. Remove them sequentially to avoid getting scratched by staples that have not yet been removed. A skin wound caused by rusty metal can cause a lot of trouble. Therefore, it is best to disassemble the chair while wearing gloves or mittens.
After removing all fasteners, the old upholstery is removed and the gasket is removed. Old foam rubber can crumble and fall apart into pieces. If you are restoring furniture in an apartment, then lay plastic film or newspapers on the floor. And only then remove the worn-out chair softening, otherwise small debris will scatter throughout the room.
The wooden frame of the chair is restored separately. It is necessary to remove a layer of varnish or paint from it, glue the loose elements and paint all parts of the structure.
Removing external parts
Step-by-step instructions on how to move a chair at home could not be completed without removing the outer frame. Almost always this is a support for the bottom, less often the side parts that go into the armrests.
At this stage you may have separate legs, no wheels - these will need to be removed too. Thus, we have a very interesting picture: externally, the upholstery of the chair does not hold anything, so we can start removing it.
How to upholster an old chair with your own hands
Before moving the chair with your own hands, you need to understand all the stages step by step. The sequence of manipulations is important, since their violation will lead to the impossibility of carrying out this process. Here are the step-by-step instructions you need to pay attention to.
Once you have prepared the entire set of tools, you can begin disassembling the old chair.
Disassembling the chair
First you need to disassemble the chair. This is done as follows:
- First, all elements are removed, which are removed quite easily. These could be armrests.
- The chair then folds into a horizontal position with the seat raised. You need to reach to the bottom and take apart the legs.
- Then the fasteners are removed from the back and base. Most often, upholstery and soft foam are secured with staples around the perimeter. They are simply carefully pulled out by prying them off with a knife or thin screwdriver.
- So all other elements are not twisted. Most often they are attached with self-tapping screws, so you need to work with a screwdriver.
It is important to do everything with extreme caution, since the lining will be needed to cut the new fabric.
Remember that when disassembling it is desirable to maintain the integrity of the fabric. Don't tear it off, it may be useful for creating a pattern in the future.
Fabric cutting
In the second step, it is recommended to cut the fabric. At this stage of the repair, you can either remove the dimensions from the furniture elements yourself, or use old existing pieces of fabric.
you need to take the fabric you plan to upholster the furniture with and wash it. Remember this is for fabrics only. Leather, eco-leather, suede and other natural materials of animal origin or their imitation are not subject to such manipulations. Otherwise, they can simply be ruined.
It is recommended to take the canvas 10% longer than the required length.
It is important to wash and iron for fabric to shrink. Then dry and iron.
Remember that exposure to temperature will allow the fabric to return to its final size. Because in some cases, especially when using natural fibers, they are able to reduce their overall size.
Then lay the fabric face down on the floor. Use a pattern drawn on paper or old pieces of fabric. A paper model will make your work more accurate and accurate.
We lay the old upholstery parts on the fabric, draw them with tailor's chalk, leaving a small margin.
Then use a tailor's chalk to draw the outlines. Remember that you need to cut it along them and allow for an increase of 1 centimeter on all sides.
This completes the cutting stage.
Upholstery and assembly of the chair
Next, we proceed directly to the work of re-upholstering. The step-by-step instructions are as follows:
- It is necessary to upholster the furniture by first placing a layer of foam rubber on the base of the frame. Therefore, it is necessary to cut it with a sharp stationery knife or blade. The dimensions must exactly match the shape of the seat and backrest.
- Foam rubber is laid out on the base.
- Place the fabric on top, right side up. Holding it with one hand, you need to place the product on the floor on the fabric. Using a furniture stapler, gently pull the edges of the fabric and wrap it around the end to pull out the furniture. It is important to guide the brackets as often as possible to prevent the material from bending or stretching.
- After the seat and back are covered with material, you need to assemble the product in the reverse order.
- Most often, the legs are attached to the seat first. So, the back is fixed.
- At the last stage, the side elements and armrests are fixed.
After fixing, pull the fabric out from the front side and check for folds.
If everything is in order, we tighten and fasten the remaining sides. Remember that assembly must be done carefully to ensure that all joints are tight and secure enough to hold the parts together. Otherwise, the product may weaken quite quickly and will need to be tightened.
The end result will definitely pay off all the efforts to tighten it up and please you for a long time.
Types of update
Restoration and restoration are divided into types, which, however, can be combined. What can you do with an old chair?
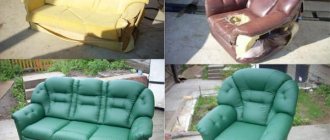
- Drag. First, you select new fabric, since this will be the essence of the restoration. The frame itself is usually not touched in such a situation. New fabric is either attached to the old covering, or the old one is replaced with new ones along with the filler. High-quality fabrics for upholstery are velor, corduroy, jacquard, tapestry, eco-leather, flock. Thick crinoline is suitable as inner upholstery. You need to disassemble the chair, unscrew the bolts connecting the legs to the frame, remove the armrests, and disassemble the bottom. Next comes work with the upholstery, inserting new springs, etc.
- Upholster. This method of restoration involves the use of a chair with a rigid base. The top skin is removed, the filler and fastenings are removed, new parts are cut out from the old parts, and the structure is checked for strength. The filler is attached to the updated or new frame with a stapler, then the new upholstery is fixed.
- Make a complete renovation. This can be called the general type of restoration work. This includes upholstery, reupholstery, and complete replacement of the base. The structure must be checked for damage. For example, sometimes it makes sense to completely replace the legs. The surface can be restored with varnishes and paints (including chalk). Doing this kind of work on your own is difficult, but possible.
The choice of materials also depends on the scope of work. Restoration may require paint removers and compounds that fill scratches and chips without leaving a trace. Many products are sold in a regular construction market, but some (furniture waxes and furniture edges) are purchased in specialized stores. However, today it is easier to order them online.
Master classes on upholstery of chairs
So, how to reupholster a chair step by step with your own hands is a rather problematic task; it is important to take into account all the manipulations described above. At the same time, there are several secrets that will help you perform the job at the highest level. Here are some of them:
- If the chair has legs, you must first cover the end part and the rear lower crossbar with a rag. Only then is the leg fixed. In this case, you will need to carefully drill a hole in the fabric. Do not leave the leg holes loose when upholstering, as the fabric here will gradually stretch and tear.
- If the armrests are soft, it is better to do the upholstery in the following sequence: first the back, then the seat and only then the armrests. The elements are attached to the frame in the same sequence. In this case, it will be possible to avoid distortions or so-called “bubbles” on the foam rubber. The work will look clean and high quality.
You will receive a beautiful chair at no extra cost.
Remember that these tips will help you upholster your upholstered furniture, not just your chair. If everything is implemented correctly, the result will be such that it will be impossible to distinguish it from the factory one.
