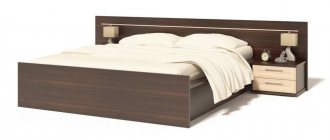
The bed is the main piece of furniture in the bedroom, so you want to bring it to perfection. At the same time, the main detail that catches your eye when looking at the sleeping place is the headboard. You can cover the headboard with your own hands. The owner of the bedroom will be able to update old furniture and show his creative streak. Detailed master classes are presented in the article.
Beauty and comfort with your own hands: how to cover a bed with decorative fabric
Textile decoration of the house makes its interior more cozy, soft and comfortable. But it is these qualities that are especially important for the furnishings of a bedroom. Beds are most often decorated with fabric and leather.
Such products are beautiful, cozy, but expensive.
The decision to cover the bed with fabric yourself will help not only save money, but also create original furniture: a delicate crib for your princess, a solid family bed decorated with a carriage frame, or something else very special.
When choosing the most suitable material for bed upholstery, consider not only the interior of the room (the decor used, its color, shape, texture).
Be sure to pay attention to the properties of the fabric.
To keep its shape, it must be dense; so that in a year or two you don’t have to think about repairs - durable; Of course, it should not collect too much dust and be easy to clean with the means available to you.
To decorate your beds with your own hands, you can:
- take old furniture, then, taking into account the initial data and your capabilities, improve its appearance;
- use a ready-made product of simple design;
- according to your measurements, make a frame with an orthopedic base yourself or in a workshop.
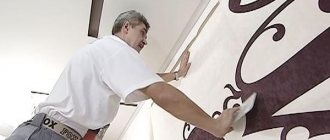
Bright bed in art deco style
It is not worth saying that creating a beautiful, stylish and at the same time high-quality product yourself is absolutely easy. But a little effort, care, good materials and a description of the process will undoubtedly help in the work.
Such a bright bed is perfect for almost any interior and will decorate it. The bed will fit especially well into a spacious room that is not overloaded with decorations and furniture, since it itself is an attention-grabbing decor. The only thing you need to pay attention to is to think over an individual color scheme.
Preparing to decorate the bed
So, first of all, you need to take care of the base of the bed.
Having carefully thought through the size of the bed, choosing a ready-made appropriate orthopedic base, drawing the desired headboard shape that suits your interior, you can make the bed itself from MDF.
To do this, use the instructions and description of assembling the bed on the Internet or order the work from professionals. The last option is the simplest and most reliable.
To decorate a finished structure with fabric, prepare:
- Decorative textiles.
- Textiles for covering the back parts of the bed.
- Foam rubber about 5 cm thick.
- Furniture glue.
- Scissors.
- Sharp carpenter's knife with replaceable blades.
- Decor for the headboard - finishing furniture nails.
- Hammer.
- Furniture stapler with staples.
- Tape measure, chalk for marking.
- Sandpaper or sander.
- Adhesive tape if you also plan to make the structure's trim (except the headboard) removable.
Before applying decor to the MDF parts, sand the cut areas of the bed base parts and the ends with sandpaper. Having a sanding machine will greatly speed up this process. This way you will be able to avoid damaging the fabric while working.
Description of work
- We start covering the bed with decorative material from the headboard. We dismantle the required part of the frame.
- We cut out a piece from foam rubber that should repeat the outline of the sheathed MDF headboard.
We cut it out using a carpenter's knife. The task is not easy. If, as in our project, the headboard has a complex shape with roundness, the cutting of the foam can be ordered at the place of purchase or in a furniture workshop using a prepared pattern. - Apply glue to the front surface of the headboard, then lay the foam rubber tightly on it so that the curved edges match as much as possible.
- Attach the edge of the foam to the MDF base using a furniture stapler, placing the staples a short distance from each other.
- Cut out decorative material for the headboard.
On the right, left and at the bottom, leave an allowance for fastening of about 10 cm. At the top of the figured headboard, make the allowance larger by 5-7 cm, so that it is convenient to carefully lay out the corners, or leave a rectangle so that you can cut off the excess later. - To ensure that the fabric lies flat, align its bottom edge and begin fastening it with a furniture stapler.
- Then place the headboard in a vertical position and stretch the fabric.
- To properly drape the corners of the figured top, cut the fabric. Fix the laid out fragments with a stapler to the back of the headboard.
- Stretch the fabric in the same way and attach the textiles to the sides of the headboard. Check the correct tension of the fabric and start decorating the surface with furniture nails.
- Using a hammer, carefully attach nails along the top edge of the headboard, laying a strip evenly along the visible outer edge (except for the bottom).
- Then, using chalk and a tape measure, mark with a line the location for the second finishing row of furniture nails at a distance of 15-20 cm from the edge.
- Using a stapler, we fix the decor along the line to the MDF base.
- We lay furniture tape over the staples exactly along the line and secure it with a hammer and nails. Decoration of the headboard is completed.
- To give this part of the bed a finished look, we cut out a blank from technical fabric prepared in advance, making an allowance of 1.5-2 cm for the hem. We fasten the fabric with a stapler.
Now you can start working on decorating the frame.
- We prepare blanks of foam rubber for gluing the base.
- Apply glue to the surface, glue foam rubber along the entire perimeter of the end of the frame (except for the part where the headboard is attached), then along the top part.
In this project, the soft frame of the case is covered with technical fabric, and the decorative cover will be removable and attached with adhesive tape.
- Cut strips of technical material to the size of the surface of the sidewalls, make allowances on all sides by 2-3 cm.
- Fastening with a stapler to the top and then to the bottom of the frame, sew the foam rubber with prepared strips of technical fabric.
- Use a stapler to attach the Velcro tape to the frame.
- Make a pattern for a removable cover. Before cutting out the fabric, try it on again to ensure the item fits correctly.
- After adjustments, the parts can be cut out. Sew the cover. Do not forget to attach adhesive tape to it at the attachment points.
- Place the cover on the frame. Place the headboard in place.
The bed is ready. It will not only decorate the interior of any bedroom, but will also become an excellent place for a complete, comfortable rest.
Other ways to upholster a bed with textiles
When decorating a bed with fabric, the main role is played by the choice of material and the method of designing the headboard. For example, a product in cotton with a small pattern will differ from a similar piece of furniture upholstered in velvet or leather-like textiles. But this will have virtually no effect on the work of the master.
https://www.youtube.com/watch?v=8hYCiwUZ6cg
One of the most popular methods of upholstering upholstered furniture all over the world is the carriage tie. Often this method of decorating a bed is used not only on the headboard, but also decorates the entire rigid external structure.
How to make a carriage tie
For work you will need:
- plywood or MDF for the base;
- foam rubber 5 cm thick;
- furniture glue;
- basic and technical fabrics;
- strong threads;
- decorative buttons;
- long needles;
- furniture stapler;
- drill with drill and attachment for large holes in foam rubber.
To decorate the head of the bed with a carriage screed, you need:
- Mark the screeds on the base (in squares or diamonds).
- Drill through holes at the marked points with a drill.
- Transfer the markings to the foam rubber.
- Using a special device, make holes in the foam rubber with a diameter of up to 1 cm.
- Glue the foam rubber onto the base so that all the holes match.
- Having covered the surface with decorative textiles, begin to sew holes, tightening them with special buttons and forming folds between the ties;
- After this, drape the edges with the same folds and attach them to the back using a furniture stapler.
- To cover the frame of the stock with fabric, use the description from the first project.
Such an elegant decorated element of the bed as a headboard can become the main idea for decorating the entire room. Use your imagination to create your own cozy corner.
Headboard with soft squares
A slightly similar to the previous, but easier to implement finishing option is to decorate the headboard with individual soft squares/rectangles glued to the base and covered with textiles. Thus, you can decorate a bed for a nursery, make a product in patchwork style or for any other style by choosing the appropriate material or a combination of them.
Tools and materials for work
- plywood sheet 150x75 cm for the base;
- 18 small plywood squares 25x25 cm;
- decorative fabric with a symmetrical pattern (you can alternate different colors and patterns);
- padding polyester or other similar artificial filler;
- stapler for working on furniture;
- scissors;
- wood glue or liquid nails.
Before starting work, prepare the wooden parts - sand them, level their ends with sandpaper. According to the size of the squares, making allowances on all sides of 5-8 cm, cut 18 pieces of decorative fabric accordingly.
Step-by-step instruction
- Place the plywood square in the middle of the fabric square. Using a furniture stapler, attach the fabric to the back of the wooden piece only on one side and slightly on the sides.
- Fill the resulting pocket with padding polyester. Distribute the filling evenly.
- Secure the remaining edges by closing the square.
- Make the remaining 17 blanks in the same way. Make sure they have the same amount of filler.
- Using wood glue or liquid nails, firmly glue the squares onto the base of the headboard.
All that remains is to use padding polyester (or foam rubber) and the same textiles to decorate the base. The bed is ready.
Good night!
Making a screed
Take a plastic button and sew it with strong thread. Tie a strong knot on the inside. Insert the needle into the drilled hole and pull it out from the front through the layer of foam and fabric.
1 of 2
Then thread the needle through the eye of the decorative button and pull the thread taut. Make a tie and tie the thread tightly around the button. Cut off the excess ends of the thread.
Immediately after you secure the first button, stop and carefully fold in the fold. It is important to correctly assemble the darts of the top row; this will set the direction of the folds throughout the headboard.
Every three to four buttons, align the folds on the edges and secure them with a stapler on the back of the frame. Make sure that all darts face the same direction.
New life for an old bed. Easy ways to reupholster a bed
If the bed has become thin or the leatherette or fabric upholstery has gone out of fashion, you can reupholster it yourself at home with new material. For this work you will need a small arsenal of tools and at least 5-10 hours of your own labor.
The article describes in detail how to do everything correctly, whether it is difficult to make a fashionable carriage tie or reupholster a narrow chair-bed. Step-by-step instructions are given for upholstering the headboard with leather or fabric, as well as other ways to update the bed.
Tools and materials for upholstering the backrest
Depending on the area of the headboard, a certain amount of fabric will be required (1–4 meters). For decoration, use 4-5 large buttons, which are then covered with fabric. Basic tools and materials:
- paper clips (preferably at least 1000);
- staple gun;
- ruler;
- screwdriver;
- paper and pencil for a sketch;
- stationery knife;
- large square for marking;
- sewing machine;
- strong threads and thick needles;
- sharp scissors and chalk for patterns.
For upholstery, it is better to choose good fabrics that will not soon fade, become dilapidated or lose their shape. If it is leatherette, then take a material that does not crack. For a carriage screed you need dense foam rubber with a thickness of approximately 10–20 mm and glue. Sometimes self-tapping screws, stapler brackets, slats and other wooden dies are required for additional fastening.
Attention
Reupholstery by a specialist will cost at least 3-4 thousand rubles, but you can save this money and do everything yourself.
How to update: step-by-step instructions
To reupholster the headboard, you need to disassemble the bed and remove the staples from the old upholstery. It is desirable that the surroundings be clean and that the parts are not mixed with other things. During the work, your bedroom becomes a mini-workshop. Step by step procedure:
- Remove damaged upholstery from the headboard.
- Remove the existing screws from the headboard to release the inserts (if any).
- Check if the foam is damaged.
- Prepare new fabric: iron it if necessary.
- Cut out the shape for the headboard so that you can wrap at least 5-10 cm around the edges (before you start cutting, trace the outlines with chalk, as for a pattern).
- Carefully secure the wrapped fabric along the edge with a staple gun (the distance between the fasteners is 20–30 cm).
- Check again that the fabric has no folds or unevenness and is well stretched.
- Cut out the shape for the buttons with a small margin.
- Using a circular motion, sew around the shape of the same fabric with strong threads so that at the end it can be pulled into the bag.
- Insert a button into the center of the form, tighten the form so that you get a large button pulled into the fabric.
- First, use a needle and then a stapler to attach the finished buttons to the headboard, already covered with new fabric (work with the stapler from the reverse side so that no traces of fastening are visible).
- Place the finished headboard in place.
If the headboard consists of separate parts (inserts), for example, on the sides or in the center, then they will all need to be covered with new fabric. Then the inserts will need to be re-screwed. Each part requires a separate pattern.
Attention
Buttons decorating the headboard are best placed centrally and in one line. It is also acceptable to use a larger number of decorations, which are arranged in a checkerboard pattern.
Leather and eco-leather
When upholstering with leather, the procedure is the same, but keep in mind that this material is thicker, it will be difficult to nail it to the headboard and stretch it without folds and wrinkles. The fabric is attached to the sides and in places that are not visible. It is also nailed along the edges with nails with large heads.
For reupholstery:
- Choose wear-resistant leatherette or eco-leather in the store.
- Disassemble the headboard, cut out the desired shape of the material along the contour with a grip of at least 10 cm.
- Pull well before stapler (start at corners).
Important
Leatherette is a very pliable material. It can be pulled directly onto a wooden surface to prevent the leather from stretching or sagging in the future.
Fabric
If the bed has a regular plywood or wooden headboard, then it can be visually improved by covering it with a beautiful fabric. To drag:
- Disassemble the bed, remove the entire bed and mattress.
- Release the wooden base.
- Using a utility knife, cut the foam padding to the size of the headboard.
- Glue the foam form onto the wood and secure it with a stapler.
- Cut the material to the size of the headboard with allowances of at least 15 cm, stretch, and secure the edges with a stapler.
Check that there are no folds. To additionally secure the headboard to the bed, you can use several wooden planks.
It is better to choose a fabric for upholstery that is very durable and abrasion-resistant. For beauty, textiles that imitate tiles, wood or antique panels are often chosen.
Advice
If you have experience, you can create a royal headboard by cutting out a beautiful shape with a jigsaw or saw and covering it with red or blue velvet with gold accents.
The video shows the process of reupholstering a bed with fabric:
Polished furniture may develop scratches over time, spoiling the overall appearance. To eliminate the shortcoming, you need to reupholster the headboard. To improve the crib:
- Disassemble the body into pieces, remove any upholstery, if any.
- Glue the foam rubber, secure the fabric cut to the desired shape with a stapler.
- Reassemble the crib with a new headboard.
Advice
You can reupholster not only the bed, but also children's sofas and armchairs. For furniture, choose heavy-duty, but preferably natural materials.
How to make a carriage tie?
A carriage tie can transform any bed. Making it is not as difficult as it might seem. And most importantly: the method does not require large expenses at all.
On average, for a standard double bed you will need to make 25 holes , which will then be pulled together, creating the effect of an unusual carriage pillow.
Main material: cheap foam rubber, which can be bought at any hardware store.
For carriage screed:
- Free the backrest by removing the old upholstery.
- On clean wood or plywood of the headboard, apply a diamond pattern for the future screed.
- At the intersection points of each diamond, drill a hole with a diameter of at least 10 mm (there should be approximately 25 pieces).
- Sand the surface and hole so there are no nicks.
- Cut the foam to fit the area of the headboard.
- Glue the foam rubber to the headboard, secure it along the edges with a stapler (you can use special foam glue, for example, W-18).
- Apply the same diamond-shaped pattern to the foam base and make the finished holes wider using a tube or furniture support (two fingers should fit into the hole).
- Cut the fabric slightly larger than the size of the headboard to leave room for hems.
- Straighten the material over the headboard, gather it in the area of the holes to create beautiful folds.
- Use a wide needle to secure the fabric inside the holes and cover the hole with a wide button.
The buttons are usually covered with the same material as the entire headboard.
Advice
Before applying the design, make a simple sketch on paper. This way you can determine whether elongated or regular diamonds are right for you, how wide they should be and how many of them to make in general.
You need to chamfer the foam along the edges, then the finished headboard will look more rounded. When marking the foam, check that all corners are on the same line. To cut wide holes in the foam rubber, it is better to use a furniture tube (support), which must first be sharpened. Then the holes will be perfectly straight.
The sketch is drawn from the center: first into squares, then into rectangles, and then into rhombuses. Don't forget to leave an edge around the perimeter. Once everything is agreed upon and ready, transfer the drawing to the base. Start screeding.
If you decide to replace the headboard, then choose:
- high-quality MDF;
- laminate;
- plywood;
- or natural wood.
Sometimes such a base is attached directly to the wall.
The video shows how to reupholster the headboard with a carriage tie:
You will find master classes on upholstering a headboard in various ways in a separate article.
How to update a chair-bed?
The peculiarity of this furniture is that it is quite narrow and consists of a row of pillows. Each piece will have to be reupholstered with new fabric, including the sides, which may take time. If the frames have rotted or crumbled, then you will have to change them too . For reupholstery:
- Remove old upholstery from the recliner cushions.
- Replace broken parts (springs) with new ones.
- Cover the pillow with foam rubber.
- Open the mold for the new upholstery, stretch it, and then secure it with a stapler.
- Using the same method, tighten the seats and sides of the chair-bed (make sure that the material does not wrinkle at the corners).
Reference
Re-upholstery may take 1-2 days. But the result is worth it: after changing the upholstery, an old chair-bed can still last an additional 5–10 years.
The video shows the process of reupholstering a chair-bed:
The back can be tightened not only with a carriage tie or fabric with buttons. The following methods of constriction are popular:
- fabric with decorations in the form of nail heads;
- ready-made pillows above the bed, which are hung on the base and seem to hang in the air;
- using a wall cornice covered with textiles (up to the ceiling), or, conversely, across the entire width of the room;
- other soft panels directly on the wall (in the form of columns, squares, etc.);
- creating an artistic panel on the wall.
The beauty of the back is emphasized by:
- straw wallpaper on the wall;
- wooden or bamboo panels;
- paintings;
- photo wallpaper.
For more information on how to decorate the wall at the head of the bed, read another article.
You can also simply draw any extension of the bed on the wall without resorting to reupholstery.
Tools and materials
Thanks to the right choice of upholstery material, your bed or pull-out sofa will not only be comfortable, but also beautiful
Before you start sheathing, you need to stock up on suitable materials and tools. The comfort and reliability of the furniture depends on how correctly the materials are selected, and how quickly you complete the planned work depends on how correctly the tool is selected.
| Illustrations | Upholstery materials and their description |
| Microfiber . This is a two-layer woven material made from polyester and cotton. The material is pleasant to the touch, environmentally friendly, durable and resistant to prolonged exposure to sunlight. A characteristic feature of microfiber is its soft, velvety feel. Until recently, the material was produced only in a single-color version, but today microfiber with a pattern has appeared on sale. | |
| Jacquard . This is a double-sided woven material with a high density of weaving threads. As a rule, the material is produced with a complex pattern and alternating several colors and textures. Modern jacquard, thanks to its synthetic base, demonstrates high abrasion resistance. | |
| Matting . This is a type of jacquard, but instead of complex patterns, it uses simpler weaving with a minimalist pattern texture. Depending on the size of the weave, the texture and relief of the fabric differs. | |
| Flock . This is a modern upholstery material that is made by sputtering shredded cotton fibers onto a synthetic, glue-coated backing. Due to its elasticity, the material is convenient for doing upholstery yourself. The fabric is durable and resistant not only to abrasion, but also to punctures, so it is recommended for furniture in apartments with pets. | |
| Velor . This is a rather delicate material that is not recommended for covering furniture that is constantly in use. The advantage of velor is its excellent appearance combined with softness to the touch. | |
Faux leather. The material is used for covering the headboard and bed frame. When manufacturing the material, vinyl coating is applied to the fabric base, which is given one or another microrelief that imitates the texture of natural leather.
| |
| Genuine (pressed) leather . Furniture genuine leather is made from tanning waste, which is thoroughly crushed and mixed with a binder and dyes until smooth. From the resulting mass a sheet of the required configuration and size is formed. | |
| Fillers. In order to give the upholstery volume and make the furniture really soft, fillers are used. The most affordable option is medium- and high-density foam rubber, which is sold in slabs of different thicknesses. A more wear-resistant filler is a polyurethane foam backing. More expensive fillers are made from natural raw materials, such as coconut flakes. In order to prevent the upholstery from being rubbed from the inside out, a light cotton lining is placed on top of the filling (on the right in the photo). |
Most of the tools that can be used to finish furniture are available in any home workshop.
The list of tools depends on the type of upholstery material and the complexity of the planned work. A basic set of tools and related accessories includes:
- Construction stapler with staples.
- Brush and quick-drying wood glue.
- Hammer and furniture nails.
- Screwdriver with a set of bits and drills.
- Scissors and mounting knife.
- Large needle, thick thread (twine) and decorative buttons.
- Measuring tool.
Workflow Features
Decorating fabric upholstery with furniture nails
The essence of the furniture upholstery process is to evenly cover the headrest with foam rubber and stretch the fabric over it. Depending on what decor is planned, the fabric is attached smoothly or with decorative folds. For a better decorative effect, braided fabric cord, special buttons, furniture nails and other components are used for upholstery to make the furniture even more attractive.
How to make a carriage tie
The carriage screed, as the name suggests, was mainly used for finishing the interiors of carriages and the plump pillows compensated for the shaking of the spring suspension
Carriage screed is one of the most popular and sought-after methods of upholstery of upholstered furniture. Taking into account the specifics of the finishing, furniture decorated in this way can only be used in classic interiors.
An example of how you can veneer the headboard of a homemade bed yourself
The advantage of this method is the ease of its implementation. That is, you can start finishing furniture without any experience. Let's look at step-by-step instructions for decorating bedroom furniture with a wooden headboard.
| Illustrations | Headboard with soft squares |
Preparing to decorate the bed. At the preparatory stage, the bed is disassembled into individual structural elements for the convenience of subsequent covering. That is, we will have to dismantle the slats of the mattress holder, remove the headboard and disassemble the supporting frame.
After the structure is disassembled into its component elements, we inspect the surfaces and remove dirt and dust that could impair the adhesion of the glue. | |
| Preparing the headboard frame . If the headboard has a complex shape, it will not be easy to cover it with fabric. Therefore, we prepare the headboard in such a way that the end result is a rectangular piece without protruding patterns, as shown in the photo. Of course, it is possible to upholster a headboard with complex curved shapes, but this requires a lot of experience. | |
| Holes for fabric covering. The holes are needed in order to attract upholstery and filling through them and thus create the desired relief. To begin with, we mark the squares on the headboard - this is exactly the pattern that will be obtained based on the results of the work completed. The side of the squares should be at least 10 cm, if made smaller it will be difficult to form folds in the pattern. At the intersection of the lines at the corners of the squares, we drill through holes with a diameter of 10 mm. | |
Fastening the foam. The prepared wooden surface is covered with a uniform layer of glue, on top of which foam rubber is laid.
After the foam has adhered to the headboard, we punch holes in it that should coincide with the holes in the wood. | |
| Installation of the substrate . We lay a cotton pad on top of the foam rubber with a margin of at least 10 cm around the edge. We fasten the backing around the perimeter with a stapler. | |
| Securing the fabric . We spread the fabric over the foam rubber and push it into the previously made holes. We stitch the fabric with a coarse thread and tighten it with a button. | |
| An important point regarding the first row . Literally from the first row, we carefully monitor that the folds on the upholstery are the same. Again, we make sure that the depth of the depressions, where the upholstery is tightened with buttons, is the same. If you ignore this requirement and errors are discovered late, you will have to redo a lot. | |
| Fastening the fabric from the wrong side . During the sheathing, the free end of the thread is brought out to the back side of the headboard, which must be secured with staplers or furniture nails. | |
| Upgrading the back of the headboard . Upon completion of finishing, the front part of the headboard will look attractive, which cannot be said about the back. The easiest way to decorate the back of a headboard is to cover it with a solid piece of fiberboard. The sheet material will additionally press the fabric around the entire perimeter, enhancing the strength of the entire headboard. |
Other ways to upholster a bed with textiles
Along with the carriage screed, there are other cladding methods, including combined options, as shown in the photo
In addition to carriage sheathing, where the surface is divided into plump squares, there is a method in which the surface covered with fabric turns out to be perfectly flat. On the one hand, this method is simpler than carriage sheathing, since there is no need to form squares. On the other hand, stretching the fabric evenly without the slightest wrinkle is also not easy.
Tools and materials for work
The materials and tools for smooth sheathing are the same as for carriage sheathing. However, since you won’t have to form raised squares, you can do without drilling holes in the headboard and without using decorative buttons.
Work order
| Illustrations | Step-by-step instruction |
| Preparatory stage . Before upholstering, we disassemble the bed to make it easier and more convenient to work. | |
| Installation of foam rubber . We glue a solid sheet of foam rubber on top of the headboard and trim it around the perimeter. | |
| Installation of the substrate . A backing is laid on top of the foam rubber and stapled around the perimeter, as shown in the photo. Excess material is trimmed. | |
| Trying on and cutting fabric . The fabric is laid out on top of the headboard so that when trimming there is as little excess as possible, and it is trimmed so that the material can be folded onto the inside of the headrest. Then a layer of quick-drying glue is applied over the foam rubber with a spray bottle, on top of which the fabric is lined and smoothed. | |
| Fabric fastening . After the glue has dried, the fabric stock is placed on the reverse side, stretched and stapled. | |
| Installation of decorative elements . Beads or other decorative elements are attached along the perimeter of the sheathed headboard. |
How to cover a bed with fabric with your own hands?
The bed determines the direction and style of the bedroom design. An ordinary boring bed makes the entire decoration dull. How can you radically and inexpensively update this piece of furniture? Three interesting techniques will help you create a soft headboard for your bed with your own hands.
Upholstered headboard - a new design for your bedroom
The headboard of such a bed is completely covered with fabric, under which soft foam rubber is placed. For greater decorativeness, various methods of screeds are used. These beds are quite expensive, but the good news is that you don't need to purchase a new bed. You just need to make a new soft headboard - the video and master class will help you with this.
Even the simplest upholstered headboard looks great, and if there is an ottoman with the same finish next to it, the new room design is almost ready.
Master class No. 1 “upholstered headboard in a couple of hours”
This is one of the simple techniques for creating such bed decor, which is perfect for those who do not want to spend a lot of time fiddling around.
Materials and tools:
- plywood;
- foam;
- any fabric for the base;
- thick fabric for external upholstery;
- furniture stapler;
- electric jigsaw.
Since this method does not involve screeding, it is advisable to take fabric with a bright, beautiful print. Plain fabric can also look impressive, you just need to choose the right color so that you can enjoy the soft headboard of your bed with your own hands for as long as possible.
Master class No. 2 “headboard in the form of soft squares”
The good thing about the upholstery technique in the form of soft squares is that the headboard can be made even from fabric scraps and pieces of foam rubber. If other methods require solid cuts, then here you need to make a lot of small squares. Moreover, you are not limited in the combination of colors and textures - the originality of the product is guaranteed.
Materials and tools:
- textile;
- foam;
- batting (sintepon);
- plywood or very durable cardboard;
- scissors;
- jigsaw;
- glue or screws;
- screwdriver;
- hooks for hanging;
- furniture stapler.
Master class No. 3 “headboard in carriage style”
Carriage tie or capitonne is a fairly common method of furniture decoration, inspired by the way carriages were finished in the 18th century. This is a soft upholstery fastened with rivets to the base, forming a pattern in the form of squares or diamonds. This decor looks aristocratic, bringing a feeling of comfort and stability to the interior of the bedroom.
For this type of headboard decoration, it is best to choose heavy, expensive fabric that forms luxurious folds.
Perfect for:
- leather – natural or artificial;
- velours;
- velvet;
- faux suede.
These are dense materials capable of forming distinct, beautiful folds - they are the goal. The fabric may have a pattern that matches the design of the image being created. Therefore, light fabrics with simple patterns are completely unsuitable for carriage screeds.
https://www..com/watch?v=mnNA-95gEDo
The following materials are used for screeding:
- buttons covered with fabric;
- massive beads;
- crystals.
Buttons can be matching or contrasting - both methods give their own unique effect. Classic contrasts of black and white in the art deco style are good. You can use fabric rose buttons together as a romantic element.
Materials and tools for work:
- a sheet of plywood or a board with holes;
- foam rubber 50 mm thick;
- padding polyester;
- knife;
- rubber glue;
- thick paper;
- strong thread;
- large needle;
- marker;
- buttons;
- thick fabric;
- furniture stapler;
- electric jigsaw;
Photo gallery
Did you like our site? Join or subscribe (you will receive notifications about new topics by email) to our channel in MirTesen!
Do-it-yourself furniture reupholstery at home is easy
Sooner or later, we all usually face the need to reupholster furniture. We are talking about upholstered furniture that just needs to be reupholstered. Furniture repair in the form of changing the upholstery is usually called furniture reupholstery.
Today we will tell you how you can reupholster furniture with your own hands by replacing its upholstery with new one. As an example, we will describe the process of reupholstering a bed and show photographs of the main points of the process. Believe me, this is not such a difficult task (for those whose arms grow from their shoulders and not from somewhere else).
In order to reupholster a sofa, bed or anything else, you will need three basic things:
There are different reasons why upholstery fails, for example:
- Fabric upholstery may fade in areas regularly exposed to strong sunlight;
- leatherette upholstery may crack and begin to peel;
- any upholstery can be damaged by the claws of pets;
- any upholstery can simply be accidentally torn or stained;
Preparing to reupholster furniture
Preparation for reupholstering furniture should begin with the selection of upholstery material. Depending on your financial capabilities and tastes, I recommend choosing between genuine leather and fabric. Faux leather is not durable.
Leather upholstery
If you decide to buy genuine leather as upholstery, then choose it of such a thickness that it still remains quite elastic. Do not try to buy thick leather with a thickness of more than 3 mm (unless you are pursuing some goals known only to you). Thick skin will be difficult to work with.
How to cover a headboard with leather yourself
The bed is the main and central piece of furniture in any bedroom. People spend about a third of their lives sleeping, which means that the choice of bed and bedding must be approached seriously and responsibly.
Designers are constantly creating innovative models of mattresses and beds, so there is a huge variety of bedroom furnishings.
Most of them not only fulfill the main purpose of providing a person with a comfortable sleep, but also help decorate the interior, giving it a certain style and originality.
Installing or updating a headboard is the fastest and easiest way to transform the overall mood of your bedroom. Among the various options, the most popular is a soft headboard for a bed, which, due to its design, gives the sleeping area a special coziness, softens sharp corners, and sets the mood for a comfortable rest.
Of course, this part can be purchased in stores separately or as an element of the bed frame, but many prefer to make a soft headboard with their own hands, giving free rein to their imagination and creative ideas.
We offer several master classes on how to make an interesting headboard, and also look at other models of craftsmen and designers for inspiration.
DIY soft headboard “Carriage screed”
Carriage binding is a decorating technique that was widely used in the 18th century to decorate carriages (hence the name). Today this method is used for upholstery of upholstered furniture and interior items. The modern name for the carriage screed is capitonne.
In order for the result to look truly impressive, it is recommended to use expensive, rich material that looks good with numerous folds, for example, leather, velvet, velor, faux suede.
Light cotton with small flowers is a completely unsuitable fabric.
The screed pattern itself can be made in the form of squares or diamonds; buttons covered with the same fabric, beads, and crystals in color or contrast are used as rivets.
Materials and tools:
- plywood for the base (furniture board);
- high-quality fabric (with a margin of 25-30 cm more than the length and width of the plywood base);
- foam rubber about 5 cm thick (the size of a plywood sheet);
- padding polyester;
- covered eyelet buttons;
- drill for drilling plywood;
- sharp knife;
- Crochet hook;
- universal glue;
- strong lace (rope, twine to fit the buttons through the eyelet);
- furniture stapler with thickened staples;
- scissors;
- wall fastenings and screws.
Progress
Take a sheet of plywood, you can use a rectangular one or cut it into an interesting shape. In this example, two boards are used with dimensions: 200 cm by 60 cm and 140 cm by 60 cm. Cut the foam rubber to the size of the plywood base. Mark the places where the buttons are attached on the foam rubber, for example, in three rows in a checkerboard pattern.
Next, use a sharp knife to cut holes in the foam for the buttons.
A fun way to make holes is to use a heated metal tube. Heat the tube on the stove for 3-4 minutes, then make holes with quick movements. You can make 2-3 holes at a time, then heat the tube again for 15-20 seconds. Before doing this, be sure to place a board under the foam rubber so as not to spoil the floor.
Place the foam rubber on the plywood and use a pencil to mark the locations for the holes. Drill the holes with an 8mm wood drill bit.
Glue the foam to the plywood. Make sure that the holes in the foam and the plywood match.
Place a layer of padding polyester on top with a margin of 3-5 cm on each side. Lay the fabric on the padding polyester with a margin of at least 10 cm on each side. Turn the plywood over and secure the fabric with a furniture stapler on the reverse side.
Prepare your buttons. You can cover them with fabric yourself or take them to a workshop. Thread a cord at least 15 cm long into each button and tie a knot. This project required 62 buttons. Take a crochet hook and insert it into the hole from the plywood side.
From the front, on the fabric side, feel for the hook. Check the distance from the adjacent button with a ruler and make a small hole with nail scissors. Hook the lace with the button and thread it through the hole.
Pull the cord well and staple it securely to the back.
Attach the fasteners with self-tapping screws and hang them on the wall. Ready!
36 photos of options for a soft headboard
headboard, bed ( 13 votes, average: 3.69
DIY headboard: 90 photos of stylish shapes, colors and decoration ideas
The bed is the main subject of the bedroom. You can not only sleep on it, but also just relax or watch TV. The design of the bed and the room as a whole is determined by one of its main elements - its headboard.
This short review will describe its main types and materials used for manufacturing, as well as instructions on how to make a headboard with your own hands at home.
Types of headboards
There are various materials for their manufacture. A classic bed headboard is made of wood. In order for the furniture to fit perfectly into the room, it is necessary to choose a method of processing and decorating the wood. If the wooden surface is not decorated, then it is covered with paint or varnish.
The decor can be made using various types of leather, textiles or using exotic materials in the form of mosaics or natural stone.
In this case, the tree serves only as a basis for the product and does not perform an artistic function. Therefore, in this case, instead of wood, other similar materials, for example, plywood or chipboard, can be used.
The headboard can be made of metal, that is, forged. Such metal products are used in various artistic styles.
Materials and tools used in finishing headboards
It is quite difficult to make a high-quality upholstered headboard, but it is quite doable if you plan all the operations in advance, select materials and tools.
Before starting work, you will need to select the design project that you plan to do. Nowadays it’s easy to find and select various photos of the headboard that you can make with your own hands according to the design that matches the interior of the room.
To make the back, you will need a sheet of plywood about 1 centimeter thick as a rigid base. To add softness, you will need a sheet of foam rubber of the appropriate size and a thickness of at least 5 centimeters.
To finish the headboard area you will need a piece of fabric or leather. In addition, decorative elements will be required for decoration.
For work you will need the following tools: drill, hacksaw or electric jigsaw, furniture stapler with staples, knife and scissors and glue. To attach the artistic elements you will need a sewing kit and twine. A screwdriver and a hammer will not be superfluous.
Interesting design ideas
In addition to decorating the backrest in simple ways, there are various design options:
- the use of carved shelves and sections;
- decoration with pillows;
- use for decorating brickwork;
- wooden lattice with carvings;
- combining the headboard with the ceiling.
Some prefer elaborate forms that emphasize the originality of the room. You can use bright shades of cladding, which will allow the product to become an accent in the interior. Gilded surfaces will add sophistication to the bed, and unusually shaped buttons will create a luxurious look throughout the bedroom.
Gilding and silvering the surface will give a luxurious and expensive look to the entire bedroom.
The headboard can be made of any materials, have different shades and sizes. It is important that it fits into the interior of the bedroom, does not clutter up the space and complements the design of the room.
Cover your bed with fabric with your own hands: create your own cozy world
If the bed has become thin or the leatherette or fabric upholstery has gone out of fashion, you can reupholster it yourself at home with new material.
For this work you will need a small arsenal of tools and at least 5-10 hours of your own labor. The article describes in detail how to do everything correctly, whether it is difficult to make a fashionable carriage tie or reupholster a narrow chair-bed.
Step-by-step instructions are given for upholstering the headboard with leather or fabric, as well as other ways to update the bed.
What fabric to choose for upholstery?
Many different fabrics are used for furniture upholstery. They vary in texture, overall style, resistance to wear and stains, and many other parameters.
If your sofa will be in a room in a classic, Empire or Baroque style, choose luxurious jacquard, velvet, velor or suede. If you place it in a room decorated in high-tech style, choose leather or dark matting. For a room in a minimalist style, you can choose suede, chenille, matting or flock.
Consider whether you will sleep on the sofa or just sit on it. For a sofa used for sleeping, it is better to choose soft, breathable fabrics made from natural fibers that do not stick to the skin. When it comes to reupholstering the headboard of the bed, pay attention to the aesthetic properties of the fabric.
If there are small children in the house, give preference to leather - it is easy to clean from a variety of contaminants. If you have four-legged pets, choose fabrics from the “Anti-Claw” series - they minimize damage from cat and dog claws, and are much more resistant to ordinary damage.
