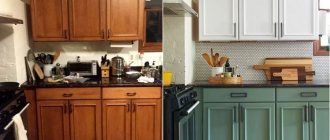
Repairing kitchen furniture is a troublesome and time-consuming process. It can be done with your own hands, which will help significantly reduce financial costs. Naturally, any furniture, regardless of its quality and manufacturer, loses its external luster over time, and some of its parts fail, causing a lot of problems.
To update your kitchen design, you don’t have to buy new furniture; you can restore and repair what you already have.
If you plan to repair kitchen furniture on your own, then you should mentally prepare for the painstaking and lengthy work associated with assembling and disassembling the set, replacing various parts, sanding, painting, etc. that is, you will have to come to terms with the fact that the kitchen is in some then the period will not be able to function normally.
Need for repairs
Kitchen sets are most often made of chipboard, sometimes wood, with elements made of metal, glass and plastic. During operation, natural aging of the material occurs, mechanical damage of various types occurs, and various stains and stains appear. First of all, the appearance of the facade suffers: the color fades, yellowness appears, cracks, scratches and gouges appear, as a result of which the furniture loses its attractiveness. To eliminate these negative phenomena, restoration of the kitchen set is necessary.
Floor kitchen cabinet diagram.
Many problems arise when various structural elements break down. Most often, the housewife is annoyed by faulty cabinet doors: skewed doors, self-opening or difficulty opening them, as well as problems with drawers. In a word, if not a rework, then at least a small repair is necessary.
Repair of kitchen units most often includes the following work:
- repair of drawers and shelves;
- strengthening the cabinet body;
- replacing hinges and repairing doors;
- restoration or replacement of countertops;
- restoration of the geometry of damaged elements;
- strengthening hinges;
- restoration and renovation of the facade;
- replacement of accessories.
Standard sizes of kitchen units.
Tools and materials required for work:
- hammer and nails;
- screwdriver, self-tapping screws;
- putty knife;
- sandpaper;
- tassels;
- wood glue.
Types of kitchen facades and their features
The façade design is a base covered with a decorative coating. The performance characteristics depend on the base part; the finishing protects the base and decorates the product. The front side of the kitchen unit is responsible for the overall appearance of the interior of the room. There are many varieties of these elements, which according to their structure are divided into two basic types:
- Frame. They are a combination of two materials, one of them fills the middle of the canvas, the second serves as a frame.
- Solid. The cabinet doors are a solid plate without seams or joints.
According to the method of opening doors, they are divided into:
- swing;
- folding;
- with lifting mechanism;
- sliding
Base material:
- Chipboard. The most budget option. It has good resistance to mechanical stress, but is inferior in appearance to other building materials.
- MDF. It has good strength characteristics, is used in the manufacture of curved structures, and has a smooth surface.
- Natural wood. Traditional raw materials used in the production of most models previously had no alternatives. This is the most expensive and high-quality product with a beautiful natural pattern.
- Glass. Mostly triplex or hardened versions are used in production. Can be transparent or matte. The ends are edged with an aluminum frame.
- Metal. There are models made of stainless steel and aluminum. They are characterized by durability and resistance to moisture.
Cover type:
- Enamel. Products are coated with special varnishes and paints.
- Plastic. Used for chipboard and MDF panels. Does not scratch, does not fade, is not afraid of moisture or chemicals.
- PVC films. They increase characteristics such as resistance to mechanical damage, high temperatures, and sunlight.
- Veneer. It is durable and enhances furniture.
Kitchen door repair
The most common is cabinet door repair, which is caused by defects such as misalignment of the doors, changes in the geometry of the doors, spontaneous opening, difficulty closing, and loss of stability. The main reasons leading to such phenomena are deformation of the cabinet body, loss of vertical installation, mechanical damage, delamination or swelling of the material, failure of hinges or magnetic latch.
The most common reason is a broken hinge, which requires replacement. Typically, kitchen furniture contains standard disc-type hinges with two adjusting screws. First of all, if you have a problem with the door, you should try to adjust its position by turning these screws. If damage to the mechanism is noticeable, it is necessary to replace the hinge with a new one. This operation is carried out in the following order:
- The old loop is removed.
- One of the plates of the new hinge is tightly installed in the round socket of the door (diameter - 35 mm) so that the hinge mechanism is strictly perpendicular to the side cut of the door. The plate is secured with two screws screwed through the holes in the ears.
- The second hinge plate is installed in a similar slot in the side of the cabinet and secured with two screws through the holes in the bosses.
- Screw two screws into the corresponding holes. With their help, the position of the door relative to the cabinet body and the second leaf (if provided) is adjusted.
A common cause of the door opening spontaneously is damage to the magnetic latch. The fact of damage is determined visually, and if it is detected, a new magnet should be installed. At the same time, we should not forget about the presence of a return element, a metal plate on the sash, which must exactly coincide with the magnets.
The cause of door skew may be loss of vertical position of the cabinet. Cabinets are characterized by sagging legs under the influence of their own weight. In this case, you should place a strong support under the leg and adjust the installation of the cabinet. Wall cabinets are characterized by loose hinges. To eliminate the defect, the cabinet will have to be removed from the wall and the hinge strengthened, for which more powerful screws are screwed in.
DIY door repair
If the material itself is destroyed - it crumbles, loses strength and even becomes deformed, the door will have to be replaced. If the decorative layer is damaged, the film next to the oven peels off, the edge becomes deformed, you can repair it yourself.
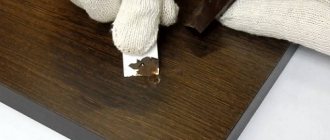
- Chips and scratches. To eliminate the defect, wax is used, hard in the first case and soft in the second. The product of the desired color is applied to the damage with a spatula and smoothed. After hardening, you can draw the structure with a felt-tip pen. To avoid accidentally cleaning it later, the cabinet door is coated with furniture varnish.
- Cracks that disrupt the structure of the chipboard board. Here they do things differently: the sash is removed from its hinges, the closer is dismantled, and if necessary, the crack is filled with PVA glue using a syringe. Then put a clamp on the cabinet door and tighten it until the glue dries completely.
- If the film peels off, then this defect is also eliminated with your own hands. Use a syringe to inject PVA glue, “Moment” or “liquid nails” under the peeled film and carefully level the film. If the coating is already deformed - shrunk, then the facade will have to be replaced.
- The damaged edge is simply removed. A new one with an adhesive base is given the same color, heated with a hairdryer or iron, and glued to the end between entire sections./li>
Acrylic or plastic is much more difficult to repair: if a peeling film is restored in the same way, then chips and scratches on an acrylic plate cannot be repaired. If there is significant damage, you will have to update the kitchen set.
The following video lessons demonstrate kitchen renovation.
Facade restoration
The most labor-intensive and troublesome type of repair is the restoration and renovation of the facade of kitchen furniture, the need for which arises after a certain time.
How is the varnished coating restored?
One of the most common ways to restore a damaged varnish layer is carried out in the following order. Minor damage is wiped with a cloth soaked in a mixture of alcohol and linseed oil (in equal proportions). After drying, the area is polished using cloth. For polishing, a mixture of GOI paste and kerosene is often used.
To restore kitchen furniture, you can use the decoupage technique.
In case of significant areas of varnish damage, the varnish coating is washed off using special emulsion compositions (SM-1, SM-2 and others). This solvent is applied to the entire surface of the panels, and after the varnish has softened, it is carefully removed with a spatula. After cleaning the surface, it is treated with a solvent and sanded with fine sandpaper. The dried surface is covered with new varnish.
Next comes painting.
Painting the kitchen facade significantly changes the entire style of the interior, so the paint color should be carefully thought out. Most often, combined painting is done: doors, sides and wall panels are painted in different colors. At the same time, harmony with the design of the kitchen walls should be ensured.
To carry out this type of restoration, all removable parts are dismantled: doors, wall panels, wall cabinets and fittings. The cabinets are disconnected from each other. The first stage is surface grinding, filling of significant defects, priming. Before painting, the surface is thoroughly sanded and degreased with a solvent. It is better to paint furniture using a spray gun or a can of aerosol paint for cars. You can also use a brush. Good quality is achieved when using acrylic enamels.
Application of film and plastic
A fairly simple method of restoration is the use of self-adhesive film. Before gluing it, it is necessary to treat the surface with a solvent to remove dirt and grease. There should be no obvious dents or bumps on the surface: all such defects will appear through the film. Smoothing is done using a rubber squeegee or spatula. If air bubbles appear, they should be carefully pierced with a needle or cut with a razor and smoothed out.
Renewing the facade using sheet plastic does not require sealing surface defects, since they are covered with a sheet of sufficient thickness. The plastic is cut to size and glued using special glue. The edges of the sheet are carefully processed with a file to form a small chamfer.
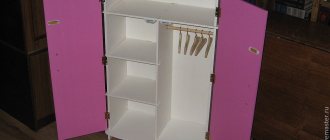
Nowadays, most furniture, such as cabinets, bedside tables, kitchens, and so on, are made of chipboard. The material is good, quite flexible (there is one for every taste and color). However, it has a big disadvantage. Over time, especially if this is a frequently used door, the hinges can be pulled out by the roots (probably many have experienced this), and the hinge dangles... the sash sags, or even comes off altogether. In general, how can I fix this whole thing? Detailed instructions + video version...
The essence of the problem is that it will not be possible to screw the “screws” back into these torn fasteners. They simply won’t stay there. We need to fix it some other way. For me personally there are only three. I’ll tell you about each one separately.
Updating facades using improvised means
If the listed measures are insufficient and the question arises of how to update the kitchen, take more decisive action.
- You can make a new door from a chipboard panel with your own hands . To do this, select a shield of the same color and pattern, which is not difficult. The shield should have a thickness of about 20 mm. Then the chipboard panel is cut exactly to the size of the old door, the door is cut out, and sockets for the hinges are drilled into it using a milling cutter with a diameter of 35 mm. Then you need to glue the edge to the ends of the sash, attach the hinges and install the cabinet door back.
- Making a door from MDF is a little more difficult, but it is possible (the same as updating an MDF facade). It is impossible to make a facade with an acrylic panel or photo printing - this requires special equipment.
- A great way to update a cabinet with your own hands is veneering. The material is produced on an adhesive basis, and to repair the sash, it is enough to cut out the part of the required size with a craft knife and attach it to the chipboard panel. The material holds up well if ironed.
- Self-adhesive film is a more than affordable method of updating furniture; it can serve as an alternative to photo printing if you stick a film with an image on it. The old film is removed and the new one is glued to the surface. The coating is adhesive-based, so you just need to smooth the material to prevent bubbles from appearing.
Glue + sawdust
The solution is as old as time, and it should be noted that it works well. Perfect if you have a piece of chipboard torn out.
The idea is simple - we take sawdust (you can take it from a chipboard, a piece of which has been torn out), or find it near furniture factories, next to large construction supermarkets (usually there are pieces lying around that no one needs), crush them, mix them with glue (previously we used PVA) this Apply the mixture to the broken areas and let dry. And that’s it, tighten the “screws”. It's holding up well.
However, now there are a large number of adhesives; on the Internet I even saw a guy pouring a lot of glue from a glue gun into broken places. And everything seems to be holding up
I used to repair hinges in the kitchen a long time ago. BUT due to the fact that the sash was used often, it broke quite quickly.
So this is again an option for a while, for constant use (10 - 15 openings per day), this is not the best way.
Wooden “chopik” + glue
I think this method is the best. After such a repair, the door in my kitchen worked for several years, and nothing was torn out again.
The principle is this: Remove the sash - door, then you need to take a drill and drill out the torn holes.
We take a drill with a diameter slightly smaller than a wooden “chopik”, for example, my chopstick is 9 mm in diameter, and the drill is 8 mm.
We do not drill to the full depth of the door, usually 80% is enough, the main thing is not to drill further, because the drill will come out on the other side of the door, which is not always necessary. To do this, there is a special limiter on the drill, or at the required depth, you need to screw electrical tape onto the drill and not go beyond its limits.
Next we pour glue into the hole, I take “MOMENT” which glues the wood (you can take any other one; there are now dozens of different ones). Well, we hammer in the “chopik”, do it carefully so as not to break the back wall!
Let it set for about 15 minutes. Then in our wooden inserts, I drill another hole in the center, also not to the full depth. This is done in order to tighten the “screw” freely, but do not overdo it. For example, I have a “screw” with a diameter of 4 mm, and I take a drill with a diameter of 2 mm.
I tighten it on the removed door, try it - it holds perfectly! Now you can hang it on the closet .
This third method, I think, is the best for repairing chipboard doors. Moreover, it is suitable for frequent openings.
Now we are watching the video version
This is where I end, I think my materials were useful to you. Read our construction blog, there will be a lot more useful.
Kitchen units are subject to various negative influences during operation, as a result of which they become deformed, delaminate and lose their former luster. In this situation, timely repair of kitchen furniture, which is easy to do with your own hands, will help out.
Similar articles:
DIY decoupage stools How to update old furniture Do-it-yourself restoration of old furniture DIY chair restoration
Restoration of kitchen furniture
In a small room of a modern apartment, it is most beneficial to install built-in furniture. But, like any other, it undergoes changes over time that worsen its appearance. It's not just aesthetics that can suffer. Functionality is impaired: cabinets begin to open with difficulty, doors squeak, and the countertop becomes deformed. And the owner begins to understand that the situation can be corrected by independent repair of built-in kitchen furniture.
There are several restoration methods, from which you can choose the most suitable one for aesthetic reasons and financial capabilities. In order to choose the right update method, you need to familiarize yourself with all the available options. Detailed step-by-step instructions will help you implement the task; with their help, it will be easy to repair an old kitchen set and any other furniture.
Changing the appearance
You can transform your own kitchen without completely replacing the furniture. It is enough to update and adjust the old cabinet doors to make the interior “sound” differently. There are plenty of ways to do this:
Repainting
Surprisingly, you just need to adjust and paint the old single-door cabinets a different color, and the entire kitchen set is transformed and changes the appearance of the kitchen. It turns out that it is too early to throw away or take the furniture to the dacha, and in general the interior looks bright and fresh. This is the most budget-friendly upgrade option and is worth a try.
Before painting, all cabinet fronts will need to be removed and freed from decorative trims and fittings. The surface should be cleaned, removing traces of old paint, primed and painted in the color you like.
When the coating is completely dry, the handles need to be screwed back into place and the doors hung back.
Replacement of facades
You can resort to this method if the familiar and comfortable kitchen cabinets are still quite strong, but the doors are either obsolete or cannot be cosmetically restored. In order not to buy a new set, it is enough to purchase elements of suitable size in a furniture store or order their production. But removing old facades and hanging new ones takes an hour.
Decoration
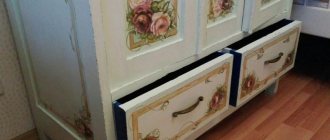
Creative people will be interested in updating their kitchen with unusual and bright decor. Wooden doors look great with artistic painting, and for more modern materials there is a fresh solution - vinyl stickers for furniture.
Replacement of accessories
A well-designed kitchen interior should create a complete picture, in which there will be no inappropriate details that fall out of the general idea. But it is the small and seemingly insignificant touches that are responsible for creating a single image. Take a closer look at the updated set; perhaps it would be more appropriate to add new handles to the new decor.
How to update kitchen furniture
A situation often arises when a still functional set begins to disappoint with minor breakdowns: the edge has peeled off, the cabinet is warped, the handle does not hold well. It is unwise to buy another headset, since the existing one can still be used. Remodeling an old kitchen into a new one is no easy task. Complexity depends on the scale and type of problems. You can perform the following types of repairs yourself:
- edge gluing;
- replacing countertops;
- renovation of the facade;
- replacement of fittings;
- correction of the geometry of a cabinet or drawer;
- replacement of upholstery.
Facades
Restoration may be required not only due to breakdowns or other defects of the furniture, but due to its “moral” obsolescence. Having seen a design he likes, the owner may want to change the appearance of the facades. In this case, repairing a kitchen set involves updating its front panels.
Pasting with polyvinyl chloride film
PVC film is a popular material for redesigning kitchen furniture. It is easy to use, durable and does not fade. There are several types of film:
- smooth;
- with a textured surface imitating various natural materials;
- with embossing.
Imitations of wood and natural stone are the most impressive, not only in appearance, but also to the touch. The average film thickness is 0.2-0.55 mm.
It is advisable to paste kitchen facades and cabinets with a more durable and inexpensive material. It lays down easier and does not bubble during the sticking process. Since it is not easy to cover an old kitchen, it is better to follow the technique of gluing PVC film:
- Use a tape measure to measure the size of the façade. Leave 20 mm on each side for bending.
- On the back side of the film there is paper lined into squares measuring 10x10 mm. The obtained dimensions of the facade are marked on it. After which the fragment must be carefully cut out with a stationery knife or scissors.
- The fittings are removed from the kitchen facade: handles, hinges and locks are unscrewed. Working with PVC film requires an absolutely even base. Therefore, dirt and crumbs are carefully removed. The surface of the door is degreased using White Spirit or another solvent.
- Apply the film to the facade, not forgetting about the fold allowance. Gluing is carried out in the direction from top to bottom. Carefully peel off the paper base. Glue the film to the facade, ironing it with a dry cloth or sponge. Make sure that no air bubbles form. Gradually remove the paper, sliding it down. The greatest difficulty will be in processing the corners. To paste over an old kitchen, use a hairdryer. When heated, a slight heat-shrinking effect is obtained. In this case, the film is firmly attached to the base.
- The final stage of work is the installation of previously removed fittings.
Coloring
When thinking about how to make a new kitchen set from an old one, they remember the simplest and most affordable method: painting the facades. This method requires careful surface preparation.
- The doors are removed from their hinges and the fittings are unscrewed.
- Swollen or otherwise deformed ends are cleaned with sandpaper or an abrasive stone. Fine dust remaining after the process is carefully removed using a rag or vacuum cleaner.
- The facades are washed and degreased.
It is important to know: before painting, protect the workplace from splashes and drops by covering the surfaces with paper or cloth.
To transform facades, it is recommended to use spray enamels. The paint is applied holding the can at a distance of 15-20 cm. The door is installed vertically. You can also use the double coloring method using stencils. After the facades have dried, fittings are installed on them.
Rattan update
Rattan fabric is a beautiful material with a woven structure that has an easy-to-clean surface. When soaked in cool water for 15-20 minutes, it becomes soft and slightly increases in size. After drying, it becomes strong and elastic again. This property of rattan is used when redesigning furniture.
There are 2 options for updating facades. Using any of them, you can replace the glass of a cabinet and replace it with a dense, beautiful material with a textured surface.
- Making a frame from slats and attaching rattan to it with staples using a construction stapler. Work is performed with softened material. After drying, it will stretch and gain strength. The slatted frame is attached to the facade with small nails without heads or fixed with Moment glue.
- Glue dry rattan to the facade using water-based glue. A good choice is Moment Montage. A frame of slats is secured on top of the canvas with nails.
The slats are pre-polished and varnished. The most impressive are carved planks or those with a pattern burned into them. Instead of wooden ones, you can use metal or plastic slats.
Choosing material
Today you can select and hang doors on your kitchen set from almost any material that can hold its shape: wood, plastic, glass, light metal. These can be modern composite panels or combined facades - there is a wide range, but you need to choose carefully, weighing all the pros and cons.
Tree
Once upon a time it was the only material for making furniture. Today, solid wood doors are among the rather expensive elements of luxury kitchen sets. But it is wood that can create a feeling of real home warmth and comfort in the kitchen. True, you will have to treat it very carefully so that the wooden cabinets are not damaged by hot steam and water.
MDF and chipboard
It's almost wood, but furniture made from faux wood panels is much cheaper. This is because their production requires not a natural massif, but the residues after its processing - shavings and tiny fibers. Thermosetting resins give rigidity to pressed boards. MDF is stronger and, from an environmental point of view, safer than particle boards, and therefore is about 50% more expensive.
Such panels are just as sensitive to the factors of the kitchen environment as wooden ones, so budget sets must have waterproof and durable protective coatings. It can be plastic, enamel or PVC film. The most luxurious and expensive option is natural veneer.
Metal
The most durable and effective doors for kitchen units designed in a modern style are made from aluminum profiles. Advanced designers even suggest hanging painted stainless steel facades on single-door cabinets. Such furniture is expensive, but it is completely justified. After all, it is enough to adjust the metal doors once when installing the kitchen to forget about repairing the kitchen unit forever.
Glass
It is absolutely not necessary to equip the entire kitchen with cabinets with glass doors, although there are such options on the market. It is quite enough if some wooden or metal facades are partially glazed - this will be inexpensive and at the same time add elegance to the interior.
