Problems often arise with storage space for household chemicals. All sorts of powders, cleaners, rinses... There are more and more of them, but there is usually nowhere to store them. The bathroom is too humid, the kitchen is not very pleasant, as they can spread extraneous aromas, which do not combine well with cooking, or rather, do not combine at all. However, there is a way out - a closet in the toilet. Although the toilet is usually a small room, you can still find free space in it - above or behind the toilet. This is where you can hang/install the toilet cabinet.
Shelves with doors
It is not necessary to leave the shelves with the items on them for everyone to see. You can close the space with doors. The material for the door leaf should be light. For this purpose, plywood is the best option. You can take thin sheets, since the door area is small.
Read also: Paint colors Graphite gray RAL
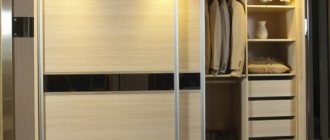
We will fasten the doors using furniture hinges. There is another option: we attach guides to the shelves below and above, and make holes in the doors or screw small handles. The sliding doors are ready.
You can stick an element of photo wallpaper on the surface of the doors or paint the plywood in a color that will match the rest of the interior. An excellent decorative option would be decoupage. It is not necessary to use classic elements with flowers and ornaments; you can make a modern design, for example, in the pop art style.
How to make a corner shelf?
Ideal storage systems for a small toilet.
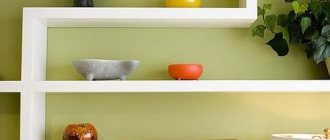
If the toilet area is very limited, then wide open shelves will simply be inappropriate. Here it is worth thinking about how to take advantage of unsightly corners. Several rows of open shelves of non-standard size - already ordinary ones - will fit well here. They are convenient for storing toilet paper, cotton pads in glass jars, detergents and cleaning products.
To save space in the house, corner shelves are often used. They look more modern and practical. And note, you can embed them anywhere.
The manufacturing process, in essence, does not differ from that described above, but there are some peculiarities. One of them is that the upper and lower parts are made up of two elements with the ends cut at the desired angle.
Then the process is carried out like this: first, the two parts of the top are glued together and clamped for a while. Do the same with the bottom beam. Polish, cover with a primer mixture and fasten according to the algorithm written above.
That's it - the work is almost the same, but a new, convenient, practical product is already appearing.
Manufacturing process
The entire process of assembling a closet in a toilet comes down to five steps.
- Measurements of the restroom room.
- Drawing on paper.
- Drawing a design sketch.
- Cutting materials to size.
- Assembly and installation of parts at the installation site.
The closet in the toilet is installed in several stages.
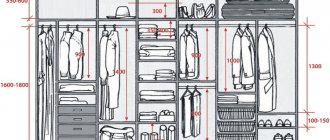
In the list above, all points are clear except the third. What is the difference between a drawing and a sketch? Here's the thing. A drawing is the main document on which all technical parameters of the future product are indicated. Allowances, gaps, lengths and thicknesses are taken into account here.
The drawing shows all the parameters of the future cabinet.
Another thing is a sketch. This section refers to the sketch as it relates to the design definition. For a visual representation of the future cabinet design, its color palettes, patterns and other effects, a sketch on paper is the ideal solution. You can consider several options for the future design of the restroom at once, choosing the best one from them.
A sketch is a drawing of a design solution.
Manufacturing materials
If you make toilet shelves yourself, to make them it is better to take:
- drywall;
- plywood:
- tree;
- laminated chipboard.
Read also: Spectral colors Science Fandom
Most often, plasterboard is used to make shelves, because this material is easy to work with. With its help, you can make comfortable and aesthetic shelves yourself. It is recommended to buy moisture-resistant gypsum plasterboard sheets for the bathroom and toilet.
When choosing plywood for making shelves, a material with a sheet thickness of 15 mm is more suitable. Products made from such raw materials will serve for many years - plywood has high strength and durability. When working with this material, it should be taken into account that the shelves may sag over time due to weight. If possible, it is better to use wood instead of sheets of plywood. Wooden shelves will definitely not sag even under heavy loads. In addition, wood products look very beautiful. Laminated particle board is usually used in the manufacture of doors, since this material is not moisture resistant.
Freestanding models
The design mainly consists of open shelves. The advantage of this option is convenient access to things and the ability to hide some items behind the facades. The downside is that you need to constantly maintain order.
The cabinet takes into account the shape and dimensions of the toilet. This model can be found in showrooms or made to order. Or do it yourself: all you need is furniture panels, timber and fasteners.
Neoclassical-style furniture fills the entire wall space and forms a spacious storage area in the toilet.
The metal rack is compact; for such a design, the model of the toilet is unimportant. Decor and household items are stored on glass shelves.
The cabinet does not take up much space, but is quite spacious - ideal for a small bathroom. Frosted glass fronts hide the contents of the shelves.
Ideas for creating a closet in the toilet with your own hands
To reduce renovation costs, you can make a closet in the toilet yourself. The location behind the toilet is the best option, which takes up minimal space. In our article we will tell you what materials are used when creating a cabinet with your own hands. PVC or wood is used for the facade.
Installation is quite simple; the day before you only need to prepare the block frames, special fastenings for the lock and hinges. For protection, it is recommended to cover the material with stain or varnish. We create a frame and internal shelves. We purchase plastic facades with glass ready-made or to order, and install them to the base ourselves. Using metal profiles and sheets of plasterboard, we close the correctly selected installation, then we mount an open niche for decoration.
We lay tiles on top of the gypsum board. We use a niche to create an open closet. We paint the shelves in the required tone.
In this case, the acid green color repeats the shade of the ceramics on the walls.
Niches covered by a facade
Toilet interior in vintage style. The color of the doors is in harmony with the shade of the tiles.
Roller shutters cover a niche in the wall.
The façade material is painted white. The doors are fixed flush with the installation box.
The built-in wardrobe looks compact and provides access to communications. This, by the way, can be done very cheaply with your own hands.
White roller shutters do not stand out against the background of white walls. Despite the color division, the interior is perceived as one.
Interesting: how they hid the boilers in the closet behind the toilet (full description of the process and estimate)
The wood texture of the floor, cabinets and doors goes well with green ceramics.
The wenge door hides access to communications.
Ceramic finishing of the inspection hatch. In the closed position, the contour of the niche is almost invisible.
Built-in wardrobe, which is closed by furniture roller shutters.
Built-in cabinet above the toilet installation.
Access to the water heater through the inspection hatch.
Options for the location of cabinets in the bathroom
The most popular solutions.
Cabinet behind the toilet
A convenient cabinet behind the toilet provides an excellent storage system for toilet paper, towels, air freshener and other small items.
The photo shows a pop art style toilet with a cabinet located behind the toilet.
Thanks to this placement, it is possible to free up space on the cabinet with a sink or shelves, which can be decorated with other beautiful decor.
Above the installation
Such a solution will be an excellent addition to the toilet, which does not overload or clutter the room. This arrangement not only allows you to hide communications, but also provides enough space to fill with other necessary things.
The photo shows a cabinet with a mirrored door above the installation in the interior of the toilet.
Hidden
It is distinguished by a very aesthetic appearance and, due to the facade part, which harmonizes and merges with the walls in the interior, creates the feeling of a complete plane, behind which there is actually a secret closet with a lot of things. Quite often, when finishing a toilet with tiles, the doors of the hidden box are also decorated with identical cladding.
Side
It perfectly complements the decor and, due to its thin and light forms, does not overload the space. This piece of furniture may be left or right-handed.
The photo on the right shows the interior of a small toilet, decorated with a narrow floor cabinet with drawers.
Angular
It is considered the most suitable option for small toilet rooms, which can be located in any corner of the room. Two corner shelves installed on both sides of the toilet will look very organic.
In a niche
Such products are equipped only with shelves and doors, and the rear and side walls represent the niche itself.
The photo shows the interior of a toilet with an open cabinet with lighting built into a niche.
Design of a small toilet with a cabinet
A small toilet room is equipped with narrow shelves that take up space above the toilet barrel, or a side wall or mini-models, with open or closed shelves that look very harmonious and neat.
Quite often they use products with mirrored facades, which make it possible to visually increase the dimensions of the room. Such cabinets do not contribute to cluttering the space, give the atmosphere a special lightness and allow you to radically change the design of the room.
Design of a toilet in an apartment - 7 rules
It would seem where you can mess up in a room as small as a toilet. But in such an area everything is visible, every detail matters. Let's figure it out.
We recommend: How, why and with what to paint a grill: heat-resistant, heat-resistant paints
Toilet - wall-hung only
This is the first most important and ironclad rule - only a wall-hung toilet with installation. Without it, you don’t even have to think about toilet design. Even the most expensive and sophisticated floor-standing toilet is inferior to a wall-hung one in all respects. Differences:
- Only the wall-hung toilet has a modern appearance.
- There is no ugly silicone joint with the floor or a gap between them.
- Because visually the area of the room is estimated by the floor, but the suspended floor does not occupy it, the area seems larger.
- Convenient to clean. Dirt does not accumulate behind the toilet and at the joint.
- Effectively takes up less space.
A modern toilet design without a wall-hung toilet is impossible. This is the thing on which saving is unacceptable.
Some photos will show regular floor-standing toilets - this is a mistake. These photos are here to illustrate other ideas, I will not return to this.
Hatch in the toilet
This is the second point, without which the toilet design will be of a very low level. The worst thing you can do is use a ready-made white metal hatch. This is a purely rough technical solution, which is unacceptable in the design of a toilet in an apartment.
Correct ways to hide pipes and meters:
- Hidden hatch under the tiles.
- Furniture doors.
- If inexpensive - a painting or a printed photo, a panel, a roller blind.
The latter can be done very inexpensively. And this is already better than a white hatch. Be sure to hide the pipes properly. It is on such nuances that the design of the toilet is built.
Please note that the hidden hatch under the tiles will have dark gaps around the perimeter. To prevent this from being noticeable, the grout of the rest of the tiles should also be dark.
No more than 2 colors
The toilet is white. Those. There is always 1 color already. There should be no more than two colors that strongly contrast with white. Otherwise there are too many details for a small toilet without a bathroom. The exception is patchwork and other non-aggressive mixtures, where colors do not dominate and do not attract attention.
I love dark and black colors in the interior, but not in the bathroom, toilet and kitchen. On average, the design of a small toilet looks advantageous in light colors. Everything else is an unjustified risk.
White, beige, gray, wood shades are the best colors. I wrote in detail in an article about the design of small bathrooms.
Small sink
There are very small sinks specifically for toilets. Being able to wash your hands is very important for a toilet without a bathtub. Otherwise, we come into contact with the door handles of two rooms at once just to get to the sink.
They are so miniature in size that in width they occupy little more than part of the wall with the platband. This is not a design issue, but for practicality I recommend it.
Decorative lighting
There is no need for a bright overhead light in the toilet. We do not need to look at ourselves in the mirror or perform any hygiene procedures. This means you can make decorative lighting and use it as the main one.
One of the modern ideas for renovating bathrooms in 2022 and for the toilet too is to place light sources at the bottom and middle of the room, making them hidden. With this arrangement, they provide a lot of shadows and the interior looks not boring, but at the same time strict. The more textured the tile, the more voluminous and interesting it will look. There are a million ways to embed LED strips, special profiles with a diffuser screen, etc. You can find a place for them even on an area of 2 sq.m.
Brush holder on the wall
Yes, such a small thing. There are very few objects in the toilet and each of them affects the overall perception of the interior. And such things as a brush are usually left for the last minute and bought “temporary”. Which then, of course, last for years. Just buy a normal one right away and hang it on the wall.
Toilet larger than 2 sq.m.
2 meters is more than enough space for a toilet and is exactly the size in most apartments. That's why all the rules and photos are about them. If your toilet is larger, then it makes sense to place additional items there, otherwise the space will be used irrationally.
Candidates for entry: bidet and pseudo-bidet, washing and drying machines, boiler. If the toilet is still small, here’s how to place a washing machine in the bathroom.
Plywood shelves
The most common material for shelves is, of course, plywood. Thanks to its low cost, strength and durability, plywood has held a leading position in this area for decades. In addition, anyone can make a shelf in the toilet behind the toilet with their own hands from plywood. And if you not only want to rationally use space, but also decorate the interior, then this material is the best option for you.
First, you need to decide on the type of shelf; they can be either classic with straight parts or with curly cutouts. If you have a jigsaw, then it is best to choose the curly options. They require a little more effort, but they do a much better job of decorating any room.
First you need to decide on the appearance and size of the shelf that you want to make in the toilet with your own hands, since the size and shape of the parts depends on this. It is best to first find or draw a drawing of the shelf. This will make your work much easier and, in addition, you can easily calculate the amount of material you need.
The next stage is marking the parts on a single sheet of plywood. If your design has several parts of the same size, then it is best to make patterns from cardboard and draw with their help. After the parts are cut out, their ends need to be sanded well. After this, you can fold the finished product and begin decorating it.
Flat surfaces can simply be covered with stain and varnish, this is quite enough. But you will have to work a little with the ends so that the shelf has a beautiful appearance. It is best to use edge tape, which is simply glued to the ends. The tape can be matched to the color of the tint or, conversely, it can be used to shade the ends. When everything is ready, you can hang the shelf on the wall.
Installation
At the first stage of planning a cabinet at home, it is necessary to make a preliminary design of the future design. Initially, you should decide on the type of cabinet, whether it will be wall-mounted or built-in, then on the dimensions of the structure itself, and if there are shelves in it, determine the distance between them.
The standard distance is recommended 25-35 cm, but it is worth choosing individually at your own discretion.
After choosing a model, when all the necessary materials have been purchased, you need to build a frame for the future cabinet.
- If the size of the cabinet allows, then you can install shelves inside, attached to pre-prepared corners/beams. The type of shelves is selected according to the expected weight so that they do not sag. And also they should not come into contact with pipes and not interfere with free access to communications.
- And at the end of the installation we install the facade.
Built-in cabinets and shelves above the toilet
In modern bathrooms, where communications are usually hidden in a partition or false wall, it is possible to install built-in cabinets and shelves above the toilet and sink. This design option is not only convenient, but also looks more aesthetically pleasing. Firstly, the toilet cistern is also hidden behind a false wall and does not spoil the appearance, and secondly, in this case there is certainly nothing hanging above you.
Niche above the toilet with shelves
Built-in wardrobe above the toilet
Materials
When choosing a ready-made wall cabinet for the toilet, you can look at products made from a wide variety of materials. The most common types are plastic, wood, wood panels, and less commonly metal and glass.
Plastic is the most practical material. It is not at all afraid of moisture, can serve for many years, does not oxidize, does not rot.
Low strength is compensated by stiffening ribs.
Plastic is cheap, but flexible enough to make the most intricate designs from it.
But you won’t be able to make shelves out of it in the toilet with your own hands, because the material is inconvenient to process.
People are also put off by the aesthetic unattractiveness of the material.
The tree looks much more solid and beautiful.
But high-quality material is not cheap; it requires a lot of knowledge for proper processing. The tree also does not tolerate moisture well, so it will have to be thoroughly protected from dampness.
Chipboards, in particular MDF, are less expensive and more convenient. They are easier to process, cheaper, and suffer less from moisture. For aesthetic appeal, you can cover the panels with decorative films.
But you should only take medium and high density slabs. Processing the material does not cause difficulties for people familiar with a jigsaw and hammer.
Metal is beautiful, reliable, durable. There is a wide selection of ready-made products; not everyone can assemble a cabinet made of steel or aluminum on their own.
Glass looks even more beautiful, but it is fragile and difficult to process, so it is not used often. If you look for ready-made solutions for installation behind the toilet, you can find various options at different prices.
| Variety | Price |
| Laminated MDF | 6000-14000 RUR |
| Plastic | 2000-5000 RUR |
| Metal 45x35x50 cm | 500-1000 |
| Wall glass shelf | 1700-3000 RUR |
Corner shelves
If you are a fan of original design solutions, then you can make a corner shelf for your bathroom with your own hands; it is not difficult and will not take much time.
To work, you will need a piece of plywood, a jigsaw, a screwdriver, self-tapping screws, a level and a pencil with a tape measure. To attach the finished shelf to the wall, it is advisable to use hidden fasteners that will be located on the walls that will be adjacent to the wall.
Making an original corner shelf for your bathroom with your own hands is actually very simple.
First you need to draw a circle on a piece of plywood or other material from which you want to make a shelf. To do this you will need a simple pencil and a piece of rope. If the piece has an even square shape, then you must first draw diagonals on it. These marks will be needed in order to later divide the circle into four equal parts. Next, drive a small nail into the center, to which a piece of rope is tied. A pencil is attached to the other end, with which a circle is drawn.
Next, the circle is cut out along the marks and divided into four even parts. One of the parts needs to be made smaller, since it will be the top shelf. To do this, you just need to attach a rope with a pencil attached to the sharp end to correctly trace the semicircular shape. After this, the part is simply cut off according to the mark.
And at the end, the workpieces are fastened together, two large parts are attached vertically to the bottom piece. Above, parallel to the bottom board, a reduced piece of a circle is attached. That's it, the DIY bathroom shelf is ready. It is enough to simply paint and decorate it.
A corner shelf is easy to make, but at the same time it can decorate almost any interior. The most important thing is to hang the wooden object in such a way as to prevent moisture from getting on it. Otherwise, just special impregnations to protect against moisture are enough.
Kinds
There are several types of cabinets that can be installed in the toilet room.
A wall cabinet requires its location on the wall. Such structures are fixed using fasteners such as anchors, bolts and screws. Hanging cabinets can be located at any height convenient for the owner of the room and provided for by the dimensions of the product.
Also, toilet cabinets are classified according to the shape of the products into the following:
- rectangular type - the most common design in shape;
- triangular shapes are perfectly embodied in corner products;
- radius options are not very compact, but attract with their interesting design;
- trapezoidal products have a large capacity.
Drawing a diagram
Before you make a cabinet behind the toilet in the toilet with your own hands, you need to make a competent diagram.
Drawing up a diagram is a necessary step before starting work.
The main points to pay attention to when drawing are listed below.
- Draw the diagram in standard planes (top view, side view, profile view).
- Apply dimensions indicating allowances. An extra 2-3 mm will not make a difference when cutting MDF sheets. Not such a big expense. But when cutting, there is a gap at the cutting site, which is why the geometric parameters of the lined workpiece will differ. To eliminate this discrepancy, the allowance must correspond to the size of the gap from the cut.
- When installing a cabinet with closed doors, draw out the interior arrangement on a separate sheet. This way you can competently plan the internal space and cut workpieces according to pre-specified parameters.
- Separately, draw a diagram for cutting blanks and parts. This will save you money on buying extra material. Proper planning of expenses is the basis.
- Mark all necessary junctions of pipelines, electrical wiring, and sockets. On the cutting sheet, be sure to mark on which side you plan to cut the recess for the pipe. This will allow for better distribution of the material.
It is advisable to make the diagram as detailed as possible.
Draw a sketch separately. For a more effective presentation, use colored pencils, markers or paint. Organize your design at the highest level. Consider several options for the future decoration of the restroom. This will allow you to choose the optimal design.
Development of a design drawing
Any design, even the simplest one, needs detailed elaboration. Creating a drawing will allow you not to be distracted by calculations and correcting errors during work.
Detailed design drawing
First, you should draw several sketches, choosing the location of the cabinet, its interior space, and the design of the facade. Then it is necessary to measure the height of the room and the width of the free space behind the toilet so that it becomes clear what dimensions of the structure are acceptable in the existing conditions. The drawing shows the location of pipes and other communications, linking their position to the corner of the room.
Sketch drawing
Taking into account the data space obtained during the measurement, a detailed drawing is developed, which shows the location of the cabinet, communications and access to them, frame features, top and bottom covers, shelves, doors, places and methods of fastening individual elements.
The principle of fastening the frame and shelves
The width of a typical toilet varies between 820 – 850 mm, so the installation of shelves with cutouts for pipes (about 250 mm) occurs across the entire width of the room.
There are several door design options:
- Traditional swing doors require free space for opening.
- The sliding sash does not require free space.
- Roller shutters can be used as a shutter, the blade of which moves up and down along the side guides.
- The interior space can be closed with blinds or curtains.
Mirror swing doors
Shelves made of metal and glass
Metal shelf holders in combination with glass shelves are suitable for decorating any room, including the toilet. Glass will give the effect of free space without the effect of clutter.
Metal processing will require you to have certain knowledge in this area and the availability of special equipment. The fastening points of metal parts are connected by a welding machine.
The glass thickness must be at least 6 mm. The edge is carefully processed and polished. If you do not have special equipment, then it is better to order all the glass from a glass workshop.
It is better to choose shelf mounts with suction cups. This way you won’t have to make holes in the glass, and the shelves will hold tightly. There should be a sufficient number of suction cups. The entire glass area must have uniform supports that distribute the total mass among themselves.
